

mr paul
-
Posts
250 -
Joined
-
Last visited
-
Days Won
4
Content Type
Profiles
Forums
Gallery
Articles
Everything posted by mr paul
-
 Oh yes lol,,,you are right, I forgot about the hard pack. It would make sense that they would be the sandtroopers with that particular pack on. It never made it to the final edit. According to the details on the Hot Toys figure the armour shares all the same details as the TK. I'm of to watch it again in a couple of hours. i will have a good look for pack appearances.
 -
Me and my pack in the streets of Kedha. Pretty much happy with it in comparrison to the visual guide reference material released so far. I believe the frame to be heavily weathered and black along with the end caps. I may correct this in the future. I will be adjusting the colour of the weather shroud (poncho ) and possibly making the longer variant antenna to accompany the pack. I suspect the the one displayed at CE was broken and although was seen in some imagery before the films release I have not noticed the short antenna version in the film or in ref material post release.
-
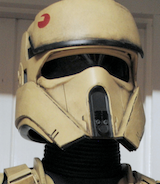
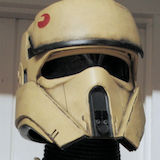
Love this armour
-
Do the sandtroopers in R1 have the same ab buttons and sniper plate details as the OT sand troopers? I thought the only difference in armour between the R1 TD's and TK's is the filtration system in the helmet. Otherwise their armour is identical.
-
From the visual guide. Could quite possibly be the CE pack. Gives a much better reference for the colour of the frame (very beaten up) and end caps, bedroll (weather shroud) colouring. You can see the green ammo box. The same and colour of the orange patch can now be seen. Pauldron over shoulder strap. The bedroll is referred to as a weather shroud. I am still holding out for this being a poncho. if it is not it should be
-
Looks like the Jedha stormtroopers only real difference to a standard TK (ignoring updated armour) is that the front of the helmet is removable for air filtration. Aside from that the ab plate details are that of a TK however these are in fact TD's. very cool.
-
I will be posting up the last part of the thread soon which will show the methods I used to weather my version 2 pack. As much as I want Its a little too soon to be discussing how much screen time the pack had in Rogue One and which variant of the pack were seen on screen. I don't want to be spoiling it for anyone who has not seen it yet. This will make interesting discussion once it is more safer to do so and I look forward to it.
-
I have had no issues with over 6 hours usage in total of the pack. I wear mine with my RS and the padded straps sit over the shoulder bells and do not cause any damage. The tensioned straps on the frame cushion the pack from the back of the armour and the whole thing if positioned at the right height on your back is solid and does not move. You may find your shoulder straps moving outwards after an hour or so, you may need an extra pair of hands to put them back into place for comfort. You will need help getting the pack on safely. Damage to your armour may be caused if you attempt to get the pack on yourself. My pack weighs 7.4KG it is a bit of a lump.
-
Some images of our packs at Rogue One last night. We wore them for 3 and a half hours. All in all not too uncomfortable and looking very sharp on patrol.
-
I have had a look and this problem and it can be solved with a quick adjustment in the sewing. In this image of my strap, not enough room for hook to be positioned correctly. Unpick original stitching. Position buckle 3.5cm away from where it is fixed at the top. Sew back on to match the way it was. This should now give you enough play in the strap for the hook to hang correctly. Well done guys for noticing this. I suppose depending on how your strap is sewn this mod may or may not be useful. It may be in some cases the strap needs to be reduced in length. Feel free to post your variations in straps if there are any more.
-
It may not be that there are different straps just differences in the placement of the stitch lines during manufacture. Both my left and right straps are the same. i would be happier with this conclusion as i do not want to have to search for cE accurate straps any further tee tee. It would be simpler to just correct the stitching to match the CE pack and it still be the correct strap.
-
Yes there is definitely differences in the way this strap is made. It seems to be where that small row of stitches is placed. I think I can move these stitches to make it look the CE pack, should be an easy fix. My concern is my hook will not angle downwards correctly with it being held so tightly with my small strap.
-
What I will look into is whether this affects the way the the hook hangs from the strap. It may be that I can modify the strap by unpicking and restitching it to give me the extra half inch or so i need for the hook to hang correctly.
-
I have mounted it in the same fashion as yours and this is how much strap I have to play with. There appears to a difference in the manufacture of the shoulder straps. very interesting.
-
While your observations on the the hook placement seem to be correct it has also seemingly highlighted a difference in the manufacture of the extra padded shoulder straps. This is my hook threaded through my pack and as you can see there is a lot less strap to play with. At least half the size. It appears that Scousetroopers strap may be short as well judging by the image he posted. if you could confirm that Scousetrooper that would be helpful.
-
Yes that looks very good. Well done.
-
Ok that makes sense. Can I see some pictures of your set up with the hook in this position. Maybe some comparison shots. If correct this is a great observation. I only have a few mm of strap before the stitching for the buckle occurs. The CE image appears to have a longer strap. Might just be angle and photography however I will look at this closer asap.
-
You do not need to remove the bolt to thread the metal popper through. A firm tug will do it and it goes straight through. It may not be advisable to remove the bolt on some of these hooks as they have not been undone in 50 years or more. If you do choose to remove it then a soak in WD40 or other oil may be a good idea. You may risk breaking the bolt otherwise. If the popper did come undone during a troop the hook would not slide off because the popper stops it from coming off the end of the strap. saying that I have trooped for hours wearing the hook and the popper is more than adequate to hold this heavy hook in place. It requires quite some force to undo the popper.
-
The CE hook could possibly be stitched in place. There are no clear images to confirm this however it does sit high up as you have correctly pointed out. I have just been having a comparison with my hook and it is possible for the hook to get lodged in this position due to the buckles and wot not behind it and baring in mind the shoulder strap is tensioned with the weight of the pack pulling on it. It could be that this is how the guys who dressed the mannequins simply hung it. Either on purpose or it got wedged like that by itself. Might be advisable to not make any permanent changes until more ref becomes available. Unless you have some then please feel free to share it. Good observation This is the CE hook
-
Making and Weathering a Bedroll My bedroll is made from medium weight natural unbleached calico/canvas. Using Dylon olive green the fabric is dyed in a washing machine. Once coloured I cut it to 4 meters in length and 53 inches wide. I roll it into a tube with a 14 inch circumference. Stuff it with bubble wrap to add volume but not weight. The ends need to be fatter than the centre so more bubble wrap is stuffed into these areas. Stitch it down its entire length. Each end is folded over in a semi circle reducing the the length to 43inches in total. Sew the ends into place. I am using watered down acrylic paints to further darken the fabric. the olive dye makes a good base to start from. I will be using dark and light muddy browns, green greys, desert yellows, khaki, grey and black throughout this process. A large soft paint brush and an airbrush is used to apply the paints. With the brush slap on the darker colours to knock back the olive. The airbrush is used to dust on layers of colour. Drip and splash the mud colours on to replicate muddy water hitting the roll. Let it soak in and make the fabric wet. This allows the colours to bleed into one another. Rough sand paper the fabric to damage the fibres and gain that textured surface. Do this while the fabric is wet or dry. Twist up the material and dry brush the folds with thicker paint. When the tension is released interesting random patterns are formed on the surface. Keep repeating the above techniques until the olive is completely gone and a darker, drab military green/ brown is produced. I have dusted with khaki and desert yellow too. This is my bedroll once painted. Further weathering will take place once it is attached to the pack. You can see the colour of the roll juxtaposed to the pack in daylight. My version 2 pack in the back ground. In the foreground is an incomplete pack I am in the process of building and colouring.
-
The "Bedroll" This is a difficult part to identify. There are no distinguishable details to recognise what this is. Not only in regards to what was used for the prop but also what it could be used for in the film. In the real world we see these additions to soldiers back packs and they tend to be bed rolls. I personally would like this to be a poncho. Ireachy and myself have looked into possible ponchos/shelters however all of them have a lot of stitching detail on them and so we have not found one that matches. The CE bedroll seems to have no visible seams. It is heavily weathered and dirty and seems to be tucked under and folded each end and possibly stitched shut. The ends are folded in this fashion. The diameter of the bedroll is slightly wider than the ammo box. The texture of the fabric is rough. Each end of the roll is fatter than the rest of it. These straps need to be pulled tight to hold the antenna securely in place. Here again you can see how enlarged the ends of the bedroll are. This screen shot gives an idea of the colour Hot Toys show the roll to be brown. We have not seen anybody use anything yet that looks like it could be the found part. I have heard of pup tents, Chinese rifle cases, half shelters being used. Nothing matches. Either this is a found item or it could be that it is scratch built. i will go on to show how I opted to build my roll from scratch and to make it as close to the CE roll as possible even though once again the reference material is quite poor.
-
Ammo Box Liner Installation The lining seen inside the CE ammo box seems to be installed very untidily and messy. This could be intentional or it could be that it has got damaged through use. I will be installing my liner in a more organised fashion as I want it to hide the fixings that can be seen inside the box. Also I want it tidy for when I am trooping and under close inspection from the public. The fabric looks to be black and quite plain so I have chose to use a matt black cotton fabric taken from an inexpensive bed sheet from a local store. You get a lot of material for your money so if you make a mistake it is not a problem. Cut yourself a piece 35"x 23" and place evenly over the ammo box pushing the fabric into each of the 12 compartments. Fold under the edges and tack them to the dividers in the box being careful to glue them away from the edge. It looks better if fabric is not poking out from the box when finished. Tack all around the 4 sides. It does not have to be exact as we are still keeping it in the spirit of the CE pack so a little untidy is a good thing. Pinch a little of the fabric over each of the 6 holes in the centre and cut off with some scissors to make a small opening for the holes. It should look something like this. Line up the facade and push firmly onto the ammo box making sure the little cast marking is at the bottom as seen on the CE pack. You can see here how glueing it away from the edges results in a clean finish when assembled. There seems to be noticeable flat black markings painted onto the facade of the CE pack. It could be weathering, camo patterns or something else. Here is a rough outline of the more obvious black areas. Here I have recreated this paint scheme as best I can with the poor reference imagery available. It is interesting that the facade is painted black in this way yet the rest of the box remains its original green colour. More weathering will be applied over the top of this later after the pack is completed.
-
On the subject of antenna tubes. I have reverted back to my initial sizing for the outer diameter of the tube. The spacing in-between the tube as it wraps around the rod appears equal to the width of the tube itself. I find it impossible to achieve this spacing with a 5mm OD tube. My original estimate of the tube width was 6mm OD. A 6mm tube wraps around the rod 13 times and allows for the equal spacing in between. However this time around I have gone for a 6mm silicone/latex surgical tube as opposed to silicone/latex air hose.
