

BDWC
-
Posts
300 -
Joined
-
Last visited
Content Type
Profiles
Forums
Gallery
Articles
Everything posted by BDWC
-
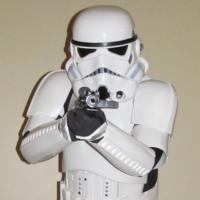
 Name: Jim Summerlin 501st TK ID: 24233 FISD: BDWC Garrison: Alabama Armor: Anovos Helmet: Anovos Blaster: Highly modified Rubies Height: 5'11'' Weight: 220 lbs Boots: TK boots Canvas Belt: Rob Kittell Neck Seal: Anovos Holster: Anovos Hand Plates: JustJoseph63 Gloves: Anovos black rubber Electronics: Self-made dual fan system Full Body Front Full Body Back Full Right Full Left Right Side Detail Left Side Detail Ab Button Detail Left Forearm Right Forearm Sniper Plate Outside Sniper Plate Inside Thigh Ammo Box Inside Thigh Ammo Box Outside Boots Helmet Front Helmet Left Helmet Left Ear Helmet Right Helmet Right Ear Helmet Back Helmet Hovi tip detail Helmet Inside and Lens color Ammo belt outside Ammo belt inside Neckseal Blaster left side Blaster right side Blaster 3/4 Leftside Blaster D-Ring Thermal detonator back Interior Strapping Arm Strapping Posterior Connections Cod Connection Outside Cod Connection Inside Left Side Connections Closeup Right Side Connections Closeup (functional) Hand Plates Action Shot
 -
Order at imperialissue.com Sent from my Imperial TK communicator
-
Personally, I really, really like my TKittle belt best [emoji16][emoji1303] Sent from my Imperial TK communicator
-
voted Really torn between #1 and #5, but thought both were the only ones that included the armor, which is such a big part of obtaining EIB, not just the blaster IMHO
-
WOW, great work on all the many and intensive mods to really set the gold standard for modding a Rubies E-11 !!! I am honored that my small modding attempted are referenced in this thread. (as currently, my blaster is the only thing holding me up from my EIB application.) I don't know if I can take my Rubies to the level that you have done, but you have definitely shown that is CAN be done!! Congratulations on a truly amazing mod, and thank you for the malicious documentation and pictures for other to follow your path
-
Snarky responses aside, your answer is simple as defined by the plates needed to pull: The longest part, probably the ab plate will define your longest MINIMUM dimension The widest part, probably the kidney, will define the widest dimensions ONLY if you are pulling longest and widest AT THE SAME TIME And, the tallest part, requiring additional sheet width and sheet thickness as to not tear during the pull, is probably the helmet mask section. So, depending on your mold buck vacuum plat offset heights, I would wage that the MINIMUM table dimensions, and thus sheet dimensions for .080"ABS, would be about 40" x 30" just based on the ab plate and helmet mask (3ft sq might make it but would possibly cause webbing on pull along the mold's longest axis) If you want to batch pull, you probably want to increase your size to about 4 ft. sq. Of course to conserve material, the available sheet size plays into this, so if 4' x 8' is the sheet size, for example, then 4'x'4' vacuum table would be best. I hope that fully answers your question, but your yet undefined process, plays into this heavily
-
Harbinger's first build - ANH Stunt (ANOVOS) [Centurion Approved!]
BDWC replied to Harbinger's topic in ANH Build Threads
Looking good! I just have two comments, 1) although not required, it looks like there is still a bit of flash in the eyes, but may be camera angle, 2) I did not know the hovi tip rings needed to be painted white, so I learned something new Sent from my Imperial TK communicator -
Thank you very much! Granted I’ve had a few challenges that don’t apply to every build, but I hope that I’ve shown that there’s always a way to fix things, or make them work. This forum and the entire FISD community is what makes possible all these seemingly impossible things. No matter what it is, some trooper before you has tried it and can help you know your options and what might work best. After all, “troopers helping troopers” is what it’s all about! One recommendation that I can give is to build your armor completely to Centurion standards right out of the gate. I was just too anxious to get approval and start trooping immediately, but as you can see, you can modify and change as you go like I did. There is no time limit to your build, you can always keep improving, and most importantly, have fun with it! I can’t wait to follow your build, and welcome to the ranks! Sent from my Imperial TK communicator
-
What can I say? I couldn’t wait... so, gonna get a test run in tonight for a 3 hour Halloween zoo troop [emoji197] [emoji316] [emoji204] Sent from my Imperial TK communicator
-
Whew!![emoji51] *** runs to grab drill bit and already painted rivets ***.....( then remembers upcoming Halloween troops, and puts on for Nov1st “TO DO” list. Sent from my Imperial TK communicator
-
Trial suit-up with new shims in place The fit is very close to perfect, IMHO. Although I might be able to trim 5mm off each side, I don’t know that it would be enough to cut out the shims, tear them from the backer plate and have enough left to try a second shot at “melding the gap” This was literally the only material from the kit available to even attempt making shims from the same Anovos plastic [emoji45] Sent from my Imperial TK communicator
-
Thank you, and yes, the seam areas are super polished (steps were 400/600/1000/1200/1500/2000/2500/Novus3/Novus2) However, there is still a slight color difference . O used all newly made ABS paste, two batches for this process, all freshly cut from same plastic as the shim and plate material. So this is what has me scratching my head. My only guess is that the backer plate, which is from a different brand ABS may be playing into it. It’s not bad, it’s just that it is not perfectly invisible and I’m a little OCD about these things. But I’m at a point of trying to not letting perfection get in the way of good enough. If you go back in this thread, I used the same techniques as I did on my bucket mask, which came out perfect.... so I’m not sure what is going on. BTW, I was looking at vacuforming some extra rivet covers so I’ll let you know how that goes Sent from my Imperial TK communicator
-
Thanks Tony! I’ll have pics up tomorrow [emoji108] Sent from my Imperial TK communicator
-
Photo without the kidney rivets ok?
-
After 5-6 days and 4 plus rounds of sanding/pasting/ repeat, I cannot get the seam to be 100% invisible. The melted ABS just doesn’t exactly match the original even when blended in. So here are my completed kidney shim photos and I’d really like some feedback back if this will pass EIB or Centurion or if I should start sourcing some color-matched paint. I really don’t like the idea of painting plastic, but I guess I will if that’s what it takes to go the next level!!! Regardless, looks like I’ll be putting in my kidney rivets so I can make some of the Halloween troops [emoji847] Sent from my Imperial TK communicator
-
These designs look great!!! Working on my shims right now, so hopefully I should be submitting within the next week or two [emoji16][emoji1303] Sent from my Imperial TK communicator
-
The ABS pasting has begun Both side have already had return edges created using a heat seal iron. These were also “pasted” to blend into the original kidney returns in addition to the pasting of the shim extension seams. Sent from my Imperial TK communicator
-
I haven't changed my small mesh screens out of my Anovos hovi tips just yet, but planning on just using a sifter of drain screen from the dollar store. It has the large mesh, and as cheap as it is, I'll have plenty of chances in case I cut it wrong with my aviation snips
-
All right I had one successful troop with the “temporary shims”, so now it’s time to rip them out ! I am now putting in the Anovos scraps for a perfect color match. This ABS is much thinner, so hopefully easier to form to the kidney plate curves than my temporary shims were. However, always being afraid of overheating the Anovos plastic, I’m using clamps to “coax“ the shims into place during glue up. Magnets just weren’t enough to get a good flat match at the seam-line for the ABS pasting area Perfectly good shims ripped off now, because I’m just crazy enough to prefer ABS paste work over color-match painting [emoji15] Sent from my Imperial TK communicator
-
My heat sealing iron arrived today So I will be "ironing" my final shims to to take out the curves and waves, then practicing on some scraps before attempting the return edges
-
I’m with gmrhodes13 on this. I’ve played the game and it’s fine, but ( after becoming FISD educated) I tend to enjoy the high definition graphics more for examining the armor and costumes. I may have a cosplay problem [emoji50] Sent from my iPhone using Tapatalk
-
Pretty sure Joseph is talking about adhesion But, I wanted to talk about ears: I too suffer from the perfectionist affliction. And here’s a tip about the ear—> you will be VERY lucky if you can get them to sit flush on both sides, primarily because they sit on the helmet joining split. I was able to get mine very flush on the front( aka “viewed”) side, but one ear remained to have a larger gap than I’d like on the rear. That was the best I could do and had to accept it. Like others have said, imperfection is actually more screen accurate [emoji12] Sent from my iPhone using Tapatalk
-
Meanwhile, on the ab plate side: I know that my strapping will be cut and riveted on the left side and a snap with corresponding snap plate added to the right side, but for now this will work. Also, this will allow me to use velcro temporarily on the shim sides. This will help with the final sizing when I put on the “true” shims once my sealing iron arrives. Sent from my iPhone using Tapatalk
-
I cut the ‘temp’ shims from the “too white” ABS sheet. I tried to put enough, but not too much, E6000 on them since I will be taking them off in about 10 days to two weeks. I made sure I used very straight factory edge for the seam side and glued them up After sitting overnight, and even with the color mismatch, it’s, well, not terrible [emoji12] Sent from my iPhone using Tapatalk
-
Well, just found out that my sealing iron that was supposed to be here on Oct 3 may not arrive until Oct 11th. This normally would not be a big deal except that I am one of two TKs scheduled for an Oct 5th wedding. So I am using two granite tiles and a heat gun to try to flatten the shims VERY carefully. Meanwhile, I will watch the shipping and if need be, temporarily E6000 on pieces of the ABS material that’s a little off a color match. No one but me and my fellow TK will even know, as the belt hides most of it and the seam will be just a hairline. If the iron arrives in time to fix the material flaws and still allow for ABS paste cure and sanding times, then I’ll complete it before the wedding... but it’s not looking likely. But I did get the shims to mostly flatten out Luckily there was just enough material to make the shim and allow s little extra to make returns Interim shim configuration plan inbound..... Sent from my iPhone using Tapatalk
