

supernaut11
-
Posts
141 -
Joined
-
Last visited
-
Days Won
1
Content Type
Profiles
Forums
Gallery
Articles
Everything posted by supernaut11
-
Dremel vs. Air tools
supernaut11 replied to Jaltrooper's topic in Getting Started - Read this First!
Hi Jon, I think you'll be just fine using a dremel. Just take your time and practice with it first. During my builds, I've used a combination of lexan hobby scissors, score and snap ( I'd recommend a utility knife instead of an exacto ), and the dremel. It just depends on the piece and also just to experiment to see what works best. Good luck! -
Nukems ANH Stunt Build thread! (AP)
supernaut11 replied to nukem25rs's topic in Build Threads Requireing Maintenance
This diagram should help you. -
Here can see the type of applicator I used.. Note the "Tacky" putty.. Don't use this. I used it to mask the teeth and I spent an afternoon cleaning it off. It had the consistency of chewed gum.. It was terrible. Use another method or just go around the teeth. This was after one coat.. Two more followed.
-
I brushed mine on with a sponge applicator.. It was actually dabbing as opposed to brushing. Don't worry about getting full coverage on the first coat. It'll dry quickly enough for a second or third coat and you'll get it all covered. It's messy and it smells bad, though! Open that garage door! I've heard of light sanding prior to coating.. I didn't do that. But that might be something to consider doing.
-
Getting started on an AP ANH Hero build. Wish me luck.
supernaut11 replied to sparker86's topic in ANH (Stunt and Hero)
I started on the shins and went all over the place from there. But my advice would be to get the torso of the armor fitted first, before the limbs. It'll help you with getting the overall proportions down. I made the mistake of fitting the thighs first. It looked ok until I got the rest of the armor on and it made my thighs look too skinny. I had to tear them apart and resize them larger than I would've thought before. Which, btw, I could not have done without using E6000! I was so thankful I did.. I highly recommend it.. The link that Kalani posted is golden, as is Ukswrath's build thread. I heavily relied on that during my build. Good luck! I will follow your build! -
It would appear as though that is your right shin. Smooth rounded outer and a subtle curve, or dip on the inner. Good luck with your build!
-
I don't have Anovos but I honestly have not heard anything positive about the soft goods. There's certainly other options for those things. Any black compression top and bottom will be fine. I found mine on Amazon.
-
Very clean! Good job on the tops. I did the same thing on mine as well.
-
About 3 1/2 weeks to get mine.
-
Quick0817 AP TK Stunt armor build thread
supernaut11 replied to quick0817's topic in Build Threads Requireing Maintenance
You'll need to use Photobucket. Once your pics are uploaded, choose a pic, click "share", then click "direct link". Your pic will be copied. Now, go back FISD, when you're in the reply window, click the image icon and paste your pic in the URL. -
Quick0817 AP TK Stunt armor build thread
supernaut11 replied to quick0817's topic in Build Threads Requireing Maintenance
Good luck, man! It's a great kit.. Take your time and enjoy the ride. The forearms are just fine to start with. As you progress through your build, you'll find that you have multiple things going on anyway, so I wouldn't worry too much about that. Take a look at several build logs, not just AP, but different ones as well. And take notes! That was very helpful for me. -
supernaut11's ANH stunt build thread [AP]
supernaut11 replied to supernaut11's topic in Build Threads Requireing Maintenance
Thanks, Henry.. I appreciate the compliments. I took a chance with that acrylic paint but I was pleased with it, too. It paints on very smoothly and is flexible when dry. I would recommend it if your looking to paint your hand guards.. Enjoy your AP armor, it's a great kit and good luck getting your TK ID! It feels great to get that email! -
supernaut11's ANH stunt build thread [AP]
supernaut11 replied to supernaut11's topic in Build Threads Requireing Maintenance
Thank you, sir! I appreciate that. -
Good luck with your build! Enjoy it.
-
supernaut11's ANH stunt build thread [AP]
supernaut11 replied to supernaut11's topic in Build Threads Requireing Maintenance
Aaron, thank you! Your enthusiasm and mad skills since the beginning of your epic build thread provided tons of motivation for me along the way! Thanks, man! I appreciate that. Thank you! I make regular trips to Dallas since my girlfriend and one of my brothers both live there.. I'd be thrilled to troop North Texas! Thank you, sir! Thank you, sir! Thanks, Mark!! Your kit was a pleasure to work with. As happy as I was to finish, I miss the build now. But there's still my brothers AP to help him with! Thanks, Ron! I appreciate that. I'm thrilled to be in the squad with you guys. I'm sure we'll troop soon! -
supernaut11's ANH stunt build thread [AP]
supernaut11 replied to supernaut11's topic in Build Threads Requireing Maintenance
I hope that there has been some helpful info in this build log. It's been such an incredible ride getting to this point and there's no way I could've done this without all the great people here on FISD. Thank you!! And as for my brother, he has his ID, too! DZ-11218.. Yep, a Tusken Raider.. He began researching it and the next thing you know, he completed a costume! He's about 1/2 way through his TK, so it won't be long till he joins us here on FISD.. And with that.. Here we go.. TK-11722, 501ST LEGION, STAR GARRISON, CENTRAL TEXAS SQUAD.. -
supernaut11's ANH stunt build thread [AP]
supernaut11 replied to supernaut11's topic in Build Threads Requireing Maintenance
Thanks, Brother!! I appreciate the compliments.. There's more posts on the way. -
supernaut11's ANH stunt build thread [AP]
supernaut11 replied to supernaut11's topic in Build Threads Requireing Maintenance
Next up, the detonator.. The first thing I wanted to tackle was to get the end caps down to their proper length (20mm). Using a 20mm cover strip as a guide, I marked around each cap, taped off, then trimmed them down with a dremal and sandpaper. I then placed both caps on the tube and measured the overall length to determine how much of the tube needed to be trimmed. You can see that I needed to trim approx. 1/2 of the tube to achieve an overall length of 7 1/2in. 1/2in. trimmed off one end. I then placed both caps back on and measured. 7 1/2inches. Next step was to place the control panel on the tube so that there is an equal amount of space on each end, between the panel and each end cap. Then trace around panel and caps with pencil. Paint prep.. Areas that will be glued are taped off. I put the tape just slightly inside the lines to assure there will good paint coverage. I used a Testors rattle can for the paint. Once dry, the control panel was glued in place. Put the end caps on (Do not glue yet!!), put one of the metal clips in place, and mark the hole thats closest to the panel. Drill hole, remove cap and install. Now you can bend the clip to lay flush on the tube and mark the next hole for installation. Now end caps can be glued. Always watching -
supernaut11's ANH stunt build thread [AP]
supernaut11 replied to supernaut11's topic in Build Threads Requireing Maintenance
In order to make the holster approvable as an ANH, I needed to make an quick modification to the belt straps. First I cut down plain strips of leather to match the width of the black strips supplied with the holster. Black straps are removed and a length equal to the width of the straps are cut at the ends and placed over the screw holes on the holster. A leather punch was used to make the holes in the new leather straps. To be accurate, I will need to make some cuts on the body of the holster as well. It will pass for basic without these cuts so I'll worry about that later. -
supernaut11's ANH stunt build thread [AP]
supernaut11 replied to supernaut11's topic in Build Threads Requireing Maintenance
Next up, the ab buttons. With painters tape, I made small stencils using my Ofna circle cutter that I bought several years ago for my lexan RC car bodies. I placed a piece of tape on a scrap piece of ABS to use a backing. First coat of Humbrol #8 (grey) and #14 (french blue).. Again, lots of stirring. After two coats. I purchased a set of hand guards from justjoseph and I think they look great! However, I wanted them to match the white of the armor so I chose to paint them with a white acrylic. It took at least three coats to achieve the look that I wanted but I'm pleased with the result. The paint is very flexible but will still crack a little. But hey, a little cracking just adds to the accuracy The guards were then glued to the gloves with E6000. -
supernaut11's ANH stunt build thread [AP]
supernaut11 replied to supernaut11's topic in Build Threads Requireing Maintenance
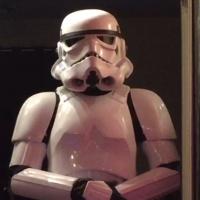
AP's cut lines on the helmet and ears make this a very straight forward build. A note about Humbrol enamel.. stir the paint with a toothpick.. Then, stir it again.. And when you think you've stirred it enough.. stir it again. Then close the lid and shake it. Open, and stir again.. It brushes on much nicer if you do this. I started with the teeth (Humbrol #5). I believe this was the first coat. It may have been the second, I honestly can't remember. Ultimately I applied three coats. Allow plenty of dry time in between, at least an hour. The tear drops (I think that's what they're called), were a combo of free hand and stencil (the vent lines). First was a solid coat of black (Humbrol #21). It isn't necessary to paint solid black but that just me. Then the grey (#8) Same process for the back. Stencils were used for the vent lines here as well. Completed.. almost.. Lenses not installed and ear screws still need to be painted. For the vocoder I chose to use Humbrol#85 (satin black). Stripes are the stickers provided by AP. -
supernaut11's ANH stunt build thread [AP]
supernaut11 replied to supernaut11's topic in Build Threads Requireing Maintenance
It's time to revive my thread! It's hard to believe it's been 4 months since my last update! It's been it's been a productive 4 months and I do have a few parts of my build plus the completion that I'd like to share. I'll pick up where I left off with my approach of offsetting the halves of the left shin to help line up the sniper plate. As it was, if you were to line up the halves, the sniper plate, (front view) would dip to the outside. The plate still needed a hot water bath to slightly bend the outside wing in just a bit to make the gluing and clamping easier. Gluing was still done in stages. First the middle, then the outsides. The arms went pretty straight forward. Forearms and biceps were joined together by gluing a strip of 1in. non-roll elastic along the inside, leaving about a 1in. gap at the elbow. A strip was then glued to the inside of the top end the bicep with a snap at the other end for the shoulder bell. I placed two male ends on the inside of the shoulder bell in case I needed to make adjustments. -
Nukems ANH Stunt Build thread! (AP)
supernaut11 replied to nukem25rs's topic in Build Threads Requireing Maintenance
I second that! I was a bit apprehensive to trim mine all the way to the line but yours turned out great! Are those the decals or did you paint? Either way, those look great, too. -
Messed up painting! Help!
supernaut11 replied to The Anonymous Egyptian's topic in Assembly, Mods, and Painting
Tamiya swabs with thinner are excellent for removing paint. The cotton is spun very tightly on the stem so there's no shedding at all. I use these with my scale models and I love them. ----------- -
TK-11722 requesting 501st access. Profile http://www.501st.com/members/displaymemberdetails.php?userID=21873
