

87ninefiveone
-
Posts
93 -
Joined
-
Last visited
Content Type
Profiles
Forums
Gallery
Articles
Everything posted by 87ninefiveone
-
 Applied and denied. So much for skipping the build thread. Need to fix the following.... 1. Gap between kidney and back plate. 2. Kidney/ab/butt plate fit issues. 3. Drop boxes need to be out to the sides further (not an issue as they mounted with a loop of fabric). 4. Fix the greaves/boot gap. Bummer. But the end is in sight I suppose.
 -
Thanks man, that means a lot coming from someone with your level of knowledge. As for some of your suggestions... The ab and kidney are currently attached to each other on each side via three 1"w x 3" l elastic straps. I might switch to nylon strapping or some mix of the two to try and straighten things out a bit in that area. The shoulder bell upper strap is actually as short as I can make it, the problem is that the weight of the arms is pulling the shoulder bridge elastic out from under the plastic bridges. I think I might be able to remedy this a bit with some strategically placed Velcro between the elastic and plastic bridge to stop them from moving around relative to one another.
-
Hi, I’ve been lurking for around 3-4 months now as I’ve progressed through my build and I’m finally to the point where I’m ready to submit to the local GMLs. Before doing that though I’d like to get some critiques and ideas on how to fix some of my lingering issues if possible. I’m only shooting for basic approval at this time, but I’ve been building with an eventual EIB in mind and figure I’m about half way to achieving it at this time. Armor: T/MC Helmet: ATA (TMC in progress) Neckseal: Darman TIE Pilot Holster: Darman Boots: Deer Stags Nolitas Handguards: Stock ABS T/MC ANH kit Undersuit: Champion C9 2 pc Blaster: Painted and weathered hasbro, but needs obvious work before being EIB acceptable. Height: 6'2" Weight: 205lbs Issues that stand out to me... 1. I'm too darn tall for this kit. (see side shots with arm lifted...hello gap between ab and chest) 2. Deer Stags aren't tall enough. Plan to remedy this with some sort of fabric/vinyl collar around the boot tops to stop the shins from riding up on top of the boots in front. 3. Large gap between shoulders and chest/back plate. I've tried about everything I can think of here and can't find anyway to eliminate this. I think I'm just too big. 4. Left forearm is hanging a bit low. I think this is more related to the hand guards being attached to the forearms. The elastic is too short and seems to be pulling down the forearm as a result. 5. The kidney plate is all crazy. The darn thing is twisted and torqued all funny to the point where it doesn't sit straight on me which causes the sides to point at an upward angle and the whole job to look bad. This is my biggest issue (...I think...) 6. Biceps might be a bit large due to the fact that they were the first thing I sized and when doing so I actually had them on my bicep rather than below it as they're properly worn. Since I used CA glue and inner/outer strips this isn't an easy fix. Luckily, they're not horribly large and appear in proportion to the rest of the suit.
-
POLL: What glue have you tried, what actually works
87ninefiveone replied to Daetrin's topic in Assembly, Mods, and Painting
After using E6000 to glue the lenses into my helmet my wife strictly forbade further use of it since it seemed to stink up the house for a few weeks after application. As a result I tried a bunch of different types of glues when it came time to start on the strapping system. I found that Acrylstik High Performance hot glue sticks at Jo Ann Fabrics (~$6) worked really well. You have to let the glue gun get nice and hot, use it liberally, and then let it sit for 1-2 hours before stressing it, but it sticks about as well as E6000 does and is every bit as removable (all with no stench). So, for what its worth there’s another option for those that aren’t fond of E6000. -
Dyeing Black Boots White
87ninefiveone replied to Palpatine1977's topic in Build Threads Requireing Maintenance
I've.gpt a discount code for angelus direct if.you want to try their paint. No cracking yet on mine after a few brief trial fittings. PM me if interested. -
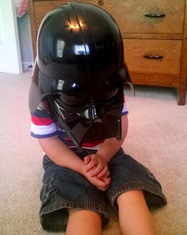
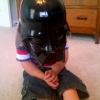
ATA helmet has arrived and Im.....
87ninefiveone replied to Polar's topic in Build Threads Requireing Maintenance
The right eye always has a bump on the bottom edge on screen derived helmets. The angle of the photo probably makes it look worse. It may also be exaggerated here a bit by the eyes being very deep set. -
It actually doesn't look as bad as everyone is always going on about....I can see where people would complain that there are better self assembled kits for less money, but this looks a heck of a lot better than rubbies or FX kits do and the list of stuff to modify is fairly short. Good luck with the work and makes sure you post some photo along the way!
-
Dyeing Black Boots White
87ninefiveone replied to Palpatine1977's topic in Build Threads Requireing Maintenance
Finished up painting my deer stags tonight. For those interested, using angelus paint it took 8 medium to light coats and 1-2 oz of paint to get them looking good. The elastic took four coats to cover. They seem pretty scratch resistant but I suppose time will tell. -
ATA helmet has arrived and Im.....
87ninefiveone replied to Polar's topic in Build Threads Requireing Maintenance
Try finding a local hobby store that sells rc cars, got mine from a store called hobby town USA. They came with a reamer for like $15. -
Will these boot be ok for TK armor
87ninefiveone replied to Scorpionmatt's topic in ANH (Stunt and Hero)
Looks good for basic approval, might not pass eib or centurion level though due to the seams on the sides.before you decide to keep them make sure they're tall enough that they stay inside your greaves rather than popping out because they're too short. Velcro can help that situation, but there will always be a chance that they pop out from under the shin armor if they're too short. -
I've got a royal guard and two TKs. One finished and one awaiting assembly. My wife hates them all....but I'm still going to get more.
-
Looks like you've got another 1/4" to 1/2" to take off the cap portion in order to get the ears to sit right. There's very little extra meat on the ATA helmet when joint the two though so trim just a bit at a time to make sure things will still fit when you're done. My biggest issue with the ATA helmet was that I trimmed right up to the line on the right and left sides of the faceplate which made fitting the cap difficult as they barely overlapped. My suggestion is that you don't trim the sides of the faceplate at all if you haven't already, it will make your life easier as you fit the ears and things start to come together more.
-
Dyeing Black Boots White
87ninefiveone replied to Palpatine1977's topic in Build Threads Requireing Maintenance
OP, any word on how well your paint/dye job held up? I bought myself the same deglazer and paint and I'm waiting on boots to show up tomorrow. Hopefully they'll turn out half as well as yours did. -
As an update, I attached the upper and lower sections this weekend. I didn't think there was a whole lot of issues with them being seperate previously but the suit is much more comfortable afterwards. So....bam....dumb question answered.
-
That's kind of the situation I'm in now...except that I'm not short (6'1", 200lbs). Right now I've essentially got it rigged such that I've got an armor shirt (breast,back and arms) with a seperate ab/kidney lower portion. I guess I'll give it a try and see how it goes during an extended wear period. If it sucks I can always add some straps to connect the sections.
-
So I'm an admitted newby, but I'm about 80-90% of the way through my build and I'm struggling with why the chest/back needs to be connected to the lower ab/kidney armor? From what I can tell by wearing the armor around the house for 10-15minutes here and there for test fitting I don't see much need to attach them together. No attachment seems to give good mobility (okay, not good, but as good as it gets) and the chest/back doesn't seem to move around or fall away too badly when bending over due to the relative rigidity of the upper plastic straps (free floating in back of course). Is there a practical reason that becomes obvious when wearing the armor for longer periods of time? I.E. is it necessary to stop the midsection from sagging? Does anyone else out there troop without attachment between the two sections?
-
Hero bubble eyes, how to install them?
87ninefiveone replied to DarSec's topic in ANH (Stunt and Hero)
I didn't do bubble lenses on mine, but I did attach flat ones by molding the curve of the helmet onto the lenses. Here's how... 1. Start with a disassembled helmet. It makes access roughly 1.2 million times easier. 2. Use a pencil to trace an outline about 1cm larger than the eye opening. 3. Gather your courage and cut out the shape you traced. 4. Boil some water. 5. Get some tweezers. 6. Dunk the lens into the boiling water, have your helmet at the ready and immediately transfer it onto the eye socket. The plastic should go all flappy with a few seconds in the water. Dont overdo it. 7. Next, You'll need a round tool to press it into place quickly before it cools. I used a metal teaspoon and tablespoon. You'll also need to push down around the outside edges a bit to form a return edge around the outside of the eye socket. 8. Repeat for the other. Eye. 9. Celebrate! Note, you can redo the heat and mold process to the lenses ad finetum without issue until you get it just right. Edit, for attachment I just used e6000 glue at about four points around the perimeter of the lenses. -
ATA Helmet Bottom Opening Dimensions
87ninefiveone replied to OnlineJeff's topic in Assembly, Mods, and Painting
Measured mine with trim installed, 170mm front to back, and 220mm side to side. Unless you don't have a nose you'll have to put it on sideways and rotate it to get it on. As stated above though, fit the cap with the rubber trim installed to make sure that the front to back positioning is correct. -
Better Armor Through Science?
87ninefiveone replied to 87ninefiveone's topic in Assembly, Mods, and Painting
Sorry Walt, should have explained myself better. The steam bending idea would be entirely for bending/forming small areas that don't conform to the shape you need (greaves, belts, helmet, etc...). I never meant to imply that you would want to use it for the vacuum forming process itself. -
Alright, so I'm a chemist by trade and I got to thinking about the options we have out there for bending/reshaping ABS and HIPS. Basically from what I gather we've got the following two techniques.... 1. Heat Gun - Too easy to burn ABS or HIPS. 2. Boiling water - Does anyone really have a pot big enough to do greaves? Also 212'F plastic hurts... So I was thinking....dangerous right? Both ABS and HIPS have a glass transition temperature (Tg) right around the boiling point of water. ABS is 105'C (221'F) while HIPS has a Tg around 90'C (194'F). The Tg is the point at which the plastic rapidly goes from a soilid glassy state to a flexible plastic state and is the reason why these plastics can be easily thermoformed on a vac table. So, what I'm wondering is whether or not anyone has attempted to use a steam cleaning machine (or some other similar steam generating device) to attempt to form or bend armor as opposed to a using the traditional methods? I would think the steam would be advantageous as it could be easily directed similar to a heat gun but without the possibility of easily overheating a piece like a normal heat gun. Directional targeted heat would also mean you don't have to mess with a giant hunk of near molten boiled plastic and a cauldron of boiling water either as is the case with boiling your armor to reshape it. So, anyone tried this? I'd do it myself right now, but I don't have any nice scraps of ABS laying around to try it on.
-
T/MC Armor Purchased on eBay - Real or not?
87ninefiveone replied to 87ninefiveone's topic in eBay Armor
Hey Tray, no worriers. I didn't send any PM's via FISD. At the time I hadn't registered yet and I sent an email to whatever address was listed in the armor supplier thread. -
T/MC Armor Purchased on eBay - Real or not?
87ninefiveone replied to 87ninefiveone's topic in eBay Armor
For what its worth the kit was real. It showed up Tuesday this week and everything was there including a bunch of brochures from moncal's prop making shop. -
Hi Guys, I found this auction yesterday with about 30 min left on the clock. I was on the list for ATA (already have a helmet in fact), but I'm impatient and wanted a suit to build for Halloween in October and was worried about not getting it in time to do the build. Also tried contacting T/MC via the listing here on FISD a few weeks ago and got nothing back....So, long story short, I picked up this kit unbuilt kit for $750. http://www.ebay.com/itm/221450996503?ssPageName=STRK:MEWAX:IT&_trksid=p3984.m1423.l2649 From what I can tell it looks right for a T/MC kit, but I just wanted to get everyone's opinion on whether or not it actually is. It appears to be missing any sort of cover strips, but I figure I can always source some ABS for the purpose on the cheap (hopefully). Thanks!