

maxsteele
-
Posts
865 -
Joined
-
Last visited
Content Type
Profiles
Forums
Gallery
Articles
Everything posted by maxsteele
-
Well, it looks like I really made a big screw up. I went to size up my tube stripe templates on my cheeks to prepare for painting them. I noticed something off: See the 14th and 15th stripes? The 14th stripe will be touching my ear, and the 15th stripe will be covered by it. Then I started looking at other people's builds, and it seems their ears are set back a good 1/2" or so more than mine are. I followed everything, I lined up the traps with the tears, I double and triple measured all my holes, I made so many posts here validating everything I was doing, and my ears are too close to the face plate of my helmet. I'm disappointed that I was so careful and even told my line ups and screw holes looked good, only to find out this far into the build I don't have enough room to put all of the stripes on the cheeks. If I attempt to move the ears back, I'll have to drill new holes, and my ear shapes will be off and may not cover the cut lines between the two pieces. Also, if I don't have enough left to trim, I'll need to start over with the ears again. Another issue is moving them back will expose the current holes I have drilled. If I can, I will simply just leave off a couple of blue stripes on each side of the cheeks and call it good. I'm fine with this. I have seen some other builds on the forums that don't have 16 stripes on one side and 15 on the other. One build had 13 on each side. I would be able to have the same. Thoughts are always welcome. EDIT: It seems the CRLs have this to say about the tube stripes: Tube stripes are medium blue, numbering between 9 and 16 per side with the curve bends extending backwards. Between 9 and 16? Does this mean that there were helmets that didn't have exactly 16 on one side and 15 on another? Yep, here's one with 13 stripes on the right side. Just like how I'll have to do mine. This guy has 11 stripes, and the space between the end of his ear and the tear looks to be the same as mine: And both of these crawling TKs have 13 stripes: Ok, I believe my panic attack is averted. I took my helmet back apart to see if maybe I put my ears on the wrong way, but I hadn't. I think I'll keep my helmet apart for applying the tube stripe decals and painting them. I'll put my ears back up to it to make sure I don't paint any stripes underneath them. I'll just cut down or ignore a couple of the tube stripes in the template when I paint.
-
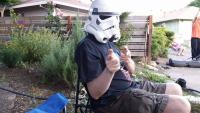
Ears painted. I haven't put the black rank stripe on yet, but I wanted to show this painting progress. My cell camera took the pic upside down. I tried 5 times to rotate the pic in imgur, but it just wouldn't stick. It's ok though, you can see what they look like.
-

My First Armor Build Thread ANH-S CAP Armor.
maxsteele replied to Stormy1992's topic in Build Threads Requireing Maintenance
I'm not too familiar with Scootch's armor, but I am seeing that there is too much flashing there on the ends of the chest sides. Same on the other side. As for your ab and kidney pieces, you want the sides to butt against each other and fit your body. For my kit, most of the cutting was on the ab side. I think I can see the mold lines on the ab piece for your kit on the sides where you would trim away, but also I think you'll be trimming away from the kidney. You may want to search on the forums for another Scootch build to see how they cut the ab / kidney. -
Ah, that explains why I went with flat. My options with Testors were flat and gloss, and I didn't see the suggestion ahead of time to mix flat and gloss together to get the matte finish. That'll be a "to do after I finish my whole build" task.
-
Ah well. I used flat black. Probably won't paint over it unless it costs me a cert. That vocoder took some serious concentration to get painted correctly!
-
I personally don't like the look of stopping the frown at the fifth tooth, leaving a white void, and then continuing the frown after it. I do see that some just painted over the 5th tooth, which is what I'm going to do. However, I see what you mean that I do look like I'm bringing the frown to a point on the indent of the 5th tooth hole. I had stopped it there from this description: "Frown is painted gray and does not leave the teeth area." Where I stopped it seemed to be where the teeth area ended. What I'm wondering is where exactly should be the stop point for the frown points? Reference photos that I'm looking at don't get a good shot on exactly where the points come down to the detail of the helmet. I don't want to bring it down too far where it's interfering with the cheek areas. What helmet detail would be a stop point for the points of the frown on ATA? I can then use that as my point, and then paint backward into the rest of the frown.
-
Great job Darren! I'm almost finished painting my helmet, having decided to go with all paint as well. I used flat black for the vocoder, and gloss black for the pinstriping. I thought I read somewhere very early in my build to use flat black instead of gloss on the vocoder. Not sure if that was correct, but it looks alright. I found a great method when using templates to first paint down a base coat color of whatever you're painting on first, let it dry, and then paint the color you're using the template for. In my case, I have tube strip templates from Trooperbay. I'm going to put down the template, then paint a layer of white over the template. Once it dries, I'll paint the blue for the stripes and that will prevent any bleedthrough. I did the same method for the stripes on my rear traps last night using Trooperbay templates and painting grey first to prevent the bleeding. They came out great! I won't flood your build thread with my pics, I'll just link to my ATA helmet build: http://www.whitearmor.net/forum/topic/24746-my-ata-helmet-build/?p=345862
-
Thanks Steve! Here are the finished tears and traps. Still need to paint the ears and tube stripes:
-
Alright, now that I've been able to look at the tears without the tape, I feel they're the right size.
-
I think I made my tears too small. The tape is really preventing me from telling. When I'm in there painting, it feels like I'm really close to the sloped edge, so I didn't push the black out any further. I'll pull the tape off when I get home tonight and take a look.
-
Hahah! Of course it's normal to be a little crooked. Thanks Germain. I won't worry about trying to correct it. Yes, I've been aware for awhile now about the extra flashing on the sides of the back plate. I used the excuse that I've seen other NE builders leave it there and no one gave them a hard time, so I've been leaving it alone myself. Now that I have more experience cutting and shaping my armor, I will get to that. There are other build items on the list in front of it, but I will take care of it. It shouldn't take me longer than an hour at most to measure and cut away the excess. These last couple of weeks I've really been enjoying my build, as it all starts to come together.
-
Boy, if anyone is a poster child for "Yes, you can paint your helmet!" it's me! Here are some tips I have learned from my first time ever painting something like this: 1) Get a number 0 brush. This is the brush I use to start my black line, and to start my grey line over the black. I'm holding it like a pencil, gripping really close to the bristles, and I have had a lot of control over it. I found that it's easier to start further away than I'm wanting the line to be, and gradually paint up into it. I used a thicker brush to paint in the rest of the black and the rest of the grey, but I used the number 0 brush for the line edges. 2) Keep your paint mixed. I use toothpicks and stir the jar I'm working with every 10-15 minutes. It keeps the oil and paint mixed up and 'fresh'. 3) Keep your brush on the painting surface. When I'm moving my brush, I keep constant pressure so the brush glides along the surface evenly. When I'm ready for another stroke, I pick up the brush completely, move it to the new location, and then start painting again with a consistent pressure again. If I drag the brush or move it back and forth, the bristles start getting separated and will start painting where I don't want them to. 4) Clean your brushes. And I'm not just talking about after finishing with them. The work above took me 2 hours to fully complete. When I'm in the middle of painting the lines, I stop for a moment and clean my brush because the paint is starting to dry on the brush and it makes painting more difficult. 4) Don't be afraid to make a mistake. When I would paint a line a little too thin in a spot, I could wipe it away quickly without much impact. Otherwise, the phrase I always tell myself is "It's supposed to look hand-painted!" There will be little errors and mistakes. That's what makes it hand-painted. These lines I have painted are not perfectly straight. They don't need to be, and I prefer that look over machine-drawn straight lines.
-
You want hand-painted? You got it! I need a second coat of grey once that dries, but there ya go. I was trying to see how masking would work, but it just wasn't coming together that way. I'm happy with the way it looks! My hand-painted straight lines will never be completely straight or non-bumpy. Again, that's why it's a 'hand-painted look'. I'm good with the thickness of the black as well. I just wanted to stop mid-painting to show how it's looking.
-
I haven't glued on the button plate yet. It's just held on by some tape. Yeah, I'll need to do some modification on the butt plate, but I'm not letting that slow down my basic approval. I'm considering gluing straps to all the arm pieces instead of using button plates. Sent from my SPH-D710 using Tapatalk
-
New NE build Tampa Fl
maxsteele replied to Pencap510's topic in Build Threads Requireing Maintenance
I got my double cap rivets from Echo's sale thread. Sent from my SPH-D710 using Tapatalk -
Oooh man - I'm getting closer! Here are the boots, shins, thighs, butt, ab, kidney, back, and chest strapped up and wearable! (I still need the straps from the chest to the ab): I noticed I can see the garter rubber pieces at my thigh gaps. Now I know the reason for the drop boxes. Also, my chest plate is a little crooked. I think that will be corrected when I get the chest-to-ab elastic installed. It'll pull the chest down which will pull the back plate against my back a little more. Also, I held up my shoulder plastic to my chest / back, and they wrap around very nicely from front to back. No issue there. Next - research on how to line up and connect the forearms / biceps / shoulders and the best way to connect all that to my shoulder elastics.
-
Aah - that's why your thighs fit so nicely. You have a longer torso, so your ab is further away from your thighs than mine is. Just a suggestion from me - if you're feeling up to it, I would suggest to cut away the extra on the right side where your ab and kidney meet. You would have the same extra over on the left side as well, but that could seriously interfere with your rivets, which you probably want to just leave alone. Here's what my sides look like: The "wave" that you see on the ab side at the bottom some of my undersuit bunching over it. It's a straight line. The left side's alignment was off in this pic, so the shape at the bottom of the ab on the left side is under the belt. Here's a different shot: I also cut across the top of the ab on both sides to make it line up straight across with the top of the kidney. I was happy with how it turned out, but like I said, it could come into conflict with your rivet placement.
-
New NE build Tampa Fl
maxsteele replied to Pencap510's topic in Build Threads Requireing Maintenance
You got a nice bend! I say drill those holes and rivet away! -
That is a great looking build Stuart! I am particularly jealous on how you got your butt plate to sit so nicely. I also see you didn't have to modify the tops of your thighs at all. It looks like you have good clearance and don't have to worry about your cod catching on the tops of the thighs. Nice job, and I don't think you'll have any issue getting at least EIB with this build. I'm curious, how tall are you?
-
Everyone's been against me masking on the painting. Maybe I'll try it on a trap and see how it turns out. Couldn't hurt to try! Sent from my SPH-D710 using Tapatalk
-
New NE build Tampa Fl
maxsteele replied to Pencap510's topic in Build Threads Requireing Maintenance
I'm considering gluing snap plates to my ab for holding up the belt. I have seen others do it, it's not Velcro, and it keeps me from damaging my armour if I install anything by mistake. Sent from my SPH-D710 using Tapatalk -
Haha! Yeah, I'm going to try and get out as thin as I can. I can certainly get it consistently thinner this way than if I painted the grey first and then the black outline. I will try my best. I believe the line thickness in my test there is a good thickness. That's what I'm striving for. Sent from my SPH-D710 using Tapatalk
-
And just to allay any fears, here's a test I did where I painted a partially black trapezoid, and then I painted the grey in over it to get the thin black border: You can see where the black was underneath the grey, and where it was white. It looks uneven. Painting it all black will make a uniform coverage of the grey.
-
No worries Steve! There is certainly a method in practice here. I'm using the method of painting the black in first, and then going over it with grey to make the black outline. Here's a pic from Ale's ATA helmet build: From other research, I've seen some people prefer to paint the whole trap in black, rather than having some uneven painting, in order to have a uniform cover of the grey that's painted in over it. Once this black is dry, I'm going to go back and paint in the grey right up next to the black to get the black outline, and then paint grey over the rest of the black. I chose this method over painting all grey first and then trying to paint in the thin black line, as it's easier for me to do an edge on one side where I don't have to worry about how much goes on the other side. This way I can concentrate on how much grey I'm painting and how close I'm getting to the black, rather than painting the grey first and having to go back over the outer border with black, and risk either painting a little too far away from where I stopped the grey, or making too thick of a black line over the grey. It also gives my eye something to follow when I'm painting the grey in up to the black, and I can see the size I'm making the black line.
-
I had forgotten that in order to get an idea of how the straps will be, I can just tape the hell out of them and then try it all on to see how placement is. I spent about 2 1/2 hours last night putting on my ab / kidney / back / chest, looking in a mirror, seeing an adjustment, then taking it all off, moving the straps, re-taping, putting it all back on, and checking in the mirror again. I'm getting good at putting it on and taking it off. I found what I thought was a good placement of the shoulder elastics, and I've placed glue, clamps, and magnets: