


HockeyTrooper
-
Posts
373 -
Joined
-
Last visited
Content Type
Profiles
Forums
Gallery
Articles
Media Demo
Posts posted by HockeyTrooper
-
-
The equipment has been moved to the new owners. I'll try to update if I find out anything about their moulds. I think they might be going under a different name than armor depot also.
edit: scratch that, until I find out otherwise they are still going by Armor Depot
-
I would recommend staying away from velcro when possible as well. There are a couple of other options that would allow for some flexibility in the size if you would rather not glue them. One of these methods would be use of elastic strapping to attach the 2 halves of the forearms. It is a method I'm experimenting with on my 3PO build, so I don't know that it has ever been utilized for a TK or would work. On one half of the arm piece you would want both an inner and out cover strip glued and then elastic strapping that would be tight enough to hold the 2 pieces together but still allow for some flex. It might also be possible to completely glue the strips down to both pieces on one side of the arm (the more visible side) and then try the elastic on the other side. Just an option. Like I said, I haven't seen that done on a TK before.
-
Carl,
It depends on your intentions with TK armor, if you intend to join 501st and if you want to or are willing to do some of the assembly. The various reputable sellers of the 501st and FISD community can be found here: http://www.whitearmor.net/forum/topic/11538-the-various-types-of-armor-and-where-to-find-them/
Some of them offer assembly services for an additional charge. You might also think about what kind of TK you want to make as there various versions between the movies and video games. Different armors lend themselves to different versions and also can lend themselves to people of various sizes better. Your best bet is to get an idea of which type of TK you want to make and then determine which armor type will work best for your body type, then contact the armor makers and see who you ultimately want to use as your source.
Hope this helps!
There is a lot of information available on this site and it can be overwhelming at times so feel free to ask lots of questions.
-Bennett
-
I need to switch out to padding of some sort. Currently I have hardhat liner in and there is hardly any room in there . I think if I pad it appropriately I could also appear taller and show off more neck seal, as it is currently my neck seal is hardly visible. Just some ideas to keep in mind as you continue your build! Good luck!
-
Looking good, I am quite slim and I am getting inspired, I do have a freind who wants me to join the rebel legion, how cool would a C3PO be
 .
. If you've got the body for it you should totally look into it!
-
Painting was one of the most frustrating parts on my helmet as well. My girlfriend did most of it. Without looking at my helmet (out of town so I can't) I can't say for sure on the thickness of the stripes. The ones on the back look great, but the ones on the tears do look a little thick, I think it will be up to your personal preference though. If you do decide to redo the ones on the tears it might be worth trying to freehand it or have a friend with a steady hand freehand it after showing them an example of exactly what you want. I had her free hand the ones on my bucket. I think we only messed up on one of them and had to recolor it with grey and give it a second try.
-
From what I've heard Star Garrison is a great group of people and will be very useful for you to utilize once you begin your build. Ask lots of questions and have a good time!
Good luck!
-
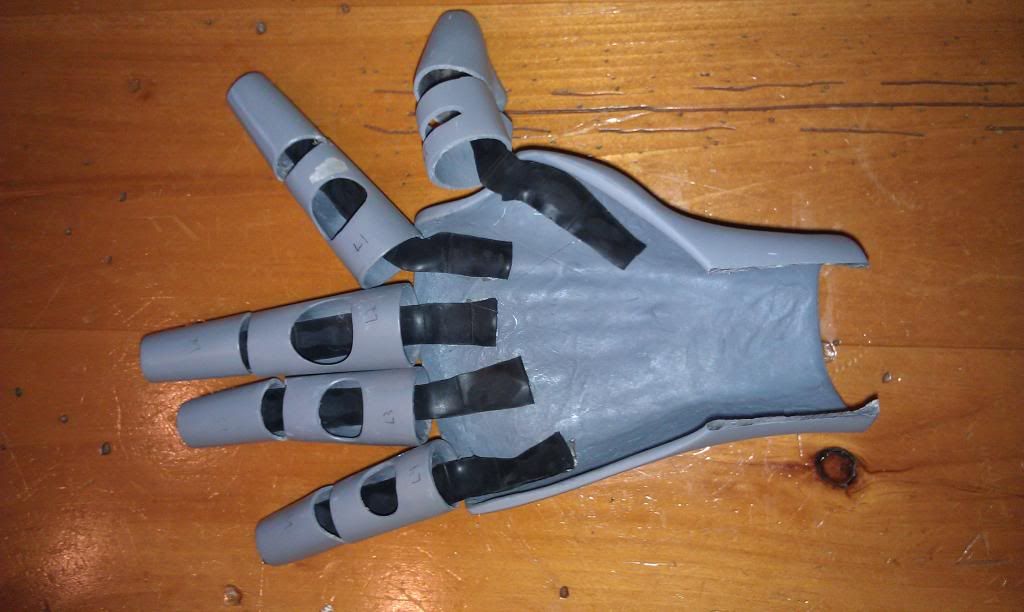
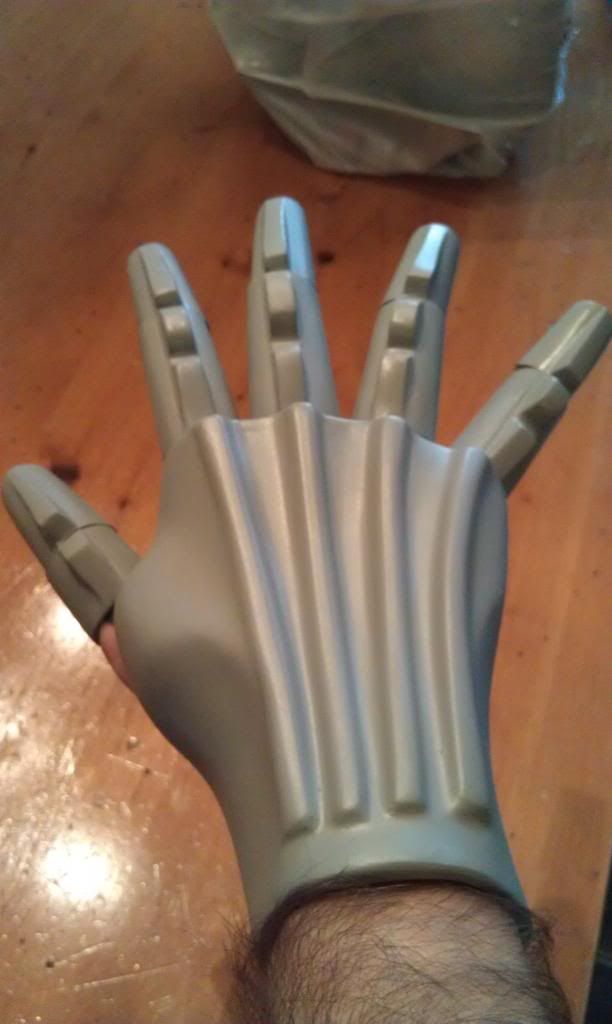
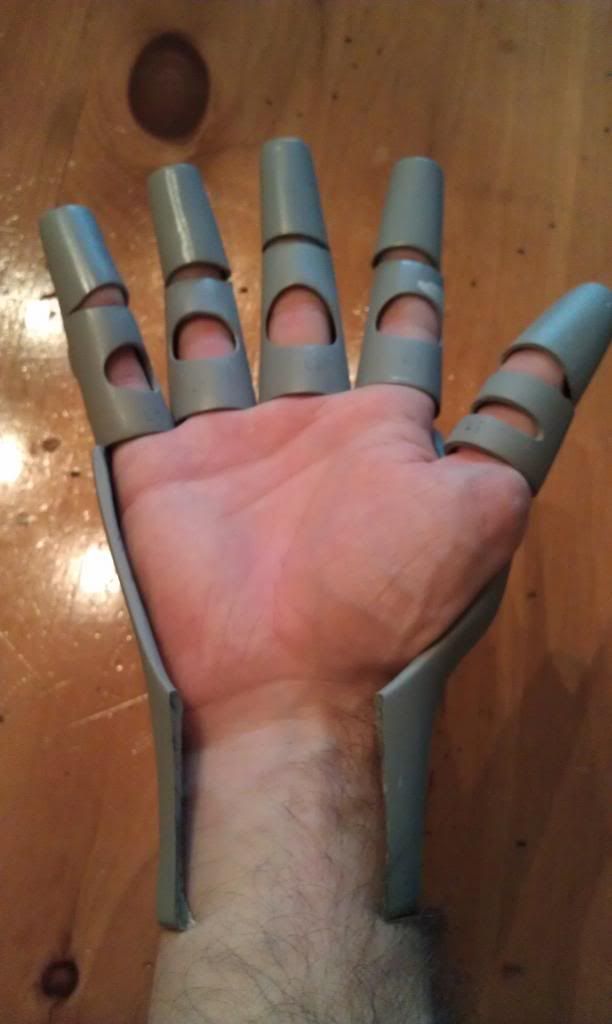
Here is the setup for one of my hands. I didn't quite get the pinky glued on straight and I definitely still need to open the wrist up some, it was biting pretty hard. Right now everything is hot glued because it is temporary. When it gets sent off for vac metallizing or painting all strapping will need to come out and then I'll reassemble it once I get it back. I mostly putting things together to make sure that the idea works before I plan on an idea working and end up finding out that it doesnt.
-
If it was me, I would save the money and go the metalizing route...expensive yes but all you need is to see another C3PO that has had this done and you'll wish you'd done it too...Just my $.02...

That is kind of my thoughts on it too. Also, I figure if I am going to do an expensive costume, I might as well go all out.
-
looking good!
-
Just wondering what you will use for the top coat, will it be shinny as on screen. I have seen on some autormotive shows that they use a liquid chrome finish on some paint jobs, they apply several different coats and the last one it basically a wet wash. I suppose if you used something like this and went over with a few coats of a tinted yellow/gold clear paint and this would give you the gold effect.
What most people do is vacuum metalize the suits. The finish of the vac metallizing is all dependent on how well the builder preps it. I'll be going with a wet sand of 1000 followed by 2000. The suit should be nearly reflective just from sanding before it is sent in. This is what they did in the movies. However, vac metallizing is very expensive. One of the other builders has figured out a paint method using an air brush that looks really good also, which would be cheaper but require more skill. The prep work is basically the same for each so I am holding off on my decision for which one to go with. Automotive type painting is an option as well but I think the price comes out similar to vac metallizing. Honestly, the self paint method is probably the best way to go so that scratches and chips in the armor can be maintained. I just don't know if I have the skill for that.
isnt there a c3po builders club or something where people who know what there doing can help you?
Yep, there is. http://bc3pobuilders.runboard.com/ This is just a place where I am sharing my build thread and seeing what kind of feedback everyone here has.
-
Your ears actually look great as is, unless you want them to be tighter. It is all personal preference. Technically "screen accurate" has gaps around the ears. But you do whatever makes you happiest with your build, good work!
-
I hadn't thought of doing that with elastic! Good idea!
Tonight I'll be working on the 3PO hands a bit and will try to post a picture if I get the rough version finished. I'm a little limited on what I can work on because I only brought so much to Colorado with me to work on during down time in the vacation. We hit Breckenridge really hard today so we are taking the evening easy which should give me some time.
-
I found the E-6000 got away from me on a couple of pieces as well. The way I avoided this was by spreading the glue a bit thinner and leaving room for the glue to spread out once everything was clamped on.
Good luck, keep up the good work!
-
A few updates:
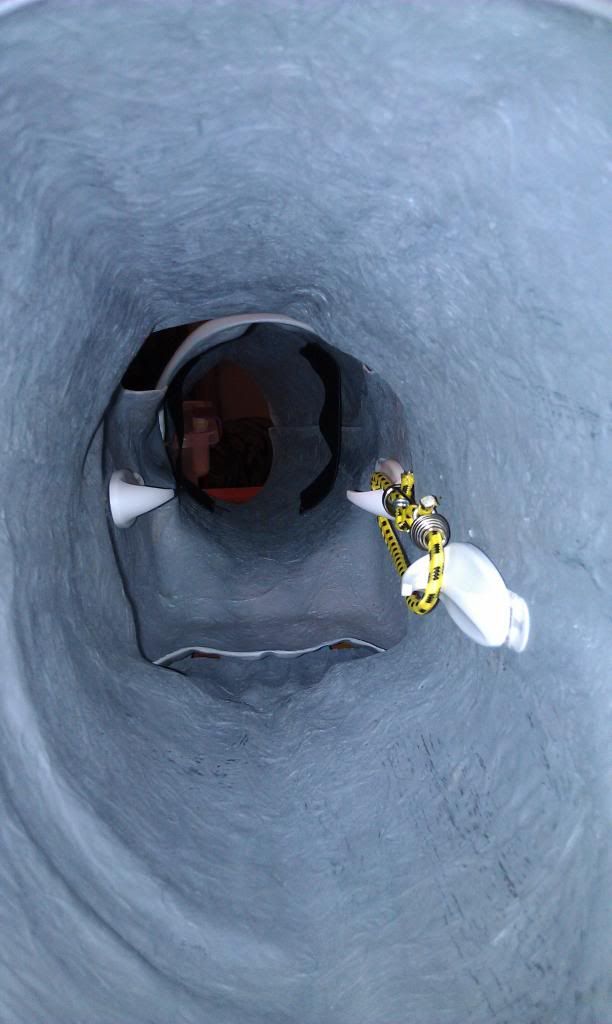
Here's what I am trying to do with the legs. The command hooks are too big to fit with my leg so I will likely find a different sort of hook that isn't as bulky that I can fiberglass into place.
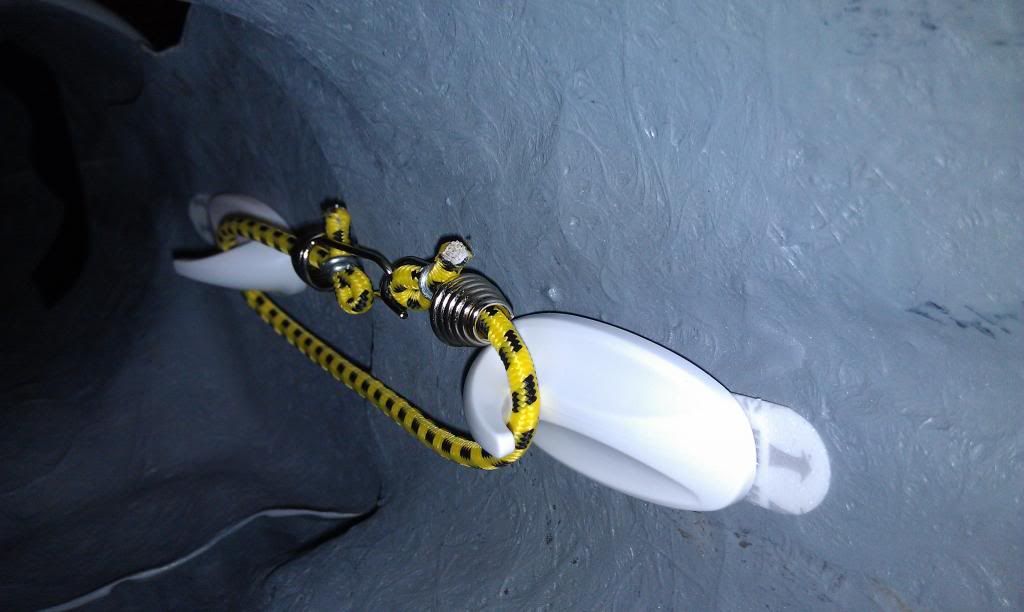
In the lower half of the leg I will probably be using elastic with a lock and key mechanism to help the pieces line up, you can sort of see it at the far end of this picture:
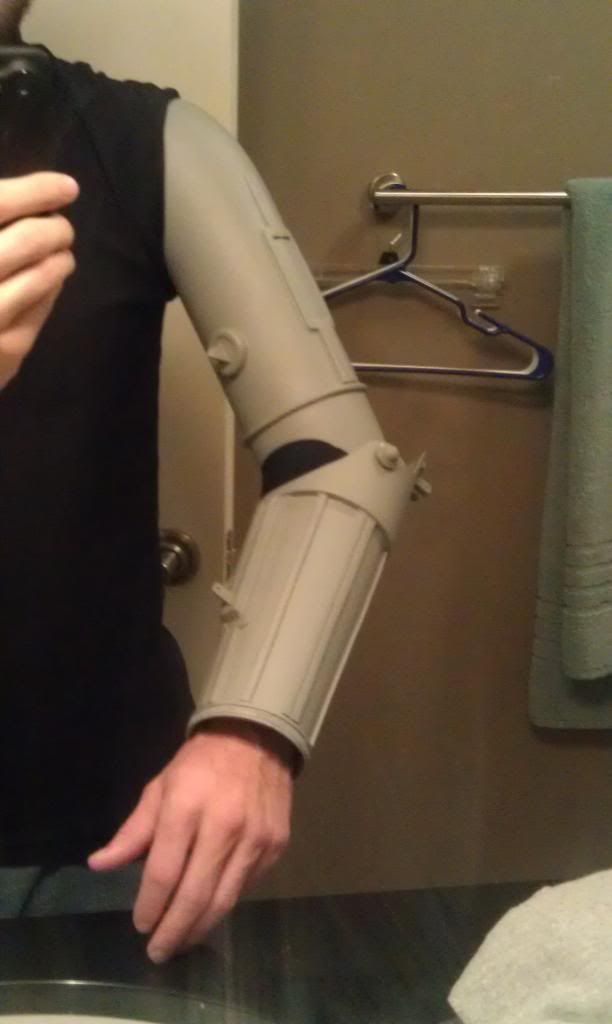
Test fit of the arm without pistons. I will be needing to open up the upper arm about an inch and then re-fiberglass the opening to give myself a little more room.
-
"Run away, run away!"
-
Welcome to the boards! They can be a little difficult to navigate sometimes so feel free to ask any questions as you begin your armor building journey.
-
Hopefully this will help you some: ------
This one has a couple of good drawings that show the difference between the 2 very clearly---------------
Are you going for ANH, ESB or ROTJ? Because I think that might make a difference for which method you're going to need to do if you go for Centurion.
-
Welcome! And like everyone else has said, do research and have fun! Ask plenty of questions and once you get things rolling take lots of pictures; here at FISD we love pictures!
-
I was searching around a bit, is-------------- a good option for people if they are concerned about TKboots not being back soon? Obviously would need to be dyed
-
Can't wait to troop with you in that thing. You know... I have always wanted to build an R2-D2...

For some reason I hear the wife in the background singing Queen...."No no no no no no no no NO!"
-
The helmet isn't actually that bad. It's a little tight by the ears, but plenty of space in the front. I'll be trying to use door peep holes in the eyes. If that works out, I'll actually have better field of vision than I do in my TK...It'll just feel like I'm looking through fish eyes.
-
"Aren't you a little tall for a droid?" At least no one will EVER ask me if I'm a little short to be a droid. I'm sure I'll hear about "the droids your looking for" all the time though

-
Awesome .... Will be watching this one !
My girlfriend wants to do a C3PO , need to get some infoBeing in Florida the guy to get in touch with will be Gordon Tarpley, his 3PO is awesome. You can also check out http://bc3pobuilders.runboard.com/
Help Out A New Member Who is Yet to Own Armour!
in Getting Started - Read this First!
Posted
I'll address the easy one first: The E-11. A great project to work on while you wait for your armor. I did the hasbro doopy doo mod for myself - at the time it was a money issue. The full doopydoo kit is fairly straight forward. Just looking at a picture can make it pretty easy to see how it goes together, but they are several progress threads in the weapons portion of the forums on people assembling them so you could use those as a step-by-step.
As for the armor, I can't personally attest to the ABS vs. PVC. As far as assembling goes though, I wouldn't let fear of assembling deter you. I had never assembled anything like this before in my life and I feel like I made my ATA kit pretty well. However, the pictures I've seen of fully assembled kits have been beautiful. Regardless, even with your measurements it is likely that you would have to do some tweaking here and there in order for the armor to fit you the way you want it to. Basically the trimming and initial assembly would be taken care of and there would probably be a few small changes that you might need to do. In addition, you've got a great garrison over there in the UK that would probably be willing to help you if you went the route of self-assembly.
There are also a couple of Attaches in your area that might be good to get in touch with as well who might have some advice on the local armorers.
UK: carbonitekid (UK Garrison/Vectis Remnant Squad www.ukgarrison.co.uk); FunkyTrigger (UK Garrison)
Good luck!