

Troopacoola
-
Posts
1,029 -
Joined
-
Last visited
-
Days Won
18
Content Type
Profiles
Forums
Gallery
Articles
Media Demo
Posts posted by Troopacoola
-
-
Any news?
Sent from my SM-G920F using Tapatalk
-
 1
1
-
-
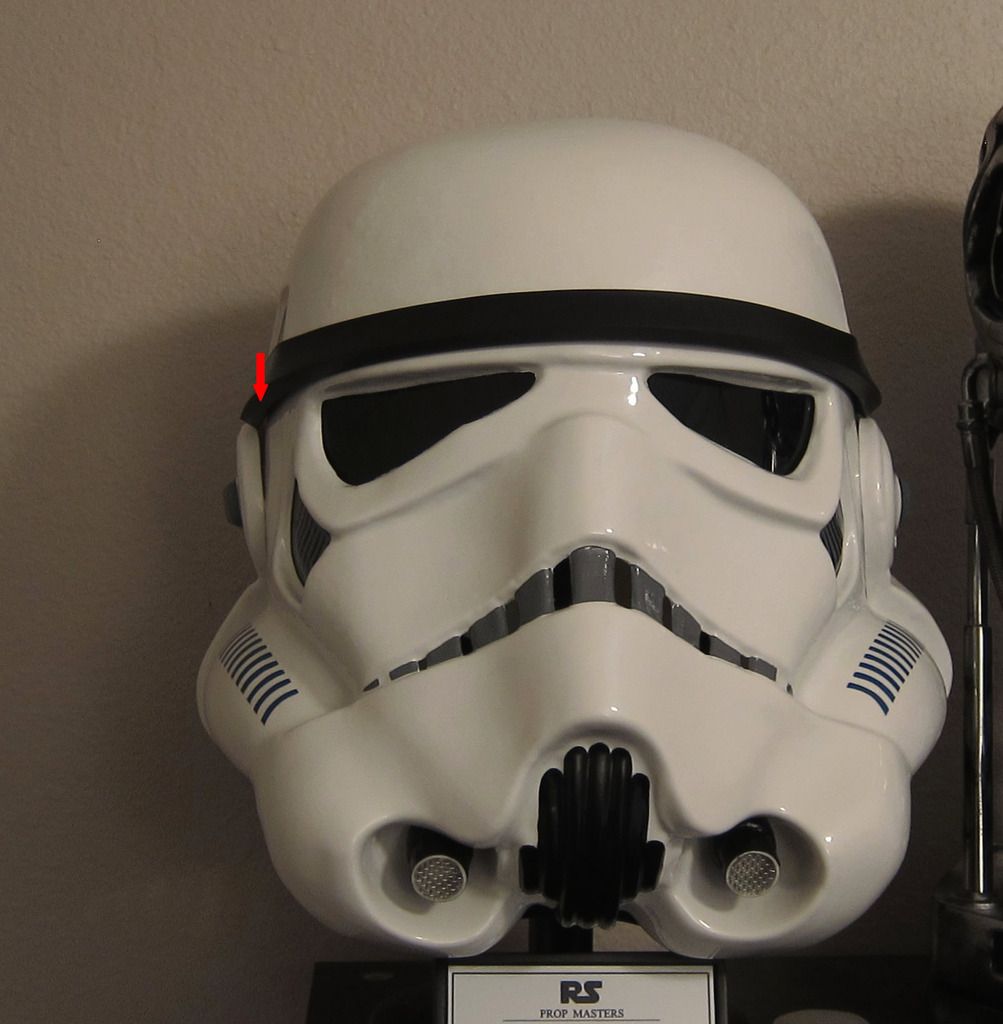
Looks fine to me. Gappy ears are screen accurate.Hello everyone. New member here, and new to screen accurate Stormtrooper armor.
I decided to jump in as close to the top as possible, so I went with the RS stunt helmet commissioned to be completely done by RS's studio. Everything on what I received compares well to what I've seen, except a gap on one of the ears (the helmet's right ear as shown in the photo). Since I'm just getting my feet wet on these things and am a bit ignorant on the fine details, I wanted to check with you folks here who I know have the knowledge and expertise to tell me if this gap would be an issue/negative for accuracy, or if it might be something of concern for the durability of the helmet? I've not decided to go full tilt into trooping yet, but am considering it. So, I wouldn't want to have issues later on either of those concerns, and would need to take care of it now if this is an issue.
Thanks everyone for your time and for reviewing my thread! I really appreciate it.
Sent from my SM-G920F using Tapatalk
-
Hahahaha! Good luck with the clearence...I'm giggling!!!! Out loud! And I love it!!!!!!! So much! Thank you for sharing that with me!
Yes I was serious about submitting. And I felt uncomfortable pointing my blaster at the lens for a pic. And I just spent 2 days hiking in the mountains, legs were protesting..... so bending down in a super action pose was not appealing either! Aaron finally said "Just be you."
Here I am.
A woman in a set of armor. My gun may not fire, but I sure the hell can smack you upside the head with it at a moments notice! (And I won't miss..... I guarantee it!)
Sent from my STV100-3 using Tapatalk
Not that you need it!
Sent from my SM-G920F using Tapatalk
-
1
-
-
Awesome! I was going to post this as my "very camp action" shot, but never had the guts!Marc, there's these as well.... Frankly, I felt super cheesy in any action pose. I kept laughing in my helmet! Sheesh....


Sent from my STV100-3 using Tapatalk

Sent from my SM-G920F using Tapatalk
-
2
-
-
Awesome news....
Now stop reading this and cracking on!
Sent from my SM-G920F using Tapatalk
-
1
-
-
Looking great T! Love the "action pose"!
Sent from my SM-G920F using Tapatalk
-
1
-
-
Welcome Clara! A few things to remember, no question is a silly question, research, research, research before buying a kit. Have a look at the build threads also to see how others build theres. It can look a little daunting at first but it's honestly easier than it looks
-
1
-
-
Yey!
Sent from my SM-G920F using Tapatalk
-
1
-
-
Love your scope Brian. For those who may have missed it, here's yours I put on my son's blaster.
Would love to get functioning prisms!

Sent from my SM-G920F using Tapatalk
-
2
-
-
Not long to go until BBB day!
That scope rail looks familiar
-
1
-
-
hopefully post an update soonNice looking bin!
-
2
-
-
Marc I've just realised your a fellow City fan! Great to see another Blue on here, and your rockin the RWA, nice choice mate.
Yeah Danny, it's all in the name lol! It was a sad day to see Pablo go!
-
1
-
-
Thank you. Too much time on my hands lol!Nice looking bin!
Sent from my SM-G920F using Tapatalk
-
1
-
-
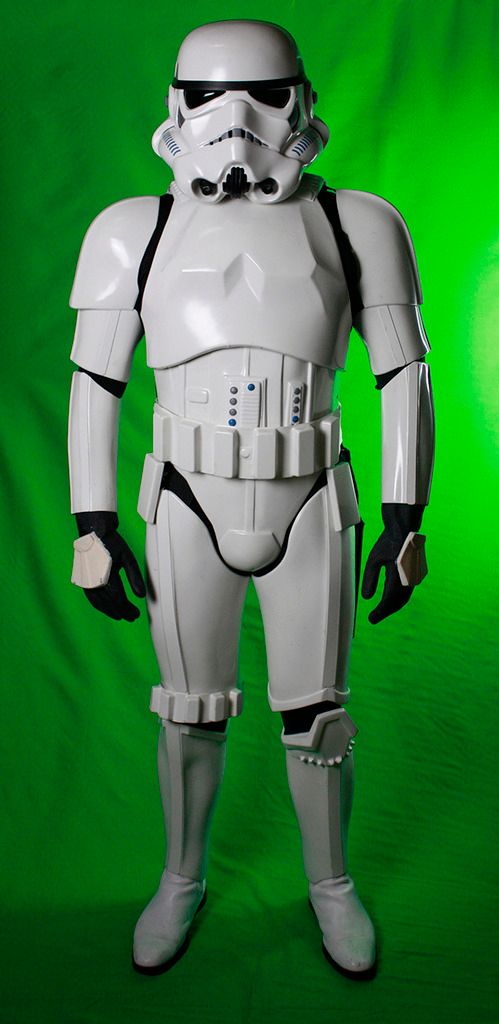
Nice looking piece of kit! In response to cleatence, I guess it's easier to deal with adding shims to the width, rather than trying to lengthen a thigh etc.I just have to do a little armour show off...and know many of you (us) like looking at great armour. I ordered a completed set of 1.5mm armour from Troopermaster last year. I've built a number of kits in the past and felt that the added expense of getting it pre-built would more than offset the time it takes me to put yet another kit together. Obligatory BBB shot:
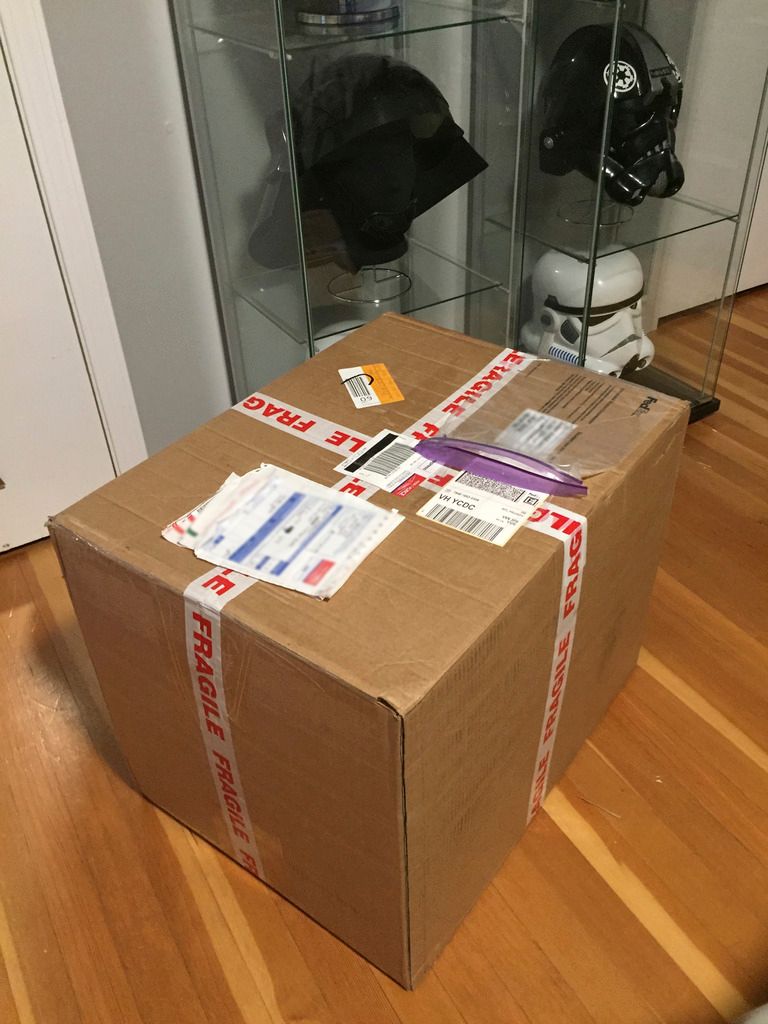
I ordered a Hero bucket with the kit and since I wanted to tackle three different variations of the armour, I got Paul to send me three separate belts and holsters, ANH latex hand plates on rubber gloves and ESB hand plates. Man, Paul did not disappoint!
While we somehow got my thigh sizing wrong, I arranged for Paul to send me a new set with the backs undone. I was able to quickly close them up with E-6000 and I was good to go....
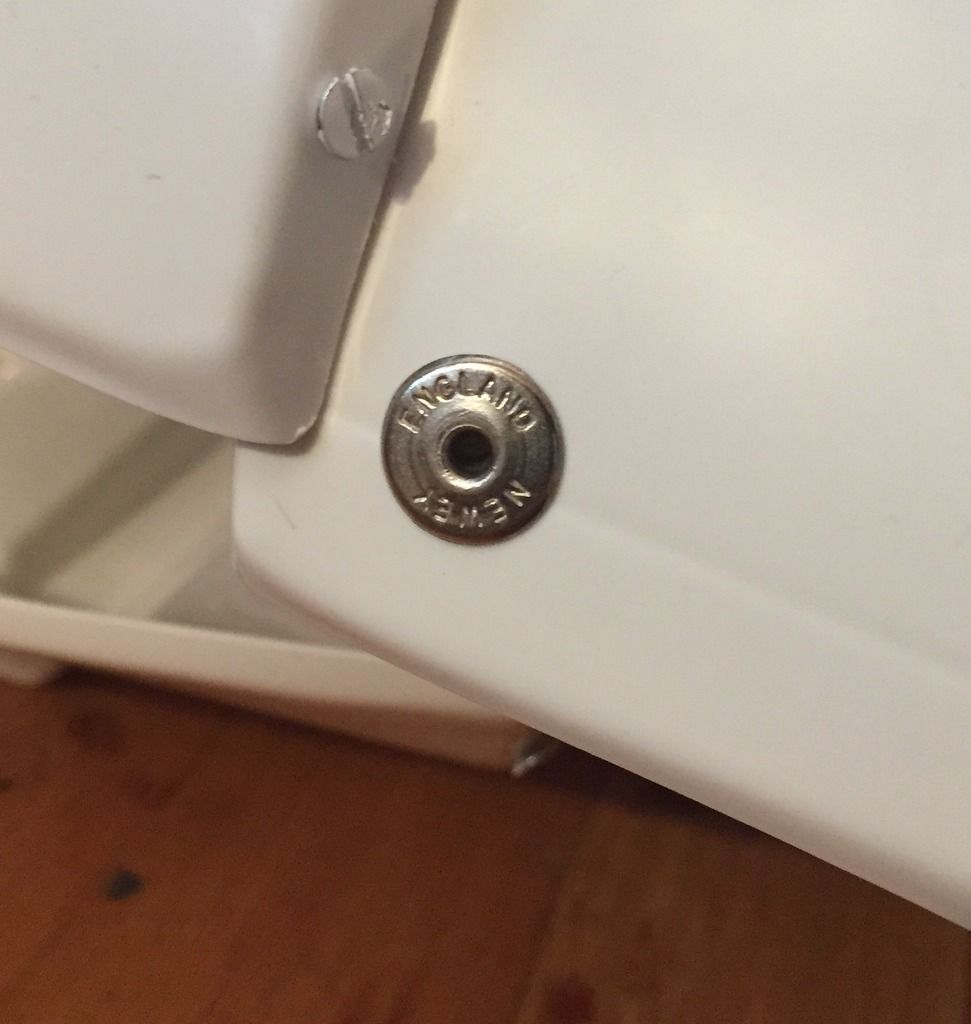
This is beautiful armour! I got Paul to put it together just like the originals--right down to new old stock Newey snaps and original strapping!
Anyways, here's a couple of my my Hero submission pics. I need to drop a few lbs to close the side gap and then I should be good for EIB and Centurion. Side rant: I think the stringent side gap rule is ridiculous when there is so much else allowed for Centurion that is not screen accurate. One peruse through the Centurion apps is enough to realize that our bodies come in all sizes. Side shims are required, but other fitting issues for height etc are not? Some tall individuals, for instance, end up with massive amounts of black showing. Vertical is okay, but not horizontally, I guess?

Sent from my SM-G920F using Tapatalk
-
1
-
-
Now to get those beauties framed!Now to close this thread out in Pyrates fashion...
I owe many profound thanks to (and in no particular order):
My Attaché Boss - justjoseph63
Mark - CTID
Andrew - Sly11
Tony - Ukswrath
Tim - DarkCMF
Paul - Daetrin - The Boss
Mathias - Locitus
Brad - 68Brick
Dan - TK-2759
Kris - Haso
Steve - starsaber25
Jorge - zv288bot
James - Kaar121
Gary - Sentry71
Spencer - Jinsei
Preston - Pretzel
Dave - ComradeDave
"My TK Twin" Teresa - Soulart
And last but definitely not least my brother in Arms Peter - Barcode
Many appreciative thanks again to you all for your support, encouragement, leadership and camaraderie - chest thumps and a TK fist raised high in your names.
Rock on my fellow Troopers - Rock on!


Sent from my SM-G920F using Tapatalk
-
1
-
-
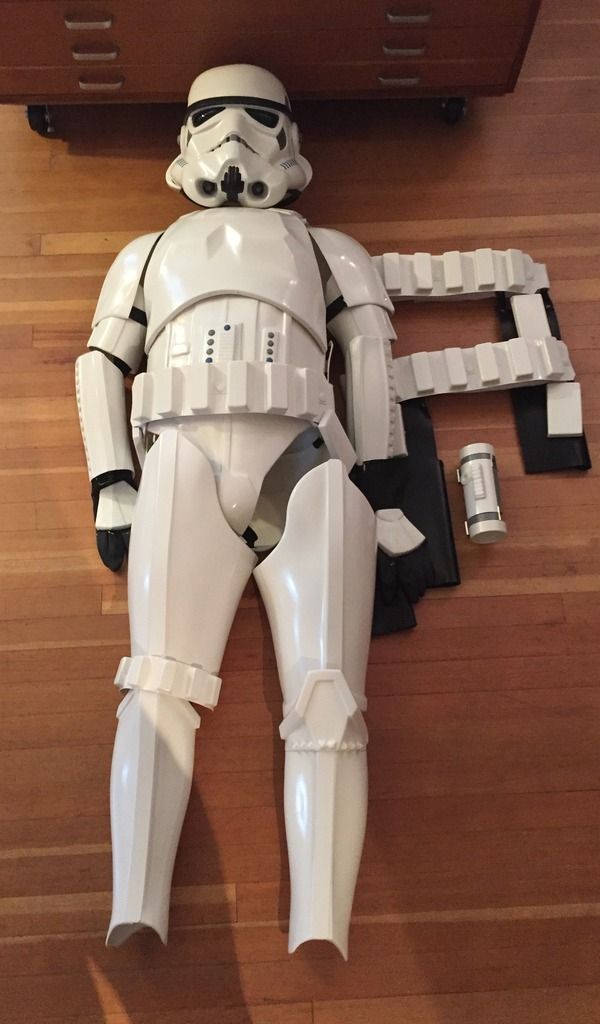
First stage of the lining done with strapping to hold the torso in place.

Sent from my SM-G920F using Tapatalk
-
1
-
-
Under body lights and some switches!Wow beautiful storage. You might want to get a Lojack system for it lol

Sent from my SM-G920F using Tapatalk
-
2
-
-
Next up is to pad out and line the trunk

Sent from my SM-G920F using Tapatalk
-
1
-
-
Then it was onto the lid bag...from a basic helmet bag to a custom one with the addition of a red lined interior


Sent from my SM-G920F using Tapatalk
-
2
-
-
Ok, so the external of the trunk is now pretty much done
Using self adhesive PVC to wrap it


-
1
-
-
Any more updates?Had to take a long break and work on some other projects, but now I'm back at it and nearing completion - we've got a Star Wars themed birthday party coming up in just over a week, so I've got a hard deadline now!
What's done:
Chest, ab, cod, shoulder bells, biceps, forearms, back, kidney and butt plate, all fitted and strapped together, with the exception of the two shims I need to add to bridge the front and the back sides.
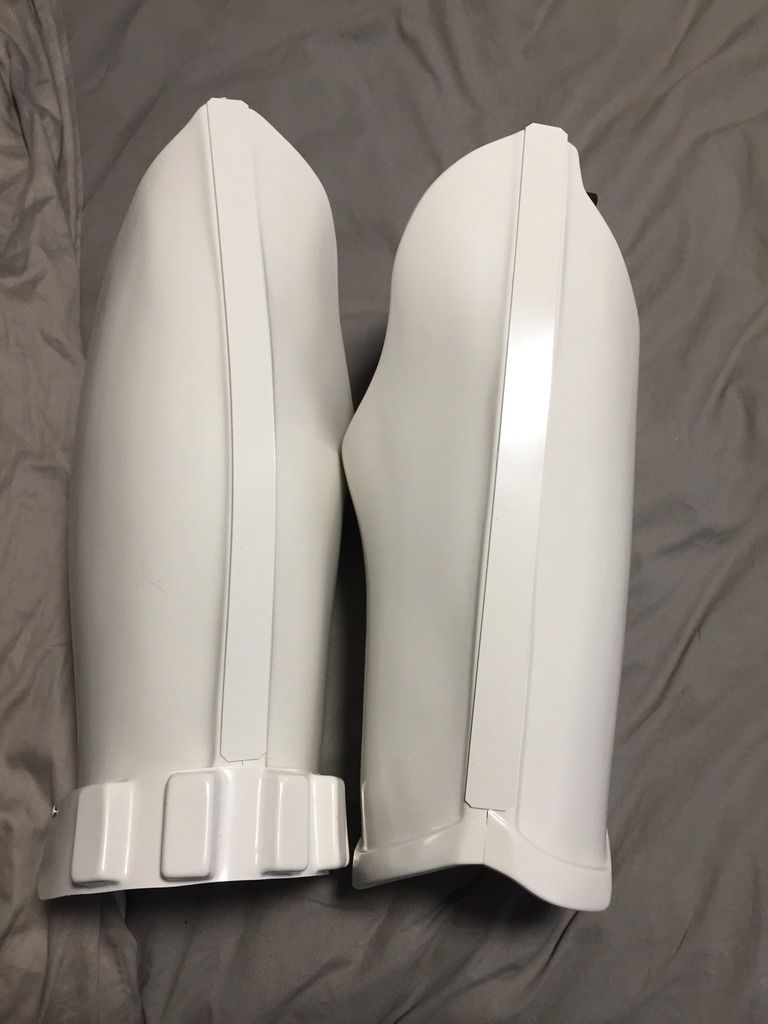
Shins completed.
Right thigh is mostly completed. After shimming the pack I have a bit of cosmetic surgery to do to make it look better, but that's on the low end of the list for now.
Left thigh is in progress - this one's shape was pretty wonky and has needed some application of the heat gun to try and get it to line up better. Currently in the first stages of gluing together.
Hand plates - for now we're just using elastic straps to hold them on the gloves, as I am planning to cast my own silicone ones in the future.
Crappy temporary boots found and painted (crappily) - they are temporary until we find better, but they only cost me $7 Canadian bucks so they'll do for the party
Still to do:
Finish left thigh.
Add the side shims.
Sew and assemble the belt and drop boxes - Iv'e vac formed some back sides for the boxes, but not sure if I'm happy with them as they're a bit small, so may redo that. Also have to vac form the snap covers.
Assemble the thermal detonator and make belt clips
Sew a neck seal
SO CLOSE!!
He will be using his MR bucket, but I am not modifying it at this time - we're going for costume here, and that's something I really don't want to mess up!!
He put on everything we have done so far last night, including the MR helmet, and my god, once that helmet went on it was so damn amazing!!! Even with all the little things I know are wrong with this kit, it still gave me chills seeing it almost complete!
I'll try to get some pics up soon

Mel
Sent from my SM-G920F using Tapatalk
-
Happy days!
Sent from my SM-G920F using Tapatalk
-
1
-
-
Hi there.
If not already, get registered with the ukg and once you've chosen your armour vendor you can begin your WIP.
Welcome aboard.
Sent from my SM-G920F using Tapatalk
-
I built mine with centurion being the end goal. Easiest way to achieve this is to plan for it from the start. Most tutorials are centurion ones, so find a popular thread and follow that.
Sent from my SM-G920F using Tapatalk
-
2
-
How Bad Do My Teeth Look?
in ANH (Stunt and Hero)
Posted
Some white spirit on a q tip will remove the excess paint buddy.
Here's my lid and how the teeth look
