

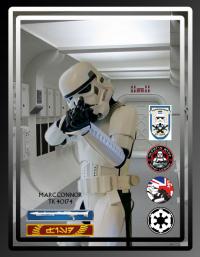
Troopacoola
-
Posts
1,033 -
Joined
-
Last visited
-
Days Won
18
Content Type
Profiles
Forums
Gallery
Articles
Everything posted by Troopacoola
-
 Hi mate. If you heat sear the ends of your elastic and double it over when you install the snaps, you won't need to stitch the elastics [emoji2] Marc
 -
Pyrates and the March to EIB & Centurion
Troopacoola replied to Pyrates's topic in ANH Build Threads
Will we be seeing a modding thread Mr P? Marc -
Cheers bud! Everything's pretty much glued except the rear of the thighs and calves. Tomorrow I intend on sanding the returns down once the glue has set. Marc
-
Biceps need a tidy up. Shins front cover installed and ready for removal and fine sand of the lower return edge Biceps complete [emoji3] Marking out the cut lines for the sniper plate. I will square off the sides when preparing to fit. Marc
-
Pyrates and the March to EIB & Centurion
Troopacoola replied to Pyrates's topic in ANH Build Threads
Thats all those push ups mate [emoji6] Marc -
As above, and welcome aboard! Maybe get in touch with your local garrison Marc
-
bowski's noOb MTK build
Troopacoola replied to bowski477's topic in Build Threads Requireing Maintenance
I spent a full day on mine. They still have tiny gaps when installed, but that adds to the screen accuracy [emoji6] Marc -
LoneRanger's ESB TK Build
Troopacoola replied to TheLoneRanger's topic in Build Threads Requireing Maintenance
Looking good [emoji6] Marc -
ANH Stunt TK - First Time Builder (ATA)
Troopacoola replied to Corpor8America's topic in Build Threads Requireing Maintenance
Lexan scissors are a godsend too! Marc -
Slow and steady is most definitely not a bad thing [emoji6] Marc
-
Looking good mate! Marc
-
Will you be going wireless?
-
Thanks Eric [emoji2] What are you plotting for yours?
-
Inspiration taken from the many amazing threads Mr Z!
-
bowski's noOb MTK build
Troopacoola replied to bowski477's topic in Build Threads Requireing Maintenance
No. When you trim your ears to fit they will cover the gap [emoji6] Cheers, Marc -
Shin covers in place and setting, they've been curing for around 8 hours so I pinched the clamps that were at the tops and bottoms of the strips. Hopefully they will not come free! Biceps have their external strips and all excess e6000 has been removed. Once the weather improves I'll get outside and tidy up those returns. The same can be said for the calves. Cheers, Marc
-
LoneRanger's ESB TK Build
Troopacoola replied to TheLoneRanger's topic in Build Threads Requireing Maintenance
You will have to open the rear a little and then close once on. Marc -
Regular Speaker vs. Aker?
Troopacoola replied to pewpewpew's topic in Electronics for Helmets / Blasters
Totally agree mate. I have the 10 amp too. Sent from my SM-G920F using Tapatalk -
A productive day today. After lots of procrastinating, I thought I would commit the day to some trimming and cutting. I got more done than I expected to. The thighs are now ready for the front inernal covers to be installed, which will have to wait as all of the magnets and clamps are in use at the moment. Front internal covers installed on the shins and setting The biceps are now done except for the clean up of any E6000 which may have bled out, along with the final clean up of the return edges and fine sand The belt has been trimmed, as has the knee ammo belt. The det end caps are at 20mm and just need a fine sand, and the ab button plate has also been trimmed. Drop boxes complete Forearms underway also All the cover strips have been prepped too.
-
Darkblitz's ANH (Stunt) Build
Troopacoola replied to Darkblitz's topic in Build Threads Requireing Maintenance
Internal covers will give additional strength to the seam. I'm using them on my build. I cut the external corners at 45° angles and then soften up the edge with a but of wet and dry, but I don't fully round it off. Sent from my SM-G920F using Tapatalk -
AM 2.0 Armor Build in Ohio
Troopacoola replied to rduda's topic in Build Threads Requireing Maintenance
Looking good! Sent from my SM-T210 using Tapatalk -
LoneRanger's ESB TK Build
Troopacoola replied to TheLoneRanger's topic in Build Threads Requireing Maintenance
Like this Sent from my SM-T210 using Tapatalk -
LoneRanger's ESB TK Build
Troopacoola replied to TheLoneRanger's topic in Build Threads Requireing Maintenance
Yeah. Completely remove the cuff edge. The elbow edge can be reduced to fit Sent from my SM-G920F using Tapatalk -
Here's another AM2.O thread. I've not read it through so it may be worth having a look [emoji2] http://www.whitearmor.net/forum/index.php?/topic/32013-AM-2.0-Armor-Build-in-Ohio Sent from my SM-T210 using Tapatalk
-
AM 2.0 Armor Build in Ohio
Troopacoola replied to rduda's topic in Build Threads Requireing Maintenance
Hi, You will have to make the ABS paste yourself. Take some offcuts of your abs that youve trimmed off your kit, and put in a jar, then add a fair few drops of acetone. It will melt the ABS into a paste. [emoji3] Marc Sent from my SM-T210 using Tapatalk
