Leaderboard


Popular Content
Showing content with the highest reputation on 01/26/2026 in all areas
-
Thank you for your time and for everything you do for the Legion. I very much look forward to hearing your feedback. Lastly, have a fantastic day! For the Empire! Daniel Baker TK-14062 Imperial Welsh Squad Sent from my iPhone using Tapatalk2 points
-
Hi daniel Thank you for your EIB Submission. One of us will be with you as soon as possible. Added to the line.1 point
-
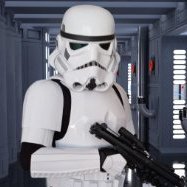
I'm not seeing any wire or notches the wire sits in, and there is no mention in the ROTK CRL1 point
-
Nice work, looking the part. A contrasting background makes it a lot easier for your GWL to edit your approval photos and also for EIB and Centurion if you accept those missions1 point
-
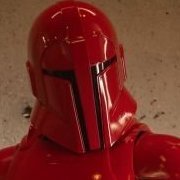
Test fittet my new boots. I found this background is a perfect choice for making good pictures. Thank you all for your support so far. Next up will be my pre approval thread. The picture below shows the pre loved armor when I started my ANH Stunt project. Most of the parts where glued together with hot glue, which is not to bad, because I was able to correct the missalignment more easy. I decided to go with my RS-Propmasters (kit) helmet, instead of the one that cam with this one in a very sorry state (MFX helmet). I was able to refurbish the MFX helmet, but the RS has a better fit.1 point
-
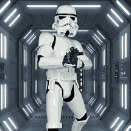
Looking good Paolo1 point
-
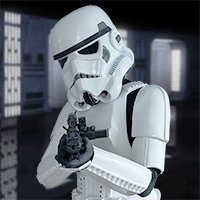
More Bicep Work, Forearm prep and belt raw trim. After some testing, I decided to up the shim width to 15mm, and the cover strips to 25mm, just for more wiggle room. To act as a foundation for the shim, I used a 30mm wide strip of ABS in the inside of the bicep, used superglue to glue the shim in the middle and e6000 to get it all together. Magnet and clamps per usual. Cover strips were then cut to 25mm width from provided ABS sheets (to ensure colour matching, though there was still a little mismatch annoyingly enough). Contact sides were sanded roughly and glued using e6000. Both biceps are now drying and should be ready for strapping later on. Forearms are next, and before that I used some hot water to straighten out some curled-in surfaces on the inner forearm. Protip: since I needed to do many straight cuts for shims and strips, I 3d printed out setup blocks with specific thicknesses (15mm, 20mm, 25mm, etc) so I have consistent measurements. Beats having to use a ruler to mark out widths or waste ABS for templates. One more task that was done was rough-cutting out the ABS belt. Since I wanted to get as close to the boxes as possible I used a combination of a Dremel cutoff wheel and lexan scissors to do rough cuts, and finished the edges using a deburring tool, a hobby knife and sandpaper. Corner angles to be cut once I get to canvas belt attachment. Next up, forearms and legs. I think I need to look more into how the foream parts line up since the outer forearm is much longer than the inner forearm.1 point