Sonnenschein Posted January 4, 2010 Report Share Posted January 4, 2010 I was just browsing Jez's awesome site, when I saw something I didn't catch before: The helmets were riveted with 2 rivets per side (1 betwenn the upper 2 screws, one near the bottom screw) So far, all the replicas I have seen use only 1 rivet (the upper one), even AP inlcudes just 1 rivet per side. Could the (in)famous pinch in the side tubes result from this addional rivet? Serveral replicas lack this pinch. Does anyone use 2 rivets on their helmet? regards, K. Quote Link to comment Share on other sites More sharing options...
pandatrooper[TK] Posted January 4, 2010 Report Share Posted January 4, 2010 Do you mean the ear screws? If so, there's 2 on Hero helmets, and 3 on stunt helmets. Hero helmets have one above the ear comm rectangle thing, and another near the base / neck trim opening. The stunts have 3, one above and below the ear comm, and another near the base / neck trim opening. Quote Link to comment Share on other sites More sharing options...
DarkTrooper[TK] Posted January 4, 2010 Report Share Posted January 4, 2010 Where's this website (Jez)? I wanna see what you're talking about. Quote Link to comment Share on other sites More sharing options...
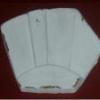
TKDUEUNO Posted January 4, 2010 Report Share Posted January 4, 2010 (edited) No, she meant rivets: ---------- I used just one on each side, but I'm sure the second really helps in keeping the faceplate firm when you're drilling holes for the ears assembly! That also can reduce the gap over the tube that can lead to a bad assembly. You can also see the second rivet in this picture, on the first helmet on the bottom, which is the only one without ears yet: --------- Edited December 10, 2021 by gmrhodes13 link not working removed Quote Link to comment Share on other sites More sharing options...
Sonnenschein Posted January 4, 2010 Author Report Share Posted January 4, 2010 Where's this website (Jez)? I wanna see what you're talking about. Daniel, the site is starwarshelmet.com Jez is the owner Pablo, thanks for posting the pics. that's exactly what I mean. I have been looking at those pics for about a 1000 times. Just today I finally saw them. So, has anybody replicated this little detail? K. Quote Link to comment Share on other sites More sharing options...
runewolf[TK] Posted January 4, 2010 Report Share Posted January 4, 2010 Well when I did it, it was not to replicate the original as I had totally forgotten about that picture... I ended up using two rivets to help pull the sides closer together so that there was not a gap in between the front and back pieces. This was my first time assembling a helmet and I was afraid the screws would not be enough to join the two parts nicely. Once the entire helmet was together, I can see that I probably did not need to do it. But I have a very sturdy helmet now lol. Quote Link to comment Share on other sites More sharing options...
TK-2126_MD[TK] Posted January 4, 2010 Report Share Posted January 4, 2010 Not to mention that if u have one or 2 helmets the screws are no problem but if u have 27 or more the rivit will save time rather then hand scrwewing 90 or more screws...... rivits!!!! Quote Link to comment Share on other sites More sharing options...
pandatrooper[TK] Posted January 4, 2010 Report Share Posted January 4, 2010 Ah, now I understand. THOSE rivets! I actually did the same thing, I riveted the cap n back and face together under the ears, but I didn't reference the pictures for placement. You don't see them underneath the ears anyways, but does help in helmet assembly and keeps the sides nice and tight. One thing to remember is to leave enough gap to install the helmet trim. If you rivet the halves without accommodating for the trim, there won't be enough room for it and you'll have to take it apart again. Quote Link to comment Share on other sites More sharing options...
TK-7980 Posted January 5, 2010 Report Share Posted January 5, 2010 Just put the helmet trim on before you rivet. Quote Link to comment Share on other sites More sharing options...
Slaveprobe Posted January 5, 2010 Report Share Posted January 5, 2010 This is the right place for a question: why use rivets? Once you drill the hole is not the same use screw and nut? The screw can be removed easly if you need to dismantle the helmet (paint job, lens, wiring etc.) and it can be reassembled in a minute. Quote Link to comment Share on other sites More sharing options...
TK-2126_MD[TK] Posted January 6, 2010 Report Share Posted January 6, 2010 This is the right place for a question: why use rivets? Once you drill the hole is not the same use screw and nut? The screw can be removed easly if you need to dismantle the helmet (paint job, lens, wiring etc.) and it can be reassembled in a minute. Yes and no the number of times u build and take apart th helmet to get it to how u want it to be is alot!!! so after a while the screws loose the grip and at the end they really dont hold that tight again. useing the rivits ( at the end once all the tweeks are done) is the way to go. dont forget to add rivits after painting , if u need to paint of course... Quote Link to comment Share on other sites More sharing options...
Darth-Felth Posted January 8, 2010 Report Share Posted January 8, 2010 Built 1 helmet a few years ago and I'm about to start working on another... I really do think that the second rivet probably helped the look of the tubes as far as them matching up a bit better. I did the 2 screws in the main ear rivet hole. and they did want to work thereselves wonky. deffinately easier to get a tear etc. It would seem easier to just rivet the suckers real quick... But getting the right placement? I'd say you would want to do some trial and eror with small screws or long safety pins through the rivet holes? alot easier than tape for placement testing... I'm thinking I am gonna try the 4 rivet 6 screw method for my next stunt buildup. But paint BEFORE riveting? I would think these things were painted assembled originally... or else there would be paint under the ears? And adding neck trim FIRST? I would think you would pre trim the area, line em up, rivet, then trim whatever excess plastic doesnt match up, sand a bit, THEN add the trim? Quote Link to comment Share on other sites More sharing options...

Recommended Posts
Join the conversation
You can post now and register later. If you have an account, sign in now to post with your account.