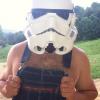
TKheehaw[501st] Posted March 17, 2014 Author Report Posted March 17, 2014 After everything dried I had time to gather everything, and do the first "fitting". A few things had to be adjusted... The ab plate was a bit high so the strap bottons were moved up. Also brought the heat gun back out to adjust the bend in the shoulder straps to prevent the chest plate from riding too high (mentioned in post #44). Also the thighs kept creeping down lower and left too much of a gap. Removed the garter to thigh straps, shortened, and double their thickness to decrease the thigh plate downward creep. Worked great after that. Wish I would have taken pics for illustration purposes of all this.Will have full armor pics fairly soon. In the mean time, had a little fun with 2 of the finished helmets. Dropped off my girl at school with both of us wearing our buckets. A teacher that is a SW fan got a big kick out of it and a little boy nearly climbed in our vehicle he was so excited. Neadless to say that started her day off great. BTW there was a primary driver, peripheral vision isn't really too good in a white bucket. With kids, safety is always primary. Note to Walt, will start a build thread for the TK kid's suit soon. Quote
gazmosis[501st] Posted March 17, 2014 Report Posted March 17, 2014 Fun build to follow so far! I am concerned about the cover strips on the back of your calves. They should be around the 25 mm width. Yours look HUGE. Quote
The5thHorseman[501st] Posted March 17, 2014 Report Posted March 17, 2014 I told myself the same. The front cover strips are good but the back ones are really wide, and i don't feel like you need this extra width. It would be good to size them down. Are your back thighs cover strips as wide? Quote
TKheehaw[501st] Posted March 17, 2014 Author Report Posted March 17, 2014 Rear cover strips are 1" or 25.4mm. I will double check this evening. Its possible that I was thinking 1" and cut something wider. If I did cut them too wide, will get the knife out. Quote
TKheehaw[501st] Posted March 18, 2014 Author Report Posted March 18, 2014 Photobucket an I are not getting along this morning to post some correction pics. Remeasured the back greave strips and they were (past tense) 1.5". They are now 1". Good eye guys and thanks so much for helping out! Quote
TKheehaw[501st] Posted March 18, 2014 Author Report Posted March 18, 2014 Now that photobucket is cooperating.... Here is the corrected strip width. Quote
TKheehaw[501st] Posted March 18, 2014 Author Report Posted March 18, 2014 Has anyone tried this stuff to paint hand guards??? Its a spray that has something like a screen printing paint in it... Thought the stuff was OK, but not great. Had some flexability and cracked some when bent the guard around. Should work OK for trooping. Quote
gazmosis[501st] Posted March 18, 2014 Report Posted March 18, 2014 Good work trimming that rear calf strip down. Make sure the strips on the back of your thighs match that width for consistency. Next is the point on that calf strip. It should be flat across the top with the corners eased just a bit. It should stop at the ridge at the top of the shin; not extend on top of it. Quote
TKheehaw[501st] Posted March 19, 2014 Author Report Posted March 19, 2014 Never noticed the rear calf trimming until you guys mentioned it.... That would give a little bit more room when the leg is flexed during a walking stride.... Looks like a job for the Kobalt exacto knife Thanks guys! Quote
TKheehaw[501st] Posted March 24, 2014 Author Report Posted March 24, 2014 Looking at the vast amount of screen clips from ANH, it seems approx 3 out of 5 troopers have the rear of the calf cut down. So here's the result. Finally got around to sticking the hand guards on the gloves and had less than great luck with the flexible one's Did not like the crack when the guards were flexed in the paint. So I velcroed the solid plastics to an extra set of gloves. Will use the solid plastic for basic 510st submission, but will change them out when flexible ones from Sonnenschein arrive. Quote
TKheehaw[501st] Posted March 24, 2014 Author Report Posted March 24, 2014 The method for attaching the hold down straps onthe shoulder straps seems to vary a bit. Decided to sew them on the elastic under the shoulder strap. Quote
TKheehaw[501st] Posted March 24, 2014 Author Report Posted March 24, 2014 Also changed out the helmet padding to the "clover design" with a snap strap to hold the bucket down. Seemed to work pretty good, just had to adjust the length. Helmet padding seems to be a real personal preference thing. Will be posting "full suit-up" pics soon, as this build journey is nearing the end. Thanks for everyones help. Quote
elleerre Posted March 25, 2014 Report Posted March 25, 2014 Hi Dave, thanks for sharing your build, I'll take as good guide when my ATA armor will arrive... Quote
TKheehaw[501st] Posted April 2, 2014 Author Report Posted April 2, 2014 Took all the pics nessasary pics for submission into Expert Inf. and noticed I have a regular rivet on my thigh ammo pack. In this tutorial, it looks like regular rivets are holding the pack in place. http://www.whitearmor.net/fisd/Tutorials-legs Cent. requires a brad or split rivet.. http://www.whitearmor.net/forum/topic/21465-anh-stunt-legion-centurion-visual-checklist/ Question: What is the head size of the split rivet used for Centurion? Is it the same size as the Ab/Kidney plate connection??? Quote
Tehcaveman Posted April 2, 2014 Report Posted April 2, 2014 http://www.whitearmor.net/forum/index.php?/topic/26477-What-we-know-about-strapping%2C-snaps%2C-rivets-etc Info you seek is here Quote
TKheehaw[501st] Posted April 3, 2014 Author Report Posted April 3, 2014 Manny, that link was the trick. Thanks a bunch! Quote
Tehcaveman Posted April 3, 2014 Report Posted April 3, 2014 Manny, that link was the trick. Thanks a bunch! NP brother !! Quote
TKheehaw[501st] Posted April 3, 2014 Author Report Posted April 3, 2014 The inside of the bucket, fans by Echo. Quote
TKheehaw[501st] Posted April 3, 2014 Author Report Posted April 3, 2014 Full front pic. Right side forearm elastic needs to be shortened, kept falling down too low. Full back pic, Strap on shoulder wasn't adjusted and back of boot was out. Quote
TKheehaw[501st] Posted April 3, 2014 Author Report Posted April 3, 2014 And a happy new TK finished w pics submitted to garrison GML. Just need to finish up the E-11 blaster. Anybody got a pattern of the trigger they want to share???? Quote
TKheehaw[501st] Posted April 3, 2014 Author Report Posted April 3, 2014 As usual, if I've missed something that isn't quite right, I'm all ears. Thanks again. Quote
Tehcaveman Posted April 3, 2014 Report Posted April 3, 2014 Can you raise your left thigh anymore ? If so I would to help prevent the knee plate from getting caught under the thigh Quote
elleerre Posted April 5, 2014 Report Posted April 5, 2014 Hi Dave, how have you sealed the ends of the neck trim on your helmet? Seems to be a professional job. Thanks! Lorenzo Quote
TKheehaw[501st] Posted April 8, 2014 Author Report Posted April 8, 2014 Hi Dave, how have you sealed the ends of the neck trim on your helmet? Seems to be a professional job. Thanks! Lorenzo Kragle! aka. zap a gap. Just a little will do. Quote

Recommended Posts
Join the conversation
You can post now and register later. If you have an account, sign in now to post with your account.