BIDS[TK] Posted January 15, 2013 Author Report Share Posted January 15, 2013 UPDATE - Test Fit OK Update time, have lengthened the Crotch Strap to stop the Cod being pulled out at the top due to too much tension. Cut up some foam knee pads and padded out the top front of the shins so that the Sniper Plate can't get caught under the thigh. This has also tightened up the calf and stops it rotating so I don't think I'll need to put velcro on the top of the boot to keep it straight anymore. Also put some foam in the thighs to straighten them up and get them sitting better. Pretty happy and think I'm nearly ready to submit 501st approval shots. Once I've got 501st approval I can then move on with EIB/Centurion. List of items yet to do for EIB/Centurion :- * Male Snap on upper RHS of Ab Plate * Split Rivets on LHS of Ab & Kidney * Shims for Ab/Kidney closure * Fill 4th tooth indent in frown Any comments or Suggestions ? Quote Link to comment Share on other sites More sharing options...
Ravenwood[TK] Posted January 15, 2013 Report Share Posted January 15, 2013 looking great... really nice work man. Quote Link to comment Share on other sites More sharing options...
gmrhodes13[Staff] Posted January 15, 2013 Report Share Posted January 15, 2013 Looking good, don't think you will have any problems with 501st approval. This won't be a problem but I noticed your knee belt looks twisted, mine was the same, I had to apply some heat then glue in place as it kept bugging me LOL. Good luck hope it doesn't take too long Quote Link to comment Share on other sites More sharing options...
BIDS[TK] Posted January 15, 2013 Author Report Share Posted January 15, 2013 looking great... really nice work man. Thanks Jeremy, I appreciate that. Looking good, don't think you will have any problems with 501st approval. This won't be a problem but I noticed your knee belt looks twisted, mine was the same, I had to apply some heat then glue in place as it kept bugging me LOL. Good luck hope it doesn't take too long Thanks for your feedback Glen. I'll have a play with the knee belt & see if I can get it to sit better. Quote Link to comment Share on other sites More sharing options...
BIDS[TK] Posted January 20, 2013 Author Report Share Posted January 20, 2013 UPDATE - Fans & Headset After having the bucket on for several test fits over the last couple of weeks I realized how hot they are to wear and today I finally got around to fitting the fans I purchased from TheWolf (Redback Garrison) some time ago. I mounted the fans in the front of the bucket between the mold for the Aerators and the Tubes on either side. I sanded off the mounting "ears" where necessary for clean fitment and used hot glue to affix them. I then ran the power cable for the battery pack to the opposite side of the bucket and mounted it in the tube using stick-on H/D velcro. I put the velcro on the battery pack lid so that I can still operate the switch with the bucket on, and still remove them when necessary to replace the battery. The length of cable allowed me to mount either side battery pack on the opposite side to the fan, and 1/2 way back in the helmet to keep everything nicely balanced. The fans point up diagonally across the teeth and towards my nose, as well as across the lenses to hopefully stop fogging. I've got Lithium disposable batteries fitted at the moment, but I'll replace these with some of the 600mha li-ion rechargeable batteries from ebay (will get 2 set's so I've always got a charged set ready to go). At the moment I've simply got the lenses taped in as I'm waiting on another pair with a slightly different bubble. Once I've chosen the pair I'm most happy with I'll mount them permanently. I then installed the wireless headset module I purchased from TK6294 (Jim here on FISD), along with my Aker Amp & Icomm Static burst module. I mounted the wireless headset module in the rear of the bucket in the rear flare, again using H/D velcro so it's easily removable. I haven't had any luck being able to put the helmet on with the wireless headset on my head, as it always either pulled off, or ended up crooked or just plain uncomfortable. To combat this, and also make suiting up easier I decided to mount the mouthpiece in the bucket full time. I laminated 5x 45mm lengths of 25mm wide ABS together, marked out the shape of the microphone junction block and then drilled and sanded out the shape. Once happy that it would mount firmly I cut off the wire retainer (the part that goes over your ears and around the back of your head normally) and cut in recesses in the ABS mounting block to allow the small wire tag I left, the cable to the module, and the boom cable into. I have used velcro on the back of the headset junction block to retain it in the ABS block, as well as velco on the back of the block so that it is also removable. With the boom mounted the mouthpiece now sits in the front of the helmet just above the vocoder mold and as it's flexible I'll be able to fine tune where I want it to sit. I hope this helps anyone who was experiencing the same fitting issues I was get their headset sorted. Quote Link to comment Share on other sites More sharing options...
Dday[501st] Posted January 20, 2013 Report Share Posted January 20, 2013 Nice idea on the abs mounting block for the mic! I think the wireless mic is great but that memories box is just big. I am pretty sure the box is super oversized and doesn't really require that much. I wonder about using a Bluetooth mic and receiver in the chest... Quote Link to comment Share on other sites More sharing options...
BIDS[TK] Posted January 20, 2013 Author Report Share Posted January 20, 2013 Nice idea on the abs mounting block for the mic! I think the wireless mic is great but that memories box is just big. I am pretty sure the box is super oversized and doesn't really require that much. I wonder about using a Bluetooth mic and receiver in the chest... Thanks Derrek, I'm pretty happy with how it came out. The Memorex box is big, but even with my oversize melon it still fits OK. Bluetooth would be cool, just nobody has come up with a saleable kit yet, would be nice to be able to answer a phone call in your bucket though. Quote Link to comment Share on other sites More sharing options...
gmrhodes13[Staff] Posted January 20, 2013 Report Share Posted January 20, 2013 Looking good there Craig Quote Link to comment Share on other sites More sharing options...
BIDS[TK] Posted January 21, 2013 Author Report Share Posted January 21, 2013 Thanks Glen. Quote Link to comment Share on other sites More sharing options...
Ravenwood[TK] Posted January 21, 2013 Report Share Posted January 21, 2013 Wow you always seem to impress me with the ideas you come up with. Very nice, clean and functional. Great job Quote Link to comment Share on other sites More sharing options...
BIDS[TK] Posted January 21, 2013 Author Report Share Posted January 21, 2013 Thanks Jeremy, I appreciate the kind words. Quote Link to comment Share on other sites More sharing options...
BIDS[TK] Posted January 22, 2013 Author Report Share Posted January 22, 2013 (edited) UPDATE - AKER Amp/ICOMM/Wireless Module Just a quick update to show the AKER Amp, ICOMM Module & Wireless Microphone receiver installed in the Chest Armor. This is all from :- TK6294 (Jim), and it's awesome gear. Love the static burst sound and the fact that there is a spare port on the amp to allow an MP3 player to be hooked up. This means you can play one of the awesome sound files from :- TK2243 Skutch on the Main Board, Daniel has done an awesome job on these and simply asks that they be kept "in the family" and that the link or files are not passed out to the general public, http://www.501st.com...hp...c46bb81e2. I mounted the Amp on the RHS of the chest armor so that I can reach the on/off/volume switch from the side of the armor. This can be charged in situ or removed for charging. I mounted the wireless headset receiver on the LHS of the chest, again so that I can reach the on/off switch from the outside of the armor. It's easily removed to replace the batteries. I used the same H/D velcro to mount these that I used to mount the fan battery packs in the helmet and I'm happy with how they turned out as they sit securely and don't hold the armor out away from my chest. I took advantage of the compact size of the ICOMM module and mounted it in the recess at the rear of the Ab Button Plate. Again I used the H/D velcro to mount it so that it's easily removable. I'm very happy with the sound quality, even with the speaker of the Amp facing my chest the sound is good. I think the only thing I'll change will be to replace the 3mm pin leads with a lead that has a straight pin one end and a 90deg on the other, simply to allow them to sit a little neater. Once I've replaced these leads I'll tidy them up with some cable retaining clips. Edited January 22, 2013 by BIDS Quote Link to comment Share on other sites More sharing options...
Ravenwood[TK] Posted January 22, 2013 Report Share Posted January 22, 2013 Very nice. again clean and functional, nice work. I just personally prefer my self contained helmet with the hovi speakers, but not as loud as the aker system. Quote Link to comment Share on other sites More sharing options...
BIDS[TK] Posted January 22, 2013 Author Report Share Posted January 22, 2013 Hey Jeremy, I've never seen or heard the Hovi setup in the flesh but it's an awesome idea. Would be great to have to sound come out of the vocoder area like the design suggests. Quote Link to comment Share on other sites More sharing options...
Ravenwood[TK] Posted January 23, 2013 Report Share Posted January 23, 2013 (edited) Here is my helmet with the hovi mics speaker system (I am replacing the shells with a screen acurate one, which is on its way) everything is in the helmet. Edited January 23, 2013 by Ravenwood Quote Link to comment Share on other sites More sharing options...
BIDS[TK] Posted January 23, 2013 Author Report Share Posted January 23, 2013 Beautiful clean install mate. What is the material you've lined it with? Looks nice and soft, almost like foam? Did you glue your lenses in and then glue the liner over the edges of them? I still find I scrape my nose on the frown mesh at times taking my bucket off and I've been thinking about what I could use to cover the edges with. Was thinking material of some sort that I could glue over the edge of the mesh. I assume that you've mounted your electronics in the tubes of the helmet and covered them with the black conduit for neatness. Out of interest how big is your amplifier? I like the flat fans mounted down in the vocoder, I was thinking about these, but I'll wait to see how the blower style I've used go and decide from there. Quote Link to comment Share on other sites More sharing options...
Ravenwood[TK] Posted January 23, 2013 Report Share Posted January 23, 2013 (edited) I got the electronics from this place (great person to work with too) self contained and easy install http://www.skullworx.com The liner I found on Ebay and it just sits in the helmet as it is formed to fit in a TK helmet, not glued in at all. The liner is a thin foam backing with the cloth facing. the battery packs are located in the spacing in the helmet and the small amp I have mounted in the top of the helmet. This is the one I used http://www.ebay.com/...=item4d07f669aa My helmet is a snug fit but feels great when its on, I really like the feel of it and don't have to worry about looking like a bobble head I do need to put some screen over the fans so I don't catch my beard in to though lol Edited January 23, 2013 by Ravenwood Quote Link to comment Share on other sites More sharing options...
BIDS[TK] Posted January 23, 2013 Author Report Share Posted January 23, 2013 I got the electronics from this place (great person to work with too) self contained and easy install http://www.skullworx.com The liner I found on Ebay and it just sits in the helmet as it is formed to fit in a TK helmet, not glued in at all. The liner is a thin foam backing with the cloth facing. the battery packs are located in the spacing in the helmet and the small amp I have mounted in the top of the helmet. This is the one I used http://www.ebay.com/...=item4d07f669aa My helmet is a snug fit but feels great when its on, I really like the feel of it and don't have to worry about looking like a bobble head I do need to put some screen over the fans so I don't catch my beard in to though lol Thanks for the links. Great looking kit, I just don't think I'd be able to get it too fit. I'll see how mine goes before I make a decision. That liner looks awesome, might think about getting one to try & if it works getting a 2nd one. Would be great for 2 day troops to be able to replace it for a minty fresh bucket. Quote Link to comment Share on other sites More sharing options...
Ravenwood[TK] Posted January 23, 2013 Report Share Posted January 23, 2013 They make 2 different size liners I have an AP kit and helmet which is the same size as the ones in the movie (small) and they make a larger one for like the FX helmets so be sure to get the one that will fit your helmet best. The nice thing about the Acer amp is its volume you will not get that with.the hovi Mic system, but I just like the.self.contained helmet set up over being heard on the other side of the room lol. Quote Link to comment Share on other sites More sharing options...
BIDS[TK] Posted January 23, 2013 Author Report Share Posted January 23, 2013 Thanks for the heads up on the liner sizing. I'll look into the larger size as the RT Bucket is up sized to suit the larger armor. Quote Link to comment Share on other sites More sharing options...
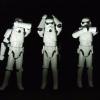
BIDS[TK] Posted January 28, 2013 Author Report Share Posted January 28, 2013 APPROVAL SHOTS SUBMITTED - Wish me Luck Quote Link to comment Share on other sites More sharing options...
gmrhodes13[Staff] Posted January 28, 2013 Report Share Posted January 28, 2013 GOOD LUCK, oh btw you could do with a little more radius on your knee ammo/battery belt, but this shouldn't hold you up Quote Link to comment Share on other sites More sharing options...
BIDS[TK] Posted January 28, 2013 Author Report Share Posted January 28, 2013 Thanks mate, I'll look at that before my EIB/Centurion Application. Quote Link to comment Share on other sites More sharing options...
TK-42779[501st] Posted January 28, 2013 Report Share Posted January 28, 2013 Looks awesome! I can't wait to really get started on my RT. Quote Link to comment Share on other sites More sharing options...
Darth Aloha[Admin] Posted January 30, 2013 Report Share Posted January 30, 2013 Looks awesome! I can't wait to really get started on my RT. Geez. Tony... I'm starting to get impatient for you ;D -Eric Quote Link to comment Share on other sites More sharing options...

Recommended Posts
Join the conversation
You can post now and register later. If you have an account, sign in now to post with your account.