snoberg Posted July 13, 2010 Report Share Posted July 13, 2010 (edited) My last thread was getting a little long, if I am spamming the forum please stop me at any point, I wanted to dedicate a separate thread for my stormtrooper hat since my body armor is nearing completion, and this is going to require a bit more attention. My first questions involve trimming, I am wondering if I am supposed to be cutting down the wavy line that follows the ear as seen in this pic And also the edges that flare out here... I am off to the hobby store to get my paint and pinstriping tape, and I am also planning to line the inside with headlining cover. Would it be wise to line the insides after trimming, but prior to assembly? I thought it might get tricky once its all together. Thanks in advance, seeya guys soon. Edited July 16, 2010 by snoberg Quote Link to comment Share on other sites More sharing options...
TrooperTim Posted July 13, 2010 Report Share Posted July 13, 2010 I trimmed to the ear line. Cut off the flare out on the front. The ear will cover this area. After I was assembled everything and it looked good I disassembled it and coated the inside with plasti-dip. Quote Link to comment Share on other sites More sharing options...
snoberg Posted July 13, 2010 Author Report Share Posted July 13, 2010 Oohh plasti-dip, thats a freaking awesome idea, I didn't know it came in a spray, I am guessing you sprayed prior to trimming the eyes and teeth? Quote Link to comment Share on other sites More sharing options...
TrooperTim Posted July 13, 2010 Report Share Posted July 13, 2010 (edited) Plasti-dip was very last, after everything was done. I used the brush on type. It was easier for me to control and you don't have to mask out parts of the helmet like you would with a spray. Edited July 13, 2010 by TrooperTim Quote Link to comment Share on other sites More sharing options...
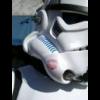
snoberg Posted July 14, 2010 Author Report Share Posted July 14, 2010 (edited) I have started cutting the eyes out, do I have them about right? they need a light sanding still, and the lenses are not secure at all, they were just there for reference. I will start on the teeth in the meantime. (I am really really loving building this... by the way ) Edited July 16, 2010 by snoberg Quote Link to comment Share on other sites More sharing options...
TK bondservnt[501st] Posted July 14, 2010 Report Share Posted July 14, 2010 you don't need to coat the inside with anything at all. there are AP build threads with complete examples of how to do every single step. this is for the ESB but anh is just grey frown AP ESB buid Quote Link to comment Share on other sites More sharing options...
TK bondservnt[501st] Posted July 14, 2010 Report Share Posted July 14, 2010 the eyes can be sanded to shape from the inside of the lid. there should be no lip visible on each edge. Quote Link to comment Share on other sites More sharing options...
snoberg Posted July 14, 2010 Author Report Share Posted July 14, 2010 I kinda want to coat the inside for a more finished look, and give the thinner parts a little extra strength. The mic tip wells in particular. Thanks for the advice on the lips, I will finish cutting out the eyes and teeth tonight and hopefully have something workable for tomorrow. I know there are a ton of build threads, I am just showing people what I am doing so if I mess something up they can stop me before its too late. Quote Link to comment Share on other sites More sharing options...
snoberg Posted July 16, 2010 Author Report Share Posted July 16, 2010 Here is a bit of an update, I have it pieced together, painted my screws white and sprayed the interior with plasti-dip. Troopertim you are a hero with that suggestion, I love the feel of the inside now, I will hand paint more dip around the vents and eyes later. My only concerns are these: 1.) The right ear has a bit of a gap, but I think I just need to get over it, haha. 2.) My brow ended up pretty low. I wanted a low brow but this one is approaching a dangerous level. 3.) Vents, a little wider maybe? they look good to me but I don't have an eye for it quite yet. 4.) My head struggles to get in this thing, I don't know if this is cause I have a massive melon or what, but after i put a face mask on and trim the bottom lip its gonna be a chore every time put it on. Maybe trim the bottom a bit? Let me know what you think, I will be painting for while Quote Link to comment Share on other sites More sharing options...
Darth Voorhees[501st] Posted July 16, 2010 Report Share Posted July 16, 2010 looks good to me! The more accurate line of helmets (AP, TE, TE2, ATA, VT, PT, Gino, [possibly TM,not sure] etc) all are "twist ons" You put your head in with the helmet turned to the left or right, and once on your head you turn it straight. thats just the way we do with the more accurate helmets. Quote Link to comment Share on other sites More sharing options...
snoberg Posted July 16, 2010 Author Report Share Posted July 16, 2010 looks good to me! The more accurate line of helmets (AP, TE, TE2, ATA, VT, PT, Gino, [possibly TM,not sure] etc) all are "twist ons" You put your head in with the helmet turned to the left or right, and once on your head you turn it straight. thats just the way we do with the more accurate helmets. I guess with great accuracy comes great... pain, or something, haha. After I finish squeezing a few last bubbles out of my decals I will post some painted pics. Quote Link to comment Share on other sites More sharing options...
Shovelheadjedi Posted July 16, 2010 Report Share Posted July 16, 2010 My brow was extremely low as well! What i did was find the point where i like it. Tape it in place, then used 3 small screws to hold it in place. And its set! It was way easier then glue. Shoot me a pm with your address and ill sens you the screws i used. I should have them still! Quote Link to comment Share on other sites More sharing options...
snoberg Posted July 20, 2010 Author Report Share Posted July 20, 2010 (edited) Here is my near completed helmet. All that is left is lenses and hovis, both of which are on order. Inside is rubberized, neck trim is in place, screws are painted white. My only concern is the testors paint on the frown and mouth piece. I had to do two coats to get full coverage, and there is a little bit of bubbling and drippyness, you can't see it in the pics but up close it is apparent. Is there a way to sand and polish enamel once it is fully dry? I have heard of ultra high grit sandpaper and might pick some up if that will help. Edited July 20, 2010 by snoberg Quote Link to comment Share on other sites More sharing options...
Shovelheadjedi Posted July 20, 2010 Report Share Posted July 20, 2010 Looks rad!! More pictures pleeeease!! Lets see every angle. Quote Link to comment Share on other sites More sharing options...
snoberg Posted July 20, 2010 Author Report Share Posted July 20, 2010 Ask and ye shall receive! Still looking for advice on the bumpy testors paint, if anyone knows a good fix. Quote Link to comment Share on other sites More sharing options...
Shovelheadjedi Posted July 20, 2010 Report Share Posted July 20, 2010 Looks great. I think with the frown, its not a huge deal. Mine has a few bumpd here an there, nothing bad thought. Id sand the eyes more, mine look the same an i was told to sand them more. An with the black strip around the ears, id thin it out a tiny bit more..... Maybe. I mean, im no expert, but it looks a tad too think. I had mine almost the same, an i just redid the grey part of the ears an it thinned it out alot!! But it looks great man!! Quote Link to comment Share on other sites More sharing options...
snoberg Posted July 20, 2010 Author Report Share Posted July 20, 2010 I still think I am going to raise the frown with some little screws under the rubber seal, and as far as the ears go I used pinstriping tape, so that is kinda the width I am stuck with unless I paint over the edge of it, which would look sloppy, at least imo. The eyes are such a touchy area too, I get nervous every time I shave more out of them. Overall I am really happy with the kit, I will recommend AP domes to everyone I can, it looks great even unfinished. The bubbly paint on the aerator is annoying me though, thats my biggest gripe (which is my fault, not the kit's). Quote Link to comment Share on other sites More sharing options...
Shovelheadjedi Posted July 20, 2010 Report Share Posted July 20, 2010 Well you did a rad job! The eyes are touchy, but just do little bit at a time. Go look at my post, my eyes are almost the same, an there is a link i believe that shows what they are sopose to look like Quote Link to comment Share on other sites More sharing options...
TrooperTim Posted July 21, 2010 Report Share Posted July 21, 2010 Looks fantastic! My only concerns are these: 1.) The right ear has a bit of a gap, but I think I just need to get over it, haha. 2.) My brow ended up pretty low. I wanted a low brow but this one is approaching a dangerous level. 3.) Vents, a little wider maybe? they look good to me but I don't have an eye for it quite yet. 4.) My head struggles to get in this thing, I don't know if this is cause I have a massive melon or what, but after i put a face mask on and trim the bottom lip its gonna be a chore every time put it on. Maybe trim the bottom a bit? You can get the ears close to flush but most everyone has a slight gap there. For a hero, the brow is fine. Just above the eyes is where it should be. As said above, accurate helmets you twist on and I always struggle with mine a bit too. You can trim the bottom opening to make it easier to slip on. A larger opening won't be that noticeable. My only concern is the testors paint on the frown and mouth piece. I had to do two coats to get full coverage, and there is a little bit of bubbling and drippyness, you can't see it in the pics but up close it is apparent. Is there a way to sand and polish enamel once it is fully dry? I have heard of ultra high grit sandpaper and might pick some up if that will help. The only way to work with enamel paints is when it's wet. Once dried, you have to use enamel thinner to get it off and try again. Mine aren't perfect, you can see brush strokes. No one really notices. Here's how my eyes are (stunt). Yours looks good; could trim a bit more if you wanted. I sanded the bump way down but that's a personal choice. Quote Link to comment Share on other sites More sharing options...
Shooter Posted July 21, 2010 Report Share Posted July 21, 2010 (edited) With Testors it's really important to both shake and stir. They tend to settle (like most enamels) especially if they were sitting too long on the shelf of the store. I shake, stir then shake again. When shaking, do it at least 2-3 mins. It won't help your current situation, but might help in the future I too had trouble with the opening (my head is 7 5/8') I recommend trimming a little bit at a time until you get it right. Also, pick up some accurate neck trim. I got mine from Mike TK 4510, very pleased with it. Edited July 21, 2010 by Shooter Quote Link to comment Share on other sites More sharing options...
snoberg Posted July 21, 2010 Author Report Share Posted July 21, 2010 With Testors it's really important to both shake and stir. They tend to settle (like most enamels) especially if they were sitting too long on the shelf of the store. I shake, stir then shake again. When shaking, do it at least 2-3 mins. It won't help your current situation, but might help in the future Noted, thanks. I am currently finely sanding the current finish on the aerator so I can apply a final thin layer, I think it may work out after all, I will let ya know. Quote Link to comment Share on other sites More sharing options...
zsavk[TK] Posted September 8, 2010 Report Share Posted September 8, 2010 Great Build Sean! Hope to see it up close one day. Im just north of you! Quote Link to comment Share on other sites More sharing options...
snoberg Posted September 12, 2010 Author Report Share Posted September 12, 2010 Thanks! The helmet is done now, I will get some shots up later tonight or tomorrow, it is sexy Quote Link to comment Share on other sites More sharing options...
TK bondservnt[501st] Posted September 15, 2010 Report Share Posted September 15, 2010 new photos? I'd like to make some constructive comments? Quote Link to comment Share on other sites More sharing options...
snoberg Posted September 16, 2010 Author Report Share Posted September 16, 2010 (edited) Here are my final shots. Issues I know about and will not be addressing unless EIB is threatened (which I do not feel it will be) Low brow - I wanted a low brow to begin with, and it ended up a few mm lower than I had planned, but I like the way it looks and I am not going to disassemble the helmet, especially since the interior is now rubberized Thick pin stripe - The pin stripe tape I purchased might be a tad too thick, but it is going to stay the way it is, I am not going to paint over the tape edges in grey to make it thinner, that would defeat the purpose of the tape in the first place. If I run across some thinner stuff I might change it out someday. Things I may do in the future Frown mesh - I may add this later, I am still torn on whether or not to, one one hand I want to be screen accurate, on the other hand, screen mesh is a very nice idealized mod for a helmet Clip screws off inside - They catch on my balaclava all the time, I may clip them but it may make the helmet completely permanent in its current state if I do so (which I don't think really matters too much) Fans - So far, not a whole lot of fogging issues, heat might be a concern in the summer though Thanks to Keith for the killer hovis, Smitty for the lenses, Brian for the awesome padding and of course, AP for the sexiest helmet on the market. Edited September 16, 2010 by snoberg Quote Link to comment Share on other sites More sharing options...

Recommended Posts
Join the conversation
You can post now and register later. If you have an account, sign in now to post with your account.