RT-Mod Rob
-
Posts
48 -
Joined
-
Last visited
Content Type
Profiles
Forums
Gallery
Articles
Everything posted by RT-Mod Rob
-
Greetings from RT-MOD!For the past year and a half, I have been collaborating with Pandatrooper (of Panda Props and Costumes) on the fabrication of RT-MOD armor. Not only has he helped produce armor in his own shop and delivered to my high standards, but he has has helped upgrade many of the molds and bucks to create a more accurate version of the RT-MOD armor. Many elements within the costume have been updated for more accuracy or have been improved in terms of quality, comfort or wearability. Everything is still being fan-made from scratch based on photo references, and scaled up slightly to match the proportions of the current RT-MOD armor.But the time has come for me to officially pass the torch. Going forward, Pandatrooper will be the main contact and fabricator for RT-MOD armor. There will be a new contact email and updates on the latest version of the armor and helmet will be posted soon. As well, there will be some cool upgrades we think you will like! I would like to say I could not have asked for a better, more dedicated individual and have full confidence in Pandatrooper and his skills in carrying the RT-MOD torch. I believe he has a unique skill and dedication that will show in maintaining a high level of quality, care, attention to detail and craftsmanship. Please give him some time for the transition, as well as restocking supplies and also allow him to catch up on some back orders.Keep in mind that RT-MOD has and will be made for fans and hobbyists as time allows. We all have lives and need to take care of that first.From simple beginnings in 2002 to here now in 2019 it has been my pleasure to be able to outfit the bigger trooper candidates with high quality, accurate gear and have enjoyed the fandom and camaraderie of those who partake in the hobby. I want to thank everyone in this community for their support over the years. RT-MOD would not be around without you!
- 21 replies
-
- 15
-

-

The 2014 What armor are you wearing poll
RT-Mod Rob replied to Daetrin's topic in Hard Armor (General Discussion)
Never in a million years did I think I would see a 'Rocky Horror' refernence in a Stormtrooper forum... The fact that I can sing it word for word, front to back should not be of any concern to members of this forum. -
Assorted Costumes I've put on Ebay
RT-Mod Rob posted a topic in Build Threads Requireing Maintenance
Maybe you or someone you know is interested. Cheers, Rob Spawn Tiffany - http://www.ebay.com/itm/Cosplay-Costume-Tiffany-from-Spawn-/321496382362?ssPageName=ADME:L:LCA:US:1123 Alien - http://www.ebay.com/itm/Alien-Costume-/321496366600?ssPageName=ADME:L:LCA:US:1123 Borg - http://www.ebay.com/itm/Borg-Costume-/321496390678?ssPageName=ADME:L:LCA:US:1123 Edward scissorhands - http://www.ebay.com/itm/Alien-Costume-/321496374190? -
Thats the email I have on file and no Joy. Thanks for digging around for me though.
-
Aloha Eric...or whatever it is One says in Boyston. Coventry, Rhode Island
-
If anyone knows Randy Abramson let him know his gear is ready. I've had no luck stalking him on line. Otherwise someone's Christmas is coming early Rob
-
Not a Trooper but it is Hard Armor...
RT-Mod Rob replied to RT-Mod Rob's topic in Hard Armor (General Discussion)
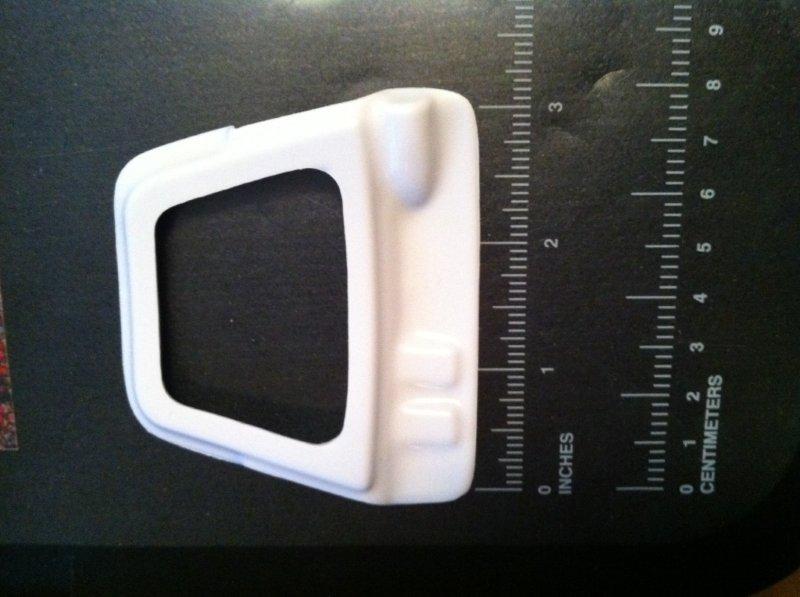
Thanks for the nice comments. I am quite pleased with the way it turned out considering the short time frame I gave myself. For those of you trying to find the trooper bits on the above pics: The inner forearms are outer trooper forearms cut down. The hand gurads are ESB hand guards with the front corners trimmed away and an extra high ridge on top. Here is a pic of the 'one time use only' foam and plastic molds I used. Ingredients for Elite Back Armor: 1 Nintendo Controller 1 Dustpan 1 Brass 4x6 picture frame 3 Wood Plugs 1 Plastic Wedge 2 Plastic Business card Holders 4 Rubber Washers 1 Bicycle Seat Frame 1 15x20x6" piece of Rigid foam Insulation Assorted plastic cuttings ...and voila! ------------ Here is the back armor. See if you recognize any trooper items on it. -
At the request of my 10 year old, who is an avid HALO fan, I took a break from forming Troopers and had a go at an 'Elite Field Marshall' - his fovorite character. Yes, having a Vac-former is a handy item for such endeavours. So here it is: Screen shot reference -------------- Those with a keen eye may see the parts of a Stormtrooper I used on it. Enjoy.
-
I'm finding the Smooth-On product pretty straight forward. I've been mixing the full package be it the gallon or pints and using a non-aerating drill mixer. It pours nicely into the molds and picks up all the detail. Sands beautifully.
-
Gentlemen and Ladies, I thought some of you might be interested in my latest endeavor. Well, it seems this last year's rapid rise in requests for suits and gear has taken it's toll on my Hydrocal molds. Poor things never stood a chance with these kinds of heat cycles. Previously, if and when a mold chipped or cracked I could fab a replacement 'toot-sweet' and 'on the cheap' but there comes a point when One must recognize a need for change. So, I have been busy recasting all my molds in Aluminum Epoxy. This will accomplish several things: -The molds will better tolerate repeated heat cycles. -Will be less suseptible to chipping. Will keep sharper detail. -Will be a fair bit lighter and can be repaired somewhat more easily. -Machinable and sandable are always good options as well. The numbers written on the molds represent the number of litres/quarts required to fill the void. The cost of this stuff would make having solid molds cost prohibitive so I opted to go for a foam core wilth a 3/8 shell of Alum/Epoxy around it. First I molded my old molds. Then filled them with expandable foam. Then shaved of the 3/8". Then filled the molds with the Alum/Epoxy, insrerted the foam and let it set. Removed the part, cleaned up the edges and surfaces and, voila, new molds. It has been a bit time consuming, has delayed some folks gear and I'm not finished them all yet but I think the end product will be improved. Some day I will get around to completing my interior kit. I promise Cheers, Rob This is what happens when your kids get a hold of your phone..
-
Drop Box depth measurements wanted
RT-Mod Rob replied to Bulldog44's topic in Hard Armor (General Discussion)
Drop me a note and I'll send you replacement boxes (I have some spares) 4pcs, fronts and backs. I hate to see you running around with those 'un-manly' drop boxes. -
Side shims for EIB and Centurion Question
RT-Mod Rob replied to rhapsodyred99's topic in Hard Armor (General Discussion)
I was just made aware of this latest hot potato... From my perspective I see the following: - On the surface it appears (to me) the new Centurion Standard seems to...um...'hinder' the more 'rotund' trooper from attempting such. - WRT the molds: There is a limit to how much a mold can be increased. ie. some guys might need just an 1" others 4-5", I use a 2'x2' swing frame table so there comes a point where the mold just cannot be any taller without compromising the plastic quality. - I have, in the past, included an extra Kidney part with the idea that the owner cut off as much extra plastic from each side of the spare as would be needed to close the gap between the Kidney and Ab. Doing this matches the curve and grade of the Kidney with minnimal visual impact. Kinda like a telescoping Kidney extension that can be glued in place so no rivets show. -If 'shims' are to be allowed the language should be as clear as possible. Just sayin' Rob -
Truth be known I took the measurements from the Don Post Stormtrooper way, waaay back when I first started. It seemed to be doing the trick but I see now that I must up the belt game (stands up on podium, leans towrds the mic) "Henceforth a new, more accurate belt, with seperate rivet covers, canvas strapping and refined Thermal Detonator, will NOW BE THE STANDARD!!! (applause here. Presidential wave. leave podium)
-
Have you tried this type of padding? https://dl.dropbox.com/u/84850169/P1070310.JPG
-
Gentlemen, Legs have been modified since the June 2010 reference above. RT-Mod Presently: Thighs - 151/2" along the front seam. Up to 26" circumference(without shims). Also, now with a return edge on top and bottom Calves - 15" along the front seam. Up to 17" circumference. Now with distinct left/right inner and outer parts. Cheers, Rob
-
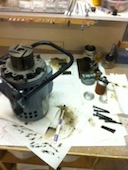
One wrong set of vanes, one right set of vanes, a mojor re and re of the pump later and.....another failure. Poor thing was just too far gone. Well, that pump gave me 11 years of trouble free service and now it can RIP. New pump came yesterday and was put immediately to work. Wow, now this pump really sucks!
-
All was going well when suddenly the pump seized. Turns out two of the vanes broke off and jammed the motor. I guess I'll be cleaning the shop for the next week til the new ones arrive. Ugh. Broken vanes in the background.
-
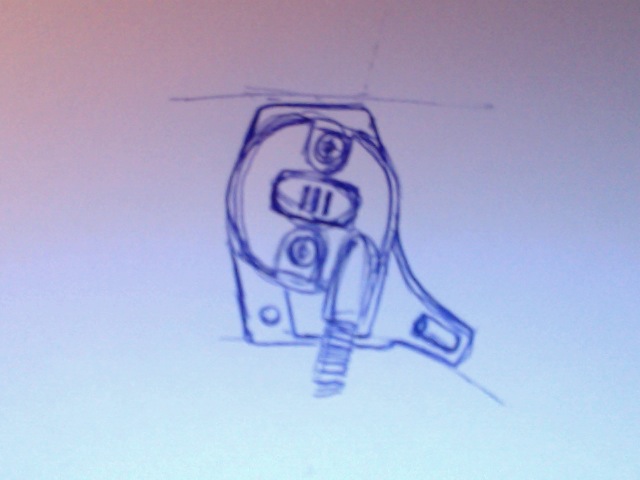
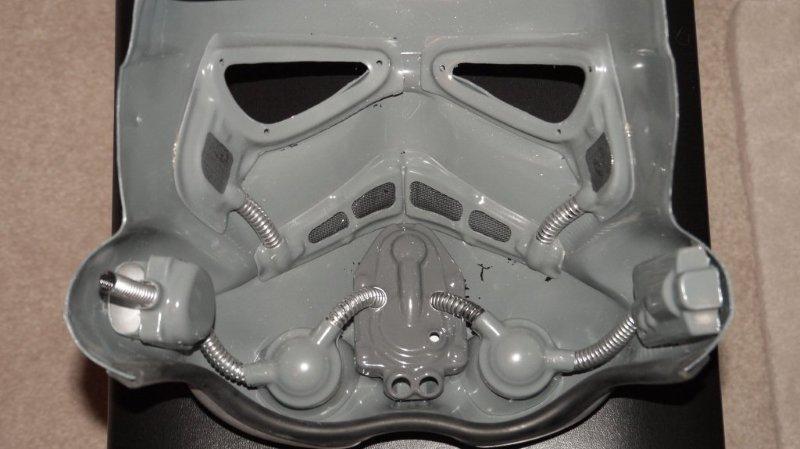
I've solved the issue of ventilation with no need for fans and batteries and wiring etc. It does invlove a mod to the rear traps but I dont think most people would notice. Ok its not really for venting. I had to cut out the assembled bits to cast a mold for the the new rear trap housing detail for my interior kit mod. The raised bullet is for running wire duct to the front ...cosmetics. The opening will be covered with a metal speaker mesh...a little more tech looking than screen door mesh. Once installed and painted it looks like it was always part of the helmet and even though it cast to fit my helmets it does fit nicely into originals as well. Here's some pics..

-
Should I trim my butt plate?
RT-Mod Rob replied to NastyNoah's topic in Hard Armor (General Discussion)
Noah, Those parts are longer than 'normal' trooper parts for the taller folk. The Butt should cradle your backside and If you are going to trim, trim the Kidney part... it has the most to give as it is a bout 1.5" taller than a regular. You can trim it from either the top or the bottom. A careful trim and some block sanding for a straight edge and you'lll be set. Rob -
TD parts/conversions now avaialble
-
RT-Mod Helmet interior Prototype.
RT-Mod Rob replied to RT-Mod Rob's topic in Assembly, Mods, and Painting
I'm still trying to guage if it's something that I could offer as an add-on but which isn't cost prohibitive. At the present it's a bit time consuming. The balance between my time, the time it takes and the cost people would likely pay has not been reached. However... I can see, if the interest is there, where once the molds are finalized I could form them them and offer it as a kit for the DIY'ers. Presently I'm doodling up ideas for the inside ear area and rear trapz. I think I have found the final draft which I will fashion into molds and have a kick at.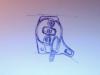
-
Canvas belt size vs size of armor belt face question
RT-Mod Rob replied to Woulf's topic in Assembly, Mods, and Painting
Did anyone happen to note the dimensions of the drop boxes??? I'm getting different numbers from different sources. -
RT-Mod Helmet interior Prototype.
RT-Mod Rob replied to RT-Mod Rob's topic in Assembly, Mods, and Painting
It's all .060 ABS. The conduit is the automotive wire wrap painted chrome though I am trying to source a metal variety. Here's a pic of the optional amp box...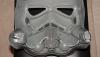
-
RT-Mod Helmet interior Prototype.
RT-Mod Rob replied to RT-Mod Rob's topic in Assembly, Mods, and Painting
Thanks for the kind words. It's a custom fit to my buckets but I did test fit it into the original sized units and fits well enough in those as well. I'm working on a bigger housing, for bigger circuit boards, to go between the speakers as an option for those with different gear. Problem is if you get to much bigger than what's there now the area in front of your mouth gets a bit claustrphobic. I've never seen first hand the Iker or iComm units so I can't say they'll fit.