

Morgi
-
Posts
822 -
Joined
-
Last visited
-
Days Won
33
Content Type
Profiles
Forums
Gallery
Articles
Everything posted by Morgi
-
I'm looking forward to my own application
-
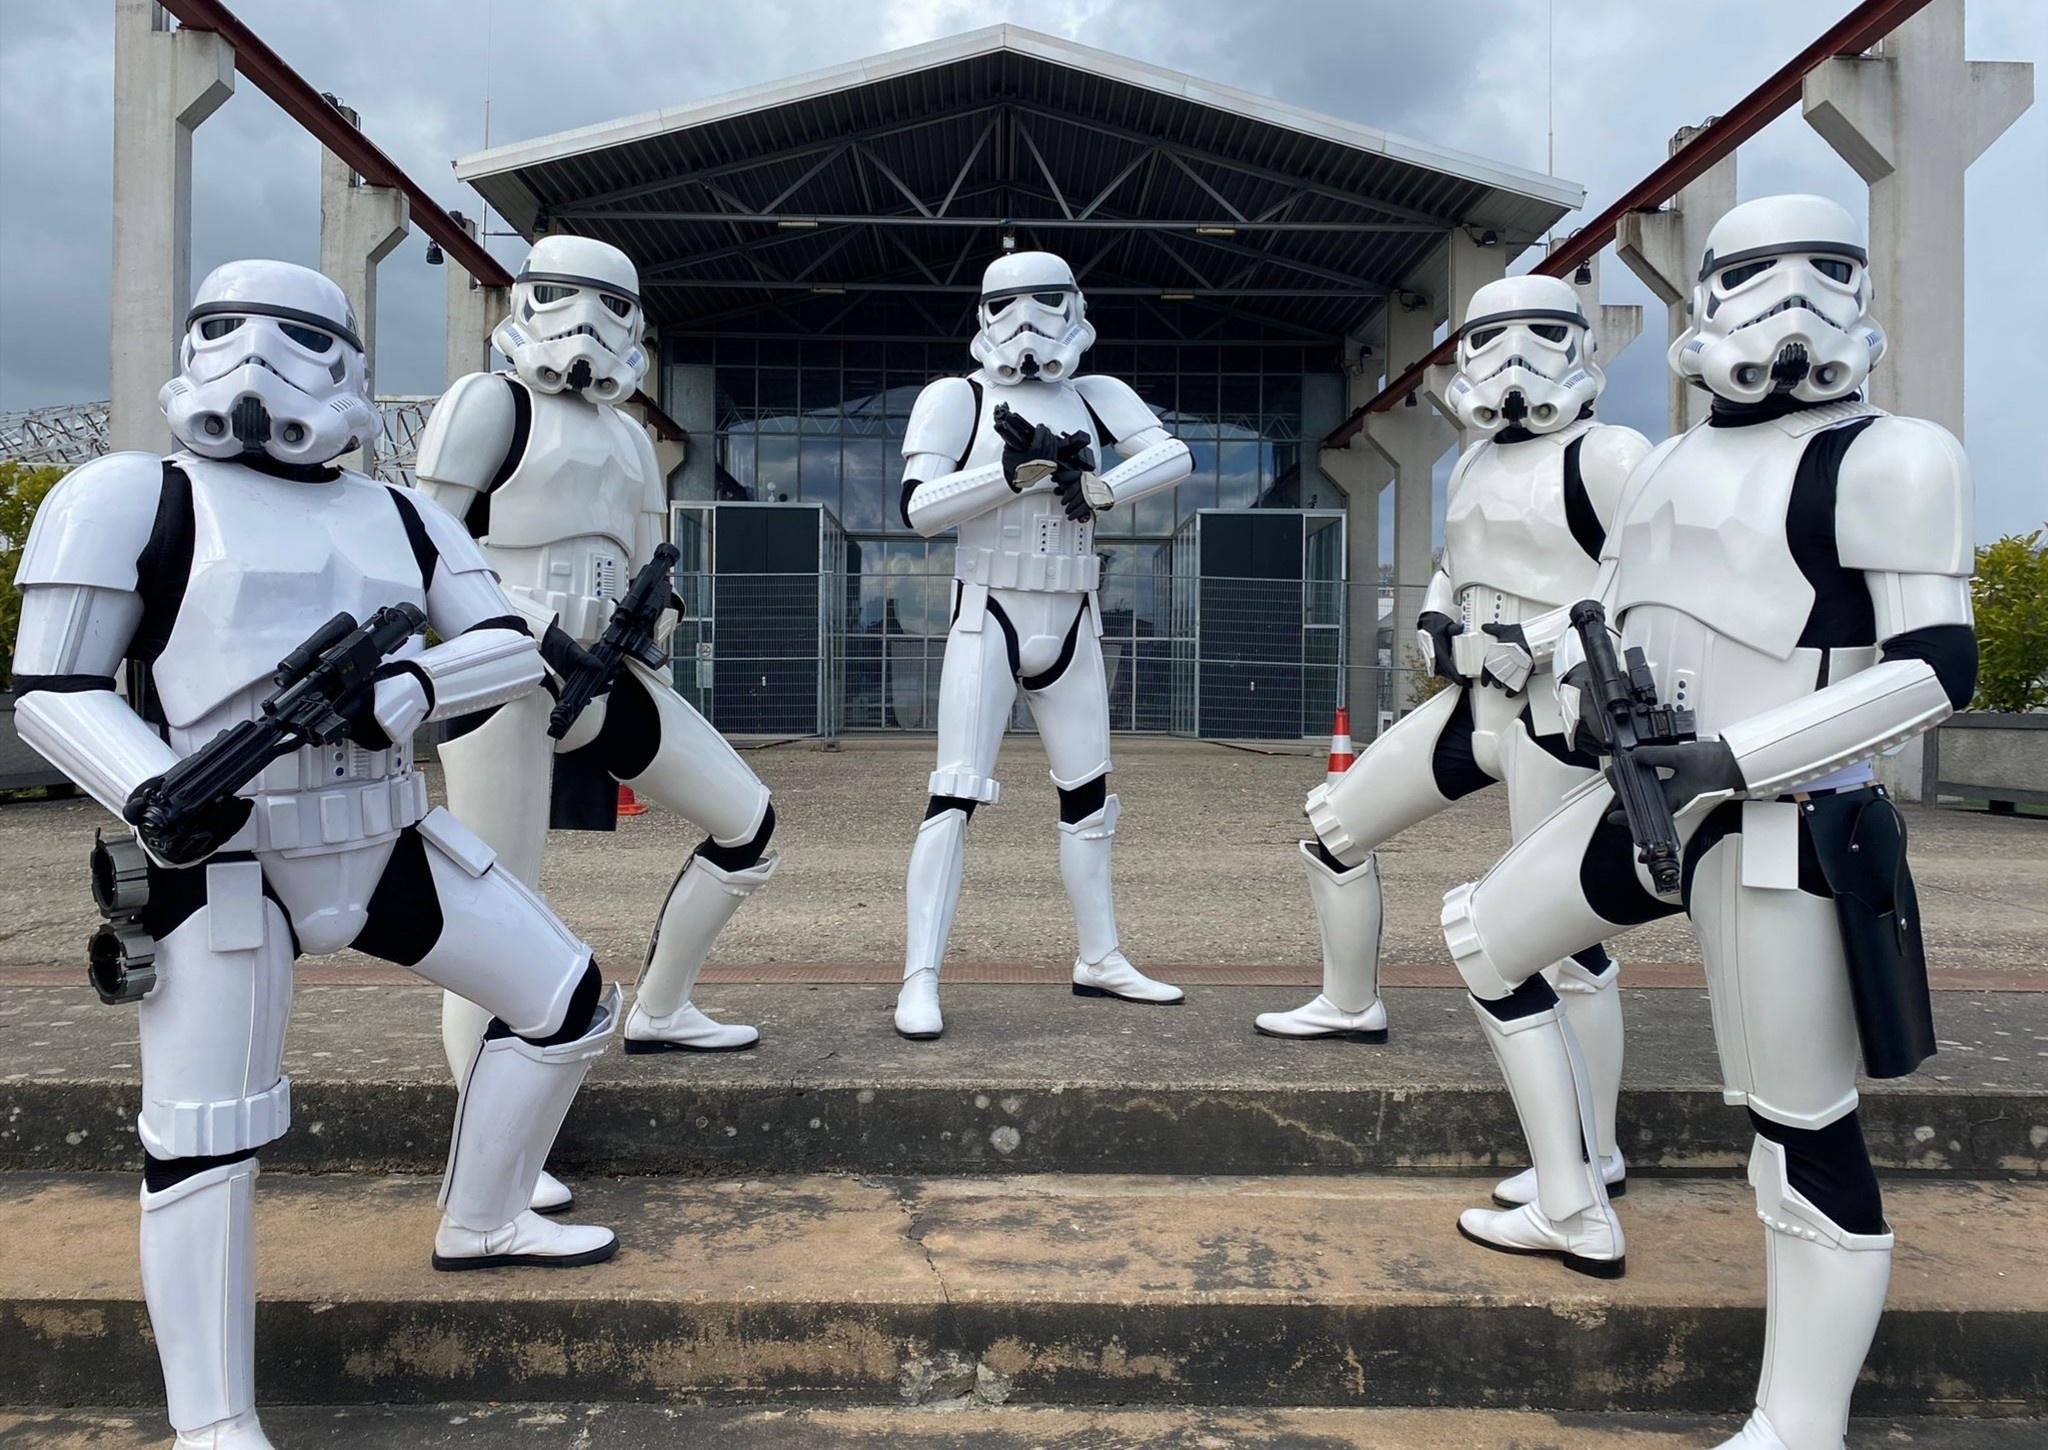
I'm looking forward to my application as well Even if I'm a bit nervous i'm the second stormtrooper from the right Yeah, that concert was a blast -- standing on the stage with the Imperial March being played by an orchestra behind you? I had goosebumps. If everything goes according to plan, I'll get to attend two other Sound of Concerts during April and I'm very much looking forward to it! Hopefully you'll get to attend one of your own in the future
-
Thanks for the info, Glen, but given the fact that I have no-one to take pictures with and no pictures of my up to date armor (there have been several modifications lately) that are in the typical approval poses, I'll just try my luck with applying directly, based on my pre-approval back in July/August and the feedback from several garrison members I've received since approval That being said: Thanks to everyone who's supported me to this point -- folks in my garrison who endured hours of TK Talk, the people on here with their continuous help in my build thread and especially Tino (T-Jay) who's been the best Attaché I could've asked for! Now, if anyone sees anything on this build thread or in my troop log that they think I should improve, please point it out to me! I've got tomorrow and the day after for some last minute stuff, the rest we'll see in my EIB application.
-
I'm here with the last things that I wanted to do before my application for EIB. Looking forward to taking the pictures this weekend and hoping that there's nothing that I overlooked... To start with, I made a list of everything that I thought I could improve with my armor. I've had that list going on for a while now, but this time I went through the last ANH Stunt Centurion Applications, writing down just about anything said. Then I sorted through that list and ended up with 17 improvements that I thought I should get done before my application. The last two weekends I worked through those, so here's a few of the things that I did. Helmet Paint This was mostly a small clean-up, making sure the lines were sharper. Perhaps not the biggest change, but Vocoder lines seem to be something that gets pointed out fairly often. ABS Belt If you've ever looked at the ABS belt, you know that the corners have to be cut at 45° and have to meet the fabric. I'd cut a little too much in my initial build, so I used this opportunity to change that. I don't have a picture without the clamp right now, but I can assure you that it looks a lot better now. Bicep Cover Strip Feel free to continue with the level 4 jokes on this one, but I reglued several cover strips. When I build this armor last summer I didn't always work as cleanly as I'd have liked me to, looking back. I hadn't been a FISD member then, the bicep especially were my first cover strips... It was good, but it wasn't pretty. So this was something that I did purely for myself: removing some of the cover strips (partway or fully and not only at the bicep), cleaning up the glue and regluing it. Honestly? I love the result. It looks tidy and like armor and not like it's in the movie and about to fall apart Thermal Detonator Now, this was not something I'd expected, but upon going through past approvals and the amazing reference by Joseph, I came to the realization that I basically would have to rebuild the entire thing. One of the end caps had a gap to the metal clip, same as the ABS plate. Additionally, the black paint on the screws had all but vanished. Upon fitting both of the ABS pieces, I realized that they hadn't been cut as straight as they should have been, so I got to cut and sand the entire thing a bit. Looking pretty good now, if you asked me Other Those were just some of the 17 improvements, but they're the only ones I've got pictures of. As they're the most interesting things, I'm not too worried about skipping a detailed description of me cleaning up pencil mark or glue residue The next thing will be my approval pictures and then we'll have to see if the DO's can spot anything else that I need to improve. Otherwise I'm sure I'll stumble across more nonsensical improvements in the future in my quest for the mystical level four
-
And one to sum it up, before I start listing every piece of advice given
-
... One or two? Man, I need to go back to elementary school, I could have sworn I counted more than that Thanks for all your effort, sir!
-
Honestly, I'm sure it's not just me, who's insanely grateful to everybody who's ever put up a tutorial
-

Nick´s ANH Stunt TK | Centurion Build WIP
Morgi replied to Nick the Trooper's topic in ANH Build Threads
Well, from my understanding the "outer edge" does mean "outer edge" and not "outer seam", but I could be mistaken... A possible solution would be to just cut off the ends until those 45° cuts meet the outer edge I hope this helped and I'm looking forward to the rest of your build -- hopefully we'll have another German TK joining our ranks soon -
Nick´s ANH Stunt TK | Centurion Build WIP
Morgi replied to Nick the Trooper's topic in ANH Build Threads
Moin Nick! Love your approach to this build! If I may chime in? Since you're aiming for Centurion, the following quote from the CRL might be helpful regarding your belt: The corners of the plastic ammo belt shall be trimmed at a 45 degree angle that that meets the outer edge of the cloth belt. -
Now that's a really nice text that I wasn't actually expecting, thank you so much! Also, it's a nice confidence boost regarding my future application Well, if you're coming to Germany for Speyer or a similar event, chances are quite good that we'd parade together, so fingers crossed. Not sure when I'll get around to trooping internationally myself, haha
-
Thank you very much, Tino! Of course you'd know best (aside from myself) how much love went into this suit -- at least two messages a week regarding this white plastic over the course of half a year might have given you some idea Ohhh, I'm very much looking forward to it. After all, I need a lvl 4 blaster for lvl 4 armor Soooo... If this is all the feedback and improvement you guys have to offer on here, I'm looking forward to receiving my Centurion certificate with a "nothing to add" for armor improvements... or to some lengthy comments about small details (best before I apply) Actually, my goal was to only get Centurion without any DO remarks regarding further improvement (not that that would stop me from small improvements, haha) but now that you're basically challenging me, I might need to re-think my stance regarding the first lvl 4 approval
-
I'm back at it -- at least with posting. I never really stopped finding small stuff that I could do in order to improve the smallest of details. Shout-out to all who endured months of messages and updates, and especially to the one person, who asked me if I was aiming for lvl 4 Weathering I did add a bit of weathering! Either by taking black rubber and making streaks on my armor with it, by using soaked newspaper to darken a few parts, or simply by wearing it and watching the weathering appear. I love it! It adds a sense of realism, especially when we look at the black marks all over the screen used armors. Trooper Box My trooper box got a bit of decoration. The overall appearance was heavily inspired by Tino's (T-Jay) Stanley: Still, I gave it a bit of my own twist and made it a little less fancy. Additional Upgrades Here we've had a few changes. The first was a slide-system to help keep the top of the ab- and kidney-plate aligned, after the kidney slipped down during a troop back in November, causing the butt plate to flare out. Additionally, this caused the armor to fit my thinner frame better, as it held everything better in place that the lose strapping could. Once again, thank you to Tino for helping me figure out a solution, I owe you some chocolate or something The second was me putting extra strapping around the buttplate, which helps pull it in more. Due to me being a bit too thin for my armor, you could often see the inside of the buttplate before this change. Now it's snug and form-fitting. The third change is a bit absurd to most, I believe, but it fixed something that annoyed me on most pictures of me in armor so far: the small gap at the top of my thigh. Due to me accidentally angling the cuts at the top, there's always been a small gap there, which doesn't really fit the overall design of a TK, in my opinion. Since I was already working with ABS paste, I decided to go ahead and fill that gap. Next improvement was fixing the back of the shins. As you can see in the picture below, the shins used to not align properly in the back -- partly because RS shins just have a weird shape, and probably also, because I didn't align the two parts properly, I believe. This fix was a bit more difficult and I'm still not 100% happy with it. I'll just wait until I've trooped in it, to see how well it holds now and if I need another approach. The last change that I can think of right now was moving the S-trim around the helmet, so there's no longer a small gap at the back of the helmet. Whilst I was at it, I also gave my helmet a bit of a paint touch-up Ohhh, and Biggi (Swoby) gifted me some very cool hand cuffs for Christmas! Whilst I'm sure there's been a few other things, these are all that I can think of right now. As the trooping season starts back up in Germany, I'm planning on doing an ESB conversion, so that's where I'll probably start a build thread soon. Towards Spring/Summer I'm planning on applying for EIB and possibly Centurion with this armor. Additionally, I've been helping out a few TKs in my Garrison, which has been really fun -- hopefully I can convince them to try for EIB as well. That's all from my side so far, thanks for reading and I'm looking forward to feedback!
-
FISD Master Armorer Program - Overview
Morgi replied to Daetrin's topic in FISD Master Armorer Program
Glad I could be of help! I'll make sure to talk with some fellow younglings about this, see how we could get more interest in this forum and the higher levels. First thing though? Get on social media -- like Instagram or even TikTok, if you want to be adventurous. Interact with the people on there, share interesting information about the FISD, about EIB and Centurion. That'll probably be the easiest step and the best way to get the younger generation involved. If this means more DPROs or Attachés that might be something worth thinking about Oh -- and avoiding such statements as "younger people are entitled" may help to get the younger people past "older people are so boring, so there's no need to interact with them on the FISD" -
FISD Master Armorer Program - Overview
Morgi replied to Daetrin's topic in FISD Master Armorer Program
So, I'm not Centurion (yet), but I thought I should chime in with my own observations as an 18-year old that frequently interacts with the U30 folks that I've met so far. And I can't really support this thesis. I've talked for hours with others my age or a bit older and whether they had a commission build, an old armor from another member or a self built armor, they were enthusiastic about improving their armor. "You can show me how to do this padding? Awesome!", "Could you help me fix this alignment?", "What do you think about reducing this gap?"... Today alone I had three talks with four others -- one 17yo aspiring 501st member, a 20yo that I'm helping get his armor approved, one 27yo TK and another who ordered his kit as we were speaking...! All of them interested in the higher levels, in taking their armor a step further. None of them active in this forum. Same thing with a Centurion TK (26yo, I believe) that I know. So why are they not applying/active? Certainly not entitlement or laziness. After all, I've spend hours working with them on armor or talking about it. You know, I actually asked them why they weren't active on here. This forum simply isn't very interesting to them. Okay, so there's been memes now that they certainly enjoy when I share them on Instagram, but aside from that this forum offers few things that they couldn't find out locally, or via talking to people on Instagram, in person or the local forum. They refer to this forum if they need to know something but otherwise don't interact with it, not posting a welcome post, because why write one if you're never gonna interact with them again? Therefore they don't get the link talking about lvl 2 and 3. I've actually had a few be surprised at it -- and then not research it themselves but work with me and other Garrison members on improving those details. Actually applying for lvl 2/3 wouldn't offer them anything that they don't already have though, aside from a certificate, so they're just happy with their improved armor. And what's the solution? Honestly? Reach out to the younger generation and get us interested. The FISD Instagram account is quite inactive, the forum doesn't offer many opportunities to interact in a way that they can't already in their garrison and lvl 2/3 have no incentive aside from better accuracy (which one can achieve without applying for them). Just my two cents as an 18yo -
As the resident expert regarding relationships, with exactly zero experience, I'd suggest you communicate and win an ally in your quest for ultimate nerd-y-ness
-
Hello and welcome to FISD! I can't speak for AM and AP, but I can tell you that the RS armor is screen accurate with all the flaws. If you truly want a screen accurate armor without a big blob of paint on the helmet, that might not be the best choice for you Good luck on your journey and keep asking questions!
-
I've had this happen to me. Didn't clamp the snap, took care not to get E6000 on the metal... Must have missed something and now got a nice, snap-shaped imprint on one piece of armor Thankfully it isn't very noticeable, unless the lighting hits just right or you see it up close in person Not the best quality picture, but you can spot the slighter brighter (and raised, ouch) half-moon circle. Yay for heat-reactions and heat-bending...
