ocmano
-
Posts
133 -
Joined
-
Last visited
-
Days Won
1
Content Type
Profiles
Forums
Gallery
Articles
Everything posted by ocmano
-
Wearing it, Changes from other selfie above: 1. Stop Strap to keep the chest from separating too far from the ABS and having a gap. 2. Belt moved down so top lines up with bottom of AB button plate. 3. Shoulders tightened from 1 inch of bell edge to snap middle, to 1/2 inch. Waiting on E11, then will be submitting. Do you have to do Basic first or can you go straight to Expert?
-
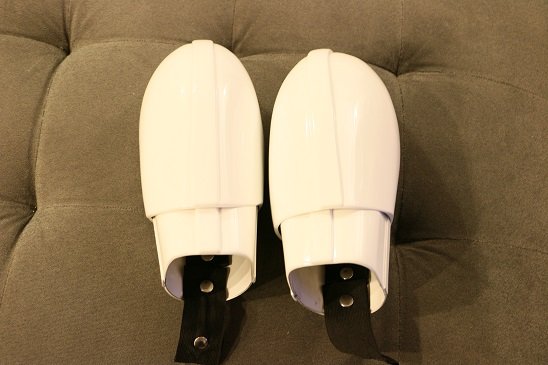
TK Boots (nothing controversial there I hope)
-
Belt, Dropboxes, and Holster. Did have to move the snaps on the belt to the edge to get the belt to line up correctly when wearing it.
-
AB Buttons, Split Rivets, Strapping and Back.
-
New helmet pics. This is with the tube stripes moved up within about a pencil width from the cheek. Had to repaint ears as well to try and sharpen them up.
-
The Home Depot Rubber gloves with the AM provided hand plates. (Have the silicone hand plates from Trooperbay, but I don't like them as much)
-
Knee Ammo Packs Rivet.
-
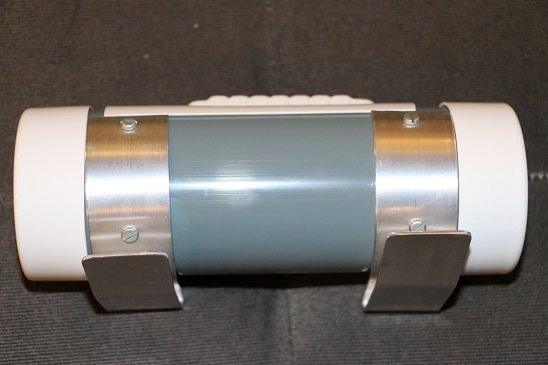
Thermal Detonator Screws. I know people get caught on these, hope these are correct.
-
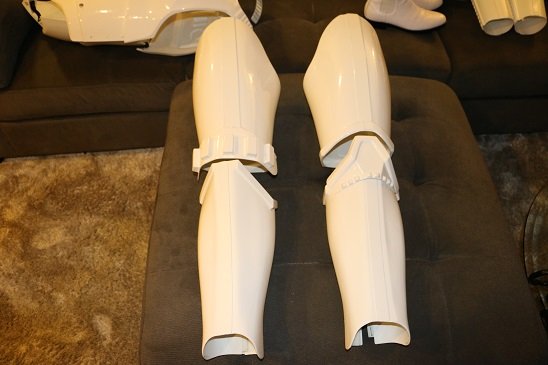
Shoulders and Legs
-
Already did. I'll upload more soon. Some of the pictures are already fixed. Sent from my SM-G955U1 using Tapatalk
-
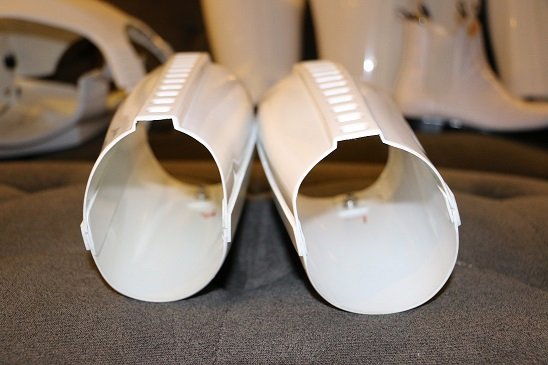
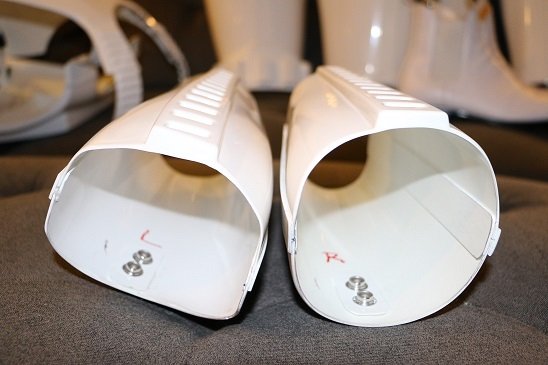
Here's the forearms close-up for inspection. Front return edge ground enough? Back Front
-
I'll add individual piece pictures a bit later for review. Successfully could wear it by September 11th. Had a gap between the Chest Plate and AB plate opening up, likely due to the chest brackets being too short so it made the chest sit too high. Didn't make the brackets, so don't think I'll attempt to make longer ones. Instead, I put in a couple of snap plates and stick a stop strap between the Chest snd AB plate to keep them seperating too far. Tested it and worked pretty good. Will post updated pictures later. BTW: Can't believe the touchscreen on my phone worked with the rubber gloves on. Bonus! Sent from my SM-G955U1 using Tapatalk
-
Day 11 - September 9 Helmet 1st coat painted (would need to redo the ear bumps later, and cleanup the chin). Tube stripes would need to be moved up as well (fixed now) Electronics in, and I could fit my giant head in there as well! [emoji16] Sent from my SM-G955U1 using Tapatalk
-
Day 10 - September 8 Helmet constructed. Onto painting and adding in the electronics. Sent from my SM-G955U1 using Tapatalk
-
Day 8 - September 6 Belt complete, Thermal Detonator complete. Onto helmet and painting. Sent from my SM-G955U1 using Tapatalk
-
Day 7 - September 5 Appendages and body mostly done. Got great rubber gloves that fit XL. Belt, dropboxes, and thermal detonator in process. Sent from my SM-G955U1 using Tapatalk
-
Day 4 - September 4 Shoulder strapping done. Interior coverstrips on arms drying, calves drying, thighs fitted and drying. Sent from my SM-G955U1 using Tapatalk
-
Day 3 - September 1 - Forearms fitted and constructed. (Used E6000 with lots of magnets so I could have multiple pieces drying at the same time) Bought the premade Bracket System, and installed it onto the body plates. Biceps and Shoulders fitted and drying. Sent from my SM-G955U1 using Tapatalk
-
This is a bit of a retroactive build thread. Only had 19 days to get the TK built while my wife was out of the country. Live in a townhouse that doesn't have a shop space, so took over the kitchen and used the balcony for cutting and sanding. Day 1 - August 30 - BBB day. Had used the list in the thread to make sure I had all tools, snaps, rivets, strapping, and glue ahead of time. AM pre-trimmed so that saved a lot of time. Started Arms first, legs next, body, then did helmet last. Sent from my SM-G955U1 using Tapatalk
-

Chest Plate and Ab gap with the Bracket & Loop
ocmano replied to ocmano's topic in Hard Armor (General Discussion)
I'll do a retroactive build thread. Finished most of my build in 12 days, and took a few pictures, but didn't take the time to do a build thread. Had to get it done fast before my wife gets back from her trip since I was using the kitchen as a shop since I live in a townhouse. Only had 19 days to get this all done really. Got a stop strap with snap plates installed already and it stops the chest from pulling up too high. So that's 'fixed' for now. What I think is the real issue is the top brackets that go onto the chest plate ridge might be too short. If they were a centimeter or two longer it'd keep the chest down over the abs much better. Might eventually try and make my own longer brackets, but the stop strap seems to work really well for now. I'll get build thread started and post anything more over there. -
So got it all on, and the Bracket and Loops between the Chest and Abs seem to be 'pushing' the chest plate up above the top of the Ab plate when I raise my arms at all. Thinking of doing bigger elastic loops so the chest plate csn sit further down over the Abs. Think it'll help, or should I not worry about it? With my arms down the gap is gone. Would a 'stop strap' that's the length to stop the ABs and Chest from separating far enough, to make a gap, be permissible? Was thinking of putting in a couple snap plates on the Abs and Chest, right by the gap, then adding a short snap ended piece of black strapping to halt the two pieces from separating too far. Still could flex down, but the strap would stop it from flexing apart. Thoughts? Sent from my SM-G955U1 using Tapatalk
-
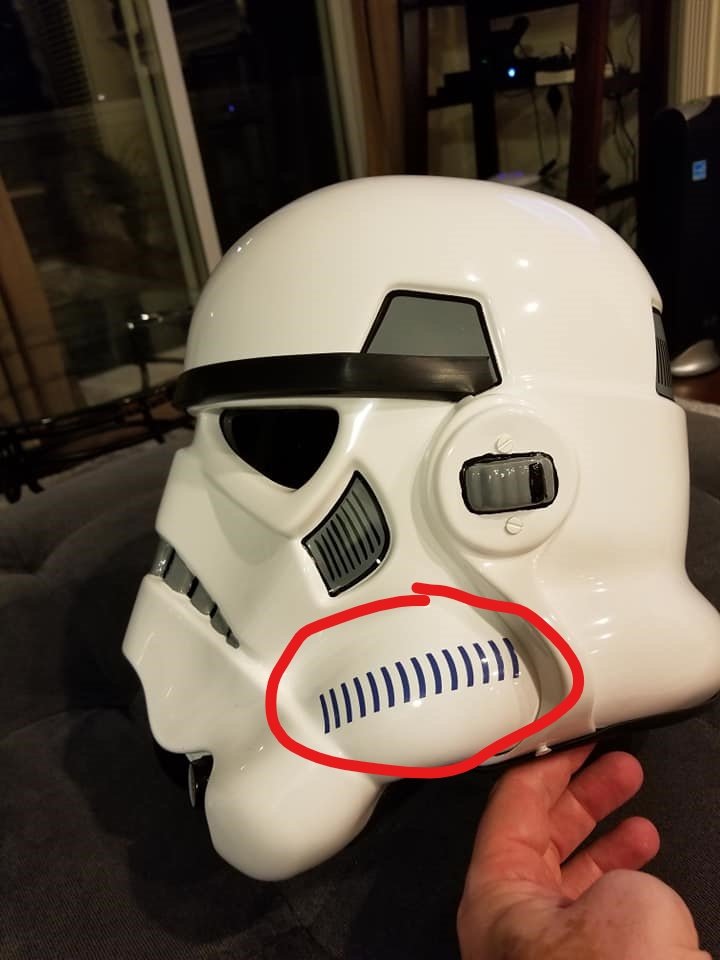
Helmet Decal Clear Coat protection - Tube 'Gills'
ocmano replied to ocmano's topic in Assembly, Mods, and Painting
Alright, just saw the other thread right after this one with the reference pics. Looked around and found a 2nd set of decals in the kit. Here's new pics with them moved up. Better? Sent from my SM-G955U1 using Tapatalk -
Helmet Decal Clear Coat protection - Tube 'Gills'
ocmano replied to ocmano's topic in Assembly, Mods, and Painting
Left side bulges out a bit more than right, not sure if I can move them without getting another decal set from Trooperbay. Tried setting the start and end at the same location based on the jowl and ears. Could try masking off the tubes and paint them. Have the right color for it, just don't know if its needed for approval or not. Sent from my SM-G955U1 using Tapatalk -
So about wrapped up, but a little concerned about the tube gills that are decals on my helmet rubbing off by people grabbing the helmet there. Now I know there's clear coat sprays out there that I could put over the decals to cover them and make it more resistant to rubbing off. Anyone use a clear coat, or have an idea how to protect the tube decals? Recommendations on what to use?

-
Yeah have both. Thought I'd try using Zap-a-Gap on this part since it seemed pretty straight forward. Used E6000 on about everything else. Considering I hadn't trimmed the part correctly, kinda glad that Zap-a-Gap was so brittle. It popped right off. Using E6000 to put it on, correctly now.