tk0084
-
Posts
67 -
Joined
-
Last visited
Content Type
Profiles
Forums
Gallery
Articles
Everything posted by tk0084
-
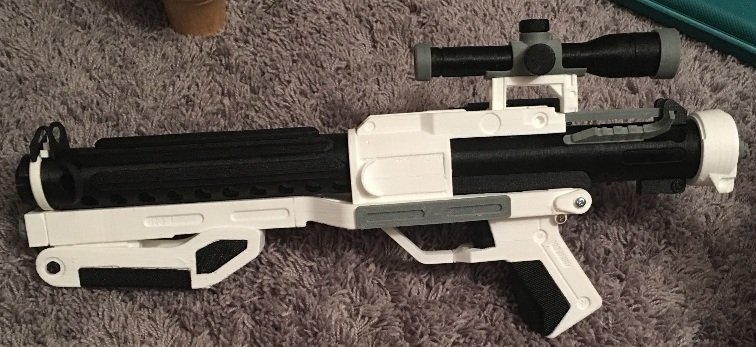
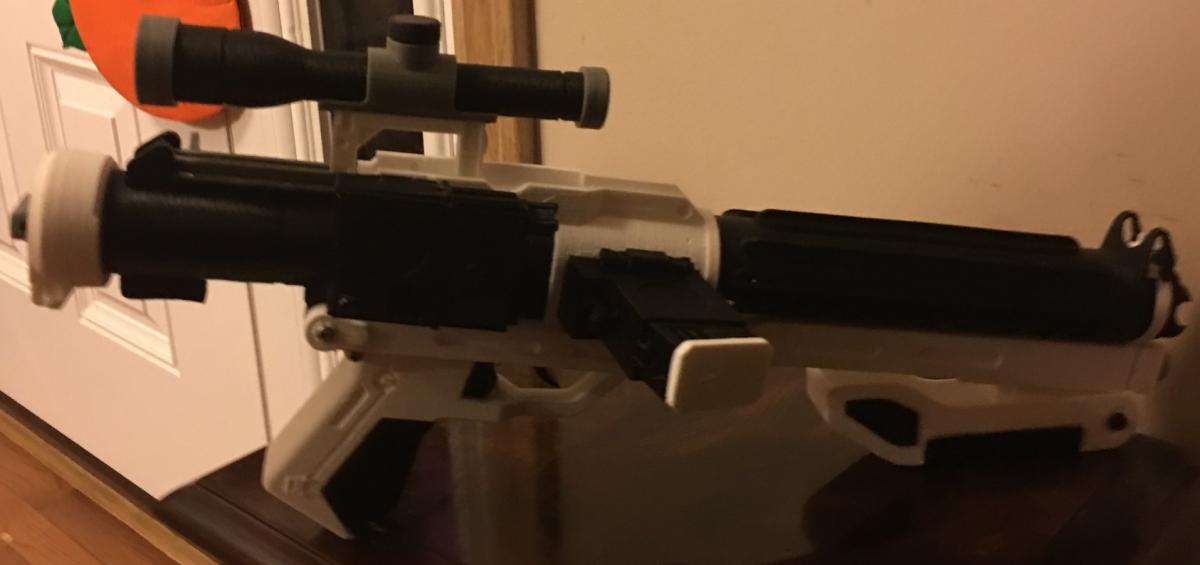
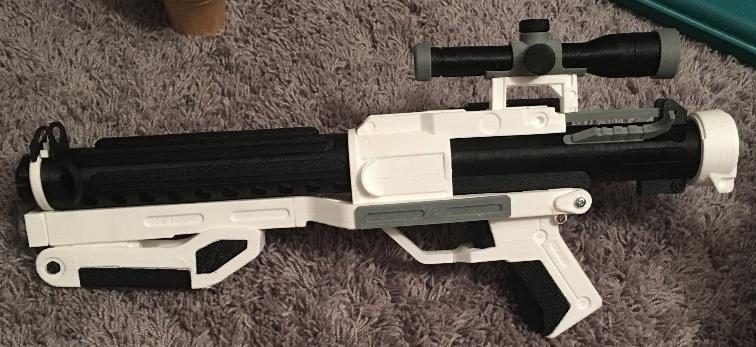
Sorry, I missed this part of the post. I print with a 20% infill and it's not squishy at all. It holds form great, is stable, and sturdy. I am very impressed with the way this turned out. I have a few orders for more. If I could figure out how to post my videos on here you'd be amazed at the durability of this stuff as well as how well it holds it's shape. A PLA blaster weighs in at 1.25 lbs and the TPU/rubber blaster weighs in at 1.35 lbs.
-
I've shipped several overseas with no issue. Shipping on them is around $40. I charge $75 for a standard blaster kit printed in PLA if you're interested. I can print the tactical stock for an additional $25 and I print the heavy blaster for $150. I've also begun printing in TPU (a flexible, rubber like filament). I'm still working on finalizing pricing on them.
-
It's very flexible but not as flexible as Ninjaflex. TPU is listed as a shore hardness between 90 - 95A where NinjaFlex is usually 85A. I have a bowden extruder (2 actually) and the trick is slowing them way down. These take 2 - 3x the hours to print than a PLA blaster.
-
I've posted it on the First Order group on FB. If I knew how to post it here I would. My 4 yr old laughed and wanted me to throw it down the stairs several times. Check you FB Messages, I'll send you the video there.
-
TPU
-
correct, there is no droop.
-
I just thought I'd share a couple pics of the blaster I just finished printing in rubber. The 1st pic is the blaster after I finished assembly and the 2nd pic is the blaster after I threw it down the stairwell (I have video of it being thrown down as well). I did this to show the durability of the blaster printed in the flexible filament.

-
ANH Behind the Scenes or Original Armor Reference Photos
tk0084 replied to a topic in Hard Armor (General Discussion)
Have you ever held one? -
While this opinion may be factual it will also become a reason that we don't get any real information out of these individuals. You've asked several good questions that continue to go unanswered & beginning to insult the people that you/we want to get information out of is not going to get them to pony up info, it will just continue the derailment of this topic & cause more drama for the next 1000 pages. Let's get back to the 4 questions that were asked a few pages ago & stop w/the pettiness.
-
Gino, Matt, Jez, or anyone else. Please tell me & everyone here how the path of dealings between individuals w/the drama is history? We have read time & again each interpretation of who has original molds, who sent/sold/stole from who, why, where, when, etc. None of these historical "facts" answer the 4 questions. So who wants to be the expert & step up to answer the 4 questions that TK4510 has asked?
-
Sadly I don't think that these questions will be answered because the ego's that know the answers want to fight about personal deals & have everyone bow to them & claim their infinite armor wisdom.
-
The name calling, slave Leia slapping, finger pointing, things haven't been this entertaining since Real World San Fransisco!!!
-
Ok, I'm only on page 5 but I noticed on page 4 that JJ states that Matt never made molds or casts several times & then a few posts later says that he did make casts to send to Dan. So which one is it? Now back to page 5.
-
While I haven't read this whole thread I would say that you shouldn't be anxious about building an AP kit. If you have modest model building skills then this kit is pretty easy to but together. I suggest that you research different methods on different sites that people use to build their kits while you are awaiting delivery of yours. Then by the time you get it you will have a clear direction on what method you are going to use & you will have it put together in no time. I built mine in 2 weeks by utilizing the method above. I have fans, mic, & speakers in the helmet from day 1 but be slightly careful on how you trim certain parts. You can recover but they are meant to be cut certain ways. If you are uncertain ask here or contact the builder, he is very quick to get back to you & always willing to give proper advice. Good luck.
-
Yes, I picked them up @ Ace Hardware. They are a 2 piece set, sometimes called chicago screws. You need to trim down the screw & other end to fit but because they are nylon they are easy to properly trim down. I don't know what Ace calls them but you want to find something like the item pictured in this link but in white. http://www.screwpost.com/index.php?cPath=2...b902694f91a503e
-
Instead of utilizing rivets to attach the knee plate to the shin try white nylon screws. They are the right color & if anything ever goes wrong you just need to unscrew them & replace. I try to make as many things easily removable as possible for any unforeseen future problems.
-
Well then you should have it all trimmed out on the 1st Sunday, sanded on the 2nd Sunday, put together on the 3rd Sunday, & the helmet completed on the 4th Sunday. Well that would be my time line anyway, lol. I found the AP kit to be pretty easy to get done. I'd say that it took me 2 weeks but out of the 2 weeks I really only spent 4 or 5 days on it so if you only have Sundays you should theoretically be able to get it done in a month (roughly). BTW, I absolutely love my AP kit & I'm so glad that I bought it. Anyone need an FX kit? lol.
-
I used a dremel w/the reinforced cut off discs to cut everything out. If you're not good w/a dremel practice on other things before going to town on your armor.
-
Please add me TK084. Thanks
-
I used hot glue on my FX bucket & it's held just fine.
-
How did you fix your knee plate on your AP kit
tk0084 replied to Bigturc's topic in Hard Armor (General Discussion)
I added white plastic/nylon chicago screws (I know they have another name but I don't remember). I was going to go with rivet's but I wasn't sure if they would hold & I didn't want to paint. The screws I used were perfect. I had to cut them down a bit but it holds the knee plate perfectly. I don't have any close ups of the knee plate but here is a recent pic. I don't get to this board often but you can PM me on the legion forums (same ID) for some close up pics. -
Actually, I know that AP was producing armor w/a cheaper plastic & the kit w/shipping was going for around the same price as FX. I do not know if he is still producing the kits w/the PVC plastic or if it was a 1 time attempt but if you're considering a change of armor you may want to investigate.
-
My suggestion, just cut the eyes like you see on the FX bucket, so there is no beveled edge touching the lense, just the straight edge of the plastic. Don't cut it so there isn't depth, just cut away where the mold starts to curve flat.
-
I'm amazed that they don't have it, every walmart I've been to carries the stuff. You checked over near the paint section, right?
-
Instead of windex try soapy water. When I did my AP decals I simply took a small bowl added water & 10 or so drops of dish soap. Then I simply used my finger to apply the soapy water to the helmet, put on the decal & smoothed it downward w/a paper towel to remove excess water, help dry, & remove air bubbles. It really worked great & was much easier than I could have imagened.