

steamboatphan
-
Posts
175 -
Joined
-
Last visited
-
Days Won
1
Content Type
Profiles
Forums
Gallery
Articles
Everything posted by steamboatphan
-
 Here's a shot of the apoxie sculpt fully cured and sanded down for the bicep. smooooth just block out my battle damaged fingers in these pics... lol
 -
Had to run to Home Depot to get a must needed tool for this build. gonna try and get the pill holes on the biceps done along with the bicep trimming done today. Gotta take advantage of this beautiful weather and do some sanding outside today too.
-
updated supply list at the top
-
I used that paint on my blaster, so I guess there's no turning back now! [emoji6] Sent from my SAMSUNG-SM-G928A using Tapatalk
-
As of right now, I think I'm going to go with the rustoleum 2x painters touch gloss white. From what I hear, anovos has stated that this is the best match to their helmet. The only downside is possible cracking due to the extreme flexibility in the ab armor. A custom paint shop would be able to spray flexible paint that would match the color, but that'll cost you a small fortune. Sent from my SAMSUNG-SM-G928A using Tapatalk
-
Last thing for the day was to mark my cut lines on the biceps and fill in half of the diamond on the biceps.... I'm using "Apoxie Sculpt" to fill in the half of the diamond. This stuff is amazing: its able to be handled/sculpted in a 4 hour window and dries rock hard in 24 hours. obviously, i will sand this down with a needle file and sandpaper once it's cured Here's my cut line sketch:
-
Today I did some light sanding on the outside of the chest plate with a 220 grit sanding sponge. i then decided to cut out the pill holes and chest "vent" First, i took a drill and put two holes in each pill: Next, I used an Xacto knife to "connect" the drill holes and used the metal file(in above pic) to achieve smooth lines: i then used a rolled up piece of 220 grit sandpaper and smoothed the pill holes out even more. Next was the chest vent: I started with the Xacto knife, and just went for it. very very very very slowly. starting with a square, then adding the points on each side. again using a combination of dremmel, sandpaper and file to get clean lines: Front View (with Chest Vent cut out)
-
First things first... once i got the armor i couldn't resist trying on some of the pieces.... dont make the same mistake as me or else you'll have the fiberglass itch for a couple of days! So sand down the inside of all the parts (i used 220 grit, buy you should probably go more coarse than that). Eventually, I will be plasti-dipping the inside of all the armor. Why? because it just looks nice! I'm sure there is other functionality involved with doing this too. After i had everything sanded down and washed off with light dish soap, I tried the armor on.... again. I gotta say, this armor fits me like a glove. I am a bigger guy at 6'1" size 38 waist, roughly 210 lbs. However, this armor can be modified for anyone between 5'6" to 6'1" and waistline 32" to 45" according to jims project run thread.
-
And here are the damaged areas: My plan is to use CA glue to close the cracks and reinforce. Pics to come on the repairs... Sent from my SAMSUNG-SM-G928A using Tapatalk
-
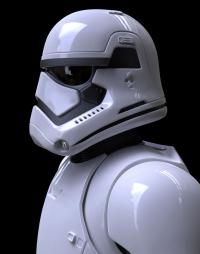
Hey guys, this is my first "topic" on the FISD so bear with me. I'm using tapatalk to upload pics and and links... hope to make this a pic heavy build for everyone that's getting a kit from Jim. Disclaimer: this is my second armor build ever but I am pretty savvy when it comes to crafts and model building. I also have some experienced builders helping me along the way. Let's get started: Here is a link to Jim's kit: http://www.therpf.com/showthread.php?t=245993&highlight=TFA%20armor Here's the PDF for his instructions--------------- Other Items purchased: Anovos standard line helmet MTK pouches Trooperbay belt MO3D Printing Officer Pistol Heston3d Solutions F11-D blaster with removable stock Trooperbay "Jimmiraquois Decals" Imperial Boots and Gloves Extreme Racing Undersuit (stormtrooperundersuit.com) on the waiting list for imperialgaskets Ukswrath's Wireless Audio system Ukswrath's Fan system I'm probably forgetting some things, but will get to them during the build. Supplies and Tools will be mentioned during the build as well. I will be working with Version 3 of Jim's kit (the most current as of right now). The goal here is 501st approval for this armor, and this is one of the few casts that will qualify if assembled correctly. I got this kit in the mail via express EMS shipping from the Philippines yesterday (4-14-16) and the box looks like they played kickball with it. Luckily, Jim is a "tetris master" and was able to pack everything nice and tight with bubble wrap. There were some minor cracks on the TD and the back/yolk and on the codpiece. but those can be easily repaired. Here is the kit with anovos helmet and Jim's Gaskets and Armor: Jim's gaskets
-
we need more pic updates!
-
These look incredible! Can't wait Sent from my SAMSUNG-SM-G928A using Tapatalk
-
Thanks for the update Heston! appreciate all your hard work
-
Requesting 501st access! TK 91583 Midwest Garrison approved today! http://www.501st.com/members/displaymemberdetails.php?userID=21050
-
Also, do you know a good place to get an assembled E-11 blaster?
-
what did you use to cover the inside seams of the armor?
-
Just got my FOTK kit today, Looks and works great! Love how the speakers come out of the vents in the helmet!
-
I was a victim of this Furry Props seller. I'm glad to say now that they have been banned from selling on Etsy and I got a full refund. Thank you Jim for getting me on the list for the OG armor
