

steamboatphan
-
Posts
175 -
Joined
-
Last visited
-
Days Won
1
Content Type
Profiles
Forums
Gallery
Articles
Everything posted by steamboatphan
-
 yes! like i said earlier, i am 6'2" about 220 lbs. I believe that this armor would be a lot harder to build if you are really thin.... More mods, at least.
 -
all i did was give the inside of all the armor pieces a good sanding with 220 grit sandpaper... some areas are shinier than others... those would be where Jim reinforced the weak spots of the armor.
-
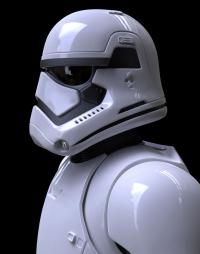
Painting the chest plate: I ended up doing about 3 coats of paint. with the grey primer down, i wasn't able to get the bright white i needed after 2 coats - as seen in this photo: After another coat of paint, the color matched the Anovos bucket 99%
-
For connecting the ab opening together i decided to do snaps. Clearly, i will need help to get in and out of this armor. The middle elastic piece is a quarter of an inch shorter than the top and bottom ones... i will adjust later so they will all be the same as the middle strap. also, note the straps to the buttplate. The thermal detonator will cover the 1.75" gap on the back as well.
-
Strapping cont.. I ended up just gluing the nylon webbing straight to the ab. You want the cod piece to sit flush with the ab. The belt will go over the cod, there is not groove for the belt (on the front of the cod piece), like on the anovos mold.
-
Leg strapping.... Pretty self-explanatory. sewing skills are a plus. 2" elastic straps, 2"nylon belt
-
the mailman just came by with my boots! (imperialboots.com) and some more swag... the neverending swag....
-
The harness was custom made by TK 265 specifically for me. I dont think i could replicate it if i tried. it's a combination of elastic and nylon webbing. WHY SO SERIOUS!?!?
-
Okay, I'm back. I got a lot accomplished over the weekend as far as strapping goes. Shout-out to TK 265 for all the help! first off i made about 30 snap plates (each at 1X1.5") Next, placement, with some serious adhesive and accelerator. Butt Plate Cod Piece (notice the glue in the pic. This stuff is potent) Abdomen part 1 (front) Abdomen Part 2 (back) Shoulder Bells and Yolk
-
so, i bought some of the SEM gloss white in a rattle can.... when i test sprayed it for color matching, it was waaay darker than the anovos helmet. just throwing that out there. I'm using the rustoleum universal advanced formula gloss white. it matches perfect and the description says high flexibility
-
When did you order it? I've been waiting forever!
-
Jim's holster will work just fine with your blaster too [emoji106] Sent from my SAMSUNG-SM-G928A using Tapatalk
-
The decision to get different holster was just personal preference. I just thought the new one i got looked nicer/cleaner here is a pic of jims holster:
-
I also decided to purchase a different holster from the one that is provided by Jim. If you are interested in getting one, PM me and i'll send you his contact info. these are 3D printed, sanded, primed and painted with metal parts (screws included)
-
Ok... Paint... Since i already have an ANOVOS standard line helmet, my goal was to find a rattle can of spray paint that would match the color of the helmet and also be flexible enough for this armor. I'm starting with the hand guards, as its a small surface area and i have still have yet to start strapping the other armor. First off, I got this primer to fill in any imperfections in the mold (sand down as smooth as you can before priming, obviously) 2 coats of Rustoleum filler primer next, lay the gloss white: I ended up getting this stuff (instead of the Rustoleum 2X painters touch gloss white) because a friend told me he used the 2X and he's starting to see spider-webbing in high stress areas Note where it says "ultimate flexibility". only time will tell how this holds up though I sprayed some scrap ABS from my Anovos OT TK with this paint for comparing to the bucket I THINK WE HAVE A WINNER!!!
-
Wow, that's not gonna be cheap! I wonder if it's just the "complete ensemble" option only at first. Do they even sell premier kits?.... that's gonna be like $3,500 at least! Happy I bought Jim's armor!And of anyone else is on the fence about this armor, just a reminder, it is a limited run, and the waiting list is long, but moving relatively quick. Sent from my SAMSUNG-SM-G928A using Tapatalk
-
Ahhh, it's posts... not likes. Thank you sir. Grand Moff is 3000 posts. Dang Sith Lord 5000! Sent from my SAMSUNG-SM-G928A using Tapatalk
-
Hey, I'm not sure if i'm posting this in the right place, but i was just wondering if you had a list of all the FISD ranks and how many likes you need to get to each one. For example, right now i have 8 likes and am listed as a "Lowly Private".... when is the next rank up? can someone give me a link to the thread with all the rankings?
-
shoot me a friend request Midwest Garrison REPRESENT! lol
-
Pics are back up.... note to self: do not move images on photobucket into a new folder while they are posted on here. Plasti-Dipping with the spray can tonight. Starting off with the hand guards, cuz they are extremely fragile!!! and definitely need a bit of reinforcement. I changed my mind about plasti-dipping ALL the armor pieces. I think with the rubber on some pieces like the thighs and forearms, it may stick to the undersuit, thus eventually pulling the rubber off. I will be spraying the inside of the shoulder bells, the chest plate, and the back/yolk, because all these pieces of armor will be rubbing on other parts. I'm hoping the rubber coating will help the paint from not being scratched off. i may add soft side black velcro for added protection.
-
so far.... yes! This kit saves you A LOT of time on assembly and the flexible fiberglass material is great! Once i start strapping it all together, i'll have more of an idea of how it sits on me and what i like and dont like and what needs to be modified. Also, I've been hearing that ANOVOS will be charging somewhere around $1500 for their kit once it gets released. i was snooping around their FB page and noticed one of their responses about when it will be available.... Pre-Orders will probably start in a month or two, but they stated that it could take up to a year for delivery. If you're anxious to get a FO kit now.... Jim's is the way to go IMO
-
quick update: i will be sanding all the pieces tonight with a 400 grit sanding sponge and start strapping on friday.... meanwhile, i gotta figure out where the hell all my photos went on the thread
-
Trying to figure out what's going on in this pic... are these just pieces sanded down which had the SEM primer on them? What's the grey vs white in color? Sent from my SAMSUNG-SM-G928A using Tapatalk
-
Ok... I was dreading this part because there is no real measurement on where the bicep pill holes go. here is the CRL of them on 501st.com It seems to me that the pill holes aren't quite centered in the middle of the bicep. I also noticed that the pill holes are parallel to the greeblie. I ended up using the trooperbay decals as a template for the holes: Then, I drilled out two holes in each pill, just like the chest plate: using a needle file, i filled out the pill holes, And there you have it! Biceps are done and ready for primer!!
-
OK, so when i marked off the bicep i made the distance from my drawn line to the bottom of the bicep around 5 1/2" all the way around. Using the cutting wheel on my dremmel, i cut along the line about 3/4 through, then cut off the rest using a hobby knife. and remember, SAFETY FIRST: always wear protective eyewear, respirator or face mask and gloves when cutting fiberglass. It may not look like it in the pic above, but the biceps are even. 5 1/2 inches on the "armpit side" the pic below is a demonstration on how flexible this kit is:
