

Cricket
-
Posts
1,317 -
Joined
-
Last visited
-
Days Won
17
Content Type
Profiles
Forums
Gallery
Articles
Everything posted by Cricket
-

Cricket's 3D Print FOTK (TLJ)- ABS, Kid-sized- FINISHED!
Cricket replied to Cricket's topic in TLJ Build Threads
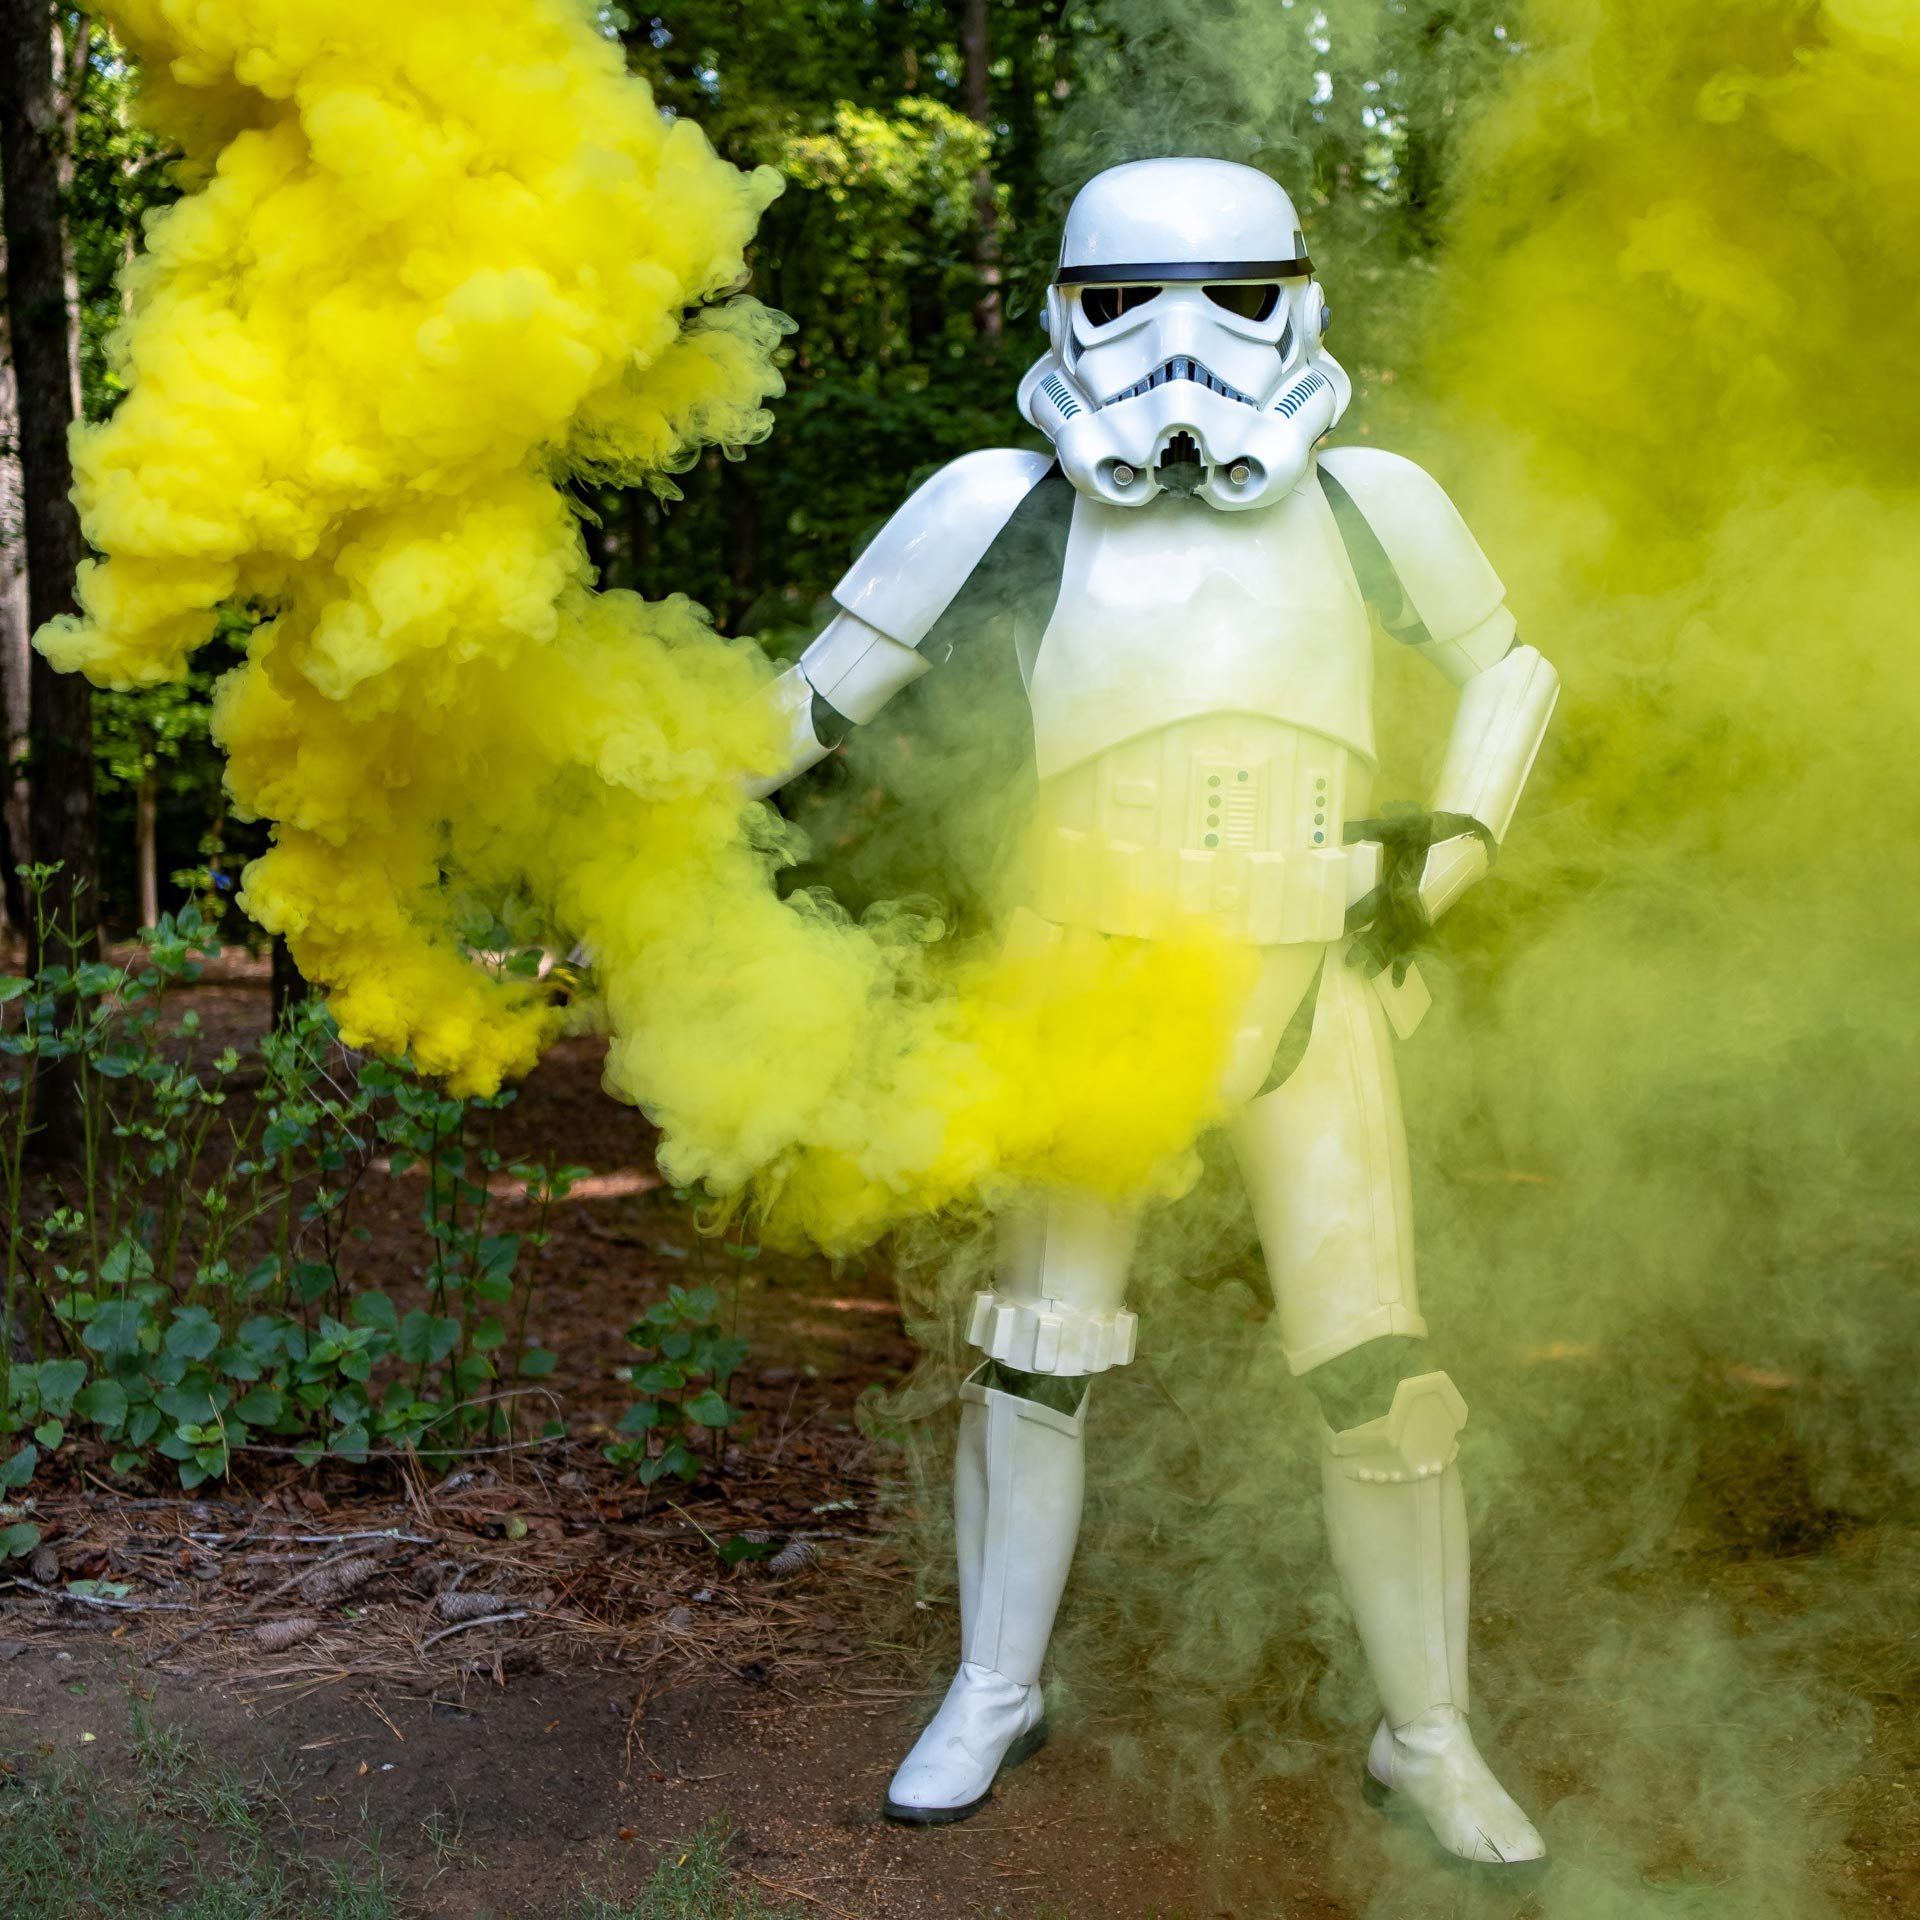
Finally got around to taking some proper photos of Cameron fully suited up in his armor today! This trooper Mom approves. Took it out for a stroll in our neighborhood. Because fall, y'all! Cameron reports that the kit is comfortable and totally troopable! Looking forward to when we can get out and do our thing again. Stay safe! -
Cricket's RS Stunt Build (for the Vertically Challenged)
Cricket replied to Cricket's topic in ANH Build Threads
Yep! I have another RS Hero, though. Always gotta keep a shiny white on hand! -
Cricket's 3D Print FOTK (TLJ)- ABS, Kid-sized- FINISHED!
Cricket replied to Cricket's topic in TLJ Build Threads
From what I'm seeing on the holster I built, the bearing acts as a stopper of sorts. It supports the blaster and prevents the blaster from rotating forward when locking it into the holster. I could be wrong on this, though (I don't have the holster nearby to double check this!). And by adding an extra dimensional element, it looks kind of cool, too. -
Cricket's 3D Print FOTK (TLJ)- ABS, Kid-sized- FINISHED!
Cricket replied to Cricket's topic in TLJ Build Threads
I'm not entirely sure, sorry. My guess is that having 3 layers allows you to put some extra reinforcement in there. I wouldn't use the holster with just the 3D printed layers alone. I can only imagine someone bumping against you and the blaster snapping off of the holster... and it would be difficult to even notice it was snapped off at all if your helmet is on. Having some metal installed in the bracket adds a bit of strength so that this kind of scenario won't be as likely to happen. This is the image I used for reference. For length, I don't remember exactly what I used, sorry! I had a pack of assorted metric screws and kind of tried out different lengths. They weren't the security torx ones because I couldn't find them in the size I needed. Remember that my build was scaled down, so the length would be different for you anyhow. The screws I used exited the inside of the thigh armor just a little bit... just enough so I could get some e6000 on them to make sure they wouldn't go anywhere and also to cover the ends to prevent scratches. I used the 7mm M3 bearings found here. https://www.amazon.com/gp/product/B07FW18RQY/ I think I kind of eyeballed things for size. I don't know if you would need to go with a thicker bearing due to scaling, though. Maybe someone else who has built a full-sized holster bracket could chime in here? @ukswrath? -
Cricket's 3D Print FOTK (TLJ)- ABS, Kid-sized- FINISHED!
Cricket replied to Cricket's topic in TLJ Build Threads
The snaps in the pic look like the typical line 24 snaps that we use on TK builds. That's what I would use. Look for Tandy brand. They attach with a hammer. You'll need a fastener kit like this: https://www.amazon.com/General-Tools-1265-Fastener-Fasteners/dp/B00004T7VT Or if you prefer to use a little less force for a little more money, you can invest in a snap press. It is my second favorite build tool (the Dremel is my #1 tool!). https://www.goldstartool.com/heavy-duty-press-for-grommets-snaps-buttons-rivets-1-die-set.htm -
Cricket's 3D Print FOTK (TLJ)- ABS, Kid-sized- FINISHED!
Cricket replied to Cricket's topic in TLJ Build Threads
Nope. The chest plate has a slight overlap over the "vest" part of the back/yoke part. I secured the chest plate with industrial velcro at the overlap in the chest area as well as at the side areas where the chest and back plates overlap. It keeps things really secure, but I don't like having to readjust everything each time Cameron suits up. In hindsight (and possibly for future builds), I will probably do this approach: creating a strap across the front part of the back plate that allows for the chest to be secured with snaps. The photo isn't mine, but I like the idea. I think strong magnets would work well for this, too. I probably wouldn't use an ABS strip as they did, but instead use a strap of nylon webbing for this. -
Cricket's 3D Print FOTK (TLJ)- ABS, Kid-sized- FINISHED!
Cricket replied to Cricket's topic in TLJ Build Threads
Also, if you've purchased the FOTK files from CGTrader, I asked the designer to rebuild his holster so it could be made functional. He has redesigned the holster so it should be functional now. I haven't printed them, but they look pretty good. It might be worth a look over there to download the updates! -
Cricket's 3D Print FOTK (TLJ)- ABS, Kid-sized- FINISHED!
Cricket replied to Cricket's topic in TLJ Build Threads
I had no problems at all with the ab section files. I printed at .3 height, 3 walls, 20% infill using a .4 nozzle. The parts are very strong and glued together quite easily (printed in 4 parts as well). What print settings are you using? Do you have pics? Not entirely sure what you're asking here? Suspenders are attached with snaps inside the ab. Male snap plates are glued inside the ab with e6000. I also have quick connect buckles attached on the suspenders (redundancy) in the front. Let me know if you'd like pics or need more of an explanation. The shins are attached with wide white elastic glued to the inside of one half of the shins. They are attached with e6000 on the outer halves... they open kind of like a clamshell. I used wide elastic to allow for a little flexibility while opening them, but not much. So for the left shin, to put it on, the shin halves open on the INSIDE, they are permanently closed on the outer side (the side of the shin that is most visible). For the closure, I used loop velcro stuck to the inside of the shin, and sewed black 1" elastic straps with hook velcro tabs on either end. There are two of these, one that attaches on the inside at the top, and one that attaches on the inside at the bottom. Yeah, the files aren't listed as a FOTK holster. I posted a Make so I could remember where the files are located. Here ya go! https://www.thingiverse.com/make:845162 -
Cricket's RS Stunt Build (for the Vertically Challenged)
Cricket replied to Cricket's topic in ANH Build Threads
I said it would be converted in a few months. Well, other projects got in the way, and life, too... so it actually took a little over 2 years to complete, but this kit is now officially a Sandtrooper! Time to go find some droids! -
Congrats #1000, trooper!!! Woo!
-
Cricket's 3D Print FOTK (TLJ)- ABS, Kid-sized- FINISHED!
Cricket replied to Cricket's topic in TLJ Build Threads
Thank you!!! I've learned a lot during this build. Lots of work for sure, but totally worth it. Thanks! Yeah, but at least I can reprint individual parts as he grows. And then when he outgrows all the parts, I can sell his old kit, and he'll still have a kit of his own. (College fund!!!) -
Cricket's 3D Print FOTK (TLJ)- ABS, Kid-sized- FINISHED!
Cricket replied to Cricket's topic in TLJ Build Threads
The best way to store armor is not in a bin, but on a mannequin. So today I built Cameron a PVC mannequin so he can admire his armor even though he can't troop in it (for now). Took less than 30 minutes to build it, and cost less than $20 for materials. The mannequin torso is a little longer than Cameron's torso (the chest sits higher on the mannequin than on Cameron), but it still works to hold the armor pretty well. Looking forward to getting pics of Cameron in his kit soon! And it's very clear to me now that this build is DONE. Thanks for the help, support, encouragement, and for coming along for the ride! -
Cricket's 3D Print FOTK (TLJ)- ABS, Kid-sized- FINISHED!
Cricket replied to Cricket's topic in TLJ Build Threads
Ah, that's a good question. You kind of have to go with what looks correct on the model. For me, this involved a LOT of staring at suits from the movie and adjusting the parts until they looked about right. Take a look at where the tops of the curved detail on the ab is relative to the wearer. Aim for that, then build the rest of the armor around that placement. I'd say that you don't want the top of the ab cutting into the middle of your chest- that would be much too tall. Maybe start with putting the top of the ab somewhere near the bottom of your sternum and adjust things from there. Does that help? And back to the build... I painted everything last weekend, so I've been waiting for the 2K Gloss to fully cure this week before proceeding any further. And I've been working on finishing up my TK to TD conversion so that's had me a little distracted, too. Thankfully, I finished everything on the Sandtrooper armor last weekend, and I'm just about finished with my Sandtrooper backpack this weekend, so now I can get 100% focused back on finishing Cameron's kit! I glued the forearm boxes onto the new forearms, so that's curing right now (I forgot to take pics). And I added snaps to the new TLJ cod. Just need to get the black details on the forearms and ab boxes, and his kit will be done! Ooh, shiny new cod.... Hoping to get pics of Cameron in his full kit (with TFA helmet) next weekend for Galactic Academy approval. We'll be taking pics for my Sandtrooper submission as well. It's nice to have things to look forward to, especially with so many things that we still can't do. -
themaninthesuitcase 3D printed TLJ build
Cricket replied to themaninthesuitcase's topic in TLJ Build Threads
Sent you a PM, @MomoSS. -
Cricket's 3D Print FOTK (TLJ)- ABS, Kid-sized- FINISHED!
Cricket replied to Cricket's topic in TLJ Build Threads
Hey Sean! Yep, I used ArmorSmith to scale everything down to fit him. For placement of armor parts, I used the CRL pic of the full-body FOTK and screen images as my references as well as studying FOTK Centurion pics. I studied how everything lines up relative to the trooper's body. For example, the bottom of the chest plate ends roughly at where the elbows bend. That was where I started, followed by hours of looking at finished kits. In ArmorSmith, I put the chest and back plates on the avatar all at once, and scaled them pretty much at the same time. They fit together. In ArmorSmith, you can color code each piece as well as change the opacity of the parts. I put the opacity at 50% and each piece had a different color. You will be able to see when parts intersect/overlap with each other or with the avatar as you move them around the avatar. You will also see how much gap you can make between your avatar and the armor part (always allow for gasket thickness!). I spent a few hours just manipulating the parts around on the avatar until I got them just right to my liking. Parts were not all scaled the same on the same axis, which was a surprise to me. For example, my son's chest/back were scaled (XYZ) at 76%, 80%, and 75%, but the ab/butt/cod were scaled at 76%, 80%, and 73%. The forearms are scaled differently, as are the shins and spats. Heads up: the spats need to be scaled up to properly fit the shins. The designer thickened the shins to repair the thin walls, but didn't compensate for this by correcting the spats to fit. I've had to add an additional 3% on the X and Y for the spat to fit correctly. Good luck with your build! -
Cricket's 3D Print FOTK (TLJ)- ABS, Kid-sized- FINISHED!
Cricket replied to Cricket's topic in TLJ Build Threads
Since I was reprinting larger forearms, I decided to also print out a larger set of shins while I was at it. The current shins fit fine for now, but I can tell that those are going to be the next parts that the boy will eventually grow out of. My plan is to have a batch of parts ready to paint so I can maximize use of the expensive 2K Gloss. I also printed out a new cod that reflects the TLJ cod much better. Here is some of that batch of parts, all spot puttied up. I love how nicely spot putty wet-sands, so I coat it all over when I can. Ignore the Sandtrooper backpack greeblies. I'm working on that as well (it's for my eternally slow RS Sandtrooper conversion!). This morning I remembered that Germain mentioned something about the TLJ forearm cut (TLJ pic on the right). I figured that now's the time to take care of that detail! I penciled in the cut line at the top of the forearm where it looked like the cut should go. Then lopped it off with a cutoff wheel and smoothed out the edge with some sandpaper. Pretty easy mod to add a little accuracy. It's raining today, so no painting. Tomorrow looks like the sun will be out though... fingers crossed that I can get everything painted soon. -
Hey Michael! Good choice of the RS armor! You will be very happy with it. I've built three RS suits and have never been disappointed in the quality of their stuff (and with the customer service as well!). The Georgia Garrison is full of an amazing group of passionate and fun troopers. You will find no shortage of people who will be very excited to assist you get your armor up to snuff. Looking forward to seeing your build come together!
-
Cricket's 3D Print FOTK (TLJ)- ABS, Kid-sized- FINISHED!
Cricket replied to Cricket's topic in TLJ Build Threads
So, I was having the boy try things on yesterday, and suddenly Cameron began complaining that the forearms were too tight around the wrist. Wait, whaaa??? They weren't too tight before! OMG, nooooooooo..... I Dremeled the insides of the wrist to open them up, but there really wasn't much to be removed. Cameron was gracious about the little bit of modding I did to the forearms by saying, "It's fine, Mom, really. It won't hurt that much. It'll look fine. I can take it." He was being really sweet because he knew how much work went into everything so far, and he didn't want me to have to make even more parts. I explained to him that the good thing about having a 3D printer is that we can make new parts as he grows, and I had expected this to happen. Welp, I knew it was bound to happen sooner or later... the boy needs larger forearms now- even before his first troop. Okaaaay, so those parts won't just magically appear themselves! I turned on the printer, scaled a larger forearm, resliced the file, and am currently reprinting new (larger) forearms and forearm greeblies. The old scale was 76, 76, 73, and the new scale is 78, 80, 73 to allow for a wider (and slightly more oval) opening at the wrist for more comfort. I printed out a test wrist piece first to verify the X and Y would be large enough, but not too big. Each forearm takes about 12 hours to print and the greeblies will take another 8 or so. Nice thing is that the forearms print all in one piece, so sanding and painting will be fairly easy. Time to buy some more 2K Gloss! -
Welcome Kaitlin! I've sized down a WTF kit to fit a 4'11" garrison friend, so you can rest assured that the WTF armor can be modded to fit your height for sure. You've got this! How tall are you? Post lots of pics, ask tons of questions, and don't let the build scare you. We're here for you. Jump in and have fun!
-
Cricket's 3D Print FOTK (TLJ)- ABS, Kid-sized- FINISHED!
Cricket replied to Cricket's topic in TLJ Build Threads
Okay, let's talk SPATS. I mentioned earlier that I was working on assembling the spats, and now I can safely say that I am done! Here's my own take on these: First, I had to cut the file so the back seam and buckle part could be completely detached from the front part of the spat and still remain in one piece. A little time in Meshmixer took care of this easily. Next, I had to figure out how to attach the spat together, allow it to open, and still remain fixed to the shin. I read recently that the screen used suits closed using a snap popper and velcro, and the front half was attached to the shin with VHB tape. I decided to emulate this with some changes. If you've followed my magnetic shin mods for my TK builds, you can guess that it didn't take much for me to realize that a magnet would work perfectly in this application instead of a snap. I had an assortment of N52 magnets on hand, so I picked out something small that would fit nicely and still remain hidden. Here you can see the hole I drilled for the magnet. I made sure that the magnet would fit through the hole without any issues. It's a go! Next I made a few magnet buttons (one for each spat). I cleaned off the extra E6000 later. While the glue cured on the buttons, I made a mark for where the opposing magnet needed to be glued on the outer part of the spat. Here you can see the pencil mark where the opposite magnet will go. I used some blue tape to make sure that the spat was lined up well, then glued the magnet on the outer half of the spat. Here you can see how it fits inside the hole. And how it looks when it is open. I made sure to clean up the excess glue from around the magnet to ensure a tight closure. Here are the magnet buttons fully cured. I trimmed the extra plastic around them to make sure they fit nicely in the inner part of the spat. Inside button glued in place. Outside view so you can see how tightly the closure connects. Additional view of the installed magnets. The magnets stay locked with the magnetic attraction and the physical lock of the opposite magnet being seated inside the hole of the spat. Additional views: Next I took some VHB tape I had on hand to attach the spat to the shin. I stuck some leftover Velcro tape vellum to on the tape to make the VHB tape easier to work with while trimming. Stuck on. This is just a temporary test fit for now, which is why the segment is short. I then attached loop velcro to the spat and sewed some elastics with hook velcro for closures. Spat stuck on and it looks good to me! Back view of the half-assembled spat. The boots I bought for Cameron didn't work out (not at all like in the pics in the eBay listing!), so I picked up some leather-like Vans that will work well for him. I still need to paint the bottoms rubber black. I had Cameron try on the shoes and shin with the spat in place. Here you can see how the spat fits. The spat is only attached to the shin at the front, allowing flex of the two halves for the foot to go in the shin part. You can see the flap of elastic and velcro on the right. That will secure the spat and allow for a little flex if needed. The elastic flap allows for a hinge-type closure, with the magnet locking the halves together. Closed and easily locks. Magnets FTW! All together now! Ideally, I should have left the VHB tape alone for several hours before attempting to mess with it. I found it came off pretty easily once we removed the shin. This might also be because the 2K gloss is really slick stuff, and I think most tape adhesives would have a tough time sticking on it. I think a good solution to adhere the front of the spat to the shin would be to simply glue it there with E6000 and let it cure for a few days. That will be my next step for these. Overall, I'm pretty happy with my spat solution now. I'm still adjusting strapping and gaskets, so work now can proceed on other areas to take me to the finish line. -
Congrats on your BBB day and your shiny white FOTK kit! Looking forward to watching your progress on this. I know @shashachu has been slowly working on her FOTK for a while- she's on the smaller size as well. You're definitely in the right place to get your build going! And welcome to the Georgia Garrison!
-
Cricket's 3D Print FOTK (TLJ)- ABS, Kid-sized- FINISHED!
Cricket replied to Cricket's topic in TLJ Build Threads
Ah, I was still adjusting fitting (and am still learning how all the pieces should assemble together), so how the forearms are facing is most likely my fault for just throwing them on quickly. It took about 40 minutes to get the armor on him because I'm still not familiar with how it all should be aligned, and Cameron was losing his patience with me putting on and taking off things to adjust. :p At one point he was like, "OMG, Mom, aren't we done?" I had to laugh because I'm all about how it's supposed to line up, and he's just wanting to walk around in the kit. I'll work on getting things better lined up with the gaskets so I don't have to make adjustments as we put them on. Is that cut on both sides of the forearm, or just on the front side? -
Cricket's 3D Print FOTK (TLJ)- ABS, Kid-sized- FINISHED!
Cricket replied to Cricket's topic in TLJ Build Threads
Test fitting today!!! Test fittings are awesome, but also a challenge to get through. I love seeing everything together for the first time. But I am not a fan of all the fine tuning that is so necessary at this stage. I still need to add black paint to the ab boxes. Adjustments need to be sewn into the belt for the thighs and rotations adjusted. Suspenders also need adjustment. The big one is that while I thought I had the biceps rigged in well, they just weren't hanging correctly with the strap I had installed in them. I have velcro sewn into the ends of the vest sleeves, so I used that to temporarily secure the biceps on the arms. The biceps kept slipping down as Cameron moved around, and as a result the forearm ends were cutting into his wrists. I'll have to make this connection more robust for the next fitting so the biceps stay put. Oh, and I put the leg gaskets on in the wrong orientation, so I couldn't put on the knee caps (and we weren't up for taking off parts again). D'oh! Now for the pics! Short test fit video. Again, biceps were slipping and will be fixed. Cameron is always so animated until I get the camera on him, then he's Mr. Serious! His boots arrived right after we took pics- how's that for timing? And I'm still adding paint to finish the helmet, but that should be done soon. Very close to being finished!!! Time for me to take a well-deserved break before finishing the detail work. I always get a little sad at the end of a build, so I want to prolong things just a little to enjoy it without feeling exhausted. EDIT: and spats are currently in assembly mode! -
Cricket's 3D Print FOTK (TLJ)- ABS, Kid-sized- FINISHED!
Cricket replied to Cricket's topic in TLJ Build Threads
Gloves. Impossible to locate somewhat screen-accurate gloves in Cameron's size. I even bought a pair of FOTK gloves from Endor Finders in their smallest size, but they are huge on him. I decided to upgrade the old gloves he wore with the old suit instead. These are Rubie's kids size FOTK gloves. Essentially, they are made of stretchy polyester, white on the palm side, black on the back of the hand, and a piece of white foam stitched on the back of the hand to simulate a hand plate. It was simple to remove the foam plate with a seam ripper. Then I added velcro to the backs of the plates and back of the gloves. Done! Next, I decided that I could do better for Cameron's leggings for his undersuit. While they seemed somewhat suitable under the armor, they were really too big. I was constantly failing at finding a pair made from the stretchy shiny material I wanted that would actually fit his toothpick-legs. The only solution left was to make a pair. Which I have never done before. Still, sewing a pair of leggings looks easier than sewing a shirt... So I taped together a bunch of tissue paper to make a very large sheet I could draw on. I folded the "too-large" pair of leggings in half and traced the shape. Then I cut out the leggings shape slightly smaller than the original (ha! I now have a PATTERN!), and placed it on two layers of stretchy shiny black fabric. I traced the pattern piece on the fabric, cut out the fabric, sewed the edges, and voila, I ended up with some slick leggings. Big hurdle was trying to sew the waistband on these, though. The material likes to stick and stretch on the sewing machine plate. I ended up applying blue tape to the areas where I needed to sew to stabilize the material and allow for it to better slip under the presser foot. It worked well, but man, a total PITA to remove. Once I sewed the waistband and removed the tape, I had myself some leggings! Shiny! Here's what the old leggings vs the new leggings look like. Cameron is thrilled with the better fitting leggings! He reports that these new leggings are so comfortable that he did not want to take them off. Seriously, I had to do an incredible amount of pleading to get Cameron to change out of them. And I guess I'll keep the larger leggings for when he (eventually) grows. -
Cricket's 3D Print FOTK (TLJ)- ABS, Kid-sized- FINISHED!
Cricket replied to Cricket's topic in TLJ Build Threads
Good progress made today. The belt is done. Biggest challenge of working with a scaled-down suit is that the belt has much more of a pronounced curve. I had to test fit each box to verify that the belt was properly stretched over the ab before making any holes. If the boxes had been installed while the belt was laying flat, the webbed part of the belt would have ended up too short. Below you can see the curve- the belt won't lay flat, but fits nicely on the ab.
