

Chiro
-
Posts
53 -
Joined
-
Last visited
Content Type
Profiles
Forums
Gallery
Articles
Everything posted by Chiro
-

lucnak's ANH Stunt Build (ATA)
Chiro replied to lucnak's topic in Build Threads Requireing Maintenance
Woooooooooooooo! Great work -
Awesome job! Going to be a great set of armour!!
-
Thanks guys! I got some advice from some fellow Redback Garrison members, and I cut the return edges down to about 5-6mm. I made sure to cut out a curve to keep the edge a uniform length, It sits a lot nicer now In other news, according to 68Brick's idea I taped and used magnets to reline my face plate, marked new drill holes, re drilled and this is the end result. I'm going to have to trim little parts off the ears, and I havent counter sunk the holes or screwed them in too far but I'm definitely much happier with it than before. Forgive the crappy paint job, will be finishing it soon I also installed the hovi mic tips
-
It does! Thanks! Main reason I'm asking, is because of this: Because of the large amount of return edge, it wont sit too well on the kidney armour :/ So you reckon I should remove most of it?
-
Thanks Haso
-
Hey guys! What does everyone usually do about the return edges on the torso armour pieces. Most of the threads I've seen appear to leave the return edge on the kidney alone, and the edge on the posterior alone, but minimise the return edge on the back plate, ab, and rest of the posterior. Thoughts?
-
I call it 'poisonous fandom' which is pretty self explanatory. There is a fine line between critiquing and flat out attacking something, which I've seen is becoming more and more blurred. It's in everything that has fans but I believe SW has a much larger positive fan base than most others I seem to be in the minority of this thread when I say I like the new armour, especially when you see them all running down the train station with great range of motion. I think it strikes a balance between capturing and respecting the look of the classic OTTK while updating it to be user friendly. Only critiuqe I have of it is how poor the connections are with thighs splitting open everywhere, but that is something people like us can fix when we build ours! On a positive note though, how cool are the new 'death', tank, and 'scarab' troopers?? Definitely looking for to seeing those builds, might even build a 'scarab' myself if I have the time and resources!!!
-
Will do!
-
Sorry for the confusion Lucnak, this is what I meant. Gives me more room at the bottom of the armour
-
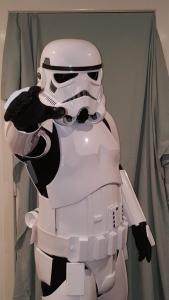
Did some measuring on the ab/kidney plate Fits nice and tight on the sides. Only problem is my an impolite person. Literally! Shows what too many squats at the gym does. To remedy this, instead of doing a straight cut, im going to cut 5mm less off of the bottom edge of the ad/kidney, than the top. This will ensure a straight line on wearing, and also give me an extra 10mm at the bottom which will allow the kidney and butt plate to fit together properly Sound like a good plan guys??? How does the alignment of the helmet look now?
-
Thanks Lucnak!
-
I'm definitely looking forward to following the build threads for this new trooper!
-
Thanks Scotty, will do
-
Moving on do I need to cut anything off of the sides to make it fit better? How much room should I have? Also, is the kidney up the right way? I apologise for the continual update bomb tonight. Do you think I'm going to need to do any work on the shoulder bells? I think I might need to cut maybe 10-20mm so I don't have it sit so high on the shoulder? Thanks guys!
-
Did some quick painting on the face plate, going to need another coat of black, and a few more grey coats (I've found out I hate grey paint, keeps going watery :/ ) Needs some refining, and possibly toothpick removal for some small areas, I have a tiny, fine tipped brush for the fine details.
-
I bought AM from trooper gear and I have been told they are for larger troopers. Thanks Lucnak, I thought they needed to be a snug fit but I can definitely cut less off! It's fits quite snug when I flex atm. I had never even thought about them lining up! So thanks for that I have put off trimming them until I've finished with the shins and ab plate, and I'll see how it feels then
-
Another update, I glued the TD together a week ago, I know the picture is crappy, but I've marked 10mm from the drop off on the front of the shins, unfortunately there isn't a crisp 90 degree angle on he shins like the thighs, so I had to guestimate, gonna cut a little further away, and re measure later. Does anyone have better suggestions? Taped up biceps. Do the biceps need to have an even amount cut off to keep them 'squarish' or is an angled cut allowed? Would like to know before I measure up cut lines
-
Thanks Brick, will do
-
After 3 weeks of nothing but uni work, I took an hour or so off and attacked the helmet a little bit. I squared off the teeth, drilled the holes for the mic tips, and attached some decals. One problem I have run into: The drill holes I made according to the pre made dents in the helmet don't line up properly. I combed FISD and found that it is recommended you attach the face plate and back first, then glue the cap on. Unfortunately I've already glued it together with xtac, so looks like I may need to do some trimming and drill some new holes. As you can see, currently the screws are making the face plate sit too high in the helmet, the face plate is catching with the lid on the right, and the ear cover on the left is not far forward enough. I'm hoping that pulling the face plate forward, and pushing the lower part back into the helmet will fix this with a few new holes. Any suggestions? Also, out of curiosity, does anyone know what the deal with this is? It will only let me screw on so far by hand which is fine atm for fitting, but will I need to use pliers to twist through the rubbery part? Thanks in advance. Also, do I need to spray or sand the sections of the helmet I'm going to pain before I put the paint on?
-
Quick question guys, im sizing up my forearms, and on my right arm, the wrist has about 1 1/2 inches gap. Should it be less? Also, something I noticed, with my kit the right outer forearm has flat edges running lengthways on both sides. Im thinking this will alter how i cut them.<br> My plan is to cut the outer so the flat edge is 8mm (for the 15mm cover strip) and then cut the inner to fit that? Sound good or does anyone have a better suggestion ?
-
Why do you say that? I got the completely opposite advice from another member in my garrison :s
-
I was going to make a joke about it but I figured it was best not too!! Thanks! I hope you aren't sick of my questions by the time I am finished
-
New things I've acquired: My undersuit, long sleeve shirt and pants My boots arrived Magnets Aker amp I just punched holes in my plates, which are just nylon webbing on top of nylon webbing, after my disaster with Velcro. And the holes for my elastic/nylon connection. On the weekend, I made it over to Cyclops' house and we did some sanding on my shins. He only had to use the Dremel twice to make up for my average job on the snips. I've completed the snap plates I'll use for my main armour, there is 20 sets, so hopefully that's enough. I still need to start on snap plates for my extremities. I used a piece of cardboard as the template for the elastic connections. I went to Sly's on the weekend, and we did work on the thigh's: Sly and Cyclops cut and sanded the front, and marked up the back. I took them home and cut and sanded the rest: I think I'll have to take 1/2" to 1" off the top to get a decent range of motion in them. Opinions? I'll hold off on gluing them together until I gather more intel. Some trimming of the forearms has been completed: I've lined up the forearms to how I think they are meant to go, can anyone confirm that the pieces on the left are left arm, and the pieces on the right are right ? I've moved on to the thermal detonator, and cut the clips to 10", cut the end caps to 20mm, and centred the plate I haven't trimmed the plate, and it's 128mm x90mm, as opposed to UKSWRATH's suggestion of 115mmx85mm, does anyone see a problem with this? It has 14.5mm between the plate and the caps, and the clips are only 20mm anyway? Next on my list is to reinforce where the hovi mic tips are going to be placed on the helmet, I plan to achieve this with the help of araldite and fiberglass cloth. Sly suggested cheese cloth but I figured fiberglass would accomplish the same goal? Lastly, I have cut some ABS for the cover strips and I have made several hooks for my shoulder bells to keep the elastic flush and I'm in the process of making my Hans hooks! That's all from me for now Look forward to any input.
-
So, I recently decided to pull the trigger and buy an ANH TK stunt! I haven't acquired everything yet , will add as I go. I bought the kit from trooper gear, hopefully it will get here soon. Under suit: yet to buy Neck seal, holster, canvas belt: ordered from mammasith (redback garrison) Helmet liner: motorbike liner from Amazon Gloves: nomex from eBay Boots: imperial boots, ordered I went to Bunnings and lincraft yesterday and bought a few essentials. Aluminium: 20mm x 1.6mm Foam puzzle mats 25mm webbing, 50mm webbing 50mm black elastic, 25mm white elastic Clamps x8 50mm black Velcro (10m cos Bunnings sucks) Painters tape. I was going to buy a hole punch at Bunnings but had a mini heart attack when I saw how many different sizes there were, decided not to buy any because I haven't acquired any snaps yet. Does anyone know what size snaps I should buy? I also haven't bought any fans or mic set ups yet. Could anyone suggest any good ones? I plan on starting with my snap plates soon so they are ready for when the brown box gets here, and I plan on copying Bids (Redback Garrison) build for that as they look super secure. If you guys had any idea where to source any of these items, that would be greatly appreciated as this is my first build of anything, ever! I would prefer to keep it Australian local if at all possible, however other sources more than welcome!!!!
-
Supply list for your OT TK build....
Chiro replied to justjoseph63's topic in Getting Started - Read this First!
Hi, thanks for all the info, I'm sure I'll be able to acquire everything I need thanks to this list! Just wondering, why is a Dremel/Rotary tool needed?
