

Thrawn's guard
-
Posts
479 -
Joined
-
Last visited
-
Days Won
9
Content Type
Profiles
Forums
Gallery
Articles
Everything posted by Thrawn's guard
-
Niccolo - I love the work that you are carrying out on your counter.....very impressive. I'm tempted to look at a pipe build once my resin build.
-
Here are the latest update pictures of the T details to the side of the counter.
-
Thanks Tino I plan to finish this when I get home later today. I also intend to replace my trigger and try out a new trigger mechanism so may be able to also post updates of this.
-
Uhcoog's Doopy Build
Thrawn's guard replied to UHCoog12's topic in Build Threads Requireing Maintenance
I have tried my hand at this modification and it works out really well though it certainly wasn't me who came up with this method first. I seem to think I used Bulldog44's great build thread as a basis for what I did (See link below) http://www.whitearmor.net/forum/topic/28778-bulldog44-dd-e-11build/page-9 -
Uhcoog's Doopy Build
Thrawn's guard replied to UHCoog12's topic in Build Threads Requireing Maintenance
Wayne - Good work on your blaster so far. Wayne you'll be surprised how little green stuff you actually need so I would suggest you cut off only a small strip, (you can always cut off more if needed), and see how you get on. I have carried out lots of modifications and repairs on my build and still haven't used that much (I also always seem to have some left no matter how little I cut). -
Amazing work Brett. I really like how this all came together.
-
Thanks for the feedback guys. Looking at the photo posted above by Ian it appears unless and am mistaken that that I have modelled is correctly (Unless I am misunderstanding something).
-
Thanks for spotting that Tino.<br><br> If I understand correctly the middle section of the thicker strip which passes over the screw needs removing (leaving 2 T shaped pieces).<br><br> If that's the case I will make the amendments tomorrow evening.
-
The final item I wanted to upgrade on my counter was to add the second screw in the side plate (Which is almost but not entirely covered up by the counter housing). I managed to find a suitable screw and then marked out the correct position to install the additional screw before drilling a hole, complete with a countersink for the head of the screw, and installed the screw. Looking at the reference picture below it can be seen that there is a strip which runs over the head of the screw consisting of 2 distinct levels. I filled the hole over the screw with green stuff and then modelled a thin strip roughly with green stuff. Once it had full hardened I carefully filed and shaped it with a small modelling file.
-
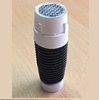
Well having broken my resin trigger I thought that I'd try my hand and modelling and 3D printing a replacement. I have a little tiding up but I'm pretty pleased with the result (Printed version next to the original resin version).
-
Thanks MIke and I'm glad that my build is of some assistance.
-
Thanks for the feedback guys. When I took the photo I had no glues the strips on the bottom of the counter so maybe once glued the gaps will be closed. If not I will definitely fill them in with green stiff. Scott that's a good tip about the craft knife for getting sharp corners.
-
Following the advice provided by Tino regarding the detail on the underside of the rear section of the resin counter, (The detail on the underside is a negative to the detailing on the top), I decided to have a go replicating what is missing from the Doopydoos kit. Firstly I measured the width and length if the three recesses on the top of the counter using digital callipers. I then used the tips of the calliper arms to lightly mark out the infill pieces on a thin piece of 1mm thick plastic ( I used a piece of the piece of ABS provided in Tino's Completion Set). Once cut I double checked the sizing by placing the plastic strips in the recesses on top of the counter. This is what they look like in position on the bottom of the counter. I will glue then on later. I think that all I need to with the counter now is add the second screw in the side as shown in Twinbrother's thread and connect it to the scope rail.
-
In order to join the counter to the rear resin section I decided to use the metal 'lips' from the real counter to provide a mechanical key in to the resin. To do this I cut a shallow channel along the top and bottom of the resin section and filled the channels with green stuff. I then wet the metal 'lips' of the counter and pushed the two pieces together to make two exactly sized recesses. I then took a strip of aluminium, measured out a length to fit just between the two channels and glued it on to the face of the resin section. This strip closes off the joint so that you can't see from one side of the joint to the other. Once the green stuff had hardened the two sections can be pushed together in to the tight fitting joint. This joint will be glued later however the bracket I make to fix the counter to the scope rail will also fix to both the front and rear sections of the counter and will ensure that the two pieces are securely joined.
-
With regard to the bolt handle can I quickly check something. This is how far the handle projects out of the receiver on my build If the handle on the Doopydoos kit is connected to a inner pipe as shown in the photograph below does the handle project far enough out of the receiver ? In other words is the handle cast from a real handle without any alterations to make it suitable for a thick walled resin kit (The wall of a real inner bolt would be much closer to the outside of the receiver wall). Perhaps the Doopydoos kit has added some additional length to the base of the handle. EDIT - Looking at this photo in the reference gallery it can be clearly seen that the handle in the kit is cast from a real handle and doesn't have any extension piece added to make it project the correct distance out of the receiver. Well that gives me another task to add to my list but at least i have the information to hand to work out how far I need to extend the base of the handle now i.e. 10mm minus the thickness of the wall of a real receiver (I assume this to be in the region of about 2mm) Therefore I'll work on extending the handle base by 8mm. The only problem is that I have glued the threaded rod in to the handle. Does anyone know if Doopydoos will send individual parts i.e a new handle as I suspect I could make quite a mess trying to remove the handle from the threaded rod ?
-
When I was researching which kit or blaster to buy I looked at the SDS E-11 but found that it was pretty expensive for something that proved to have a lot of inaccuracies. As Ian says above when you look closely many of the details are incorrect and if I was to spend that sort of money I would want something much more accurate.
-
Good thinking and a great bit of additional detail with the extra screw. I'll definitely have to add this additional screw also.
-
Another quick job whilst I wait for the green stiff on the inner bolt to harden was to look at the counter. I have purchased one of Tino’s counters and decided that I would like to set the counter to a number of my choice, have a pushable reset button but at the same time prevent the counter from resetting when the result button is pushed. Firstly I removed the 2 screws which fix the counter shell to the mechanical mechanism inside. The screws are very small and care was needed to ensure that I didn't drop them. In order to achieve this I needed to allow the button to be pushed part way but prevent it from being pushed all the way down. Looking at the button mechanism there is a lip where the button would usually be pushed down to. The simple fix was to find a suitably sized piece of metal or plastic that could be sat on the lip and would allow the button to be pushed part way down. I used a small section of the aluminium ruler I had cut up to make the scope rail. The metal strip was actually slightly too thick and prevented the button moving freely therefore I carefully ground it down slightly and place the piece on the lip. I tested the button by pressing it as far down as it would go and made sure that the numbers didn't reset before screwing the shell back on. The advantage of this method is that if I decide that I want the rest button to reset the counter at some later time all I need do is remove the small metal piece (Which is not glued in). Here is a video showing the reset button in action. https://www.youtube.com/watch?v=Zv94LAUGUg0
-
Bill - Yes adding the other lens from the Monocular does have the effect of flipping the image around the correct way. It was however proving difficult to get this remaining lens in at the correct location to ensure the scope would focus therefore I decided to opt for a sharp image rather than a correctly oriented image that was blurred. I do suspect that I may well end up purchasing a second scope and Monocular at some stage and give it another go when I have some more time
-
Continuing my work with the inner bolt I started to look at adding the serial number. I initially investigated stamping thin sheets of metal and then embedding them in to the bolt face however I found that the metal sheets were distorting too much when stamped and therefore wouldn't give the appearance that i was looking for. It was worthwhile checking out as at least now I know how that works out. Therefore I reverted to using methods developed by other members of the forum and as shown on the FISD E11 Reference Team thread. I took an engraving tool on my Dremel and carved out a shallow channel along the length of the bolt. I didn't need to cut very deeply at all as I needed only enough depth to allow me to ‘punch’ the serial number. I inserted green stuff in to the channel and smoothed. I then took each punch in turn, wet the end, (So that the green stiff didn’t stick to them), and gently pressed each punch in to the green stuff whilst it was still soft. I couldn't fit the full 16 digit serial number in so decided to simply start at the beginning and see what would fit. On this basis the rest of the serial number could be hidden by the wall of the receiver. When the green stuff has hardened I will gently sand the whole bolt with very fine sandpaper in order to ensure the bolt face is smooth and then tidy up where the bolt meets the receiver.
-
No worries regarding the counter picture Ian I should be able to work out what I need from the helpful information provided so far (Unless Mike beats me to it and shown me what I need to do ). I hope to look at this once I have finished the bolt so will, as always, post some picture of what I come up with.
-
Thanks for the positive feedback guys and glad that you like what I was able to do with the scope. @ Aheofstrife - The view through the scope is in focus however the only drawback is that the image is inverted. Perhaps this would be a task to work on in a future build. Also bear in mind that on the E11 the scope is back to front. That said I am really pleased with how it has worked out and looks much better in real life than on the photos. I've tried my best this morning to take a picture looking through the scope to show how it works. Apologies for the quality of the picture but it is very difficult to hold the scope out, take a photo with one hand and try to get the camera to focus on the correct part.
-
Thanks for the info Tino. I'll have a good luck and see what I can come up with. In the meantime I managed to finish the scope so thought that I'd post some pictures of the finished version.
-
Very nice work on the rear of the counter Mike. You may want to add the detail to the underside of the rear of the counter also (This is something that i will be looking at shortly).
-
I will shorlty be finishing off the counter housing that I have been working on however I seem to recall reading on one of the threads that the underside of the Doopydoos counter housing shouldn't be flat but should in fact have some detailing. Unfortunately I can't however remember where I read this. Could anyone point me in the right direction ? Ian (Sith Lord) I don't suppose you have a photograph of the underside of this counter do you ?
