

Thrawn's guard
-
Posts
479 -
Joined
-
Last visited
-
Days Won
9
Content Type
Profiles
Forums
Gallery
Articles
Everything posted by Thrawn's guard
-
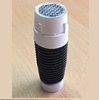
DVH Pipe Build with Extras
Thrawn's guard replied to I'm Batman's topic in Build Threads Requireing Maintenance
Ian I can't believe that I missed this thread until now. The work done on this blaster is amazing and there is a wealth of reference material, dimensions, ideas and photographs. Much of this will be of great help to me and many others so I thank you for posting such detailed information. -
Nice work so far and I'm looking forward to seeing how your work on this scratch build blaster progresses Andrey.
-
I've not really looked at my bolt yet so things like this are really useful. I really like the look of what you have done.
-
Thanks David I'm glad that you like my blaster build so far. I just hope that I can get it completed to the standard that I am aiming for. There are many other great builds that I have taken inspiration from but what I like most about this forum is the way we all help each other.
-
Dan your blaster looks great. I can't wait to see your finished photos. Good tip about the screw in the mains plug by the way. I may well do the same thing.
-
Thanks Tino I do find that the E11 reference thread is very usefully to quickly get confirmations about details such as this. I'm also not at home for the next few days and have already got withdrawal symptoms from not being able to progress my blaster build.
-
I can't wait to see what you come up with next.
-
Michael your scope looks amazing you must be really pleased with it. I like the fact that you can turn the effect on and off and could be a night vision effect. I also think that you made the correct decision by carving out a channel in the rail for your wires. It would be one if those things that would be hardly noticeable to anyone else but because you built it you would see it straight away all the time. With the constant development of new ideas, methods and innovations that people are coming up with I really wonder what blaster builds will incorporate in the next few years.
-
Hi David I'm glad to see that you managed to find some green stuff. Your build also looks to be coming along well. The vice looks great and is something that I have been thinking about for some time. Keep up the excellent work.
-
Some more pictures of my latest progress. It took a while however I managed to cut out the profile of the scope rail using a cutting disk attachment on the Dremel. I marked out a line on the vertical section of the scope rail level with the height the rail sits on the rear sight then used the resin end cap as a template to draw the circular profile of the receiver. Once marked out I cut out the profile to the front end of the scope rail. Not too bad to say I had to cut the steel ruler down and was aiming for a width of 20mm. I will need to check that the front tab on the scope rail doesn't interfere with the internal barrel section that I will be adding soon however it sits very well in to place on the receiver and rear sight. I marked out a line in line with the centreline of the folding stock pivot, as advised in chapter 24 of the FISD E11 Reference Team thread. I then measured the distance between the feet of the scope and mark out out a second line which will be central on the front foot of the scope. Here is a quick shot of a test fit (Not yet drilled, screwed or glued).
-
Having given this some thought I realised that I had an old steel ruler (The local pound shop also sells these). Checking the ruler against the aluminium strip I found that the ruler was identical in thickness, was sufficiently long however was too wide. I therefore decided to try my hand at ‘recycling’ the old ruler in to a much more useful item. Firstly I decided to check that the ruler would bend OK (after all I didn't want to spend lots of time, like my previous attempt, to get everything else cut and shaped only for the ruler to snap at the last minute). Therefore I made a shallow cut on the underside face of the ruler where I wanted to form the bend to help the bending process. Unfortunately I don’t have a bench vice therefore I took two plumbers spanners, (wrenches), to share the load and hold the short section of rail whilst bending the ruler to a 90 degree angle. I cleaned up the steel ruler so that I could later mark out the profile of the rail using a wire brush attachment in the Dremel. I then used the snapped rail as a template to mark out the profile of the replacement rail and then double checked that the marked profile matched the actual receiver. I have now started cutting the profile of the scope rail using a cutting wheel on a Dremel. I only have the detailing to the short section that connects in to the hole in the receiver still to cut so will post some update pictures this evening.
-
As mentioned previously this is the result of my failed attempt to bend the aluminium strip to form my scope rail. I did initially consider attempting to carry out a repair but had concerns with the strength of any such joint.
-
Nice work with your blaster Richard. I think a small amount of weathering would really take it to the next level.
-
I think that I have a solution for the snapped scope rail. I'll see if it works and if so add the method to this thread so that if anyone else comes across the same issue there is a solution on this forum. EDIT - All is looking good at the moment. I think when finished it may well be better than the aluminium rail I started working on.
-
FISD E-11 BLASTER REFERENCE
Thrawn's guard replied to FISD E-11 Reference Team's topic in ANH BlasTech E11
I agree with Vern. It also provides some really useful and interesting insight in to how all the parts actually connect together. Once you understand what you are trying to replicate the task is much easier. -
The next task I looked at was to fix the rear sight in to position. Firstly I held some sand paper around the rear of the receiver and rubbed the rear sight long the length of the receiver in order to form a concave curve to the underside of the scope to match the curve of the receiver. I then used the marks on the DD kit and photo references to position the sight then draw around the sight using a sharp pencil. I also fitted the end cap to make sure that the spacing was adequate to allow it to be installed or removed. Taking another section of the steel rod, taken from the counter shown on the first page of this thread, I cut 2 8mm long pins using a Dremel. I marked positions on the rear sight for the pins based on the locations where the resin is the thickest. Measuring these positions I then marked out the corresponding locations on the receiver. I then used a pin vice to carefully drilled 2 holes in both the receiver and the sight, test fit the rear sight connection and then applied a thin layer of super glue to both parts and pushed them together. Finally to ensure a tight fit whilst the glue dried I placed a number of elastic bands around the sight and receiver.
-
Using a method that I have seen used by several members on this form to add detail to the wording on the scope I rubbing a white wax crayon over the writing then rubbing off the excess with a paper towel. This is a very quick and easy upgrade.
-
Good luck with your blaster build Bill.
-
David if you have a Games Workshop store near you they sell green stuff.
-
Hey guys I was hoping to get some advice or suggestions. I have been working on my scope rail this evening and managed to snap it whilst forming the 90 degree bend at the front. I suspect the cut along the inside radius wasn't deep enough. Has anyone looked at repairing a snapped rail perhaps by soldering ? My current thoughts are to try to run a line of solder along the inside radius then grind out a grove along the outside radius. I could then fill the groove with solder and clean up.
-
I decided to have a look at how the magazine housing fixes to the receiver. I marked out the position of the housing on the receiver with a pencil and then whilst holding the housing in the correct position I used the 2 holes that I had previously drilled as templates to drill through in to the receiver. I will need to check how much of the fixing screw that I have used will need to be cut off to prevent the screws encroaching in to the internal section of the barrel however it was good to see how things are starting to come together. When i have everything test fitted and checked I will glue the joints but this will be one of the last tasks I look at. Once glued all joints will be filled where needed with green stuff to complete the look.
-
@ Aaron - Thanks for the feedback which is always greatly appreciated. I can also see what you mean about the tie fighter look.
-
Very nice work on the end cap Mike. I'm also looking to do a very similar thing so it is good to see this mod being carried out so well. You're also correct that the blaster reference thread is a fantastic and quick reference guide to what can be done.
-
Looking at the rear sight this evening I decided that I needed to sharpen up the details on each side as the cast details were a little untidy. I noticed that there was a thin metal part consisting of a circular section with 2 wings in a packet of m3 x 50mm spring loaded wing toggles and that the circular section of this was exactly the correct diameter to replace the resin cast detail. I therefore used a circular cutting disk on the Dremel to remove the majority of the wings before tidying up the cut edges using a grinding bit (See the bits used in the photo below). I then checked the position of the resin cast details before gently sanding them away. Once removed I cleaned up the sight with a damp cloth, allowed to dry and then attached the new metal details using some super glue.
-
Thanks for all the feedback on the scope cross hairs. I hope to be able to print some off on Thursday if the transparent sheets arrive tomorrow sometime so I will keep everyone up to date with how things are working out.
