


kme1682
-
Posts
53 -
Joined
-
Last visited
Content Type
Profiles
Forums
Gallery
Articles
Everything posted by kme1682
-
Thanks all for the support along the way.... I'm an official TK! (for as long as we're TK) I'm one of the kewl kids! I don't know what # I am... as far as 35th, 42nd, 75th approved and so on. "Dare Mighty Deeds" mega-hugs to my alpha and bravo-mates that helped out along way whether was in-person help, constructive feedback, sage advice, cheerleading and/or just plain awesomeness. Slurry! -krista
-
Certain clones had particular paint schemes to reflect their individual nature. (Well, that's a whole existential topic right there.) So it appears possible to have an indentified character if there are specific, unique visual identifiers. Anyways, to bring this back to the CRL, which seems to be on the basic level so far, it seems that individual TKs (ie; Finn TK) would need to have a separate set of "hallmarks" to be able to define and differentiate from other costumes. We haven't seen the movie yet, so who knows how many bloody handprint outfits there could be to differentiate the "Finn TK" from a just-got-blown-up-real-good TK. I suppose a better anology than clones would be imperial officers that have slight variations to designate who they are. There's the basic imperial officer CRL, and there's particular identifiers for some speciifc officers. I understand that some garrisons/members like to be able to specifically identify who they are portraying, so this ability might be useful for those who like to portray a specific TK. I suppose then it's possible, once the movie comes out, to weather your outfit to be the TFA TK that was second to the left in the scene when ___ blew up, or the TK on the extreme right of the____ lens-flare at 20.49min of the movie. However, I would caution against codifying these unique characteristics to the point where our GML's are bogged down trying to verify millimeter paint schemes just to be the second TK to the right and so on. Hopefully there's a happy medium for folks that want to be a specific TK (like a black/grey/red paldron wearing TK) without creating a landslide of minutia. I agree with the general thought that characters in armour will remain 501st/"darkside," even if the character in the armour is "light side" in nature per the movie plot. Happily, our basic CRL allows for entry level, and folks can choose to get more specific as time wears on. I know I've put further enhancements and accuracy upgrades on hold till the movie comes out. I'd like to see how some specific items mentioned during various accuracy discussions appear on film/ the big screen. The previews seem to show there'll be plenty o'weathering potential for folks that like the battle damaged look. I'm looking forward to seeing all the environments that the the TKs are placed... heck I'm looking forward to just seeing an army of troopers on the big screen again! Thanks again for all the work on the basic CRL! Go team FISD! -Krista
-
-----------------
-
I've seen red reflective tape work well for the three marks on the side of the blaster, which would (if I remember correctly) normally light up by LED or other internal illuminating source. As mentioned, perhaps requiring the electronics for this optional accessory would be reserved to the higher (highest?) levels of approval? Thanks again for all the many efforts! -krista
-
It could be the camera/photo, but is the material made from an already shiny fabric? There is 4-way stretch fabric that has a sheen, which would be better resource. If you tack your material to your biceps/forearm and thigh/knee/shin, you could (in theory) put on those pieces like a sleeve. As with any build, you may need to play around with the fit so that you don't look like a tube (ie; no definition of an elbow or knee). I suppose the forward white and receeding black would give an illusion of foreground/depth. Additionally, I wonder if using a piping foot, stretch material and the proper size piping cord would help to give better raised edges. The foam seems to expand to give "puffiness" but not neccessarily raised edges. Could be the way I'm seeing the photo though. I include options below to consider for sheen/shiny fabric (I am not recommending these suppliers, I'm merely offering some of the types of fabrics that could be considered. Nor is this an exhaustive list. You and others may find other helpful fabrics!) Please keep in mind that some of these fabrics could lose their luster over time. If you purchase vinyl, this will become brittle or shred over time (years, not months unless left in very hot environments. I base this on years of wearing it at goth-clubs from waaaaay back-in-the-day and how my 2007 PVC white gogo boots flaked off when wearing them this weekend. The boots looked so nice in the closet, then I put them on... I looked like a MadMax outcast. Of course, your individual experience may vary.) Each fabric has their benefits and burdens to make them a personal choice for what you feel/think is most important for your gaskets. Weave shown SupperShine: ---------- Metallic 4-way: http://spandexworld.com/c3/catalog/product/1132 Milliskin Shiny 4-way stretch: http://spandexworld.com/c3/catalog/product/1187 Regular spandex 2-way stretch (some sheen, may not photo well)-------------- Satin Spandex 2-way stretch http://spandexworld.com/c3/catalog/product/1649 (No link: Lame (pronounced la-MAY if you go to a fabric store), has 2-way stretch) -
-
Sorry to be obtuse, but would someone mind updating the first post with the version of the CRL you'd like for us to review? Or, alternatively, provide a link in the first post to the most current CRL you'd like for us to read through for clarity/typos/etc.? If y'all no longer need proof-reading, then congrats and thanks very much for all the months/weeks/days/hours of work! Slurry! -krista EDIT: Thanks. Email sent with polishing edit suggestions. A lot of great work is there; it's awesome to be at the point of polishing. Congrats!
-
I'm adding in this build-tidbit to this thread since there isn't yet a chest plate thread. I made some modifications to keep the chest plate more flush with the yoke. Thanks to Ely for the idea! As with any build methods, this is "a" way and not "the" way to keep the chest plate down/flush. Three steps to this modification: A) We took industrial velcro and placed the soft side facing the body under the yoke and chest plate. Placement will vary according to your torso. For me: Vertically, a 2x2" soft side industrial velcro was placed facing the body under the yoke on the side closest to the center chest. Horizontally, it was placed along an imaginary line from the armpit to the yoke. On the chest plate a 2x2" soft side industrial velcro was placed facing the body on either side of the center indentation. Be) Two pieces 1" wide non-roll waistband elastics had velcro sewn on both ends, same side of the elastic. One side of each piece was velcroed to the underside of yoke while putting on the armour. C) To wear armour: The chest plate/yoke elastics were velcroed first and then the chest plate was lowered to adhere to left and right sides of the waist/chest. I use velcro for my waste/sides. Again, there are other ways to keep the chest plate flush. Many have found snaps to be useful. That's not my particular build practice for a few reasons, so I'm mentioning this modification for those that like to use velcro and might need another idea to consider. We found this modification sucessfully worked well. Happy Building! -krista EDIT: b or B parenthesis turns into winky face.... that's my "something new" for today!
-
We did not cut ours. If the decals didn't work, more than likely we would have painted and still not cut them out. There are a few items (like those) that we are waiting to see the movie to have a better understanding before making "real consequence" choices. If we choose to cut, using a dremmel bit that is similar to what's used to cut out the "teeth" of the OT TK helmet should do nicely, in theory. Would be better to hear from those that made the cuts about the dremmel bit, and to hear if there was any concern about any stability/fragility of the piece after the cuts. Happy Building! Best, -krista
-
Thanks for posting this separately. My chest gaskets left/right sides are kept together by sewing elastic/velcro about 8 vertical inches at center of chest. This distributes the pull and weight down the 8 vertical inches, rather than a single point of contact. Also, as a lady I have some subtle curves that need more than a single point of contact to fit snuggly. I think some other TFA TK ladies have used the single chest strap system, so it would be great to hear from them how the rubber and fit has held up after a few troops. I love the other harness ideas, and have given me ideas to improve on the belt/garter system I have for the thighs and knee gaskets. Thanks! -Krista
-
Hi all, First- a standing ovation for the amount of work that's already gone into the CRL! I especially love having the pictures to accompany the descriptions for those more-visiually inclined folks. Well done! The following points are simply for consideration if they haven't already been decided: - Gloves: Is the idea that the current minimum standard does not have the black double stitching around particular areas of the forefinger and thumb? - Gloves: Since the pictures only show the tops of the hands, does the minimum standard for approval not require the particularly shaped pads on the palm? - Boots: If the minimum standards include the currently approved boots for OT TK, it would be good to specify "OT TK" vs "other TK" such as "TFA TK" and so on. (This assumes, based on prior posts, that TFA stormtroopers will also have a TK designation.) - Gaskets: The main difference I can easily see in rubber/silicone/latex vs. cloth-only is the visible weave of the fabric. Therefore is the idea that the current minimum standard will allow for gaskets that have a visible, yet shiny weave? Profound thanks for all the hard work. I'm very much looking forward to having a CRL that many people can attain, still look great and do good works while portraying an evil, heartless, soul-crushing First Order Empire. (Just kidding, we all know the fumes from painting the TFA TK or just the helmet make us see happy-trippy-rainbows and unicorns! j/k) :happy and cheerful birthday: If there's other stuff to get done, I'm happy to help in whatever way I can that would be useful to the TFA TKs. Thanks again for all the many efforts! Slurry! -Krista
-
Bravo, Serge! Yes. You can see why it could more desirable than velcro. If you choose to go that route, I'd love to hear how it went for you. And… if you don't mind… where you placed the elastic. Pics of the inside of the forearm looking down from the elbow to the wrist would be quite helpful. If you're not comfortable posting a pic, I understand. Happy Building! -Krista
-
Hi Serge, I'm going by memory, please forgive any inadvertent error. I'll try to expound, though the best input would be from troopers that performed the method. As memory serves, a portion of the length of the forearm (that has the "velcro tab" as you've shown above) was glued. Instead of using velcro to maintain closure, elastic was placed inside the forearm so that the end of the forearm would close due to the pull of the elastic. I suppose in theory the same principle would apply all the way up the forearm toward elbow. I think though, many folks found the forearms to be roomy at that end. I can't remember whether the elastic was sandwiched in-between ABS layers by glue then glued to the inside of the forearm, riveted to one piece of ABS and then glued to forearm, etc. I took a look through our forearm resource pinned in this forum, and sadly we don't have pics of the elastic closure method. If perhaps any trooper found success in this measure they could post a few build pics to help out those thinking of going this route. Best wishes for your build! -Krista
-
I absolutely love the tabs on the sides of the abs for the belt. We are going to make a modification along these lines as long as it doens't minimize movement, or offer some problematic difficulty I haven't thought of (or read about) yet. Best, -Krista
-
I had velcroed the entire length instead of gluing and leaving a 3/4, 2/3 or 1/2 length unglued. However, in hindsight I think it was unwise to have used industrial velcro, because the force needed to open the velcro was disconcerting. There are some techniques to avoid using a "pull apart" method to separate velcro, such as a dull blade sliiped in between the velcro. I can slip my hand easily through the opening, so it ended up not being an issue for me. I just like having options wherever possible. If I remember correctly, there were a few folks that used the elastic closure method. It would have been my choice #2 to try out if I had time. Best, -Krista
-
Hey Tony, There is a thread a little further down about bondo replacement. There is already some discussion there. Some are suggesting not to use bondo because of its rigidity. In our build, if we had a different timeline we would have avoided CA glue and bondo altogether. Like many build methods and reagents, some will find what works reliably for them and some will choose other means and supplies. I gently encourage you to read the "bondo replacement" thread, and to learn the benefits/burdens of adhesive agents before proceeding so you can make the most informed decision for your personal build of the kit. Best, -krista
-
Awesome! Wyatt, thanks so much for taking the time to clarify. Your insights are helpful to glean different methods to get a consistant finish with armour/helmet. We're thinking of re-painting the entire suit, and with your insights we'll take a second look at the helmet to see how the finish is faring since April. If you don't mind answering, how did you deal with the greeblies on the helmet? I don't think we'll want to remove them to get the sanding around the greeblies, but I suppose there are a variety of ways to deal with the affixed greeblies. We'll certainly share results- it's quite helpful to learn amoung each other what works well and what doesn't. Thanks again for your time; it's appreciated! -krista
-
Hi Wyatt, Could you clarify your thoughts on the ANOVOS helmet? I know a few alphas some had variation (paint was not of the same gloss/sheen as others), which were the outliers not the norm, and those were rectified after addressing it with ANOVOS at Celebration. For my own helmet, I had a defect that was quickly addressed. It would be helpful to understand your point of view in dismissing the paint for all helmets, if that's your view. I may have misunderstood. Best, -Krista
-
To echo Shana and Wyatt, unlike most OT TKs where the base material is shiny ABS, the base material forthe ANOVOS helmet is not shiny ABS. Therefore, in order to match the helmet, the rest of the body needs to be painted to at least match the helmet. In nearly all the paint samples I saw you will have a color mismatch if you paint only the seamless "bondo" areas. While ABS slurry will provide a close color match to your ABS (If you are using the trimmings from your TFA kit) this still will not match the coloring of the helmet. As a helpful note: if you are not using the trimmings from your kit there is a sizeable liklihood that your "whites" will not match since ABS discolors over time, or may have a different batch of white ABS. With regard to leaving the suit as ABS without paint, it is questionable whether the TFA TK in the movies will be as glossy as our current OT TKs. I realize that's another kettle of issues (screen color & sheen vs in-person exhibit color & sheen) however I think it's worth being aware. Of course, the minutia of a TFA TK as ultra-glossy, glossy, semi-glossy and so on might be best reserved for those wishing to have their kits with as much accuracy as possible. I would however, caution against an assumption that the difference in gloss and color shade by having some parts painted and other not, would be acceptable within the minmal standards. I understand the choice to color match the entirety of the suit (armour + helmet). Hopefully, this doesn't produce different overal shades of white when comparing TFA TKs from different areas of the world where some paint is accesible and others are not. Hopefully, the ANOVOS helmet has been properly QA'd to insure minimal color variation, but I've read some of the issues that the helmet has had, and I would not be surprised if we're unable to color match across the alpha/beta shipments. I don't mean to "pick on" ANOVOS, but I imagine that soon we'll have other fan sculpts, which may be made of other materials and will not have an issue with the paint match. For example, if the helmet is made of ABS, which happens to color match to the suit, then we're moreso discussing the ultra/semi gloss aspect for that TFA TK suit. Although, attempts to color/gloss match to our brother/sister garrisons across the world would still be on point, and may require painting even though the suit itself would match. Lastly, there was an inquiry about chipping. I've read diverse opinions on adding gloss veneer, or having a professional autobody paint shop apply a type of white paint that will withstand usual chipping. See above about glossy-ness, however another factor to consider could be the stability of the color. Will adding a veneer to prevent chipping "yellow" faster? If you simply paint, from what I've heard from the OT TKs that used to paint their suits, yes it will chip. This will mean an eventual choice between a "weathered" look or re-painting for a "clean" look. I've heard from the TFA TKs that have done Autobody paint shp work that the paint has resisted cautious wear and scuffs. I realize this is a lot of info, but the decision to paint is an investment in your time to sand properly, prime and paint properly, or the literal financial investment to have a professional paint shop take care of the painting. Good luck and best wishes for your build! -Krista
-
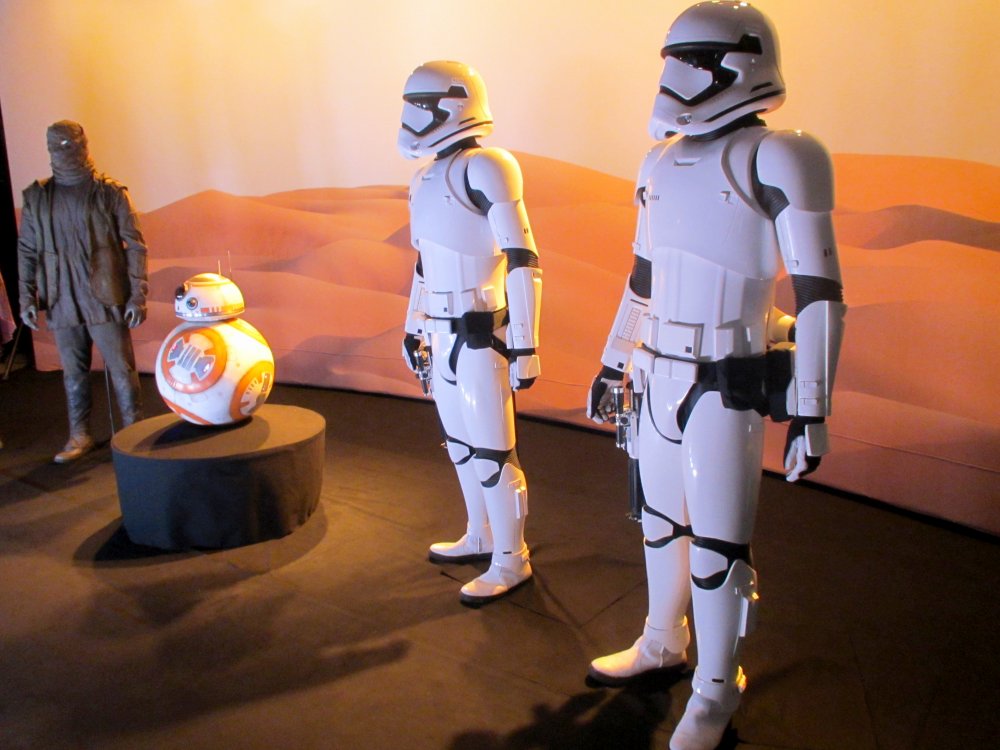
Episode 7 Stormtrooper Helmet, WIP
kme1682 replied to Dday's topic in Build Threads Requireing Maintenance
Hi Derrek, Great, very diligent work. Would you mind sharing if this helmet will be "slush cast" or vacuformed? I'm trying to get a sense of weight. My current helmet is rather heavy for a long-term troop like a parade. I'd like to update to lighter weight helmet in the future. Thanks very much, -krista -
Hi Kevin, Are the two belt boxes the two horizontal belt boxes, or the medium and large vertical ones? I would assume the latter, but wanted to double check before updating guidance on the TFA TK info. Thanks so much for your time and insights. -krista
-
If I remember correctly, there was a concern about cracking/ spider webbing of the clear coat. However, I believe a few had an auto body paint shop take care of the paint, and I wonder if a clear coat was used for those. Do we care about super high gloss? I ask because I read a lot (and slept little) during the initial build, and I seem to recall a post about the armor not being super high gloss… however, I would want someone to confirm, clarify or discount my hazy recollection. Especially since we had the beautiful TFA exhibit to enjoy. I asked Sean about our plans for repainting our kit. If we go by means of auto shop, we'll ask about clear coating. (To research whether the clear coat would yellow faster than just the paint.) If we were re-spray paint ourselves, we probably would not add a clear coat. Happy building!! -Krista
-
Hi Wyatt, Would be willing/able to clarify your comments? The way they read to me is that vac forming may not create ultra-sharp edges that would appear through an injection-molding method. Is this the basis for which there is a lack of accuracy? If so, then I wonder whether a particular build method such as injection-molding or "build up with bondo" would become a requirement of a CRL, which is what I assume you are proporting in order to "reach the required accuracy." My concern is the cost-prohibitive method for one and manual handicraft introducing errors on the other. Is there another method that you envision would provide the required accuracy? I fully invite clarification if I've misunderstood. I would like to understand where you're coming from when commenting on accuracy. Thanks very much for your time and thoughts. Warm regards, -krista
-
As far as the alpha build, we're putting together some info threads about various body pieces. We'll have the ab boxes included in the photo/info thread, but I don't have an exact date when the info is released. (I've submitted compiled info chart, but we need to put the pictures in proper threads.) I would imagine though it would be better to have pictures of the TFA exhibit, in the spirit of "primary" resource material. I'm hopeful others will have more detail shots for their visit: [EDIT] After a cordial and collegial PM conversation, Paul and I agreed it would be good to give a historical note on the ab boxes. As I seem to recall, the notes to appear as "attached to" instead of "seamless" came later into the build, after some of the more nimble of us already had passed that build point. It shouldn't be minimized how fast information came in on dozens of different threads. It was possible to miss or lose track of valuable information over the extremely condensed timeline. This is why we're trying to consolidate info and pictures for the next set of trailblazers. Thanks Paul for being kind enough not to mind a clarification. I found that scoring the bondo made for a cleaner line of the contoured ab plate, and provided additional support to the attachment to the ab plate. However, there are builders that excel at trimming and sanding the ab box contour to match the ab plate contour. This latter group would likely have the more accurate method, plus no sanding of the bondo! Bonus! As I mentioned in a separate thread, vacuform may not give sufficient angle of edges, and the screen-used suits had injection-molding as their build method. Various methods will require various solutions in order to make the costume look like the picture. I would also love to see some detailed shots of the screen-used suits if anyone can post them. Thanks in advance! Warm regards, -Krista
-
Stuff to do while you're waiting for your TFA TK kit
kme1682 replied to kme1682's topic in TFA Stormtrooper
Hi Anthony, I miss your beautiful california palm trees! The number of 1/4" screws will depend on your build method. The suit doesn't actually show the chicago screws. (Although a portion of the belt closure might sneak out of the fabric pouch, as some of ours did at Celebration.) So as far as I can determine, they're not required. However, if you follow the blazed trail, then I would think you'll need at least 20. Most are sold in bulk packets, so see if anyone in your area already has some for you to purchase, or go in a group buy. Personally I would have liked a longer post to the chicago screw to make them more dependable on the belt. We had a box drop off twice before Celebration. We fixed it, but I can't remember what we did... too many sleepness nights! Your strapping really will depend on your build method. I used a very different method than my colleagues for the shoulder gaskets using elastic and velcro. It worked very well for me. I also used strapping garters for my knee gaskets. Unless you have a very tight turn-around time, I would recommend taking a look at the kit and determine which strapping will work best for your frame. Then you can order the type and quanities you need without paying extra for something you don't. Happy Building! -krista -
Trooping issues and Solutions for the TFA armor.
kme1682 replied to captsafe66's topic in TFA Stormtrooper
I think a number of us are looking as ways to prevent the shearing/chaffing of the rubber. So far the only place I noticed it were from the knees on my build. I like the velcro to the armour idea because it will also prevent the knee gasket from turning inward/outward. I think I will keep my secondary garter system in place as a way to provide a small distribution of the weight off the thighs. By all means try out your idea and let us know what you think (when you have the kit,etc) We're learning from one another and many minds make for creative solutions. If your fabric is showing that won't be quite accurate, since the gaskets appear to be non-woven/non-porous. Some of us with fabric are brushing the fabric with another "non-porous" agent such as latex. Have a super weekend! -krista

