Mutter
-
Posts
439 -
Joined
-
Last visited
Content Type
Profiles
Forums
Gallery
Articles
Everything posted by Mutter
-

Mutter's NE ANH Stunt Build
Mutter replied to Mutter's topic in Build Threads Requireing Maintenance
I had some free time last night so I decided to start building the helmet. Wouldn't you know it, the forum was down. Without the comfort and support of Darth Voorhees's NE helmet build thread, I nervously glued the back to the cap. For my first time out, I used a little too much glue and will need to clean up my mess. I hope to be able to add the face piece and begin working on the ears tonight. -
Mutter's NE ANH Stunt Build
Mutter replied to Mutter's topic in Build Threads Requireing Maintenance
Thanks, Tim. Already bookmarked and viewed multiple times! -
Christmas came a little late for me this year. A large brown box of goodness was waiting for me when I got home last night. Obligatory pic: And it was filled with lots and lots of pretty, shiny white pieces of plastic. My daughter watched me carefully unwrap each individual piece and lay it out on the floor. She didn't seem to be as excited as I was. Kids these days. Yet, when I quickly taped together the helmet, who was the first to try it on? This will be my first build (excluding blaster) and my goal is to bring it to Centurion standards. I welcome any and all comments, critiques, advice, funny limericks, anything which may aid me in the build process. I think I'll start with the 3 piece helmet first.....
-
Mutter’s Doopy Doos (and don’ts) E11 build
Mutter replied to Mutter's topic in Build Threads Requireing Maintenance
Thanks, guys. I hit a few roadblocks in my progress: work, too cold to paint outside and my armor came in . I'm hoping to give it a final painting this weekend and then I'll post more pictures. -
Mutter’s Doopy Doos (and don’ts) E11 build
Mutter replied to Mutter's topic in Build Threads Requireing Maintenance
Thank you, I appreciate the compliment. If it wasn't for your great idea, I probably would have just cut the mag to fit. -
Mutter’s Doopy Doos (and don’ts) E11 build
Mutter replied to Mutter's topic in Build Threads Requireing Maintenance
- Thanks for the tip, Ian! It's not too late to fix. I'll get on it tonight. I now realize what I thought was excess resin was actually the magazine trim. It doesn't look easily fixable so I'm gonna straighten the edge and leave it as is. Important note to remember for my next build. -
Mutter’s Doopy Doos (and don’ts) E11 build
Mutter replied to Mutter's topic in Build Threads Requireing Maintenance
Here's the piece of dowel I sanded down to size to fit into the barrel with the area to be cut out along with the cut spring (11 curves). and how it looks in the blaster Here are some pictures of the parts being glued. The next day I decided to go ahead and begin priming. It was cold outside so I just sprayed it in the basement. As I was spraying, I was thinking if it is a good idea to be spray painting next to the oil burner. You know, open flames and all. Well, I survived so no harm done. Except for the brain cells I killed because the entire basement, and then first floor, smelt like paint fumes. Not just paint fumes, but paint fumes mixed with moth balls. The picture's color looks like crap, but it was all gray primer New Year's Day came and even with a slight hangover, you could easily see the imperfections in the resin casting so I spent some time adding bondo to clean them up. Later in the day, I decided to give everything, sans scope, a base color of metallic silver for any weathering I may add later. The scope received a coating of metallic brass. One thing that had been bothering me was the spring for the bolt. I cut it to be 11 curves which turned out to be too short for the barrel. There are 11 visible curves but the spring needs to be longer. It was sliding back and forth between the bolt and end cap. I couldn't get another spring because everything was closed since it was New Year's Day. Not wanting to wait another day (did I mention I'm impatient?), I had an idea. I cut 2 small circles out of a pencil eraser the diameter of the bolt and slipped them behind the spring into the barrel. This solved the spring movement problem and made the end cap fit nice and snug. With the silver paint drying and my spring problem resolved, I decided to have some "hair of the dog" and went back to creating another hangover. When I got home, Steve's magazine was waiting for me. What a great way to start off the new year! Steve had warned me that the walls of the magazine receiver were thick and would need to be thinned. He was even thoughtful enough to provide a link to usaeatt2's build thread where Aaron demonstrated a great method to thin the walls. I took my time here, paranoid of cracking the mag receiver walls. Everything worked out well. I sanded quite a bit of the magazine as well to make it all fit together easily. With the magazine done and primed, I continued painting. Everything received a coat of matte black paint. This time I sprayed it outside and after about 5 minutes, I brought it back inside for drying. Yes, the apartment smelled a little like paint, but it was tolerable. That brings the build up to date. I was hoping to have it done by now because my armor arrives tomorrow, but I don't think that will be possible. The armor arrived Friday night at the UPS facility 9 miles from my apartment. I was hoping they would deliver it Saturday but the facility is closed on Saturdays. Today and tomorrow are going to be really looong days. Sigh -
Mutter’s Doopy Doos (and don’ts) E11 build
Mutter replied to Mutter's topic in Build Threads Requireing Maintenance
Ah, it's good to be home again! Anyways, here's some pics on the progress I made before I went upstate. The scope rail is fabricated. It only took 2 tries to get it right! And the front sight was cleaned up too: -
Home Depot and Lowes carries it.
-
It looks impressive to me. Good luck with the build!
-
Mutter’s Doopy Doos (and don’ts) E11 build
Mutter replied to Mutter's topic in Build Threads Requireing Maintenance
I spent about 90 minutes today working on my build. I still can't post any pictures until I get back home this weekend. Sorry. I took the 7/8 inch wood dowel I picked up at Ace Hardware and began sanding it down on the bench grinder to fit inside the barrel. DON'T USE A BENCH GRINDER! After cutting off the deformed end I just created, I decided it would be easier if I flipped my belt sander upside down and use that. Much better results. Not sure why I didn't use it in the first place. Oh well. I cut off about 2 inches and gouged out a 1/2 inch circle on the edge where the charging handle will be inserted. Stretched the #62 spring and cut off about 11(?) loops. Oh, I'm creating a bolt for the barrel. I know, another mod but it won't take long and it's really simple. With that done, there's not much left I want to mod for now so I decided to start glueing. Glued up the rear stock catch, pistol grip and front sight with E6000 (I used pins and rubber bands) and glued the muzzle flash and ejector guards with super glue. That's about it for today. I probably won't be working on my build tomorrow or posting either. With that said, I would like to wish everyone a very happy and healthy New Year! Greg -
Mutter’s Doopy Doos (and don’ts) E11 build
Mutter replied to Mutter's topic in Build Threads Requireing Maintenance
@Tino (T-Jay), thanks for the tip on the counters from Dennis. I'm already thinking of doing a "done up" build later in 2015. I'll need a mag clip (Steve), counter (Dennis), power cells and a scope. For this current build, I "should" be good. Yesterday, I made the scope and counter rails while my daughter and niece were playing. I had some extra time to kill in the afternoon so I went ahead and cleaned up the front sight. It didn't really take all that long and it does look 100 times better. I had to go upstate to work on my house so I won't be able to post pics until I get back. I happened to be in Ace Hardware today. Yeah, I grabbed a #62 spring (dm101's idea) and some dowels for a bolt. Oh look, they have hammered black spray paint too. I'll add that to my growing collection of spray paint: primer, metallic silver, brass and flat black. Sigh. So much for simplicity. But it is fun! -
Helmet & Ab paint detail reference guide
Mutter replied to Billhag's topic in Assembly, Mods, and Painting
I had the same question. The chart lists gloss black yet many say semi-gloss black is more accurate. Which one i correct? -
Mutter’s Doopy Doos (and don’ts) E11 build
Mutter replied to Mutter's topic in Build Threads Requireing Maintenance
Thanks, Ian! I can't believe I overlooked those. Sent Steve a PM this morning. I tried engraving the "O" last night and it looked like a drunken "D" instead. -
Sweet!
-
Mutter’s Doopy Doos (and don’ts) E11 build
Mutter replied to Mutter's topic in Build Threads Requireing Maintenance
Thanks, Brian. I really did just want to clean it up and put it together but after reading all the other excellent build threads, it started giving me some ideas. And as you said, for the small little improvements, it didn't take that much time at all. Take your time and go slow. The resin is more fragile than I thought. Good luck! Greg -
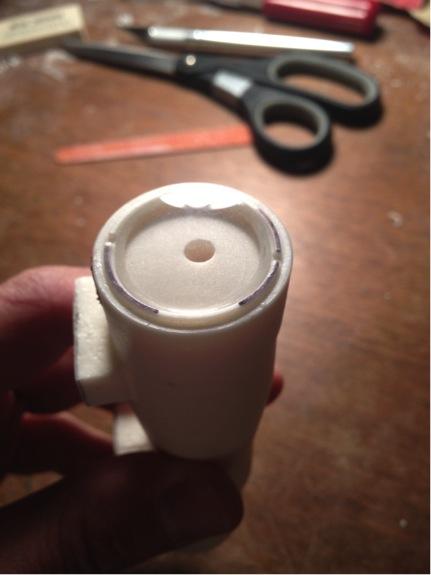
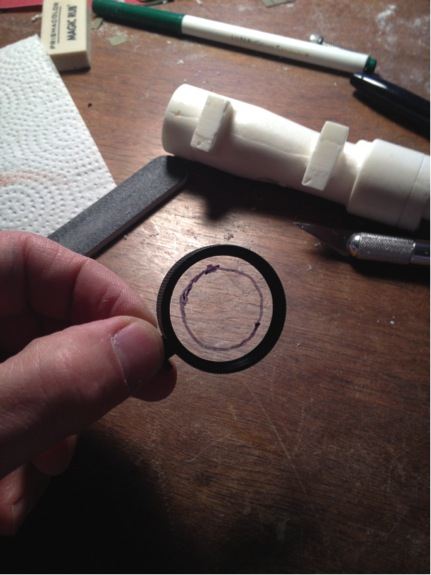
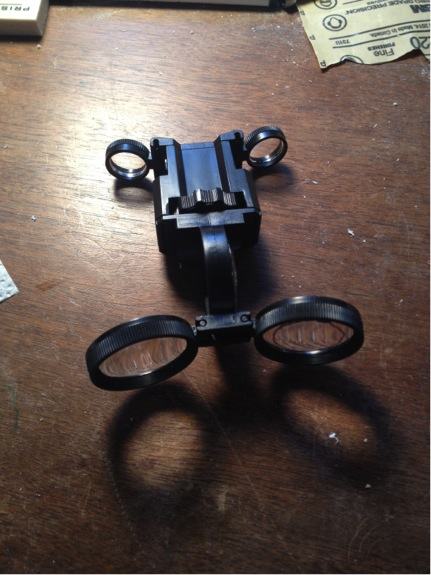
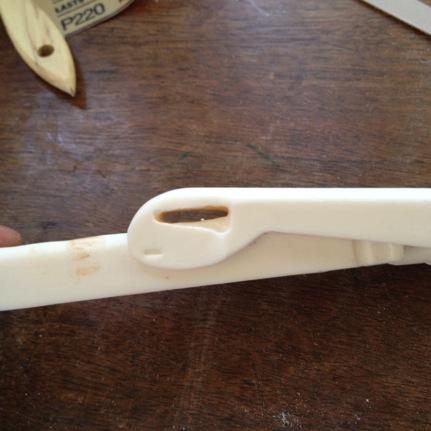
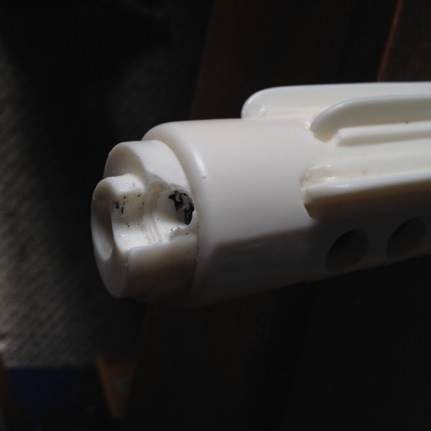
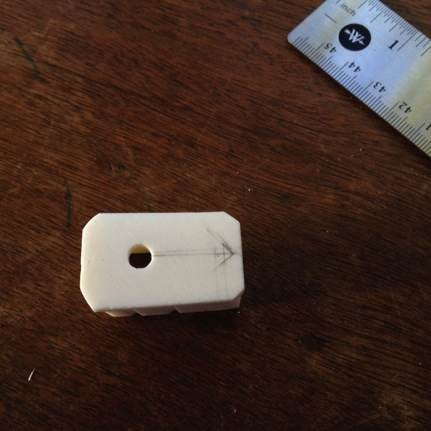
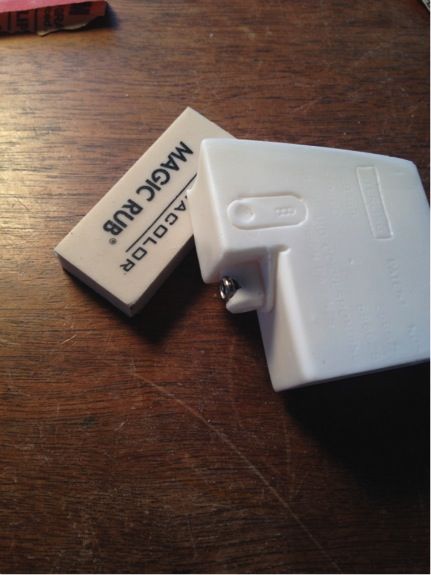
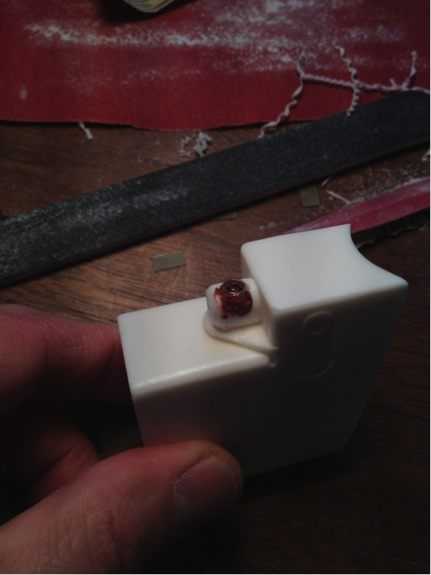
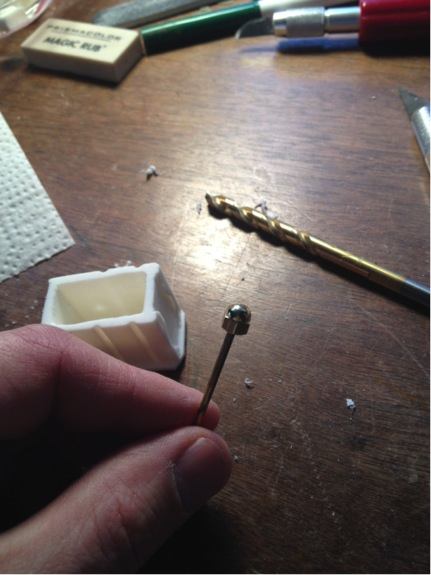
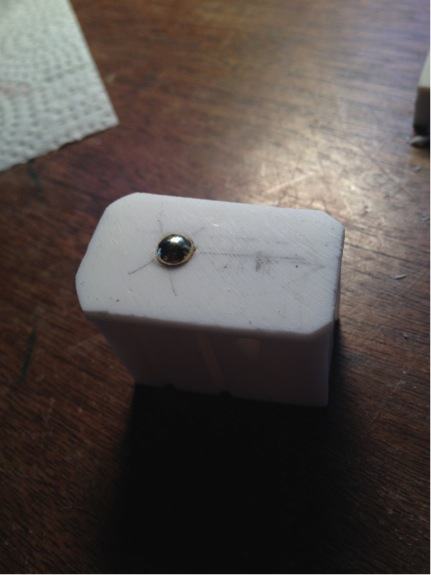
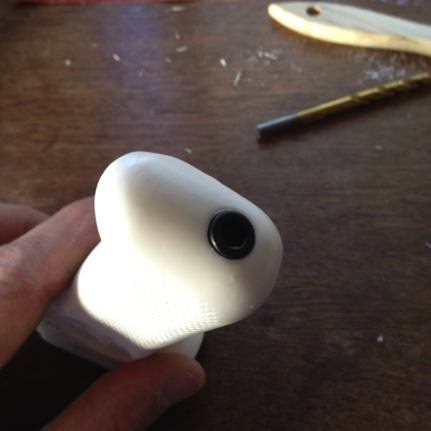
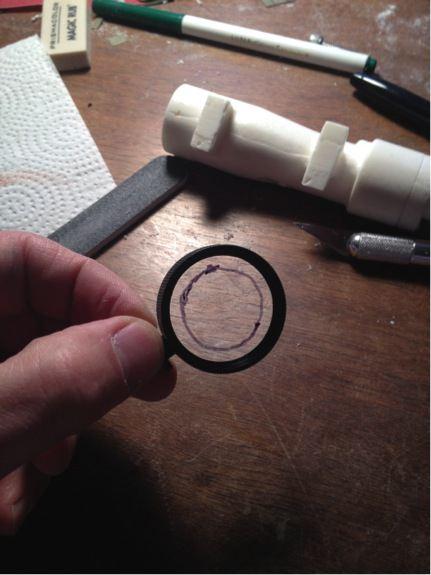
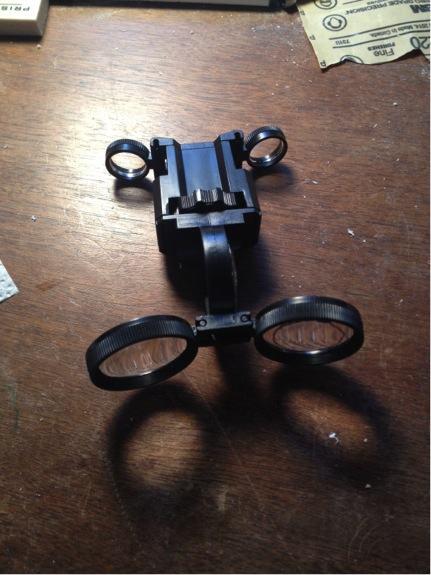
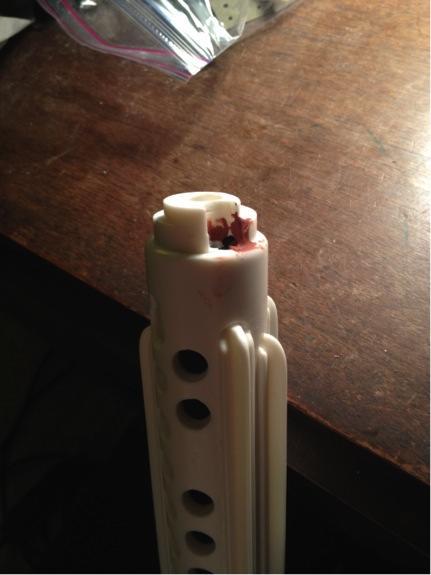
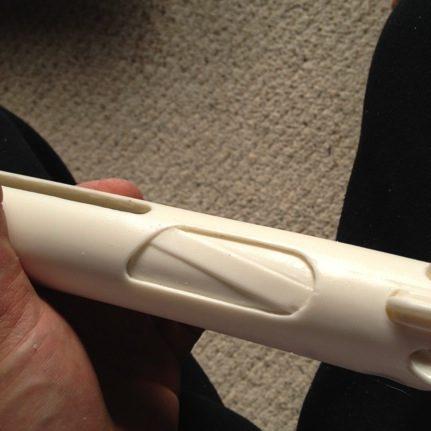
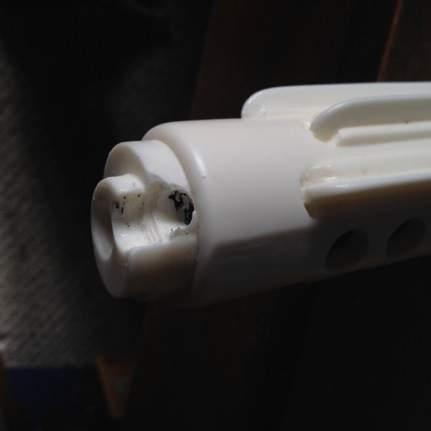
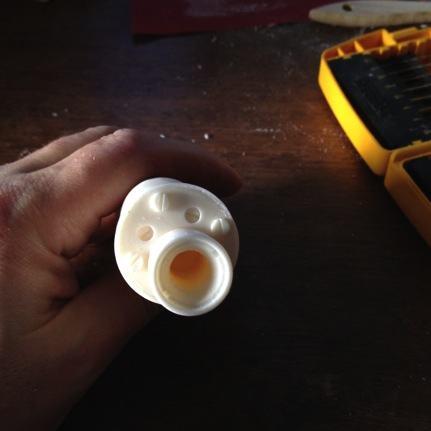
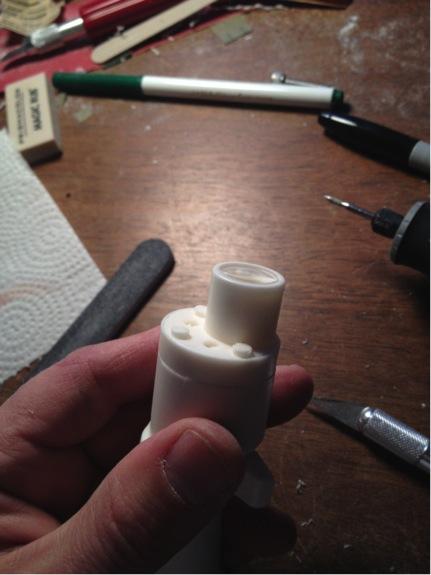
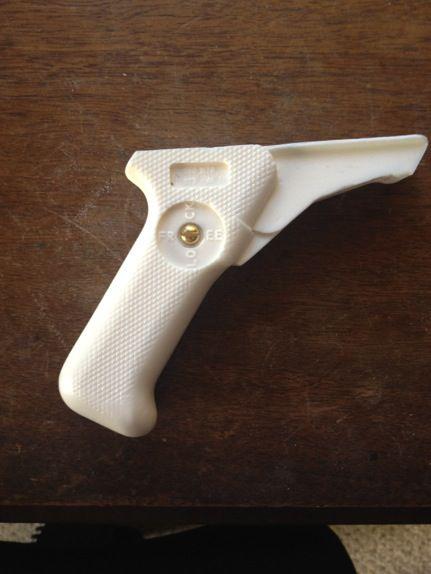
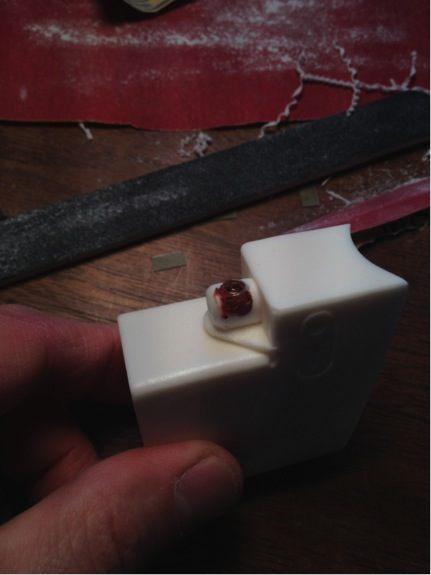
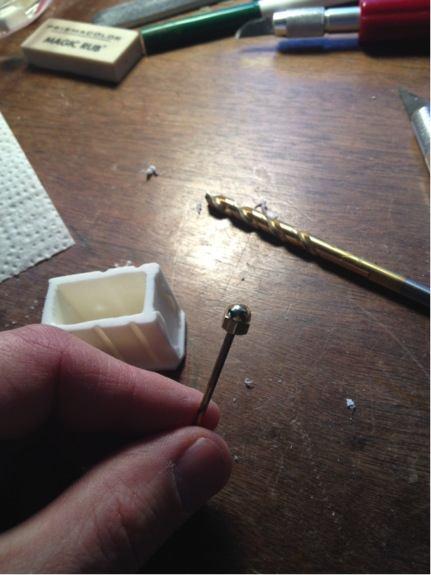
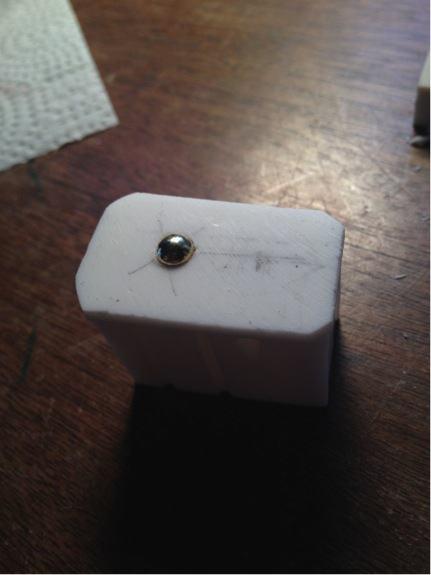
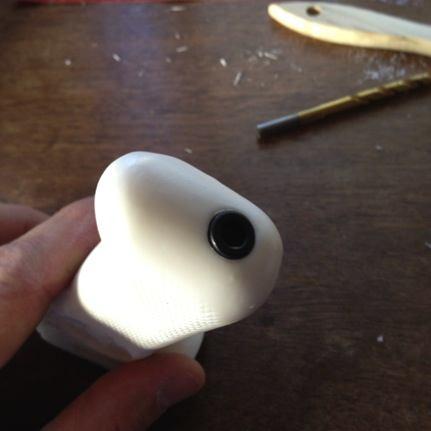
So I didn’t plan on creating a build thread. In fact, this is my very first one. I had read a bunch of other builds and was amazed at the talent and attention to detail demonstrated but didn’t want to do much more than put it together. My initial thought was to build the blaster as is from Doopy Doos and that would be “good enoughâ€. After all, my armor is coming January 5 and I want this done by then. The little brown box was delivered on Christmas Eve. Yeah, I was a little excited and dumped everything out on my bed to inventory all the pieces. First DON’T: Don’t dump everything out on your bed. There are little pieces of resin and dust in the box and they will be all over the place. I began building yesterday by cleaning up the parts. I figured some simple sanding here and there and that would be it. I started on the grip. I noticed the screw on the bottom really looked like crap so I figured what the hell, I’ve seen this done on other threads. I’ll put a real one in. It’s just a simple mod. The lock screw on the side looked like crap too. Meh, just one more mod. What can it hurt? I have a new dremmel that I was going to use for my TK build in January, might as well use it now and remove the area in the folding stock. Yes, that’s blood on my folding stock. Second DON’T: Don’t underestimate the sharpness of a X-Acto blade. I’m beginning to like adding these little details. Maybe I’ll cleanup the ejection port too. Wow, those bolts on the front of the barrel really look like blobs. I’ll drill them out and replace them will real screws. This should be easy. I started with a pilot hole then moved to a larger drill bit and crap! I guess I was too overconfident. I never got any green stuff because, you know, I wasn’t going to mod the blaster. I’ll have to find some. So I put the barrel aside, along with my ego and confidence, and started working on something simpler. I filed down the mounting knob on the magazine port. Can’t get any simpler than that. I angled the corners and drilled a hole for the bubble thingy in the magazine. That’s its technical term. I read it in the Sterling Owner’s Manual. I actually thought about engraving the off and arrow because that really looked sharp in other threads. Nah, my hands aren’t steading enough for that. I moved on to cleaning up the scope. After looking at some of the other builds, you know, it really would be pretty cool to add some lenses. Might as well. Front lens opening drilled out. Not too sure what I want to do with the back lens yet, so I‘ll leave it alone for now. Hell, I’m not sure what I’m going to do for a front lens either! I had to go pickup my daughter so I stopped there for the day. That night, we drove all over looking for green stuff to fix my screw-up on the front barrel screws. My daughter was like, “Dad, I thought you were just going to put it together?†Yeah, me too, lol. It never dawned on me to grab a tube of bondo instead. I picked some up today. I figured, while I’m out getting stuff, might as well pick up a few more things. I felt like a mechanic when the car owner goes, “While you’re under the hood, can you just do this…†Third DON’T: Don’t think you’re “just gonna build it real quickâ€. You’re not. This is too much fun! Tried my luck at adding a screw to the magazine housing. Missed it by that much (said in the worse Maxwell Smart impersonation). No worries, I got some Bondo now. Repaired the front barrel screw-up too (that’s not blood this time, but Bondo) I picked up a round-headed nut for the magazine. The resin wall had to be thinned first. While I was out with my daughter today, we were in the hardware store and I saw this. I figure I might be able to use the lenses. When I got home, I realized it was a funky binocular set so I had 2 sets of lenses! I know, most everyone else is thinking the other set can be used for another build. I’m thinking I have a spare if I screw up the first pair. The small lens fit almost perfectly! Just needed some gentle sanding and in it went. The larger lens was a different story. That one will need some serious mod. I used a bench grinder to remove the bulk of the plastic then hand sanded it and put on a bevel edge so it fit easier into the scope opening. I’ll put one of those cross hair images I’ve seen on a few other threads under the lens so I don’t have to drill the scope out. And that’s where I had to stop for today. I’m so glad I was just going to put it together as is. I need to stop reading other build threads because there are just too many talented people with really great ideas.


-
Looking forward to see what you've made!