

elleerre
-
Posts
279 -
Joined
-
Last visited
Content Type
Profiles
Forums
Gallery
Articles
Media Demo
Everything posted by elleerre
-

From horseman boots to Stormtrooper boots
elleerre replied to elleerre's topic in Build Threads Requireing Maintenance
Attached new pictures to show how paint holds after some use. Let me know what you think. -
From horseman boots to Stormtrooper boots
elleerre replied to elleerre's topic in Build Threads Requireing Maintenance
Hi here I am again for an update. I can say that the paint holds astonishingly well, except where the armor is scratching on the shoe neck (not a surprise). Besides this the rest of the boots are still white after several hours of trooping. I'll post some pictures soon. -
Simply white.
-
Plasti-dip
-
Storage Containers
elleerre replied to LoveMonkey's topic in Boots, Soft Parts, and other Accessories
Guessing why the stanley bin is 85 bucks in US and around 130 damn euros here... -
Looks like it has a forward grip.
-
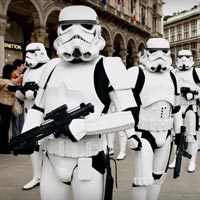
It's a chest rig without any doubt. If you look forward in the same scene, on the left side of the screen there are others, you could spot the shoulder straps crossed on the back plate of the armor. Quite a simple and "terrestrial" solution, for a SW movie. I like it.
-
Same as Coastertk. [emoji106]
-
Maybe it wasn't easy for them too. How's the feeling to work on such a goldmine and cannot share a thing with your pals?
-
To me that helmet smile is 90% of the thing, really don't understand the choice. They didn't lack designers and brainstormings for sure. Is there something around to read about this?
-
-------------- Too difficult?
-
Has to be pretty hotter in that undersuit...
-
Bushmaster stock and Leupold optic for the new blaster?
-
Chest rigs... Not bad
-
Me too. And it's not a little issue in a board like this.
-
I'm interested in the counter overall dimensions... could anyone please put them down on paper?
-
Android app for helmet audio. Development thread.
elleerre replied to LordNikon's topic in Electronics for Helmets / Blasters
VERY interesting. Is there a version for the dark side too? I'll consider to use it with an IPod touch 4 to avoid unwanted phone sounds during the use. It will be great to have developed something for it. -
From horseman boots to Stormtrooper boots
elleerre replied to elleerre's topic in Build Threads Requireing Maintenance
Like an elastic. Seems it hasn't changed a lot. I'll give a definitive opinion on the strenght of the paint after a bit of trooping. -
From horseman boots to Stormtrooper boots
elleerre replied to elleerre's topic in Build Threads Requireing Maintenance
Ah, ok thanks! I'll try to level it up with some glue or something and repaint, but it's barely noticeable when the shoe is on the floor. -
From horseman boots to Stormtrooper boots
elleerre replied to elleerre's topic in Build Threads Requireing Maintenance
Spell trouble? -
Hi everybody, following you'll find as I painted a pair of black Chelsea riding boots to make my trooper boots.<br><br> Wandering the web, I stumbled upon a product that seems to be very good and effective. It's just an experiment for now because I haven't trooped once yet, but the premises are very good. I've used a well known spray paint that I've found perfect for this pourpose (see at the end). The starting point Bought these boots online, in a horsemanship apparel/accessory shop. It wasn't easy to find something with the right shape.<br> Price was around 50 EUR shipped. Not an excellent pair of boots, but more than I could ask for trooping (and to make an experiment). Quite good leather and rubber sole. After a light sanding of the leather surface, I've masked the rubber sole all around. Then sprayed lightly a first hand of paint. This is what I got after 3 hands of paint. Finished "The product". Think everyone knows it. For those that have never seen it before, it's a sort of "spray film" which once dried form an effortlessly removable film (like those used in car wrapping). At the same time, however, does not come off easily with normal use, at least according to the manufacturers. The most important thing of this film is that it is elastic, therefore suitable for surfaces subjected to deformation, as shoes are. So will not crack when used as happens with usual paint. I tried a little search around to see if anyone had used to make the boots that we all need, but I found nothing. Maybe I missed. Please advise if someone else have done it. The procedure I used is very simple: 1) Rub the scalp to make the surface more gripping I used 800 grit sandpaper, but I think one could also use a 400 (or perhaps it was better). 2) Mask the sole with masking ("blue", that here is yellow) tape or other 3) Spraying I gave 3 coats + 1 light finishing. Recommended distance 30 cm. Interval between one hand and the other 30 minutes. For the fabric parts (elastics) you have to insist a bit more, as they absorb the color. You could give a first light hand without losing too much time on it, and insist locally with the next passages. 4) Wait for drying at least 4 hours. For full drying eight hours are recommended. 5) Remove the masking delicate step, as the film is on both the shoe and the tape. If you are not careful pulling unwisely you risk the film will lift. I suggest to slightly incise the color with a cutter before or during the removal of the tape. In this way you mostly avoid problems. The paint has a "rubbery" finish in the first times, but after some days it will lose it and becomes like real leather (maybe dust or else helps). For now it's all. I have not idea how durable is this finish on the shoe. I've made short walks and only tried the armor on. The rear calf has made little scratches on the back of the boot, but in front there are no signs of wear. BTW some scratches are welcome, right? On youtube you'll find movies where you see cars painted with the same product that are cleaned with a pressure washer without problems. We'll see if it holds here too. At worst, if it comes off, there's still under a black shoe on which to try again (perhaps with larger sanding paper) or use the classic technique with leather paint. Obviously all this is not comparable with a nice pair of white shoes already made, but you already know it. In summary: strengths - Reduced cost. Shoes and paint, I have spent around 60 EUR. The less you pay the shoes... A can is enough for a pair of shoes, and had leftovers. - Speed of execution. If you have half a day off, you are done. - Movie accuracy (if scratched). I'll not try this for now. defects - Strenght of the paint (?). I'll let you know after a couple of troopings. If you have any question I'm here. I hope this will help other fellow troopers! Ciao! EDIT 09/2015: This is how they look after some troopings, included a 2 kms walk through the streets of Milan during the SW Day 2015. I think they are holding pretty well considering the type of paint, and serving as expected. Please feel free to share your thoughs. Ciao!
-
Here I am with some updates. The trimming is almost done. Unfortunately I had not all the time I wanted to go on with this build, because [insert problem here]. By the way I've found some time to build some accessories. Thermal detonator It was impossible to find the correct diameter for the ATA caps, so I've bought a bigger PVC plumbing pipe (70 mm) and modified it to fit. Trimmed away a longitudinal section Then adapted the pipe inside the caps with the two trimmed edges joined together with no gaps (yes I know, you see a gap, just be patient). Used the heath gun to reshape the pipe to the new diameter. The wood stick helps the edges to join straighter. Result The holster is complete. I've used 3 mms thick black leather, trimmed according the template found here in the FISD board. It was a pain to make the holes to pass the stitching through. A couple of pictures during the work You'll find the finished pictures with the belt more under. Gloves are made. I've bought black chemical gloves and white latex Sonnenschein's hand guards attached togheter wit special Loctite glue (thanks Karin!) Boots are ready too. I'm very happy with these because I've found a great way to paint white a pair of black boots. Easy and "cheap". Go here Last saturday a couple of friends of the Italian Garrison Sub Zero Squad came to my place to try some fitting of the armor, we were so busy that no one took pictures, sorry. After that my work in this weekend was almost entirely on the canvas belt. Following Gazmosis' suggestions I've bought the necessary white cotton canvas and provided to trim and glue together (ironing) five strips. ThinktThe result, after stitching the edges and attaching velcro on ends, is great. It is a stiff but flexible belt. Could one ask for more? Canvas belt and leather holster, finished. Sorry for the poor quality picture. I'm concerned about just one thing: the belt is 85 mm (found in a thread here) when in the reference library is said 83 mm. My fault, I haven't verified before the correct dimension. Could this be a problem? I could trim away 2 mms from the belt or make another one, if needed. Will post more pictures as soon as possible. Ciao!
-
As told by many others that's an MG 42. Fabolous weapon but not so accurate for a TK.
-
I don't think they want to ruin their reputation doing such a stupid thing. Maybe the description an the suit are accurate, but the suit's parts were made by different suppliers...
-
The right guy's knee ribbed underarmor seems to slip out of the armor. The underarmor seems to be plain at the top of the picture. I think the ribbed parts are inserts.
