

elleerre
-
Posts
279 -
Joined
-
Last visited
Content Type
Profiles
Forums
Gallery
Articles
Everything posted by elleerre
-
Thanks Jason, I think I'll choose the menacing version...
-
Thanks for the advice, Steve. I was following pandatrooper's tutorial, that made the "twinkie" shape, hence the shape of mine. Is the squared shape more correct ?
-
Thanks Germain!
-
Ok, thanks.
-
And.... what are these screws for?
-
Hi everyone, following you'll find the next step of the build... as usual comments are warmly encouraged and welcome. Once decided the height of the brow, I've made the rivet holes, from now on no regrets... And here it is after the first rough assembly, how am I proceeding? A little check at the alignments... Then I removed the brow rubber and refined the borders where necessary. After this I provided to mark the borders of the rear shell on the mask. From the beginning I left all the ABS borders on mask's sides, now it's time to cut the excess plastic away. So, I drilled away the rivets... And cutted away all the exceeding ABS. This will guarantee that the two shells have enough (not too much) overlapping. The result after re-riveting sides and adding the rivets on the bottom. Ok, now the going gets tough... my first ear attempt ever. Please feel free to be honest with comments. First check after rough trimming. And trimming... And trimming... And trimming... And trimming... [Lots of wary trimming here] Finally I become to a quite satisfying result. I need some advice now, to know if/where there's something to modify. I'm not completely satisfied with the front gap, that is too wide in my opinion. But I don't know if it could be left as is. The curvature is quite good, is there any way to make the ear tight to the helmet? Last thing: has the bottom screw to be visible or not? I've found it half way after installing the bottom rubber seal (don't ask me how did I made it...) I've paused the build for now so I can get some advices and avoid further mistakes with the right ear trimming. Thanks in advance to everybody. Lorenzo
-
Yes I know the overlap, I was saying they overlap a lot, maybe I have to bend it backwards during the drilling.
-
Thanks Germain. About the lower border, clasping the parts together, the rear side comes in the front against the mask. You can see it in the reversed picture. Should I find the better position keeping firmly the shells by hand during the drilling? Or it's not important in this step?
-
So, I'm at another crucial point, I need some advice please. I want to reach a low brow positioning, but not in line with eyes, just a little lifted. Is the dome positioning good? I need to know before to drill the first rivet holes... And how about the teeths dimensions, now?
-
A good dark result for my helmet internals, hope Lord Vader will be proud of me... It seems a little bit narrow to put my head in.... Will be solved with the lower rivet?
-
Result after driyng (dust is because I'm still working on teeths) ATA logo masked with a double layer of transparent adhesive paper. After painting I've took away the upper one, so the lower remains to protect logo and signature
-
Another batch of pictures. Sorry again for the phone quality, but my camera is definitely gone. After taken away the eyes and most of the theets' ABS I've remembered that I wanted to paint black the inside of the helmet. Nice move, Lorenzo... So, I've washed the inside of the mask and dome with dish soap, masked up all the holes with some aluminum tape (hexaust tape), that is very sticky and has done its job. Then, following Ales' tutorial, I've protected the outside of the parts with plastic bags, fixed with blue tape (that in Italy is yellowish, I don't know why...) Finished with a good grey primer spraying. After the primer dried, I've painted the internals with spoiler/bumper paint, that has both good grip and satin finish. I'm very satisfied with the result, smooth and clean.
-
Bigger pictures inserted...
-
Ah ok, that's right, sorry. Today I'll make some further work... Thanks!
-
Thanks for your feedback Germain. However I will not paint it. I'll go with polish only, I think it's a better solution for maintenance. How about teeths, in your opinion?
-
Up Any feedback will be very appreciated, thanks!
-
Another question: how can I level the imperfections on the pulls? I was thinking to heat up the inside with a professional heater, the using something flat from the outside to level where needed. Or... will be sufficient a general polish to make the imperfections less evident?
-
Hi all, I want to show the first results of my work... Started with marking the excess ABS for the cutting, using Lexan scissors. I've left the entire side borders on mask, for now, as I've read that usually it's a little bit short. So I'll proceed with the necessary fittings and then cut the surplus ABS. As suggested in Pandatrooper's tutorial, I've made a hole on the corner between ears and front of the dome, to avoid cracking the ABS, during the cutting. As you can see, leaving the excess ABS on the mask sides wasn't a bad idea, for now. Eyes/teeths cutting... sorry for the poor quality of these pictures. Refined dome and mask, cutted away eyes and started to make holes through mouth. How am I going in your opinion? P.s.: a big thank to Pandatrooper and Ales for their tutorials...
-
Thanks everyone. Hope to start in the next days.
-
-
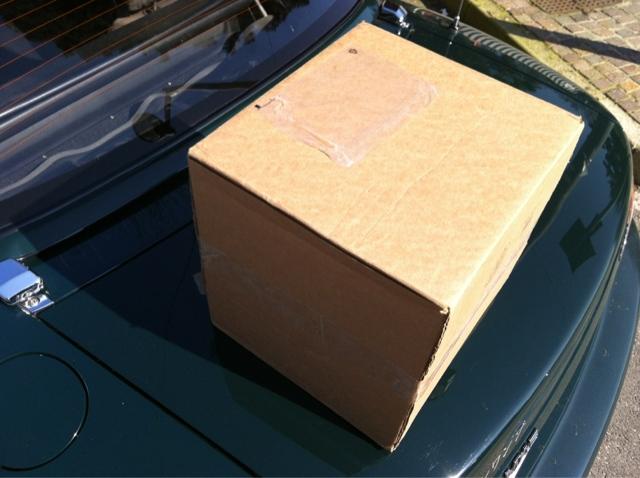
Not THE big box indeed, but one has to start somewhere... Thanks a lot! And thanks to Terrell too!
-
So... Here I am, ready to start this adventure for the first time. Can't explain the feeling to pick up this box at the post office. I'm happy like a child. For now the helmet, I cant'wait for the rest of the armor... I'll need for sure your help so stay tuned!
-

The best body suit?
elleerre replied to Brown1215's topic in Boots, Soft Parts, and other Accessories
Thanks Griffin. -
The best body suit?
elleerre replied to Brown1215's topic in Boots, Soft Parts, and other Accessories
Hi Guys, I resume this with a question: which undersuit for HOT/summer trooping? You know, if it's cold it's easy to add layers. But at least a layer it's needed when it's hot too... Thanks... -
New airsoft MK4 L2A3 soon on market
elleerre replied to skyone's topic in General Weapons Discussion
That's a good point. Engineering a new gearbox is expensive, no doubt on it. Anyone has pictures of it? I was so sure they were using a (modified?) AK47 gearbox, but I forgot that the magazine is in a completely different position. By the way, I'm still not sure that 500$ it's an honest price... With the above considerations I'll say that around 400 will be good.
