
PhoenixTrooper
-
Posts
106 -
Joined
-
Last visited
1 Follower

About PhoenixTrooper

Recent Profile Visitors


-
Death Trooper WIP (Lots of pictures)
PhoenixTrooper replied to PhoenixTrooper's topic in Build Threads Requireing Maintenance
Yeah, but it doesn't show up well in photos. I hit it with some brown spray paint mist to look like dirt, but you have to redo it every couple washes. Actually hit the neckseal with the sander on the dremel, bit don't want to put holes in the suit where skin would show through. I like it being washable, so not adding zombie spots. Sent from my 831C using Tapatalk -
Death Trooper WIP (Lots of pictures)
PhoenixTrooper replied to PhoenixTrooper's topic in Build Threads Requireing Maintenance
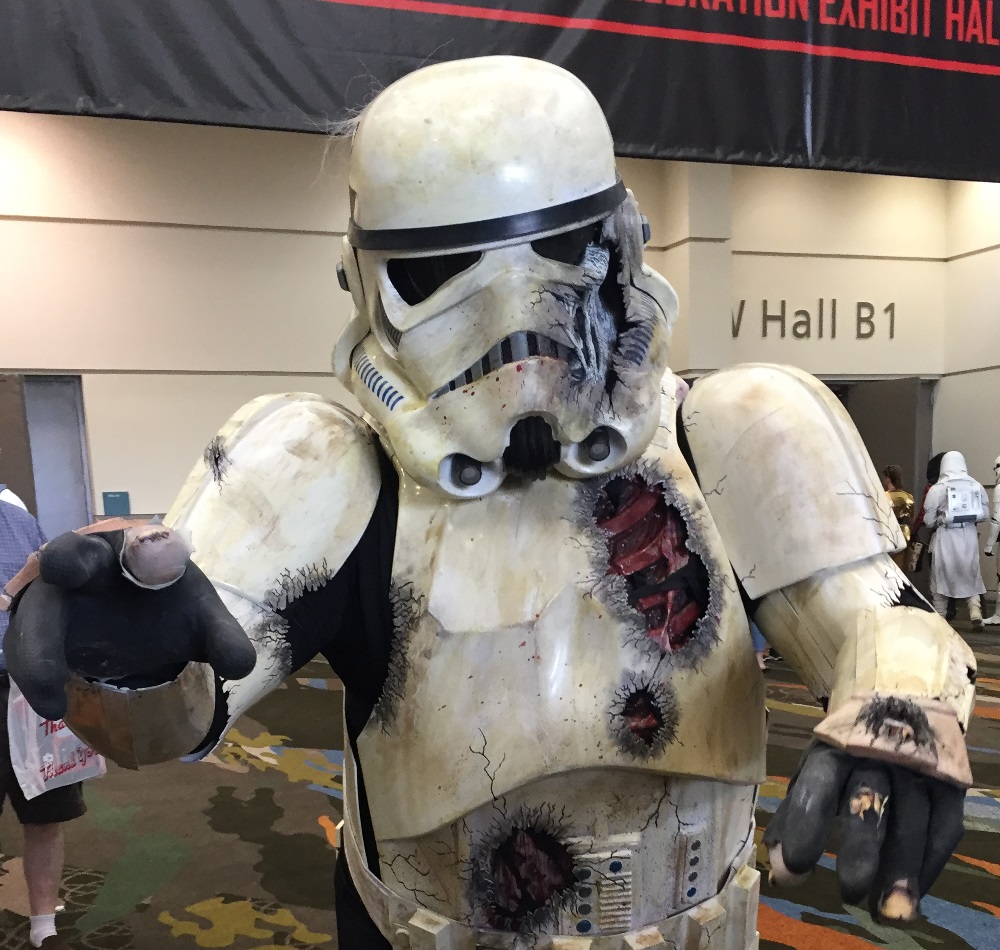
This is a pic from Con, which also shows the new weathering with more olive color they asked for. Once I get over con crud I'll repair a couple things a drunk guy broke, then throw it on and take my Centurion pics. -
Death Trooper WIP (Lots of pictures)
PhoenixTrooper replied to PhoenixTrooper's topic in Build Threads Requireing Maintenance
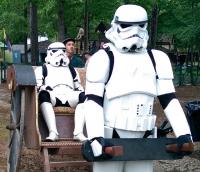
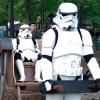
Yep, I was the one without the mouse ears. Sent from my 831C using Tapatalk -
Death Trooper WIP (Lots of pictures)
PhoenixTrooper replied to PhoenixTrooper's topic in Build Threads Requireing Maintenance
Finally managed to get the lights hooked up in the helmet. Here's a quick video. Sorry the image is kinda bad, but my phone is sorta sucky at that. There's a flashing alarm light behind the broken lens, and a sparking electricity light in the side tube. http://vid381.photobucket.com/albums/oo252/Metikla/TK%20Stuff/Death%20Trooper%20WIP/lights.mp4 -
Thanks! Yep, Centurion's the plan. I'll get to dirtying those rivets. As to the olive green - I actually was purposefully avoiding that color because it doesn't make a lot of sense. The armor itself doesn't get gangrene and rot. I wanted the weathering and damage to make sense so I was using dirt browns and soot blacks with some red blood spatters. Is there a reason behind the green? Seems a little 'fleshy'.
-
Interior connections Exterior cod connection DLT-19
-
Name = Chris Sanders TK ID = 80806 FISD Forum Name = PhoenixTrooper Garrison = Georgia Garrison WIP: http://www.whitearmor.net/forum/topic/36006-death-trooper-wip-lots-of-pictures/ Armor Maker = Anovos Helmet Maker = Anovos Blaster = Hyperfirm DLT-19 Height = 5'10" Weight = 250 lbs Boots = TK Boots Canvas Belt = TKittell Hand Plates/Gloves = justjoseph63 Neck Seal = Darman “Holster” = me Full Body Pictures: Front Back Left Right Right Detail Left Detail Armor Details Abdomen Details Action Shot Helmet Details Front Side Back Hovi Tip Detail Lens Color Accessory Details Neck Seal Thermal Detonator Back "Holster" Attachment Extra Rubber Guards S Trim
-
Death Trooper WIP (Lots of pictures)
PhoenixTrooper replied to PhoenixTrooper's topic in Build Threads Requireing Maintenance
And finally approved! -
Death Trooper WIP (Lots of pictures)
PhoenixTrooper replied to PhoenixTrooper's topic in Build Threads Requireing Maintenance
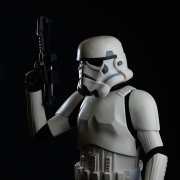
Shiny new pics acquired! -
Death Trooper WIP (Lots of pictures)
PhoenixTrooper replied to PhoenixTrooper's topic in Build Threads Requireing Maintenance
And.... it's done! Just submitted the below pics to my GML. Once I hear back from him we'll submit for EIB and eventually Centurion! Getting nicer photos made with a real camera tomorrow. In the words of some Mutant Enemy - "Grr. Argh." (Cat doesn't even care.) -
Death Trooper WIP (Lots of pictures)
PhoenixTrooper replied to PhoenixTrooper's topic in Build Threads Requireing Maintenance
So, I haven't updated in a bit. This has been for a couple reasons. One, I was looking for some good 70's tech to put in the belt boxes and such, and two, I took a break to completely redo my dining room. One hardwood floor later, I'm finally back at things. Which is good, because I really only have the legs to do now. The fun part has been putting the computer bits in my armor. I have holes one of my belt boxes, one of my drop boxes, and in one of my knee ammo packs. Belt box: Drop box: Knee ammo pack: After the tech was installed and decorated, I also got one calf completed. Decided the knee was a bit stabby looking, so... When I got done, I showed a few folks and I won a Major Award! (It said Fra-gee-le, so it's apparently Italian.) I got initial work started on the other 3 leg parts, but ran out of time to work on it for now. Hope to have it all done within the next week or so. -
Death Trooper WIP (Lots of pictures)
PhoenixTrooper replied to PhoenixTrooper's topic in Build Threads Requireing Maintenance
So, I've finished the upper body except the belt for the most part now, and haven't updated for a bit. Figured I should do that. I laid out the back to look at it all together: and decided I could use a new blaster shot in the kidney to make it well rounded. I also had to add shims to the armor since I'm not 'tiny British actor' sized. Since the Anovos armor is so thin, no matter how I did it there was going to be an uneven surface (my shim material is much thicker) so rather than making a butt join between the shim and the kidney and filling it in like I did on my ATA TK, I cut the shim long and glued it inside the Anovos kidney (also conveniently fixing where they had made the little cut out for me that would be in the wrong place with shims). Then I sludged it and sanded it down, then wetsanded so the weathering would look about right when I got to that part. Some creative weathering and cracks, and you can barely see it's separate parts now. Also cut the little cutouts back into the correct place. This is much more solid than my ANH TK, and I am considering updating it now. And while the belt isn't done yet, the thermal det is: I even carried some of the damage over to the metal clips for some reason. I guess I'm just an overachiever. -
Death Trooper WIP (Lots of pictures)
PhoenixTrooper replied to PhoenixTrooper's topic in Build Threads Requireing Maintenance
I can try to take some better pics later, but these are some quick ones I happen to have atm. I've also not actually cleaned it up to look pretty inside yet, beyond the initial painting it black. Have to cover some of the foam and hair bits and things still and add some small head pads, but it's wearable as is: The pieces are glued down with foam separators to give some depth so it looks like your skin in the armor instead of something glued over the hole. Actually do that throughout the armor. You can see I cut out the eye hole since it's behind the lens where your eye can't be seen. You can also see in the corner where I've started the back plate. It's not done yet, but it's coming along: -
Death Trooper WIP (Lots of pictures)
PhoenixTrooper replied to PhoenixTrooper's topic in Build Threads Requireing Maintenance
Put the ab plate together today. Started out cutting out the buttons and painting and attaching them like I was building a normal TK. Left the little ridge showing around the edge that they asked for on my Centurion ANH Stunt as well, since I plan eventually having this as Centurion as well. Once it was all nice and pretty, I destroyed it. If you look closely where the button plate is broken, I added some burned up wires sticking out: And finally, to get a rough idea of how they look together: -
Death Trooper WIP (Lots of pictures)
PhoenixTrooper replied to PhoenixTrooper's topic in Build Threads Requireing Maintenance
For the fun of it, I threw on the upper parts to see how it looked together and check weathering consistency: Then I started working on the boots. My ANH Stunt TK bots are over a year old and have been to the Ren Fest and other troops, so they aren't super clean anymore. I bought a new set of "less than perfect" boots from TK Boots for this, and they were so nice, I gave them to my shiny TK, and I took the older set for this. I dirtied them up a tiny bit more, since some of the dirt was real, and then summoned up the courage to damage them: I burned the edges of the leather as best I could, but it was so fire retardant I ended up using charcoal powder and dirtying it that way. Also added some 'blood' coming from the cracks. Then I put in my zombie foot (which had to be repainted like ALL the other body parts to match the white skin on the mask).
