


Clamps
-
Posts
2,090 -
Joined
-
Last visited
-
Days Won
8
Content Type
Profiles
Forums
Gallery
Articles
Media Demo
Posts posted by Clamps
-
-
Did some work on the cocking handle to allow it to ride in the channel & Shorten inner barrel to allow spring mechanism to be in a good position.

Scratched in the "OFF ->" text into magazine end.


Dropped the end cap and a chunk flew off. Had to get the JB stick out to fix it up.


-
Yeah not sure why Loctite didn't work for you Charles. You can use mine if you have a problem after. (Actually one of the Loctites I have I think is Jennys... oops)
my fail was grazy glue not loctite, so I will try that too.
-
Rubber hand guard mounting fail #2 today. Friend was over today working on a costumer and he had some Gorilla Glue. Same result.
Will look for the tube repair glue. Keith used Loctite on his and it worked perfectly.
-
Joseph, if you are interested in an older kit, I may know of someone looking to sell a kit to get a new clean white TK. PM me over on the Tantive IV group for details.
-
Looking good there Charles, have to remember a few of your issues when I finaly get to work on my armor

oh dear, if I could keep track of ALL my issues

Today's issues... normal super clue no likey sticky to Rubber hand guards....time to go out and get the kind with activator pen and try again tomorrow!
-
Yay mailman/lady!!!
Karin's rubber hand guards have arrived!!
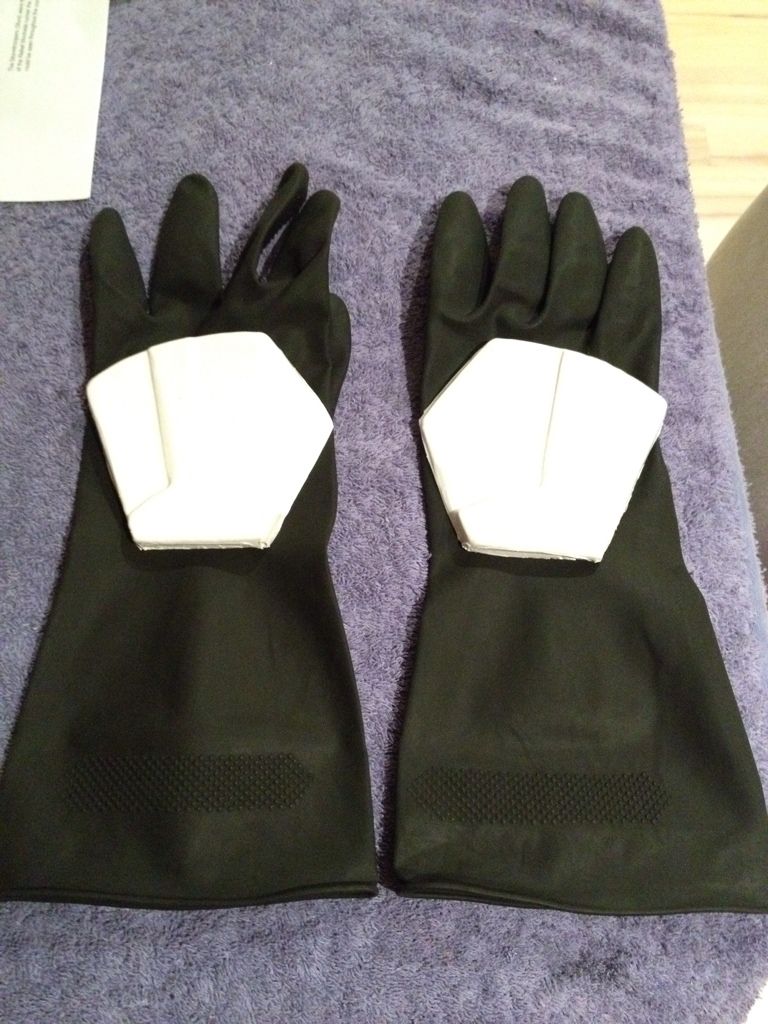
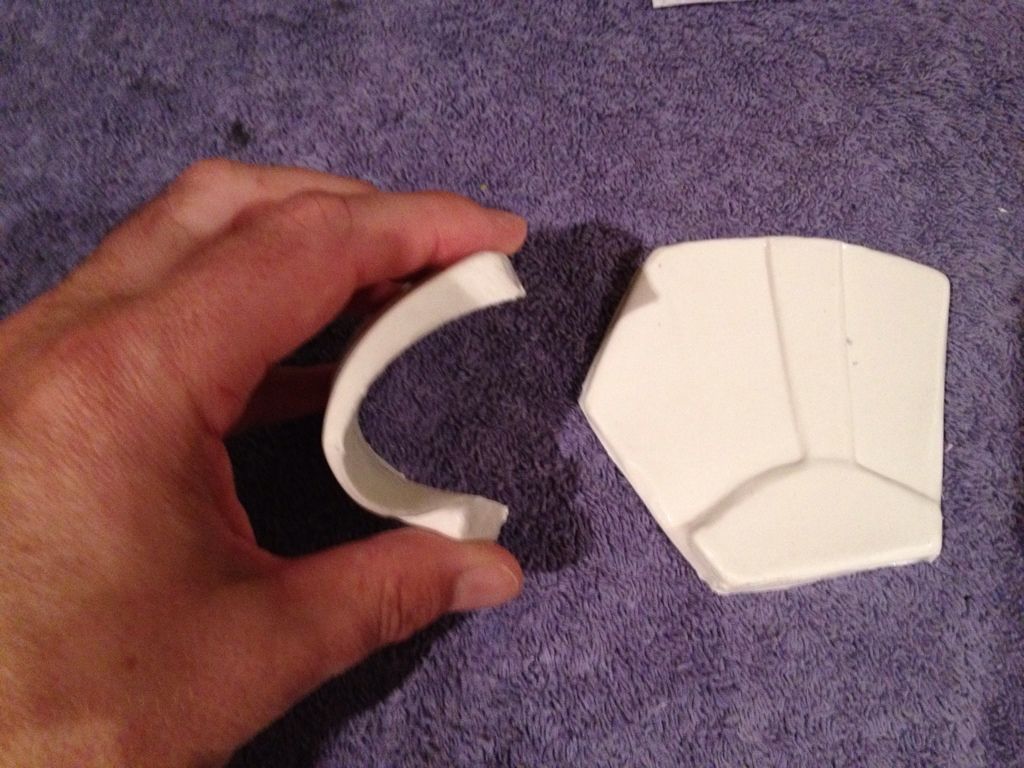
Now where's my superglue?
-
Congrats TK12421. I just ordered mine from AP this morning. Since I am a novice at being handy I opted for the fully trimmed armor and helmet. I hope that is comes out of box ready to wear without painting or tweaking too much. I cant wait for mine! My next issue is to buy a decent pair of boots and a blaster. Any suggestions from the forum???
fully trimmed AP kit is just that, fully trimmed. it is not painted or strapped or cut to fit your body type, so you'll have plenty of work to do. I got the AP trimmed, check my build thread for an idea of what you have in front of you. might be best to start a build thread to get your preliminary pre-build questions handled to keep this trooper's thread on point.
-
Lots of new recruits and build in the Southern Ontario area. lots of events going on with the CG and lots great people and contacts that are fairly local to get you on track...
-
Joseph, PM me, I have a great place for you to join up on Facebook
-
Joseph,
as someone in your position back in April, I can tell you that it is VERY overwhelming at first. Heed the advice being provided here. it is GOLD. Use these forums to your full advantage. the wealth of information here and the "troopers helping troopers" mentality is just amazing. The more you communicate here the more you will get out of it.
I am learning that its OK to ask specific questions! I was shy about it at first because I didn't want to look like a dummy. Better to ask than to either not know or make a major mistake.
#1 rule in my book is to have FUN with this. First time building is NOT easy, oh man it has not been easy. Along the way, you will pick up momentum, hit stumbling blocks and suddenly you will find yourself having he confidence to power through this and be out there trooping and raising money for the kids. I am sooo close to this point it hurts that I cannot make the tweaks I need fast enough for approval.
Patience and the knowledge learned here will go a long way!
did I mention, have fun?
-
Living in Toronto it takes about 2-3 weeks based on my two orders of experience.
-
-
Update time.
So, I found an old "kids" broom laying around. I took off the brush and handle and ugly wrapper and it is a metal tube with about 17cm outer diameter. This could work for my innter barrel!

So, in speaking with Vern, he gave me a tip on how to secure the smaller "inner barrel" by using collets to suspend the barrel and keep it from rattling around. I looked through all the crap in the house and could not come up with anything that seem like a good fit. Standing at my work bench, it hit me. HOCKEY TAPE.
I wrapped the end of the tube many times, tested the fit, more wrapes, more test fits until I found a fairly snug fit. With the tip in place, I marked where the scope rail enters the barrel and drilled out a hole large enough for the scope rail tab to fit into.
I removed the inner barrel and wrap a second section in tape just a bit behind that hole. Then I measured the hole to the mid ejector port and then applied measurement to the inner barrel (marked in red). This is my cut line. This will allow my spring/cocking handle piece will fit all the way up to the inner barrel and and have room to be pulled back nicely if all works to plan.

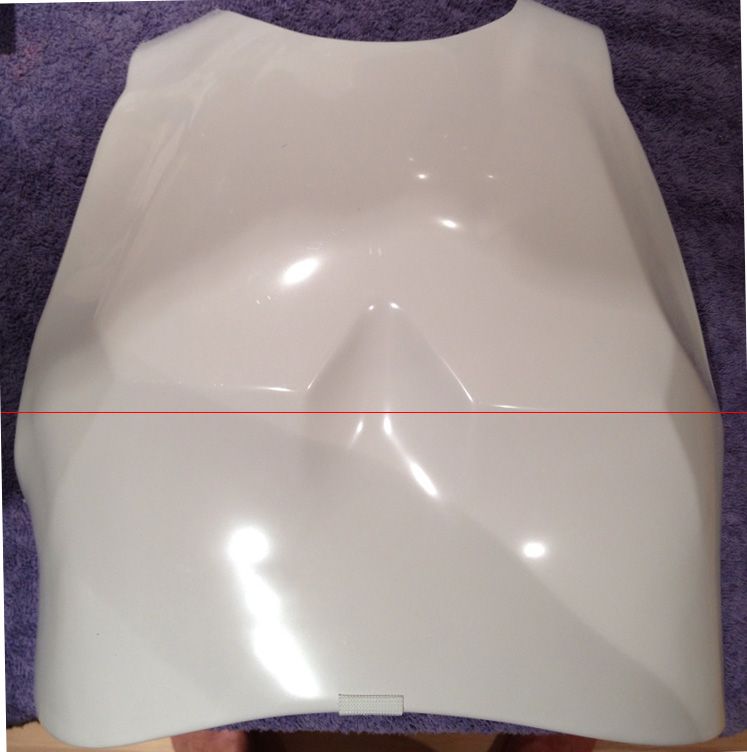
Here are a couple of shots with barrel in place that you can see through the vent holes and second angle is looking down the barrel from the muzzle tip.

I still need to work out a Hengstler bracket, been lazy to get out and buy the metal to make this happen.
So, now I just have to get everything ready for paint!!! Come on good weather!!! I am planning primer, hammered black and then possibly hitting it with a light matte black top coat. The spring, barrel etc I am gonna try to find gunmetal or at least a darker grey than the primer.
Fun times!
-
Thanks guys! if the crack presents an issue in the next fitting, I will consider the abs paste fix. For now, I thing it will be a non issue as it will be glued down on the chest. we'll see.
Finished sealing up the right forearm tonight to give a teeny more breathing room.
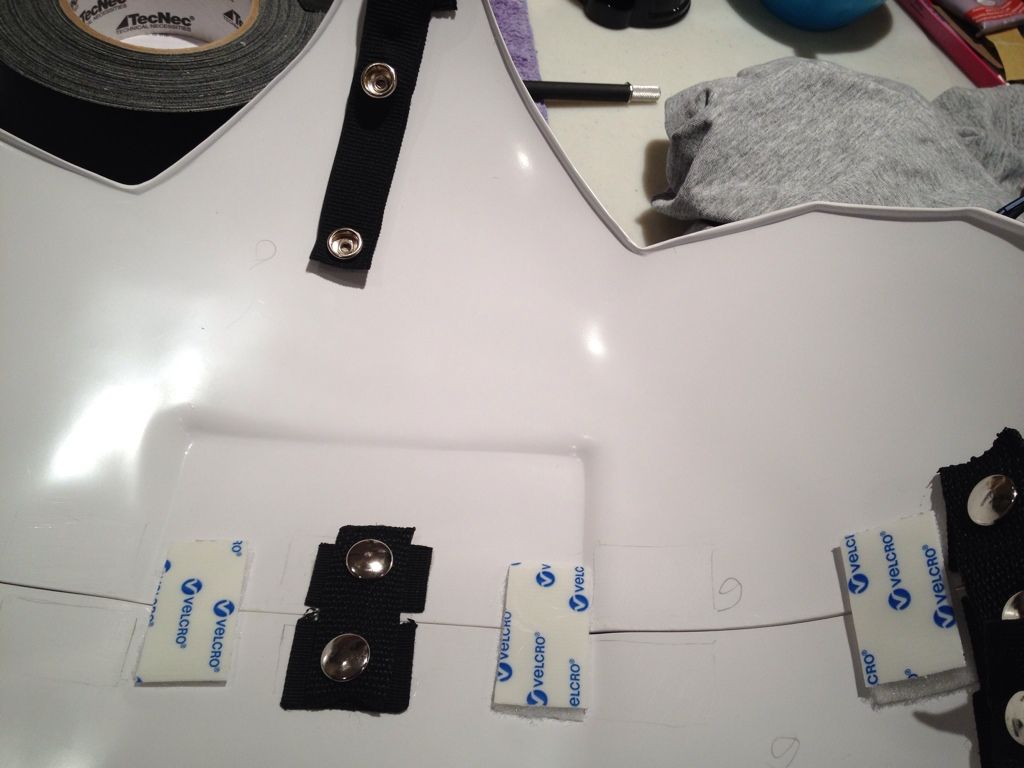
pulled the snap plates from the chest and back and will replace. I had two snaps per side and I think this was causing some of my mis-alignment issues. with a single snap, there is room for rotation of the snap to allow the font/rear to sit proper. I will know on my next formal fitting (which I am timing out to be Saturday).
Added snap plates for back to kidney connection.
Shortened my suspension system connector so it would not catch on the top of the AB plate.
Added elastic hair tie to rear of hand plate to keep the plate from sliding forward.
Researching bicep hooks so I can keep the SA bicep to forearm strapping (keeps popping out of shoulder bell and then catching when I bend my arm...locks the whole thing up.
Holes drilled for thigh ammo belt, using temporary brads to hold it as I want to put my coverstrip on first.
That's about all of the progress so far...if all goes well on Saturday's fitting, I will be submtting for approval next week!!!
oh, and interestingly enough no one, not even myself mentioned that I forgot to have my TD on in my last full fitting *D'oh!
that's all for today.
-
Just a little progress update:
Butt plate popping out issue resolved i went back to my older straps amd then added four velcro tabs
I raised the torso as high as it would go, based on physical limitations of the "boys"
Based on current default trimming. The thighs won't come any higher. In this shot they are actually smashing/ wedging my flat a$$ butt cheeks
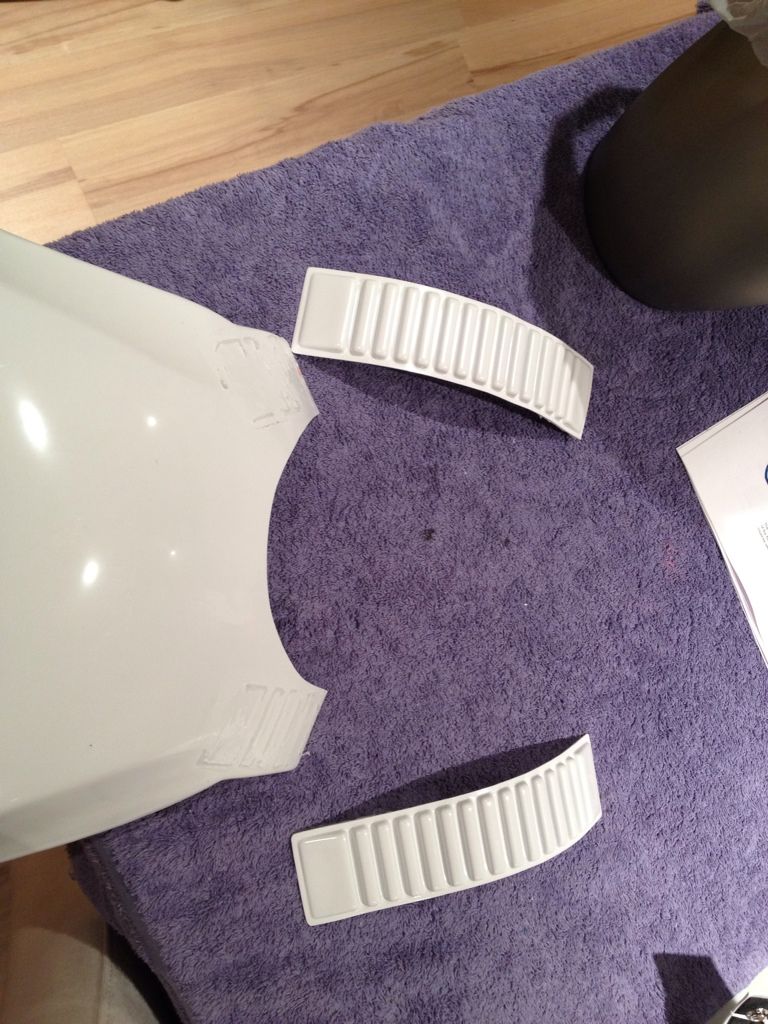
Shins complete (minus sniper plate), Biceps complete, Left forearm complete.
Decided I wanted a touch more room in the right forearm so I cut the inner for sale sign strip. This is where I realizes that these strips, while a blessing for install, are a nightmare to pull out as they fall apart or simply won't come off without getting a knife involved (which I was hoping to avoid so I don;t slash my armour OR my hands. Anywho after trying to clean that out of 1/2 of a forearm for 30 mins. I moved on to gluing a covers strip to 1/2 of the open side. Will glue the second half tonight.
And then decided to totally rework my chest/back/shoulder situation as it was twisted up. Step 1 remove the parts:
Step 2 wa to rub all the E6000 off. No problem for the chest. Kinda a pain on the shoulder straps. But all went well until I noticed THIS. <in my best Family Guy "Bruce" voice> Oh No </Bruce voice> that ain't good. I was very careful to support the strap when removing and cleaning. I dunno how that happened. I figured it should still be ok as that is the front part and glued down well with lots o support. Still sucks though.

Had the wife hold the back in place and then the front and we made a temporary connection to get me started on the elastic strapping. Once that is done I will revalue he shoulder straps.
One thing we really noticed that I never did before is on the chest piece the two breast are very different angles relative to the whole chest. this was giving my wife fits last night as she was helping me try to test alignment and she kept using the breast as a reference point. Once we realized they were imbalanced, we use the relative positioning of the Bottom edge as a whole and had better success. Is this a SA thing that I just never noticed before?
-
I'm my first build and having a blast. I am trying to incorporate centurion req from the get go. For sure it was not too much more effort to include in the build as I went.
I do have to go back and do my traps and tears with paint or paint like decals.
I am loving the challenges and the tremendous support the folks here at FISD provide!!
-
Don't worry. If you ever build another suit you'll think it's super easy.

if not easier at least less daunting of a task and wondering WHERE do I begin, HOW do I do this. OH and allow for not making the same mistakes twice (speaking for myself specifically here).

-
Thanks guys,
I will have a looksee at raising the ab, which is EASY to do with my adjustable harness
 I will bring it up and see what happens.
 As for the butt, I will shorter straps. in an earlier fitting I had shorter straps, but they kept popping off. I will put those back on and then velcro to see is that helps out.
was thinking about the forearm-bicep strapping method test, I think I need to research the bicep hooks I saw somewhere, this may be what I need to keep it from dropping to low and causing the lock-up.
So excited as I am getting close!!

-
I was thinking just do drill a couple of holes in the side of the end cap, then fill them will a couple of pieces of plastic dowel, the cut 2 L's in the end of the pipe so the dowel in the cap would slide down then twist to lock, the spring would keep it tight.
creative... I like where that is going....hmmmm
I secured the nibs with some E6000 - solid as a rock, and the cap is still removable.
Normally the Epoxy is ROCK solid, I realized when cleaning them off that I had forgotten to sand them and the inside of the cap, so perhaps the bond was not very good. Thanks for the option on going E6K
-
God, what the hell is happening with the fonts in the last post. lemme try to fix that.
-
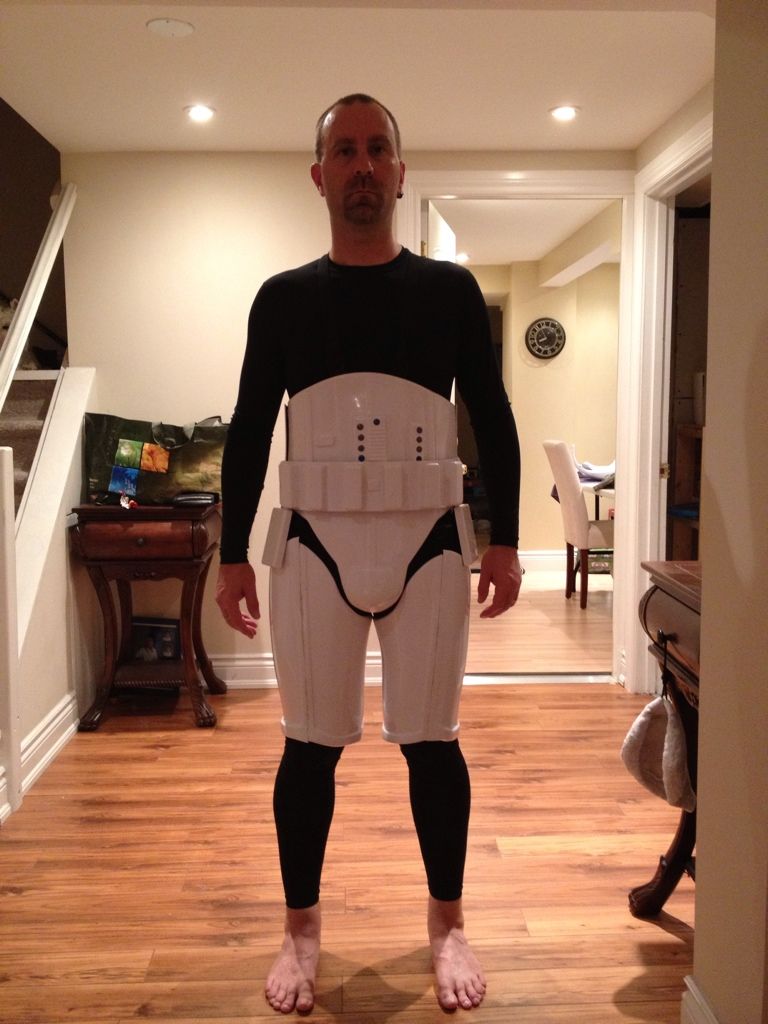
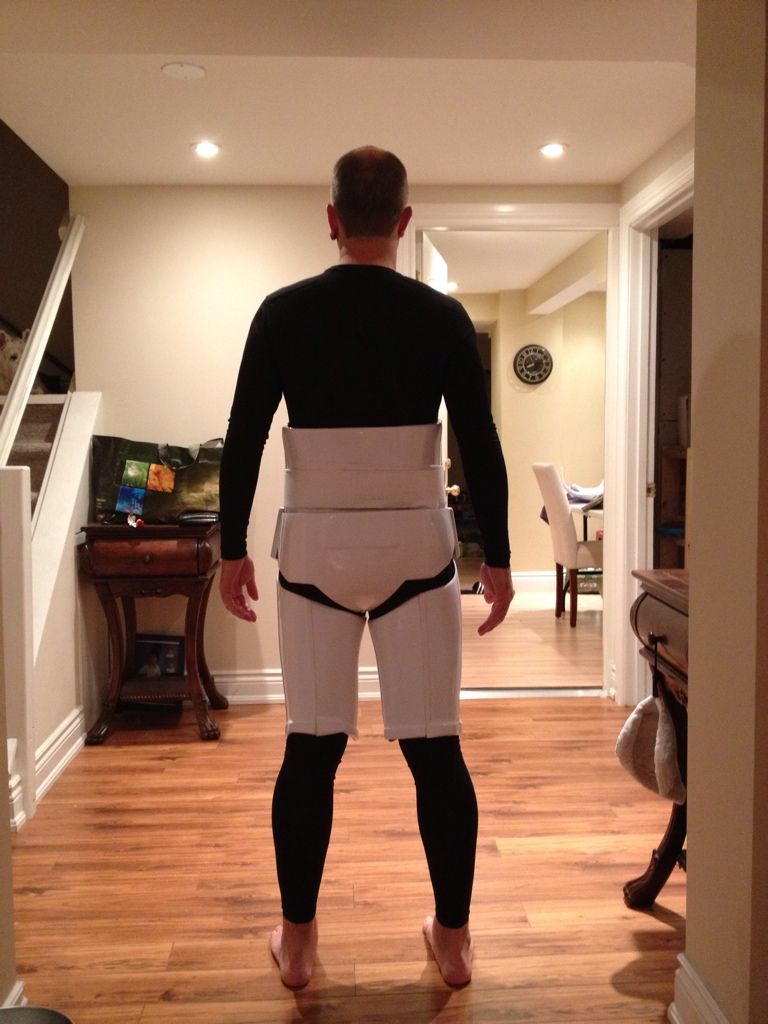
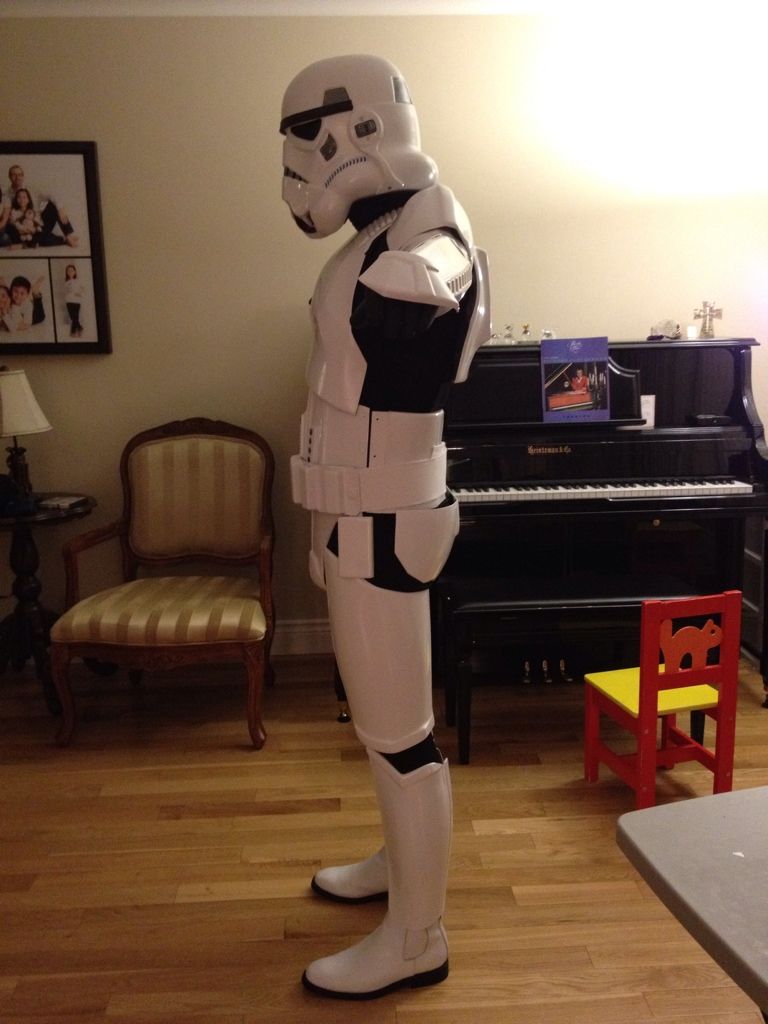
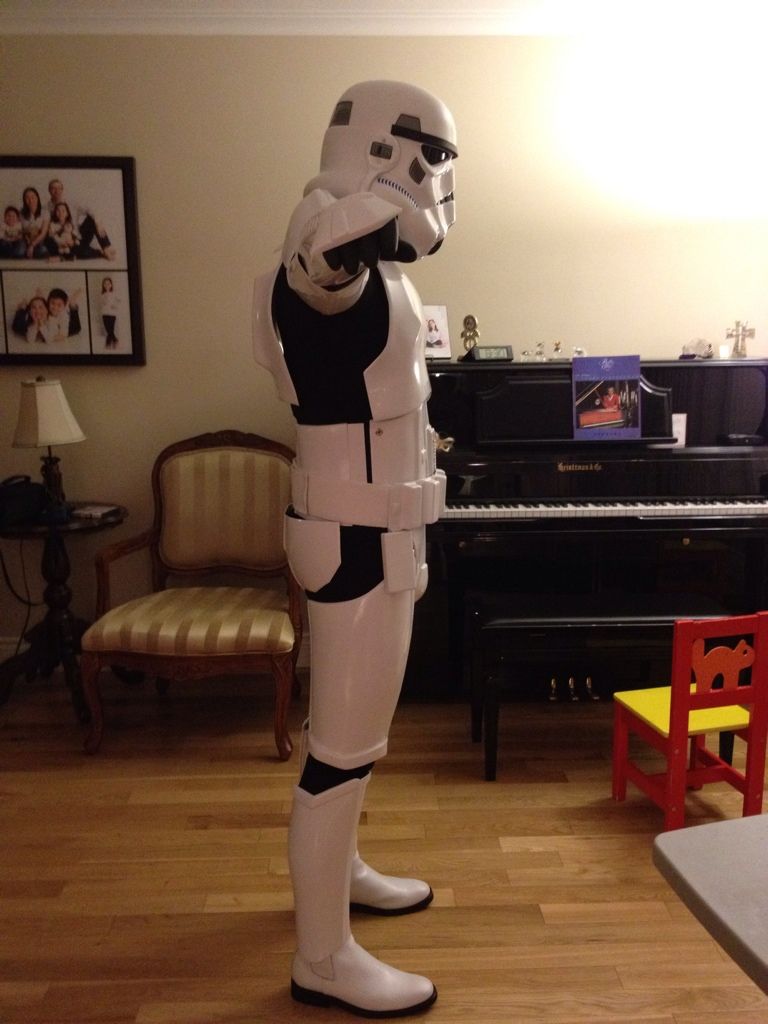
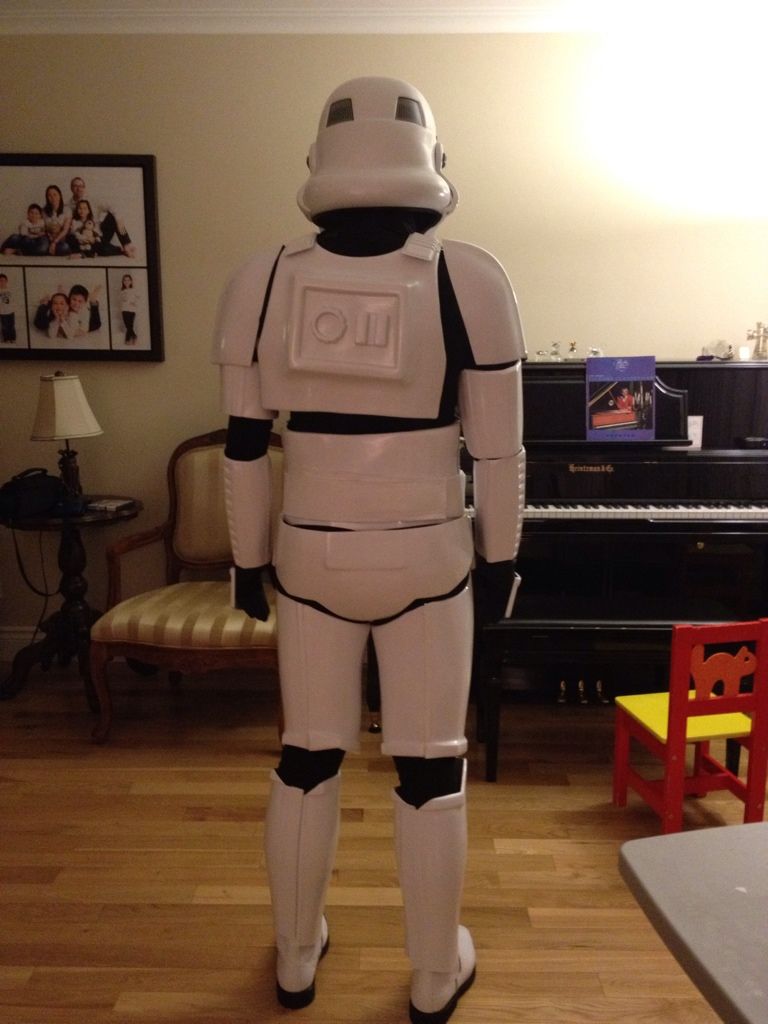
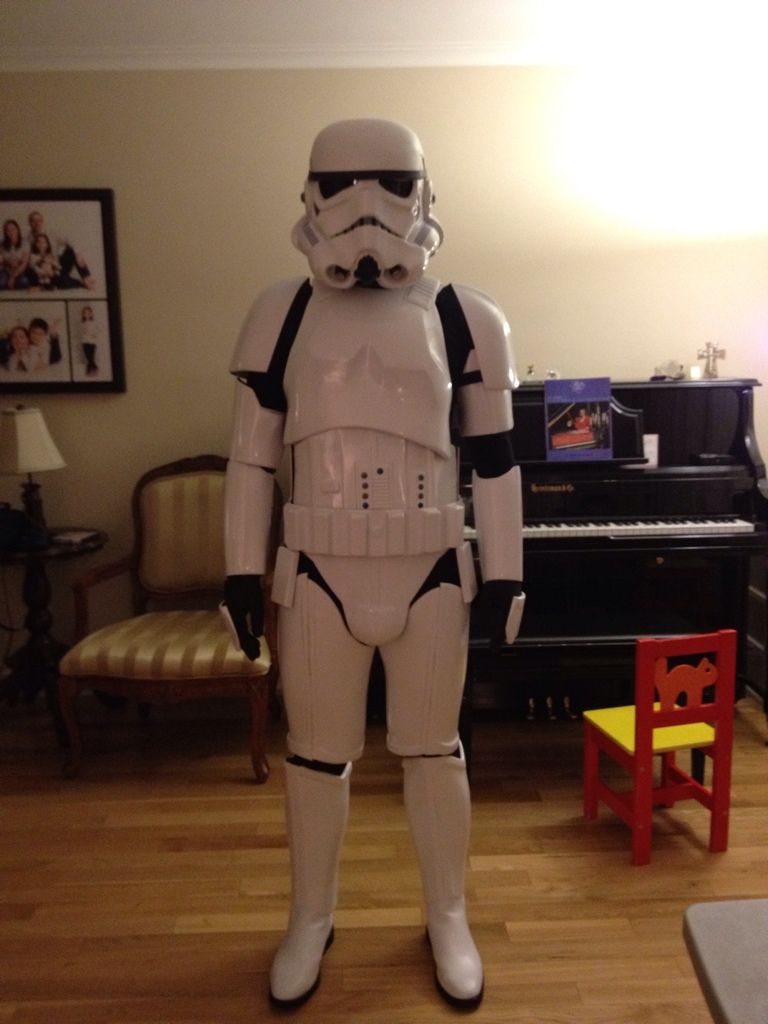
Alrighty, so, this is the moment I have been waiting for for a few weeks. The first full all parts in test fitting. All in all, I am happy with the progress of the individual parts. When they all came together, I definitely have some ISSUES to deal with. before I can really ask for feedback. But would love opinions on how to solve any of the identified issues.
** Note the sniper plate and thigh ammo belt not attached yet. Also, kidney split rivets not installed (only holes drilled).
-
biggest issue is the Chest/Back/shoulder connections. It is all weenie-eyed. I am hoping it is just a strapping problem that can be dealt with by lengthening a strap. But then I noticed the whole back has to come down another couple inches. if I do this, I will need to remove the plastic shoulder straps and make it shorter on the chest
-
Raise the thighs higher with my adjustable garter strapping
-
Definitely will be trimming out behind he knee on back of thigh so I can walk.
-
Gonna need rear strap on
hand plate to keep it from sliding forward. I will likely do most troops with nomex and formal ones with the rubber glvoes and with KArin's handguards (that are on their way)
-
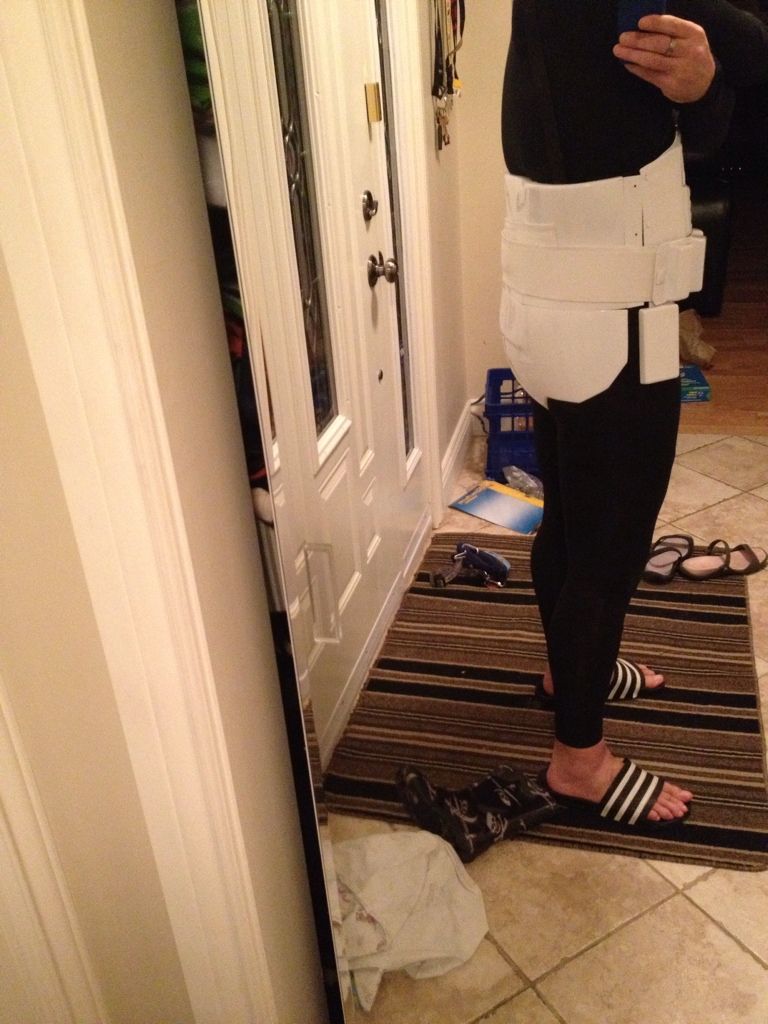
Butt plate has the popped out look... gotta figure that one out.
-
Kidney plate is digging into my back and there is a little flair on my shims. I think if I heat and re-shape the kidney a little, this will fix both issues.
-
Need to add the Velcro to shoe trick to keep shins straight once things are locked in.
-
RIght forearm/bicep is using the elastic connection strapping method. this worked well until I put it on with the shoulder bell. Then once it slips under the
shoulder bell strap, it catches every time I bend my arm, limiting the range of motion big time.
-
LEFT bicep and forearm have no strapping, thus the gap and high riding bicep.
Be gentle now, remember this is the FIRST full test.
Currently curing are the Shin front shims and Bicep shims.
-
-
for the endcap, I'd glue it down with e-6000 just a little around the edge, this way you can eventually remove it.
the inner barrel, make a pvc collet on both ends and it will keep the barrel centered. ( a collet is 2 rings of thin pvc that fit both barrels. )
for the hengstler bracket, using cardboard and making your own template is a great way to handle it!
the H logo should sit directly across from the front foot of the scope.
Thanks for the tip and explanation, I was half way headed for the dictionary! Once I have the materials to make the bracket, I will post up the results.
Time to start digging around the toy boxes for potential "collets"
-
On 9/3/2012 at 10:42 PM, chookaboom said:
Put some ABS pieces in the end cap to allow for a tighter fit. AND I afixed the D-Ring holder (seen in a later photo)
THIS FAILED.
the little nibs all three popped off when there was the slightest amount of torque put to them. I guess my positioning was a little off.
Anyone have a better way short Epoxy the whole thing shut? I am not sure why, but it would be cool to be able to open this up, perhaps for future mods or whatnot.
-
oh, a question did arise in regards to the "inner barrel". How do folks attach this when they put an inner bolt and spring in as well. Do they attach it to the inner bolt. I assume this barrel would not extend past the opening for the coking handle, as the barrel should end near the magazine, right?
Clamps' Stunt Build Thread [AP]
in Build Threads Requireing Maintenance
Posted
Too lazy to post photos. But work is still proceeding:
Chest/back strapping and shoulder belts reworked.
Thigh rear cover strips added
Left bicep to forearm strap added
Evil AP sniper plate glued on with what seemed like 1/2 a tube of e6000. SES it at the top center and will add white silicon caulking to re enforce once e6000 cured very well.
To do list:
Thigh front cover strips
Paint helmet screws
Put cap rivets on thigh ammo pack
Minor trimming on legs
Glue hand guards
Velcro on shoe and shin to hold.