


Clamps
-
Posts
2,090 -
Joined
-
Last visited
-
Days Won
8
Content Type
Profiles
Forums
Gallery
Articles
Media Demo
Posts posted by Clamps
-
-
Since I am official. Add me in homie!!
-
I have a nice park across the street with a "rocky" softball diamond.. I may have hunt for some droids over there. Keith, have a look at the photos galleries I sent you and let's discuss EiB.
-
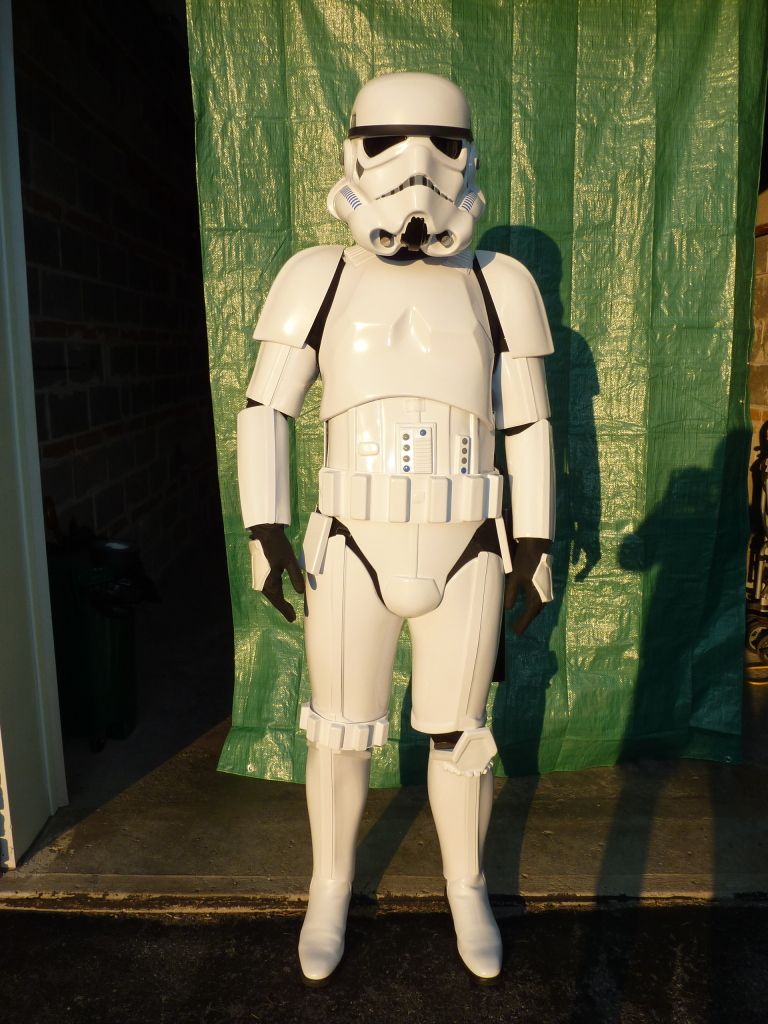
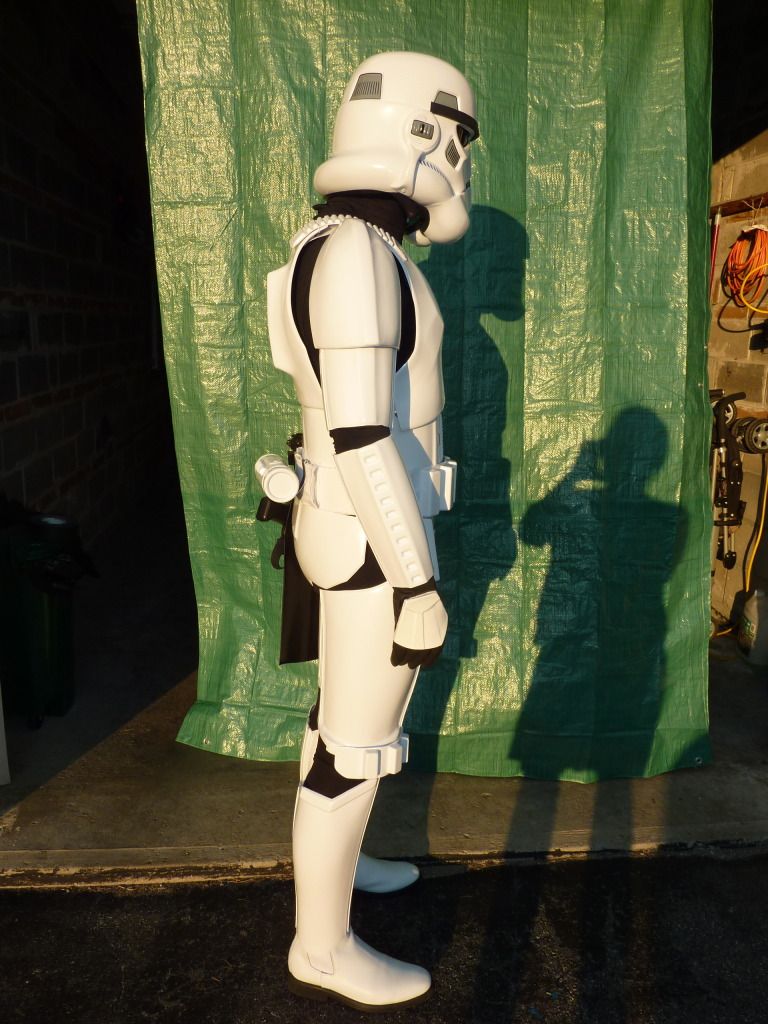
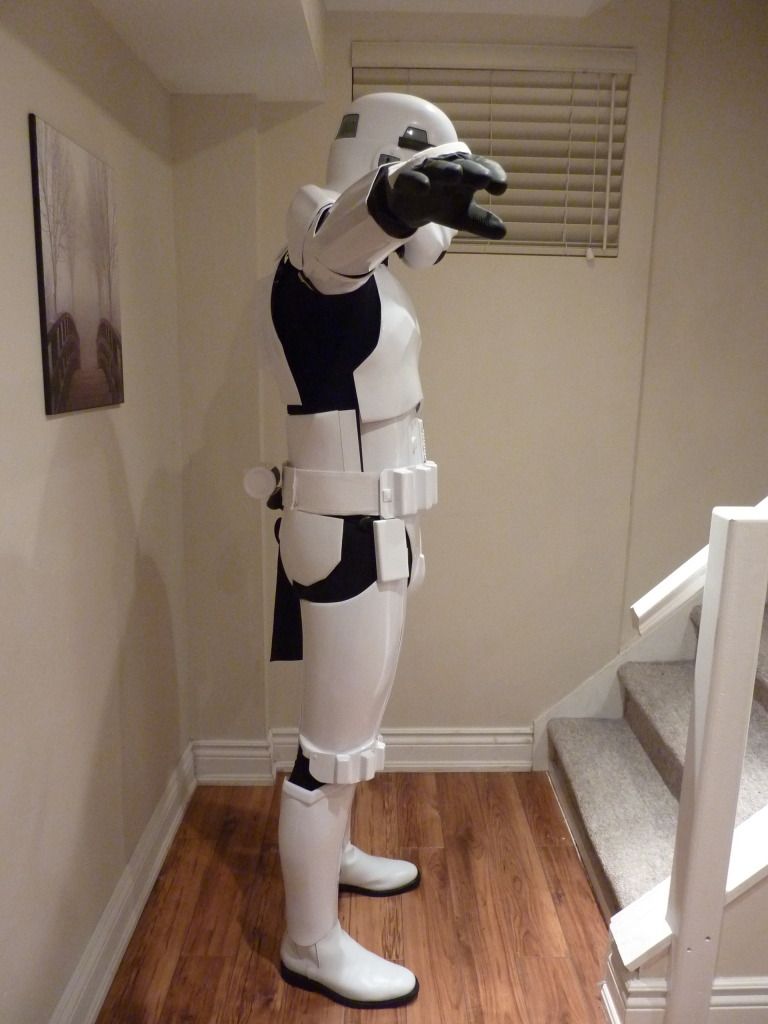
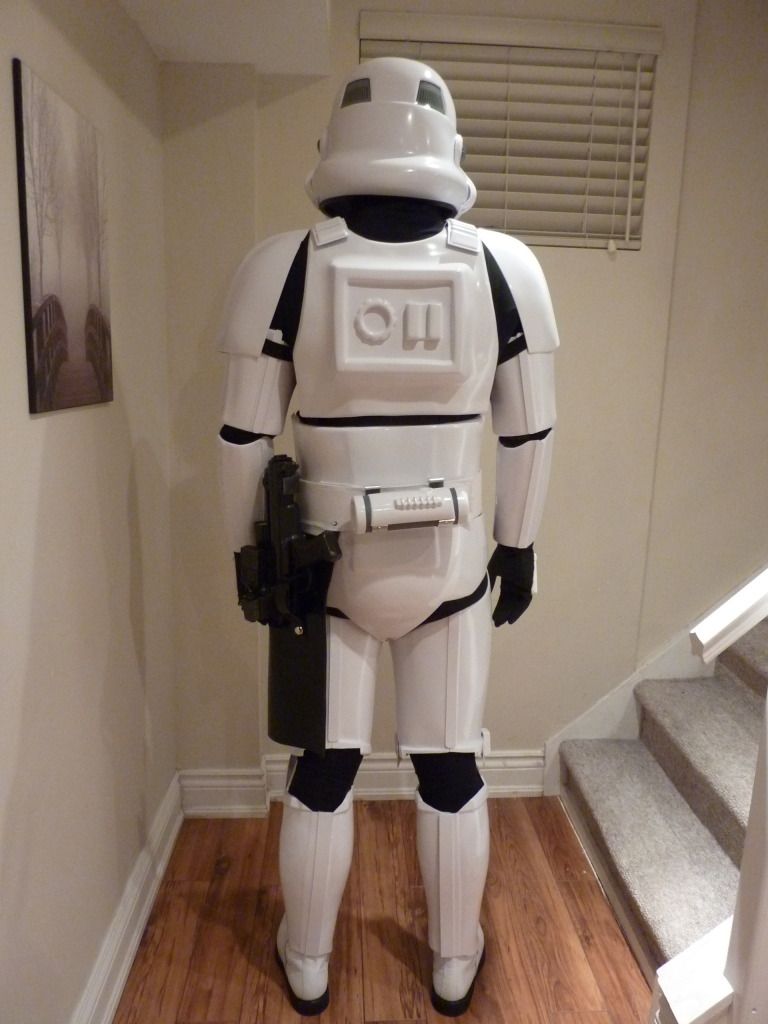
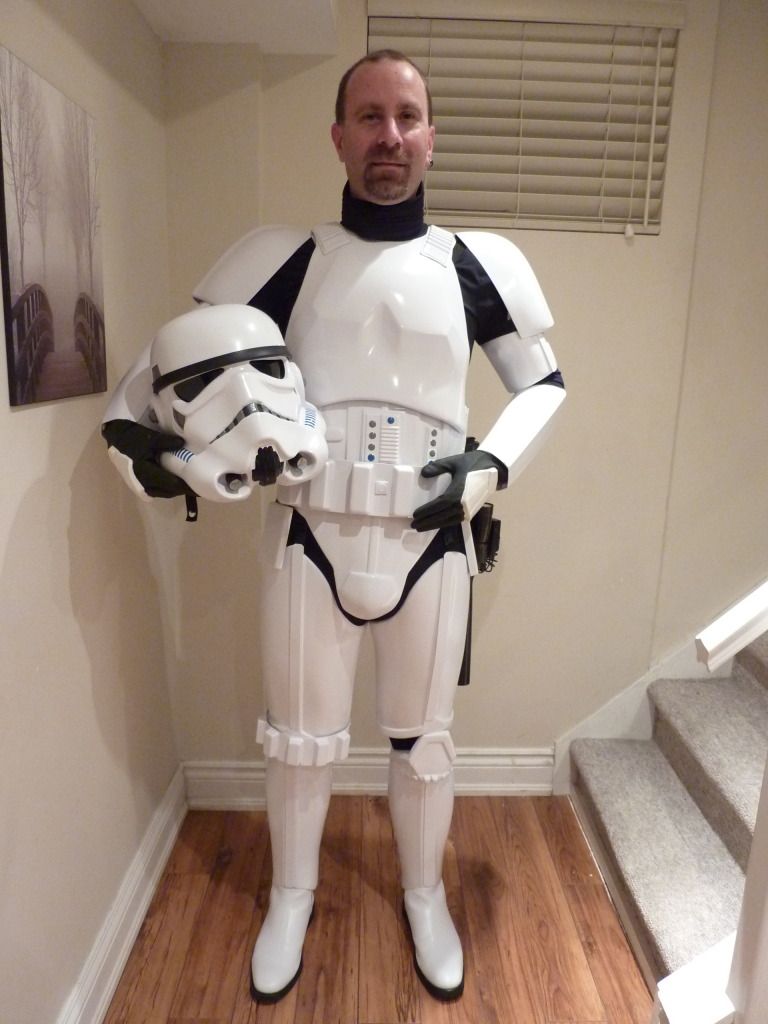
as promised, here are the photos:
-
Congrats, well done on getting approved, so do I have to call you Sir now lol, now hurry up with that blaster

thank you and of course, no, no need for sir, but i'll take it

Blaster focus will be regained in short order and getting my bucket up to Centurion standards to boot, perhaps a little boot scuffing is required.
-
TK-25267 reporting for duty! Photos to come in a little bit
-
-
Welcome Rui! Good luck on your research and future build.
-
Keith, have you named the Fire Team officially yet?
-
]You might want to do up the chin strap though (1st picture)... hehe
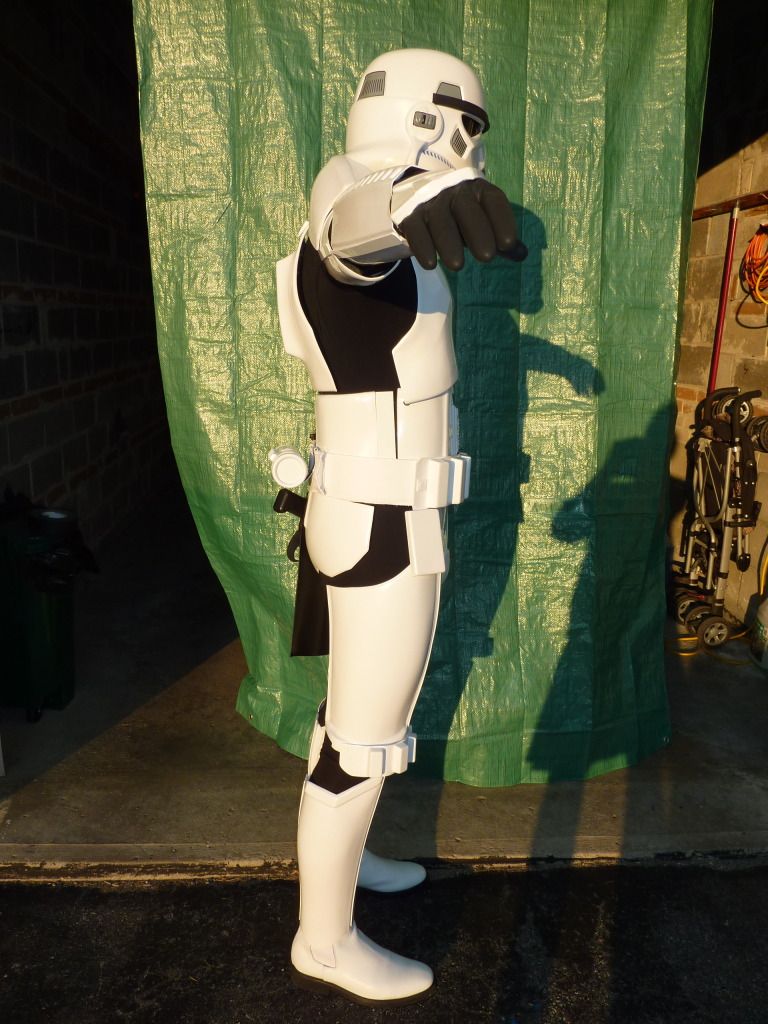
new photos submitted, chin strap issue was dealt with, thanks eagle eye, so you see the end of my belt peaking out the right thigh too?

-
Looks fantastic Mr. Clamps! You trooping with us next weekend?

won;t be able to troop until October, as I have family obligations this weekend and then out of town for a week for work. Will meet up with you guys at Keith's amour party on the 29th for an informal troop around the block.
Where/when is next weekend's troop?
-
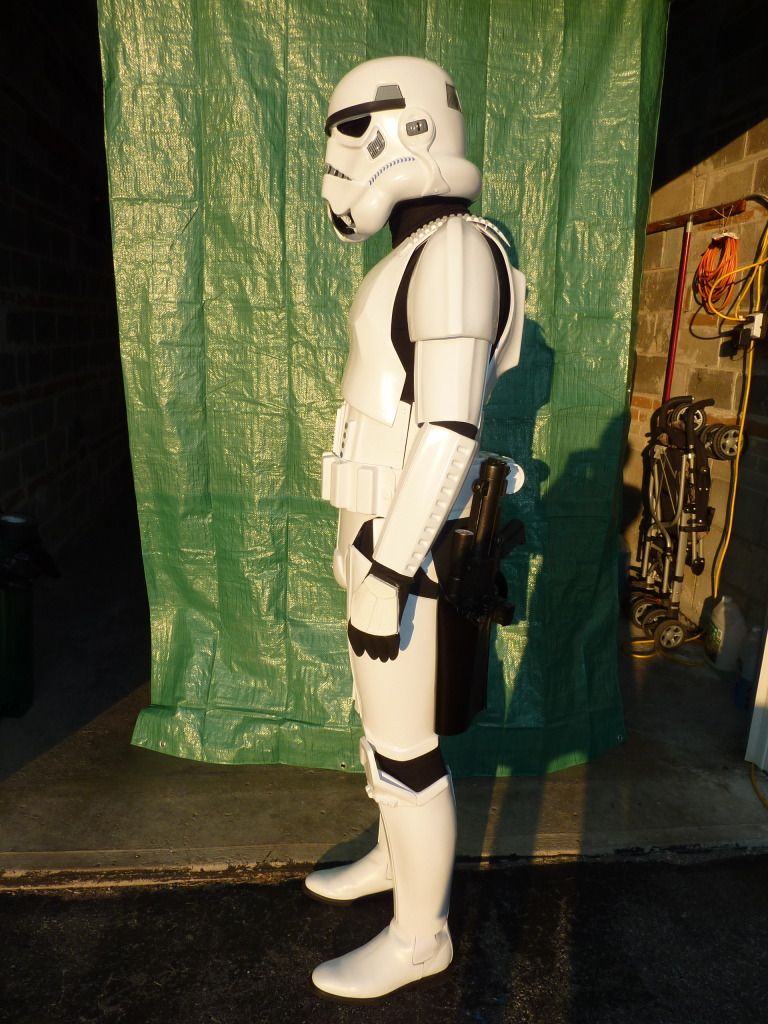
For fine tooth comb's sake I would say your drop boxes need to come in a little and your thighs up a tad.
I suggest trooping a few times before trimming anything
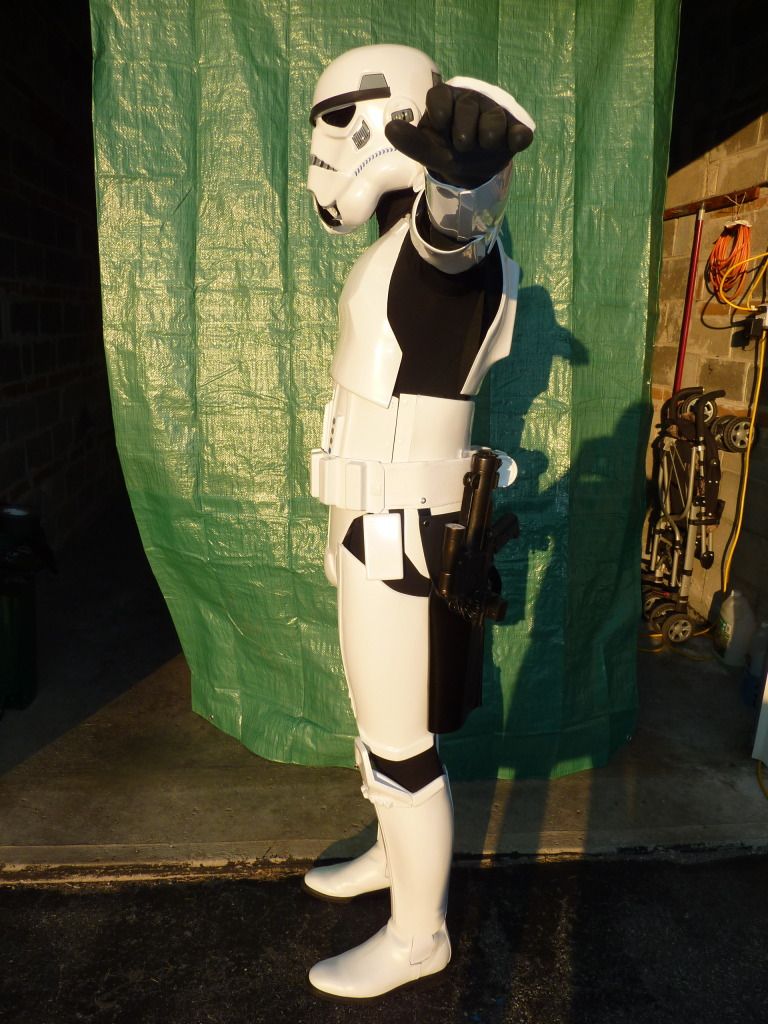
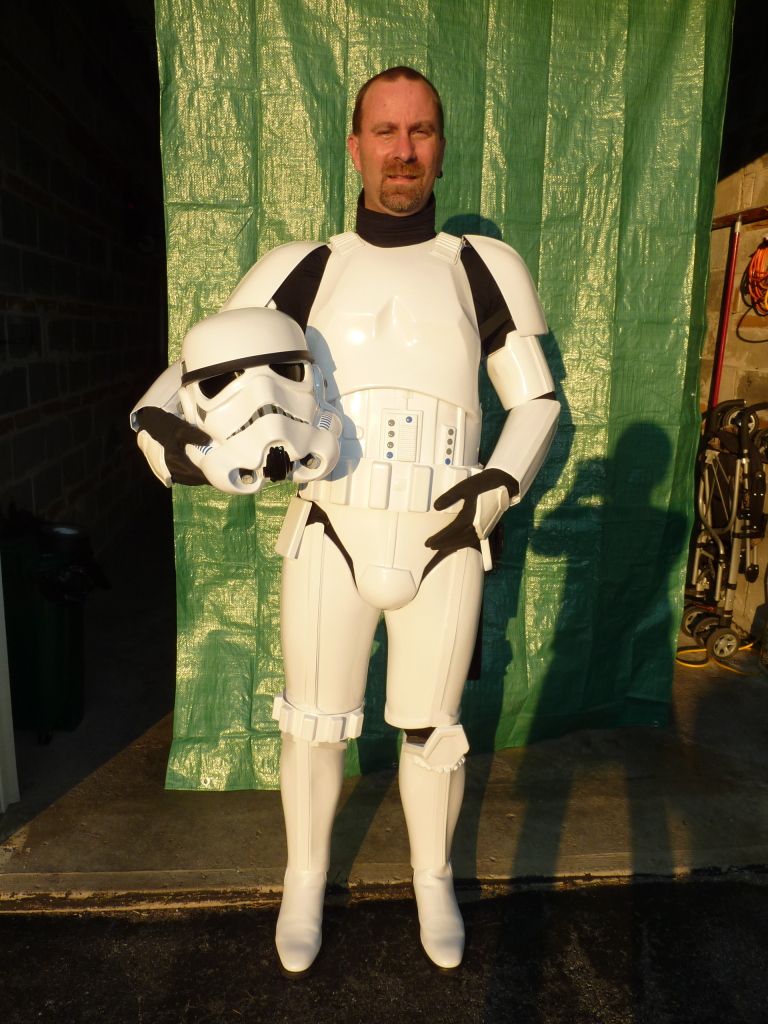
Really? Your GML wouldn't accept these photos? Don't forget an action shot for EIB

Looks like all your hard work has paid off.
-E
Thanks Eric
Our GML did not see these photos, so no issue there. After talking with him via PM, he gave me some guidelines and suggestions and I wanted to go back and do a better job so as to make it an EASY acceptance (better lighting (natural lighting, solid background,good focus).
Thighs won;t come up any further without a bunch of trimming in the butt area as it is already pinching the cheeks a bit.
Drop boxes are centered under the end square tabs (its where I have them connected)... should they be justified with end of plastic part of belt then? I have seen enough variance in the screen shots, so I went with the screw that already existed for the belt. its an easy fix for sure for EIB/Centurion applications.
it has been extremely FUN, hard yes that too, hardest part is when I made mistakes and had to try to find a way to compensate. Man, its amazing how many snaps I have used and then had to toss. good thing I got that big pack o Tandy's!
-
spot on to me?
So Vern, is that quesiton mark (?) meaning you see something that is off (beyond what I have mentioned above)?
Looking good, don't look that blury to me, well done Charles

Thanks Glen, I have more work to do to tidy up, but I am feeling pretty good about where I am. and with my tidy ups, I should be on track for EIB and Centurion (once my resin blaster is finished. First things first, I need to get all official like and approved. Will be making a setup for that tonight if all goes well.
-
I wanted to submit tonight, but, my photos won;t be up to snuff so I don't want to waste the GML's time. hopefully tomorrow I can get something captured in the daytime and I find a clean background. We'll call this a "dress" rehearsal.
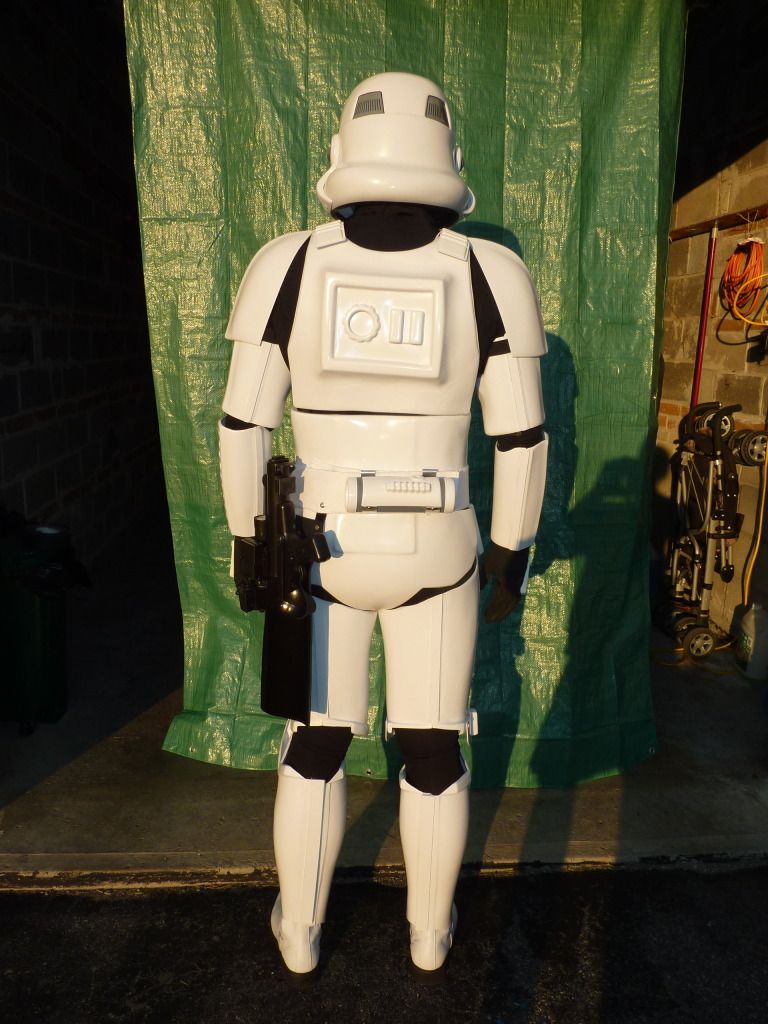
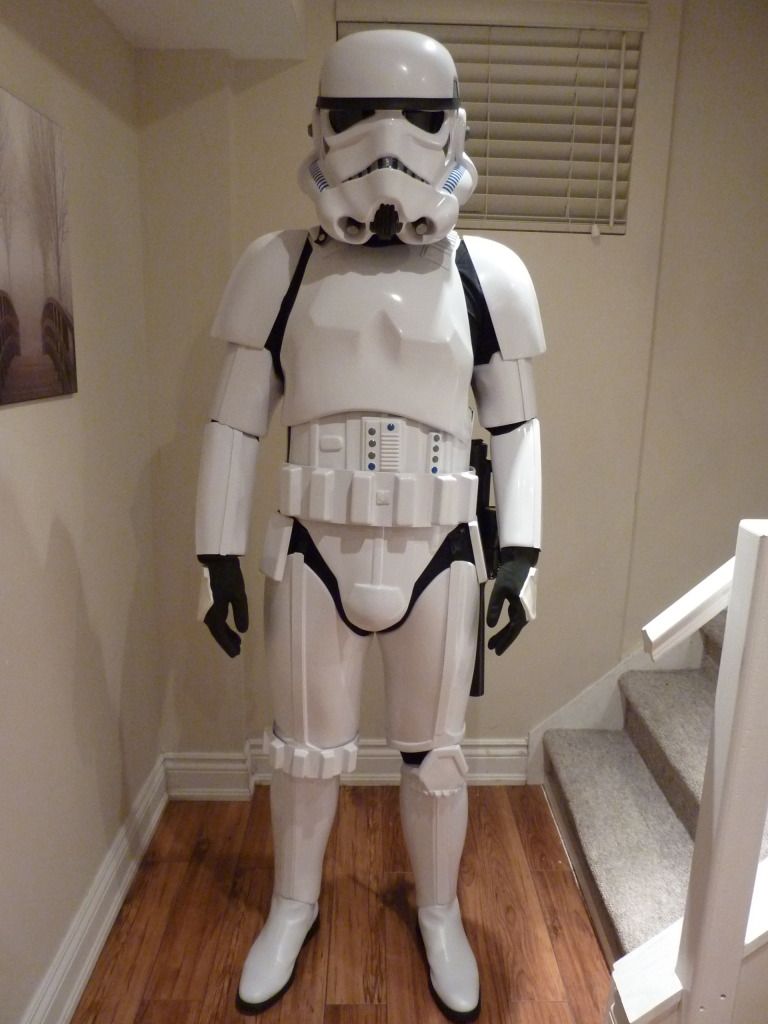
YES I know I have some issues to resolve, but nothing I can see here prevents me from 501st approval. something wonky going on with the left shoulder, my strapping on the right forearm is off and my left bicep is a bit loose, so it slips down and rotates too much.My backplate is attached with the wrong snap (have a troop level snap and a photo level snap.
Will need to find a way to keep sniper plate out of my thigh, not much room in there to do the padding behind the thigh trick....may have to trim the thigh a bit. Will need to trim the bottom of the shins too, a little too much ankle ouchie.
I am sure the fine tooth combers will certainly find much more than that.
anywho have a look at the blurry cam:

-
 -
- 
Looking forward to following this one!!
-
definitely got the popcorn
out for Glen's build that is gonna be amazing! -
I used 5 min. Expoxy as well for both builds. I will use E6000 for my end cap (in case I want to remove it to work on internals again) and the power cell/fuses as I want to be able to pull them off and go ESB with my blaster form time to time.
The thread to follow that I learned the most from is Craig's: http://www.whitearmor.net/forum/index.php?showtopic=19872&st=0
nothing original in what I am doing, just copying a bunch from there and other little things from the countless awesome builds out there.
HAVE FUN...once this build is done, my search for an SE-R14 begins!!
-
Tad more work tonight.
Did some right shoulder shaping on the back plate to try to get a flatter fit.
Thigh front cover strips curing on the bench.
I'm basically ready to go for approval.
All EIB requirements build in.
Centurion requirements are all that is left:
Boot scuffing
Hand painted helmet traps/tears (or Dave M stickers)
Finish resin blaster
Should be a fun week. Look out 501st. "Clamps" is coming!
CB
-
Aloha. Thanks for the fix!
-
Going great, won't be long now until your playing with paint
I have primer fingers already
) -
Cannot access with Tapatalk as of 4:14pm EDT.
Same error as Taras.
-
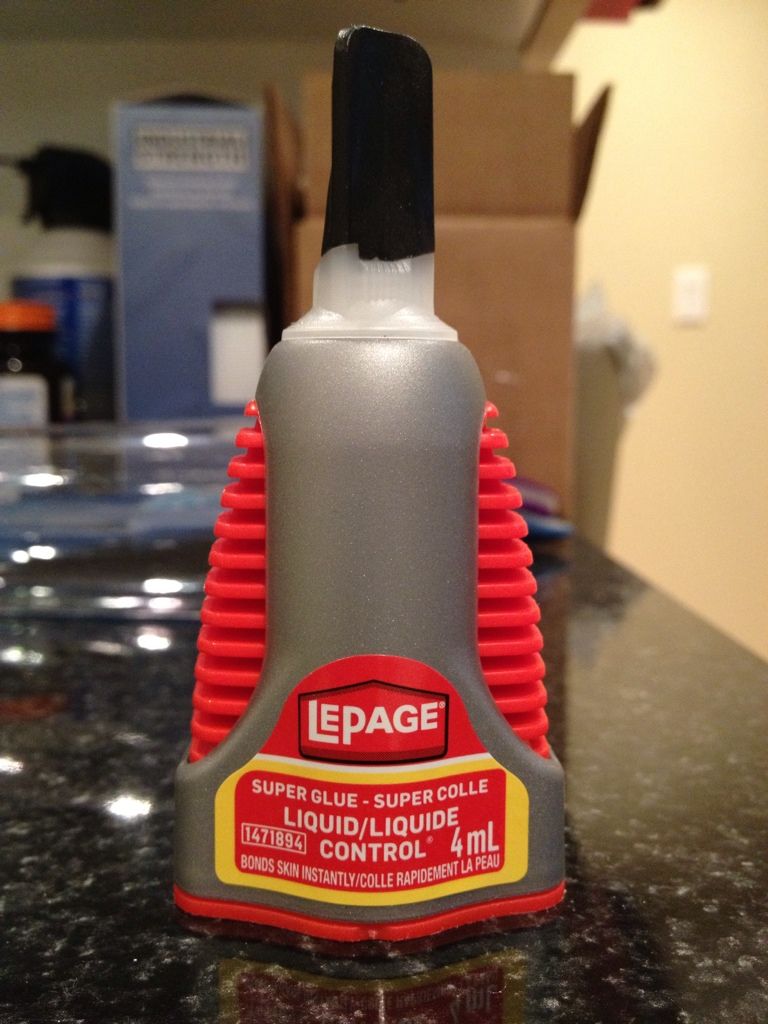
WHOO HOO!!! We have Hand Guard adhesion!!!!
1. Courtesy of Bigironvault's suggestion, I went with Loctite Super Glue and it worked amazing, damn near instant!
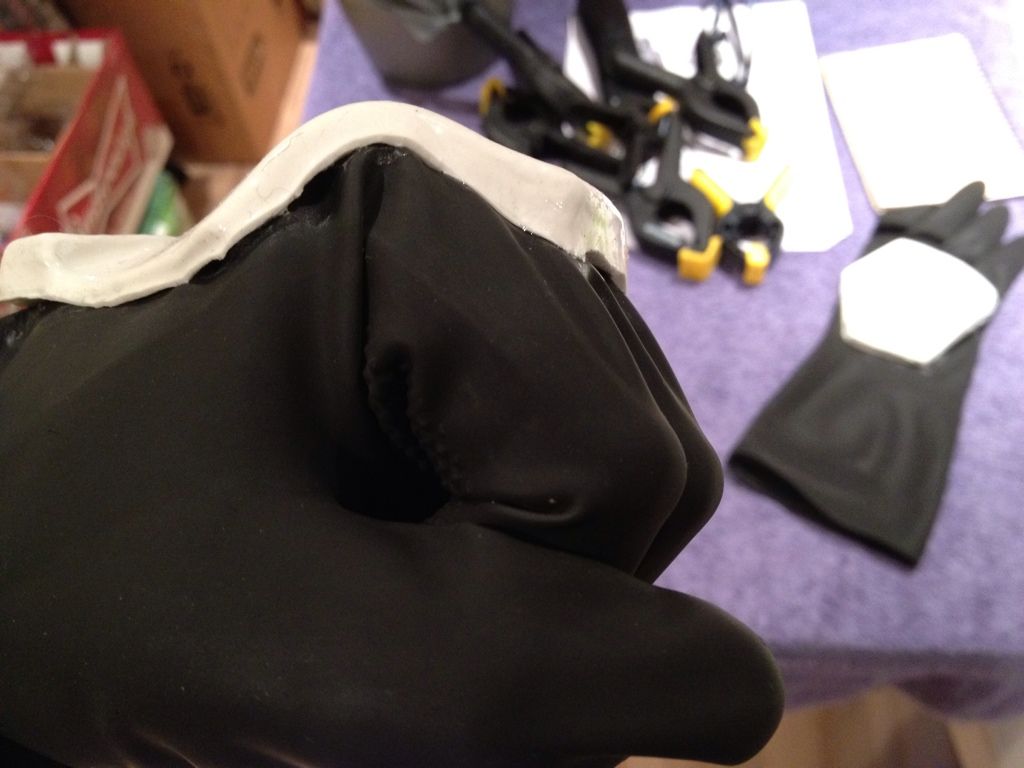
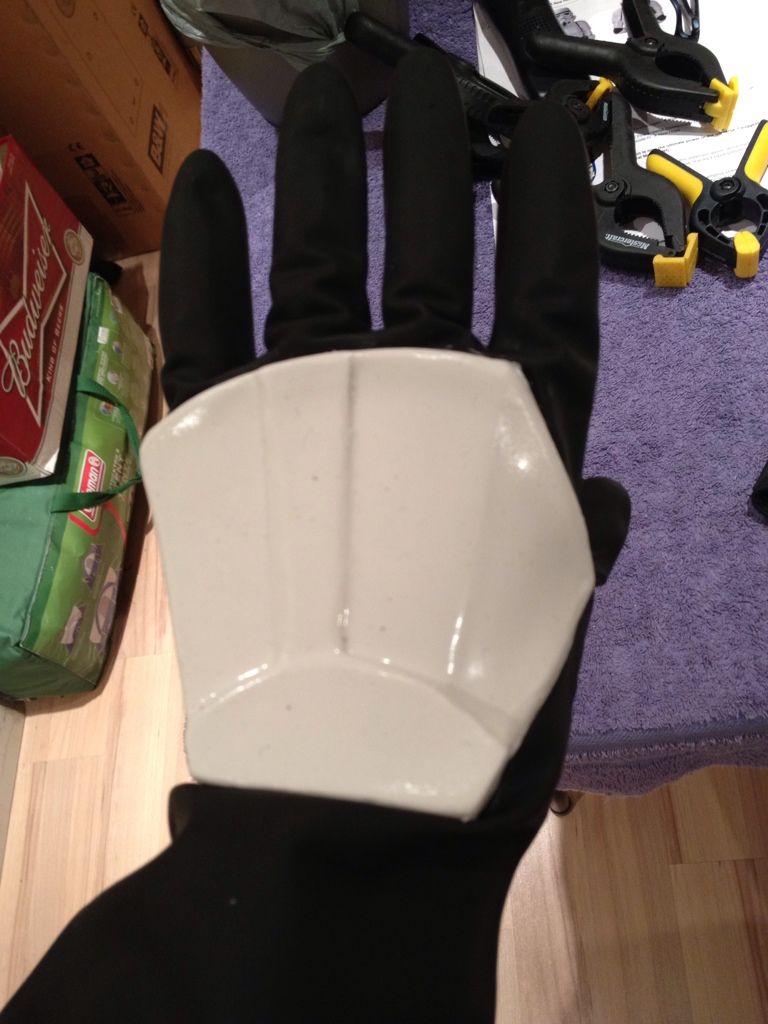
Got the Kidney side split rivets in place:
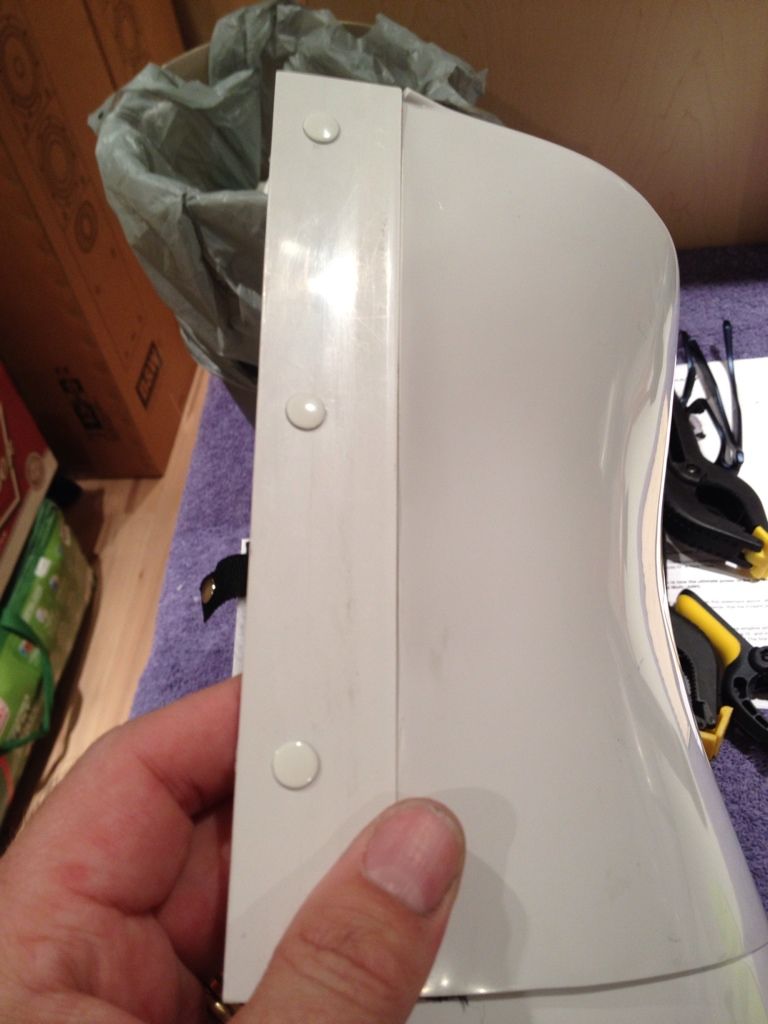
Thigh Ammo belt has been locked in with Cap rivets
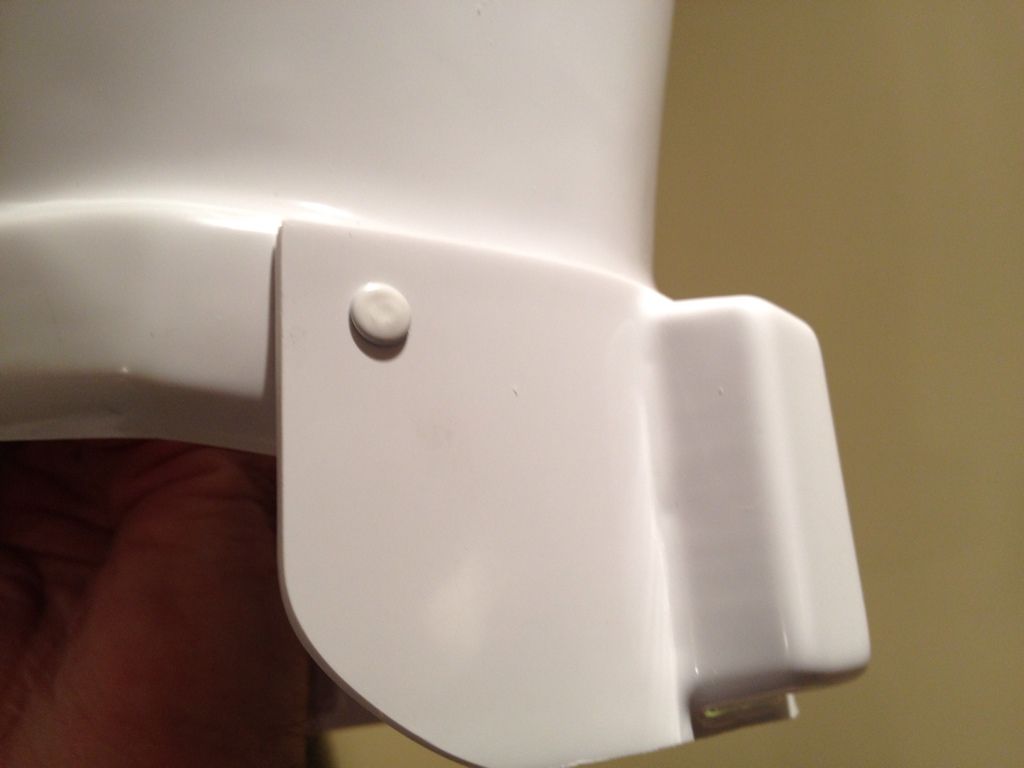
2. did a little glue fixing on the rear thigh coverstrip where things moved after clamping.
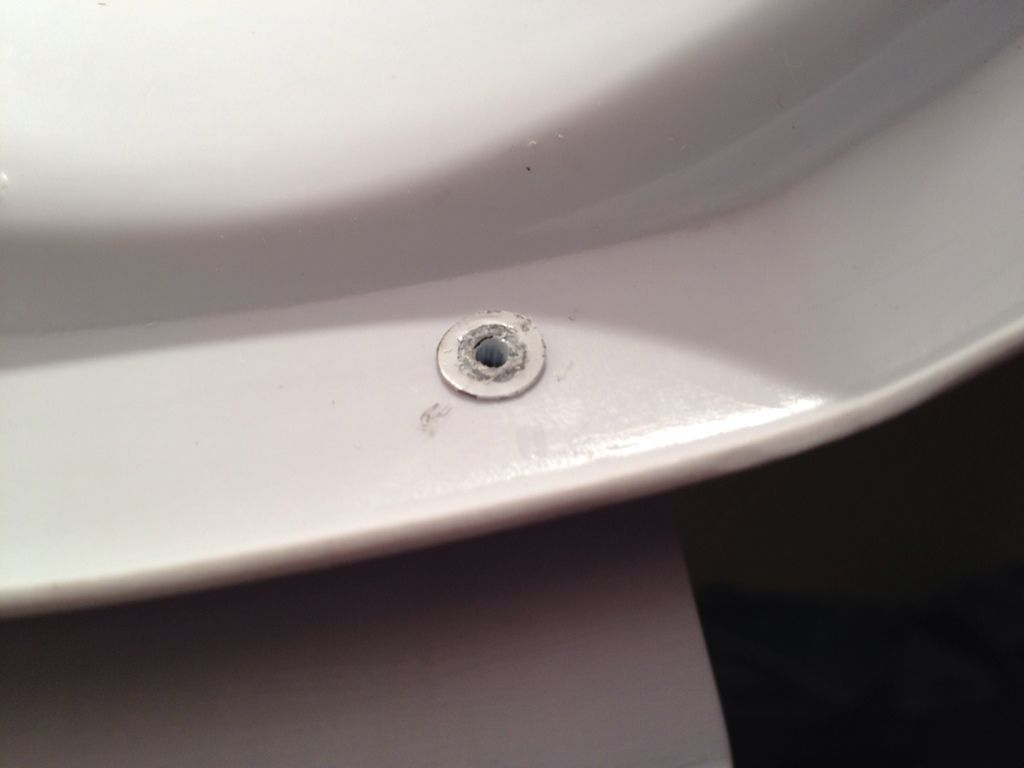
3. Painted Helmet screws white
4. Velcro added to shot and inside front of Shins to hold them facing the right way
5/6. Painted a couple of minor chips in the ear rank bar area and touched up a minor issue in the frown.
7. Minor Vocoder paint fix
To do list:
Thigh front cover strips
Test fit for final tweaks before submission
Make some mobility trims to rear of thighs
reduce sharpness of a couple areas that have potential to scratch and cut
Polishing (i doubt I can wait to do this before submitting)
EIB/Centurion To Do list
Finish Resin Blaster (Centurion)
Add slightly larger shim on my right side to close the gape by another 1/4", strapping is just not pulling it in like I'd hoped.
-
Looks great!!
Thanks, trying my best, though I am not overly skilled at this sorta thing.
short of the Hengstler bracket, everything else is ready and already it with primer!
-
I see the magic Loctite on the table with your sister, I am sure it was a QUICK fix with that stuff!
-
+2 for the Doopy's I have a Hasbro mod and a resin kit(in progress)
Easy to slap together or you can make lots lot little extras for greater detail if you want.
Have fun, making the blaster kept me (in)sane until my kit arrive.
Greetings from Ottawa, Canada
in New Member Introductions Archive
Posted
Welcome to FISD!