

boomshakra
-
Posts
425 -
Joined
-
Last visited
Content Type
Profiles
Forums
Gallery
Articles
Media Demo
Posts posted by boomshakra
-
-
Can I get an amen?!
Thanks for sharing these pictures. When you tell a good story with photos it ends up meaning a ton to those of us who are way far from the rest of our fellow troopers.
Aloha,
-Eric
I'm glad you enjoyed it and take that as a compliment - I try to weave a good story to go along with the pictures. The hard part is sorting through almost 400 of them and trying to cover all of the different armor/characters from our troops, especially a joint one with the Rebel Legion, Mandolorian Mercs, and Jedi. I'd post fewer pictures of myself, but i'm just so darn photogenic
 . Our squad is fortunate to have several different photographers join us for events!
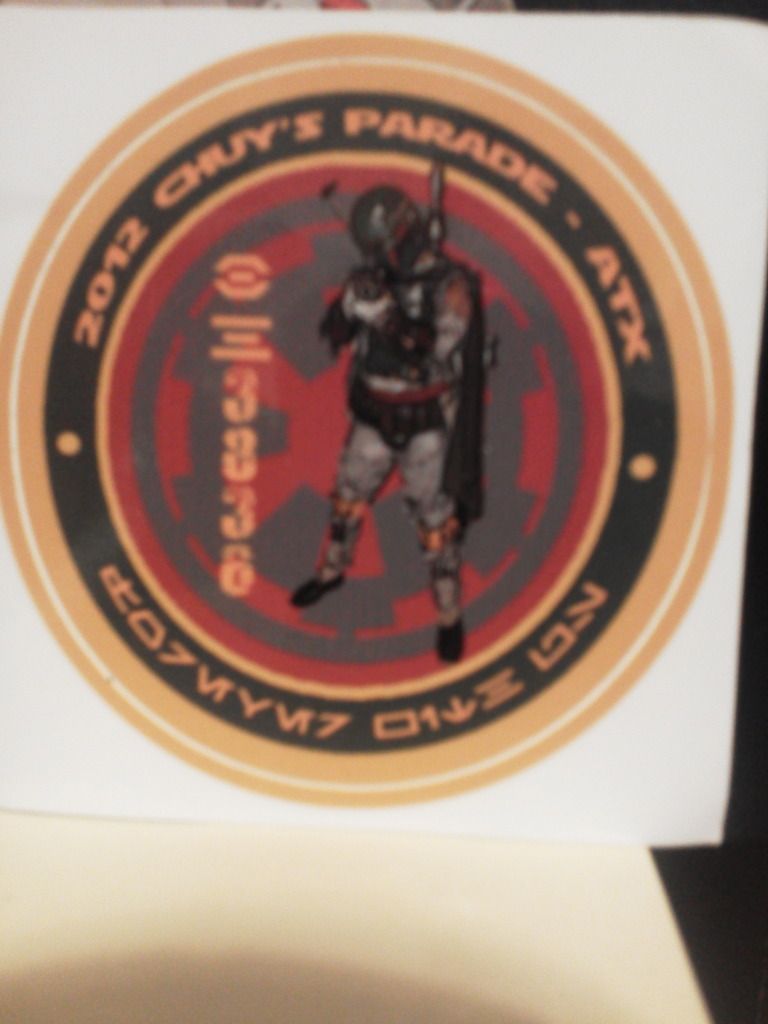
One last note and pic - Our Squad and the Legion lost a member earlier this year, Chris Lewis, BH-3836. We honored him Saturday by wearing the decal below on our armor.
sorry for the crappy picture - at the bottom it says "Forever With Us" in Aurebesh
-
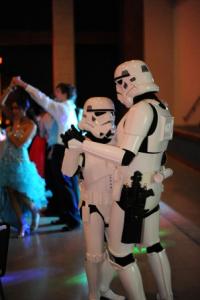
It's time for one of Central Texas Squad/Star Garrison's favorite events - The Chuy's Parade! Every year Chuy's Tex-Mex (to die for...teh yummeh...) Restaurants hosts the parade to benefit Operation Blue Santa, collecting toys to be distributed to families in need so their kiddos have a Merry Christmas. This was my first time Trooping this event, although I have volunteered several times over the years, even marching as Darth Vader (Rubies armor, I think...was years before my 501st days) one year. (all photo credits Rob Tuckfield)
Edit: While we were staging, a gentleman from a bagpipe group walked up to us and broke into the Star Wars theme song! It was EPIC!!! Unfortunately, the only documentation we have is a cell phone video (the last 16 seconds)...while it is on Facebook, you'd have to be friends with my Squad-mate (or me) to view it...

-
Continuing on the cars threadjack, my neighbor down the street has a pretty new Honda Odyssey minivan. It is black (glossy) and I swear if you look at the front of that thing, with the shape/silver color of the headlights it looks like an oversized Shadow Trooper Helmet! I have thought about trotting down there in my TK armor to take a picture...but IIRC, she was one of the neighbors who asked my wife "what the hell is your husband doing" after I did a around-the-block test-walk/shakedown when I was building my armor
-
On a happier note I was thinking of repainting my 13 year old car as a shock trooper helmet. Nobody will get it but die-hard fans.
One day I'd like to get a VW Type 181 (Thing) and TK-ify it: paint the brow, eyes, frown and traps on the hood, vocoder in front (between headlights), blue stripes on the front fenders, and the OII on the engine cover in back...maybe have a mount between the front two seats for a DLT-19. On the plus side my wife would NEVER ask to borrow my car...downside is most of the Type 181s out there are restorations and are a bit pricey...
/end threadjack
//yes, I have put a lot of thought into that project
-
6'2", 200lb - RT Mod was almost perfect - I had to trim the kidney/abs and thighs (chicken legs) but it accomodated my height very well.
-
Ah, snap plates. I think I ended up making ~50 or so, but buy more of the snaps than you think you need. During my build I would hammer it wrong or forget to put one of the two pieces on the strap & make both parts useless... I would also suggest making the webbing lengths a bit long so you will be able to cut them down to the length you need for where you're placing it. I made a few too short and those ended up being useless as well, since you want to keep the glue off of the metal snap if at all possible.
Have fun & look forward to seeing build progress!
-
-
-
-
Jason Sager 4796 EIB Letter
-
Jason Sager 4796 Centurion Letter
-
I've been following your build thread on the 501st boards - very impressive!
-
My RT-Mod was easy to get to Centurion - you just do the additions/modifications as you build. It takes a little more time but is worth it in the end. The bucket does take a little more work - be sure to do a little research on replacing the rivets at the bottom of the ears with screws (I started a thread when I did mine).
Read Darth Aloha's build thread...and read it again. Then refer to it as you build, often. Have fun!
-
My resin doopys stays home on display, Hasbro mod goes trooping. Neither is impossible to replace, but it stings a little less when it's a $40ish kit instead of $100 (estimated prices - haven't looked at their web site recently), although 'used' hasbros are getting a bit more difficult to source on craigslist...
-
RT-Mod - I have a pretty good sized melon and mine is perfect (6'2")
-
Just think of the 'saran wrap' as unwrapping Xmas presents...again and again and again
Rob does a great job of protecting his work so it gets to you unscathed! Have fun - I enjoyed my build of the armor he built for me very much. Good luck and remember you have an invaluable resource right here on FISD if you have questions (which you undoubtedly will)! -
Congratulations!
-
Seeing my name in the lid made me feel really proud too. Glad to have played even such a small part in this project, well done to all of you for making it happen and doing such an awesome job.
Si.
Ditto - humbled and proud to have my name on her bin as well. Great job, troopers!
-
What a weekend - I will start off apologizing for those of you who suffered through 3 versions of our Flash Mob so far...yes, there is another one at the end of this post
And I'll also apologize for anyone coming in hoping for celebrity pictures of any of the Star Trek:TNG bridge crew who were in attendance...they were there but far away from any of our Squad cameras. Here we go:
We did have one celebrity (that I know of) stop by the booth - I'm not sure if you'll recognize him out of make-up and without his dual lightsaber:
-
That is on my TK "Bucket List"...can't wait for him to come to Austin
-
Welcome to FISD, Ross! If you haven't already, sign up on Star Garrison and say hello there as well - the North Texas Squad always has something going on and will also help you on your way.
-
Very cool - if you could incorporate a laser into it to that would be double awesome! I've had my eye on a couple of Halloween 'ray guns' to use as a hold-out weapon for my Mandolorian build, but will wait until the after-Halloween sales to pick them up. I prefer to hand-build Mando weapons as opposed to spray painting a watergun/nerf gun, but some of the pre-made stuff can be very cool with a little work.
-
OK, based on some suggestions here, I think I know what I'm going to use....

I am stealing that - just thought i'd let you know
-
^^^ I remember when you posted that, that must have been frustrating as heck.
It was a PITA, but E6000 is pretty forgiving so just a minor setback. I've been lucky that only 2 of my 40 magnets have broken, but will probably buy another 20 or so for my next build - like clamps, you can't have too many!
Pepakura HALO Mk VI armor build
in Build Threads Requireing Maintenance
Posted · Edited by boomshakra
Mods: Please move this over to the "Non-Star Wars costuming" forum - thanks!
While my Mandolorian build is languishing without funding, I decided to see what kind of mischef I could get myself into over on the HALO side. I have seen 405th Infantry members at different cons, and I have always thought their armor was extremely cool. After checking out the forums over there and also watching "Forward Unto Dawn" (highly recommended, even for non-gamers such as myself) I thought I'd give it a go. What the hell, right? Just the cost of some 110# card stock, some hot glue...and a TON of time.
I downloaded the software needed to open the pep files and took a look at an ODST helmet first - a lot of my Squad are going to do that build from pre-molded armor this coming year (me included, pending budgetary approval). After looking at 45 pages and ~1400 pieces to be glued...I went for the Mk VI - only 16 pages and 70something parts.
Got everything printed and realized I had used the sizing for an ODST helmet...ok, so it might not fit, be a little small - no worries, it will be a practice run to see what I'm getting myself into. If nothing else, the experience will be worth it & if it is too small the kiddos can have it. Apologies in advance for the crummy cell phone camera pix...
Over the course of last week, I estimate I put in at least 8 hours here and there cutting and scoring the pieces. Here's what the fruit of my labor looked like as of Friday night:
So, out comes the glue gun. They call it a HOT glue gun for a reason...my fingertips will never be the same, but should I find myself doing something outside of the law, the authorities will never be able to match my fingerprints to the scene of the crime
Yesterday morning's progress:
Note I said 'morning'...I kept finding myself back at the dining table waiting for the glue gun to heat up again
End of yesterday:
Creating/gluing in the lights (the two bumps by the cheek/ear) and the rebreather tube (jawline) was difficult to say the least. The sad part is that once the resin/fiberglass/bondo is done, the lights will be drilled out for LEDs and the rebreather area for actual tubing. All that work and gluing itty-bitty tabs...for nothing (other than solidifying the build in those areas).
No rest for the wicked today:
You can see that the top and bottom are not connected at this point. My original thought was to keep them separated until the resin process so that they would be a bit more solid and easier to work with. Then I realized that should they harden in a shape that I couldn't match up/glue the remaining tabs together...well, I'd be hosed and back to square 1. The tricky part I was now facing is having to glue the tabs while they are inside of the helmet. Granted, it turned out to be larger than I expected (as you'll see below...I think even Master Chief would find this bucket roomy!), but fumbling around with a glue gun and then trying to get everything lined up and stuck together before the glue cooled off was challenging. But, off I went.
The result:
(Dark Helmet emulating Princess Vespa's voice) "...your helmet is so BIG!" (/end Dark Helmet voice).
Of course, the finished product won't be sitting that far forward on my head once I get padding installed. Also, the chest piece and its 'exhaust' vents on the shoulders should make it all more proportional.
This was definitely one of the more challenging projects I have ever undertaken, and I still have a long ways to go - I will probably tackle the chest piece next to get that one over and done with...so don't expect any updates for a couple of months. Seriously, I am optimistically projecting that I will be done with the armor, resined, fiberglassed, bondo'd, painted and strapped by then and not a day before. Having that finish date so far out takes the self-imposed pressure off a bit, but there is a long way to go still.
Thanks for looking and wish me luck! See ya'll in a couple of months, if not on a Troop before then