NewTrooper2
-
Posts
75 -
Joined
-
Last visited
Content Type
Profiles
Forums
Gallery
Articles
Everything posted by NewTrooper2
-
What is the usual thickness of a helmet kit? I know I've seen a few different thicknesses of kits listed on evilbay, but I wanted to know what is considered the "norm", for a good kit? Any help greatly appreciated. Sincerely, "NewTrooper2"
-
Rogue, I like that idea. Printouts would be helpful, but could we also make a category strictly to hold links to "video tutorials"? I know when I built my bucket, I used the video tutorials supplied by TK-4510, and man, it was sooo much better watching a "hands on" video showing "cut here" or "glue here" guides. He really did a great job on that video, and should be commended. Helped me turn a heap of ABS into a great looking 1st stormtrooper lid! Maybe someone could tackle the awesome task of making a video tutorial for basic armor assembly, to compliment TK-4510's bucket guide, and similar vids could be accessed from one area, instead of spread out across the board. Links could also be provided to the downloadable pdf's talked about in that section, for "hands on" builders reference as well. Just a thought. I know FISD has become a valuable link for me, and I find myself checking almost every day, for info, and build tidbits. I plan to do more helmets in the future, ( like a Hasbro clone helmet conversion, and a blackhole trooper helmet ), so I know FISD and fellow sites will be where to turn for the info I need. Let's just face it, FISD is THE PLACE for all things trooper related! Bravo FISD, and I am proud to be a member. Sincerely, "NewTrooper2"
-
Thanks Rogue......very much appreciated!
-
Feel free to post the image I sent you. I tried to post it, but my photo limit says it was too big. ( we need larger photo limits) lol Sincerely, NewTrooper2
-
I think you could run the website on the sleeve around the bottom, near the cuff of the sleeve, intead of up and down. Maybe do it on the opposing sleeve in Star Wars Imperial lettering/script, if you know what I'm talking about? And I like the design, but what about the FISD info at the top, and putting the banner below the troopers legs, then finishing it with the motto? There is something about that letter "A"'s angle that just doesn't mesh with the other letters being straight. I dunno. I mean don't get me wrong, I LOVE the idea and the look, it's just some things that seem off just a hair. I think the FISD shirt really is a superb idea, btw..........please keep posting progress pics!
-
OMG.......that is just sooooo wrong, on so many levels. Funny as hell, but still just wrong. LOLOL
-
Thanks everyone for the info and links. Tray, I have hear of Carida before. You guys do local events and the Pittsburgh area Toy fair alot. I see Carida is appearing nearby me for some things, so I'll have to stop and see the members that show up. ( I'm in Harrisburg, PA. ) I really do wish to get down to "trooper weight", but it's a struggle at times, if you know what I mean. I built my 1st lid, and am contemplating doing another soon. ( Either a black or red trooper lid ) Once I get the weight issue going in the right direction, THEN it's on to getting the armor bought and started. It's fun to make the lids, so I KNOW I'll love doing the armor, and wearing it proudly. Anyways, thanks again for the help, and hope to run into you sometime. It's members like you that make this all worth the time and effort to be a trooper. Sincerely, Bob. "NewTrooper2" 1 other off the wall question - Can one of the "talking" clonetrooper helmet toys be made into a credible looking clone helmet? I have one, and thought about painting the red or yellow stripes on it to make it more realistic. Just curious.
-
Are there listings available of local garrisons nation or statewide? I am in Central Pennsylvania, and wanted to see about garrison info, I currently have built my 1st lid, but want info on armor, etc., etc. I will need to wait for armor, since I need to lose weight to get some, ( as Leia would say, " Aren't you a little heavy for a stormtrooper? ), but I've heard local garrisons can be a great place to talk to and visit as well. Any help from fellow stormies is greatly appreciated, and I know site members are always great help. Thanks in advance! Sincerely, NewTrooper2
-
A good clear sealant for buckets
NewTrooper2 replied to NewTrooper2's topic in Assembly, Mods, and Painting
Well, the bucket is finished, and I stayed with the green lenses. 1, to be more like the original, and 2, the more rigid lenses gave me problems trying to conform to the eye openings. I'm calling this one done, and have made a helmet stand out of wood and dowel rod from A.C. Moore. Making the stand myself only ran around 6 bucks, and I still have dowelrod to make 2 more! A good coat of flat black paint, and the stand looks great. Basically, the lid looks like the 1st pic I posted, just a lil more shiny, and the lenses are glued in place. Next project, I'm thinking of getting another lid kit, and making a nice glossy black shadowtrooper! Thanks again for all the advice everyone gave this 1st time "bucket" builder. Much appreciated! Sincerely, NewTrooper2. -
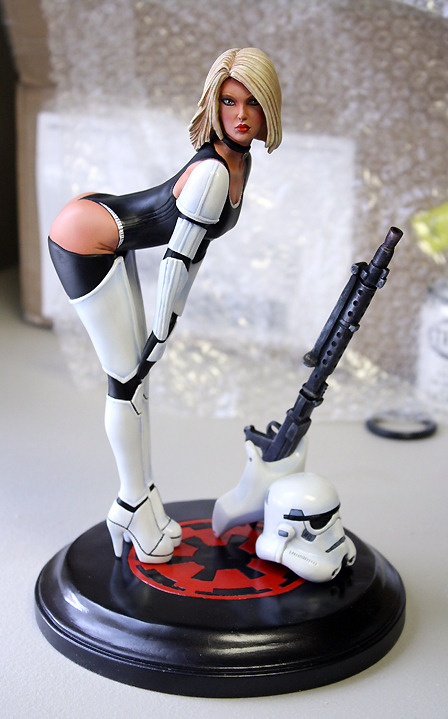
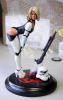
Me likey! I want one for my display case, PLEASE???? Sincerely, "NewTrooper2"
-
Me too Julie! <wink>
-
We all could use a trooper like this to liven up the barracks! Here's a pic, and a link to the webpage it's on........enjoy! http://www.hobbytalk.com/bbs1/showthread.php?t=332363 Sincerely, "NewTrooper2" P.S. - I'm going to find out where and how to aquire one of these. When I find out, I'll pass the info on to the page.
-
A good clear sealant for buckets
NewTrooper2 replied to NewTrooper2's topic in Assembly, Mods, and Painting
Cool weathering job Panda! Looks like screen used armor to me! The painting is so subtle, but still looks more like sand and grime from daily use in a harsh Tatooine environment. Now, all I gotta do is decide wether I want the used Tatooine look, or a pristine Death Star inspection look. Well, I could just solve this problem by getting another bucket kit, and just building both, right? LOL Thanks again for the help and comments. Always great hearing from fellow troopers. Sincerely, NewTrooper2 -
A good clear sealant for buckets
NewTrooper2 replied to NewTrooper2's topic in Assembly, Mods, and Painting
Yea, the lenses are flat and semi rigid. I wanted to heat them gently, so they will fit the helmet openings without much strain on them. I was thinking of making up some kind of mounting blocks for helmets, that could be glued into the corners of the eye openings, then small holes could be drilled thru any lens and the block. That way, a lens could be drawn down tight with small set screws, without glue, and lenses could easily be switched out for different situations or replacement. Maybe someone who dabbles in construction could run with this idea, and produce them. I would make up a prototype, but it would probably take me longer than someone of skill could do. As far as sealing the helmet, a few people at modeling forums I belong to suggested just using pledge, or future floor wax to seal and protect the lid. That process will probably do no damage to the decals, and give the helmet protection and a nice enduring shine. I'll have to test it on a scrap piece, and see if it works. I'll keep posting results, and if anyone likes the mounting block idea, let me know your thoughts as well. Sincerely, NewTrooper2 -
A good clear sealant for buckets
NewTrooper2 replied to NewTrooper2's topic in Assembly, Mods, and Painting
And since the post is being read, if I would decide to "weather" the lid to be a sandy, how would one go about that? I've weathered plastic models before, but a full scale helmet is a little different. What do you members use to weather? Sincerely, NewTrooper2. -
A good clear sealant for buckets
NewTrooper2 replied to NewTrooper2's topic in Assembly, Mods, and Painting
Unfortunately, I've already added the decals. I may just leave it alone, since it is finished, except for the new lense installation I am planning on. I just need to find a way to gently heat them, so I can bend them slightly to match the curvature of the eye openings. Maybe a hair dryer will heat them just enough to form them. Anyways, I've seen some good suggestions if I DO plan to seal the lid. I've even seen some posts that people put a good coat of car wax on their lids. Maybe that is an option as well. As always, thanks for the suggestions, and feel free to comment on the build. It's great fellow builders and troopers like you guys that make this the best site around! Bravo to you all! Sincerely, NewTrooper2 -
A good clear sealant for buckets
NewTrooper2 replied to NewTrooper2's topic in Assembly, Mods, and Painting
Thanks for the advice Panda, much appreciated! -
From Central PA. and I'm just finishing up my 1st AP bucket. Great to be on the site and nice to meet you all!
-
I just finished my 1st bucket and have a question. I painted it gloss white with Valspar Gloss Outdoor paint for plastic, like you use on garden furniture and such, and it's nice n shiny. I also applied my helmet decals and tube stripes which came with the kit. My question is, can anyone suggest a good clear gloss or satin sealant they have used which will NOT damage the vinyl decals, AND seal them nicely to protect them? I asked the TK on here, who manufactures the decals for suggestions, but he is unsure of what I could use, so I figured I could as fellow members and see if they had any ideas. The lid looks great, and I want to protect it as much as possible. Any help would be greatly appreciated, fellow troopers! Thanks in advance for any advice! I posted a pic of the build, so far. Lenses are not in final position. I only put them in for reference. I have some welders type plastic lenses I want to put in instead. Sincerley, NewTrooper2
-
Any tricks to deal with the ears gap properly?
NewTrooper2 replied to budspencer1971's topic in Assembly, Mods, and Painting
Kit was a 2nd and had some defects I filled and sanded out, so painting was a viable option to get it back to being shiny again. -
Any tricks to deal with the ears gap properly?
NewTrooper2 replied to budspencer1971's topic in Assembly, Mods, and Painting
I just finished assembling my 1st AP bucket kit, (purchased from ABS80, and a great kit BTW), and before I painted it, I sealed and smoothed my earpiece gaps. I found a great product at Home Depot for this called "High Gloss White" Tub and Tile sealant. Brand name is POLYSEAMSEAL Ultra. It smoothes on with a wet finger or applicator and makes a great seal for any serious gaps in your fit. It's paintable, and doesn't shrink over time. I let it dry about a week, and I painted my lid this morning outside. Home Depot has VALSPAR brand Plastic paint, used for outside patio furniture and stuff and it works great! Made for plastic, it goes on smooth and even, and I did 3 coats. 2 light coats to start, and a medium even coat to finish. It dries to the touch in about 10 minutes between coats, and it really shines and looks great, and blends in nicely. Once it dries and cures thoroughly in about a week, I plan to use VALSPAR gloss pewter grey for my frown. I'll try to post some pics when finished, but I highly reccomend the tub n tile sealant. It smoothes out so nice. Hope this helps anyone with serious ear gap issues like I had. Sincerely, NewTrooper2. -
A few more.......enjoy! http://www.youtube.com/watch?v=LlbsHdkp2vU&feature=related
-
Found these on YouTube. Please enjoy! Sincerely, NewTrooper2
-
Budget tips, will do more if liked
NewTrooper2 replied to tk7713gra30's topic in Hard Armor (General Discussion)
Great hovi casts! Please keep us posted on the site, and let us know when these might be available. Sincerely, "NewTrooper2" -
Enjoy everyone!