kiyotei
-
Posts
753 -
Joined
-
Last visited
Content Type
Profiles
Forums
Gallery
Articles
Everything posted by kiyotei
-
I'm the trooper on the left in that photo and those were damn good cookies.
-
Bubblewrap's ESB Build (anovos)
kiyotei replied to davidkturner1970's topic in Build Threads Requireing Maintenance
I have not seen the Anovos strapping system. Can you show a few pics of how its held together on the inside? -
Hi measured a few parts from my Anovos kit to determine how thick the plastic is. Here are the measurements. If the part was still numbered I wrote the number, if not I wrote the name. I measured using digital calipers. Part 9L -> .032" Thermo det -> .039, .035, .037 Part 10E -> .032 Part 9N -> .02 Part 10K -> .047 Part 5D shoulder bell -> .056 Ankle -> .065, .057 Cod -> .075 forearm - > .035, .037, .052"
-
I will have to measure it this weekend. My concerns are that they sell the kit as ABS and charge for ABS. Styrene is cheaper and not as strong. Some of my parts are really thin, such as the forearms. I do have concerns about how well it will hold up. If you advertise ABS you have to make it from ABS. Nothing else matters. If you want to make the kit from styrene that is fine but advertise it as styrene. Its like selling oak furniture and shipping customers pine furniture. Yea they are both wood but... Regarding the re-casting, it is an Anovos suite. They did the recasting themselves to either create more molds or made improvements. But as my pics show the recasting resulted in parts that don't fit. That is the problem, PARTS DON'T FIT. These are $1800 kits not $100 resin parts or whatever. For $1800 I expect to get my money's worth. The suite looks good in general. I also think only some of us got styrene. Later kits seem to be thicker ABS.
-
Hi Folks, I've been working on a TFA kit for a couple of months now and I have had a number of problems with the kit. I got my kit in late August but didn't start working on it till sometime in September. here is what I've found so far: 1. My kit is made of styrene. I have had a number of people look at it and they all agree it is styrene. The kit is supposed to be ABS. I'm waiting to hear from Anovos on this issue. They have indicated they want me to send some parts to them. 2. My kit appears to have a number of parts that have been made from molds that were recasts from the original armor. This leads some of my parts being either too small or too big to fit properly. I am also waiting for Anovos to address this issue. Now for some photos of ill fitting parts. Stand by while I post them. Pic 1: Back Armor -> For the C7 armor the back and part of the shoulder was one piece. In my kit it was split into two pieces. They recast the shoulder part from the C7 back but they recasted on the outside. this means the part is too wide now and the curves will not line up properly. This part from the shoulder is supposed to fit inside the back plate but it is way too big to fit because of recasting. We had to really work it to get it to fit. In the next pic you can see how the new part fits the back like a glove showing how it was a recast. The next pic shows how poorly they fit and how much bondo had to be used to re-sculpt the seam. Now I will switch to the boxes that get mounted on the forearms. Once again a recasting issue. The boxes were recast and are larger then the C7 boxes but the lids were recast (inner diameter) making them smaller than the box so they don't fit. I will compare the old C7 lid with the new lid in my kit. But first here is a pic of the parts I'm talking about: This next pic shows the lid mounted on the box and you can see how much smaller it is. This next pic shows the original C7 lid on my box. It is also too small to fit but fits "better" than the lid that came with my kit. This final pic shows the C7 lid and the lid that came with my kit, you can see the size differences:
-
I just didn't even think to look under 501st only. Well though for Anovos it was under an NDA so that had to be locked down for a bit before Celebration.
-
so that is why I could not find any build threads, they are under 501st ONLY. I thought it was rather odd there were no build threads. Thanks.
-
I'm trying to sort out all the boxes where they go. I have some parts I do not know where they go on the armor. I will list those first. I will then list other parts where I think they go to make sure I don't screw up. Where do these parts go: 9N 9M 6K 6J 6I Belt parts: 9L 10J 10H 6H one part I cannot identify from the pics??? Forearms: 7D 8D Chest Boxes: 9E 9F 9G 9H 9I 9J 9K
-
I bought my first AP kit back in 2006, I think. It has served me very well. However it has yellowed significantly and has major cracks in the chest plate. I decided it is time to build a new TK kit. I bought AP again because I have been totally satisfied with it. Saturday and today TK4205 came over and we worked on it. We've got all the major parts glued. I prefer to use Devcon Plastic Welder. I must say that TK4205 has a great, easy, build method. Unfortunately I did not take pics as we built it. I used to build my armor by gluing tabs on the inside edge to hold the two parts together. Then I would glue the outer stip over the seam. It turns out it is faster and easier to glue the outer strip first, then add an inner strip for strength. I recommend using strong tape on the side edge to hold the two halves together and then glue the outer tab in place. You can then go back and glue a strip down the seam on the inside to give it more strength. Thighs: I wish I had pics. The thighs are always the hardest part to glue. But the trick is to hold the two halves together at the top with tape on the inside edge. Then glue the strip just a the top. Let it dry. The glue a little further down. Do it in steps. It will pull both haves together and it will work out. It totally does not look like it will come together but it does.
-
- 1
-

-
Stormtrooper Social - Star Wars Celebration - 4/18/15
kiyotei replied to Pickles's topic in Announcements
Please roster me for this event. Thanks. Jim Peternel TK8151 -
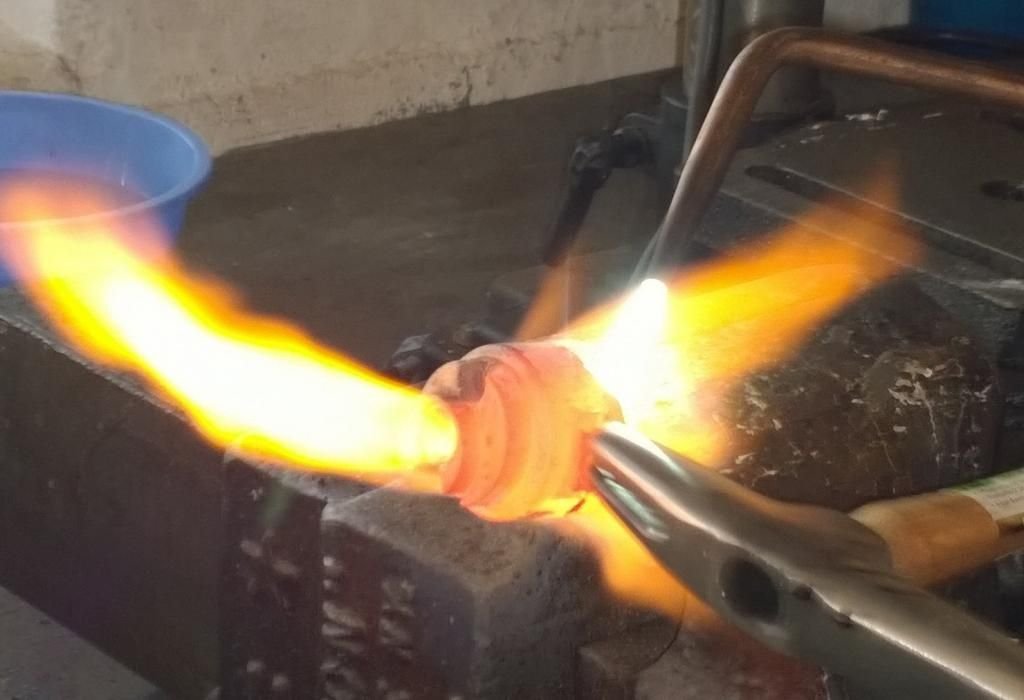
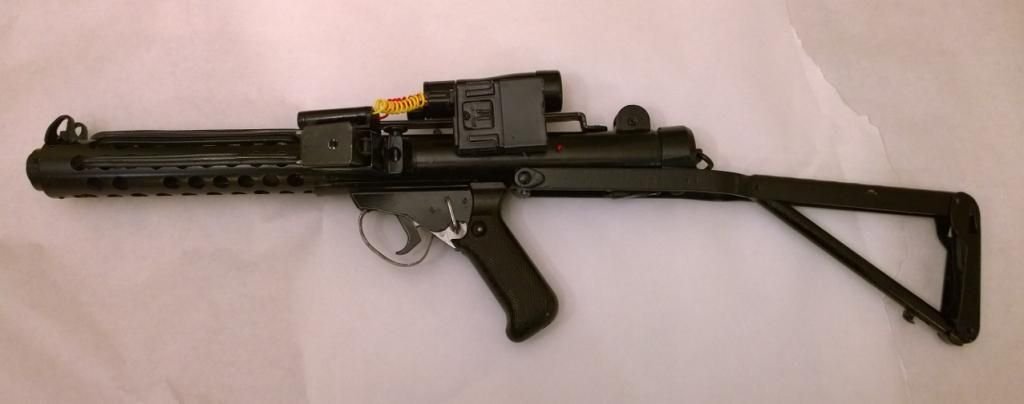
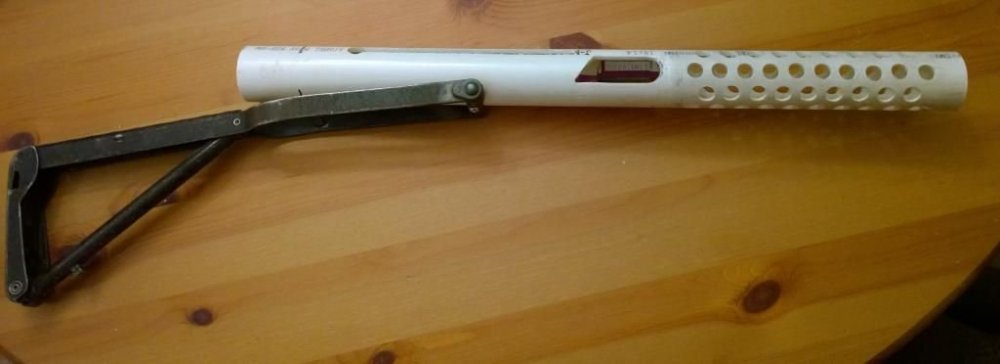
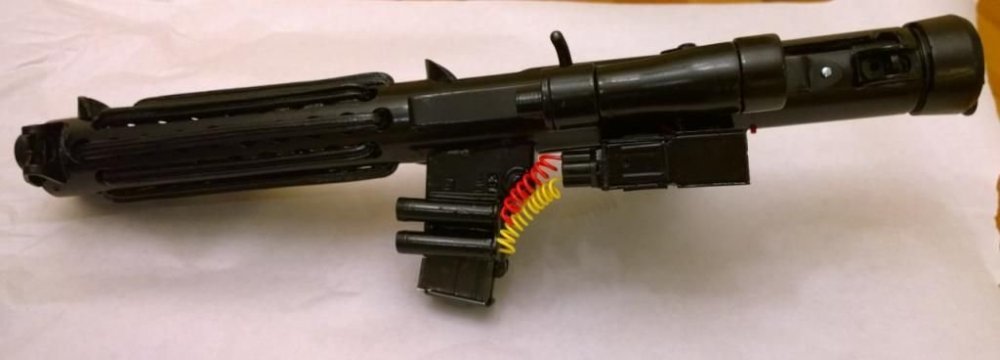
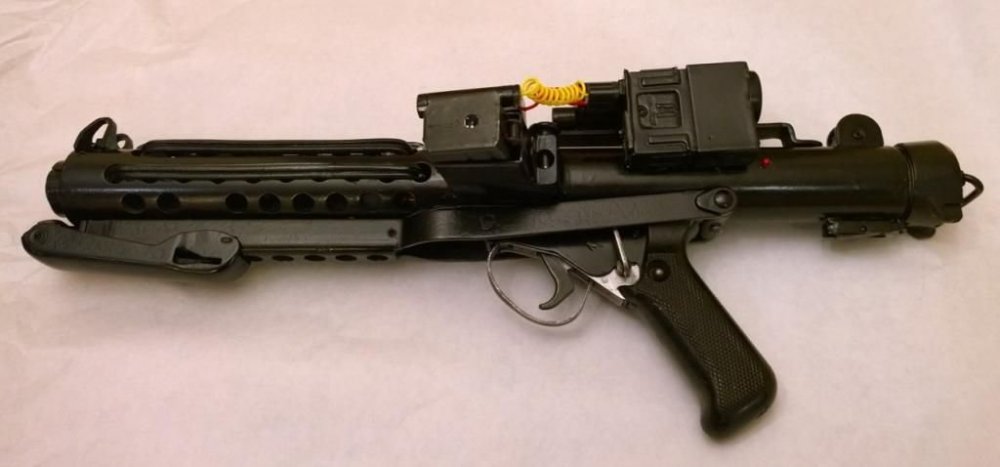
Here is a pic of the front sight being heated up to melt the braze joint. I'm afraid I didn't take any pics of me mounting the parts. But for each part drill a small hole in the barrel so that you can insert the metal nub to give you a stronger mounting. I used epoxy. Did you know you can get dye for epoxy? Cool. I used extra epoxy didn't worry if you could see it up close. I call it a weld joint if anyone asks. Here is the PVC barrel with the metal folding stock mounted. I drilled a hole thru the base of the stock to attach it to the barrel. You'll also need to cut a key way in the front of the barrel for the clip to fit in. I also had to sand down the inside of the barrel where the clip goes because its gap is narrower than the barrel. I know that makes no sense but when you get your hands on a real folding stock it will become clear.
-
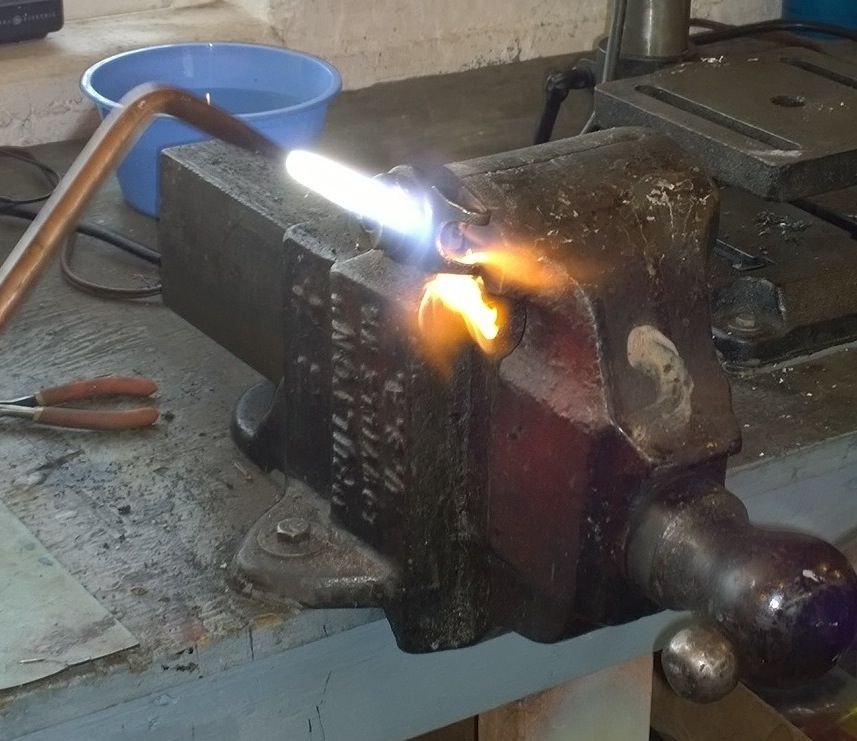
Before melting the braze joint on the rear locking mechanism, remove the spring. If you heat the spring you will probably ruin it. There is a little pin that holds it in place. Here's a pic showing the spring removed
-
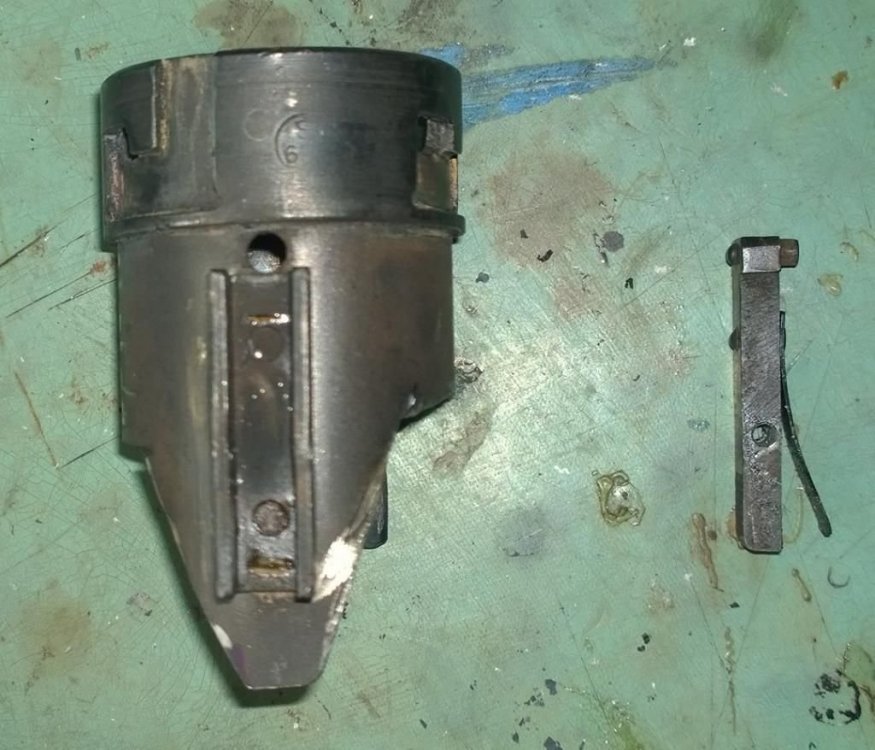
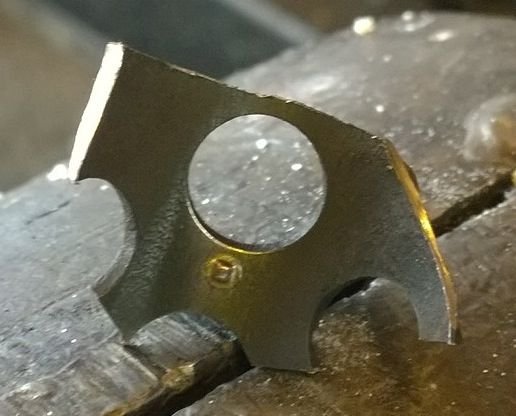
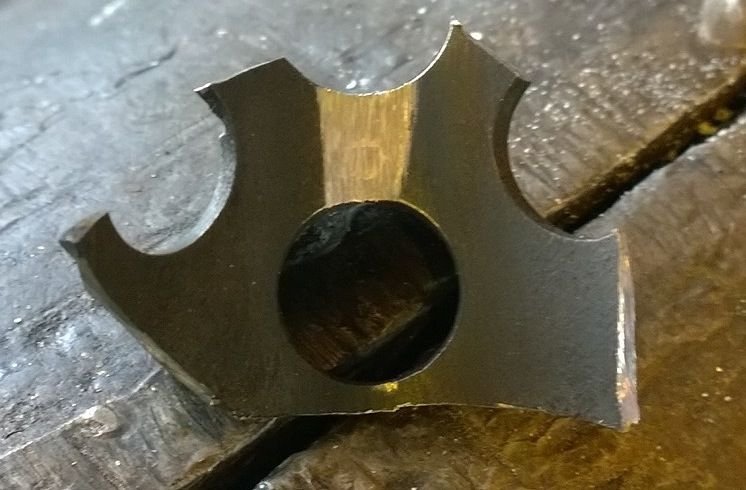
Here is the front sight with the outer shell removed. The part you see in this pic just slides out, well kinda slides out, very tight fit. You can also see the (small hole) where the metal mounting nub sat. Here is the magazine well removed. You can see the brass brazing material.
-
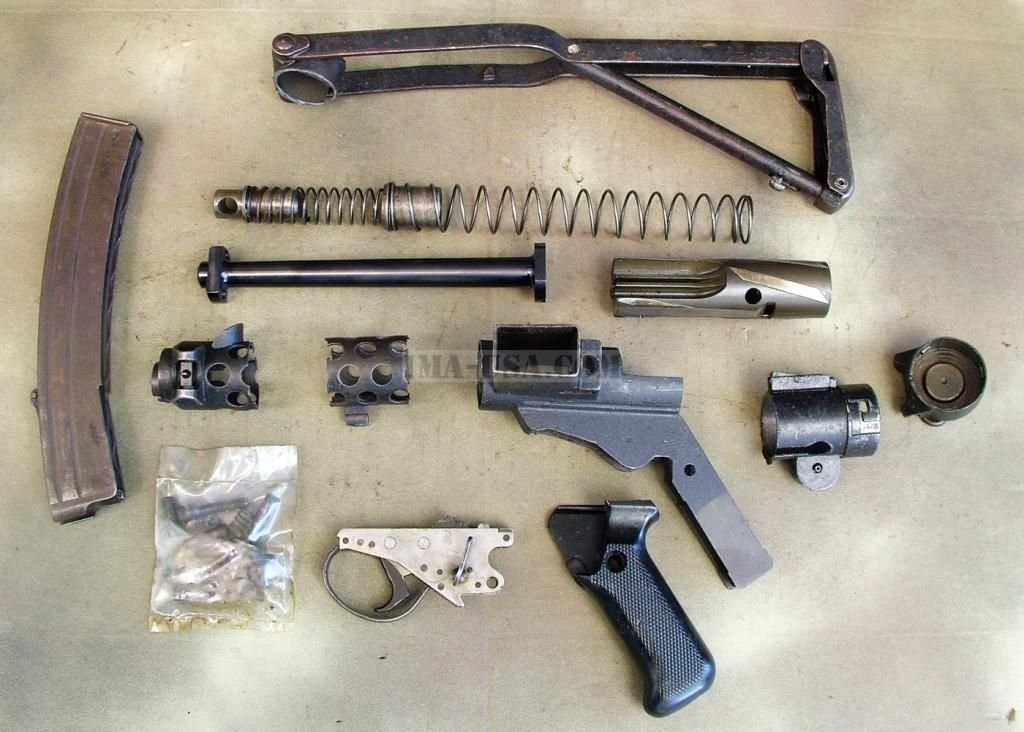
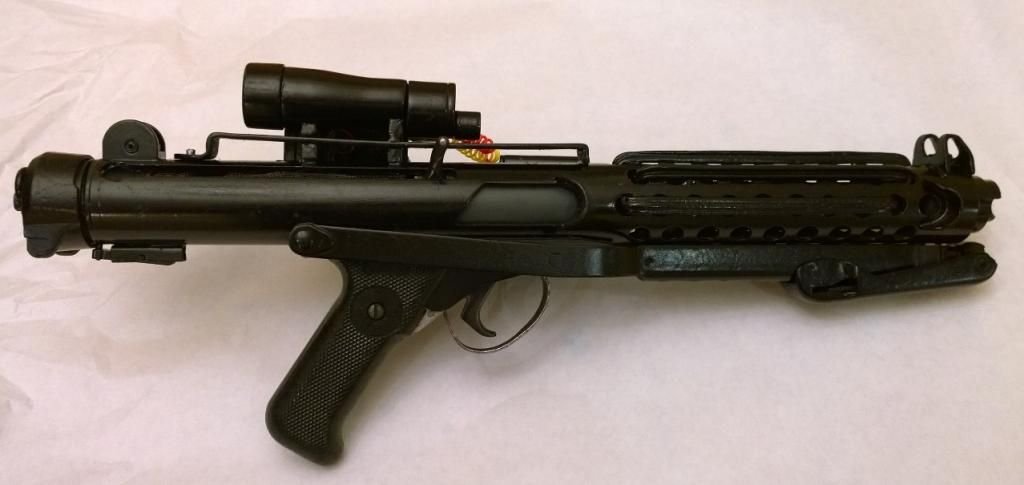
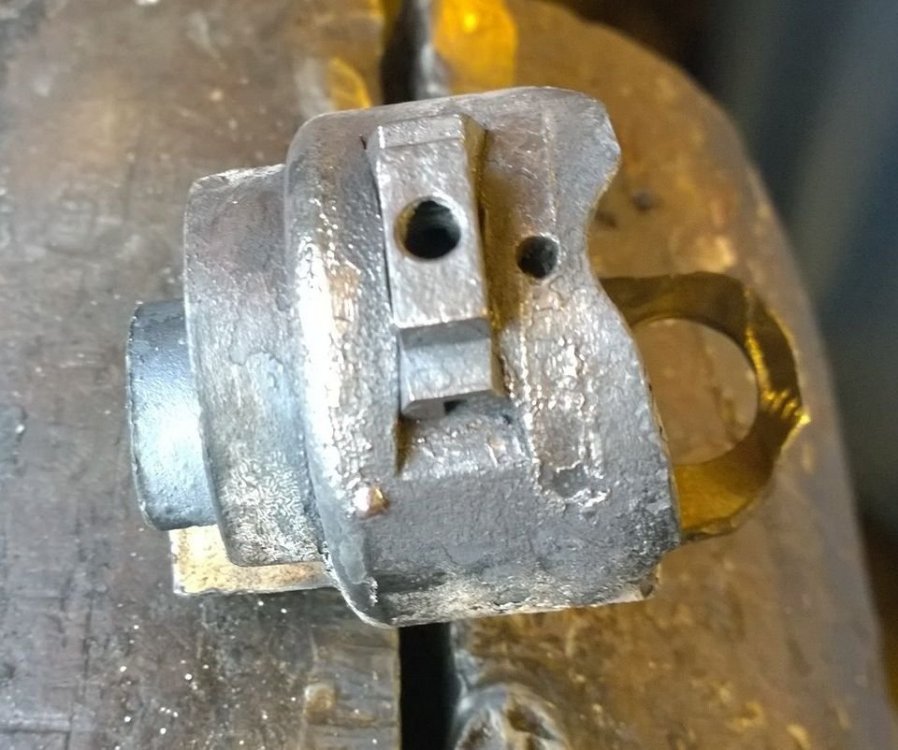
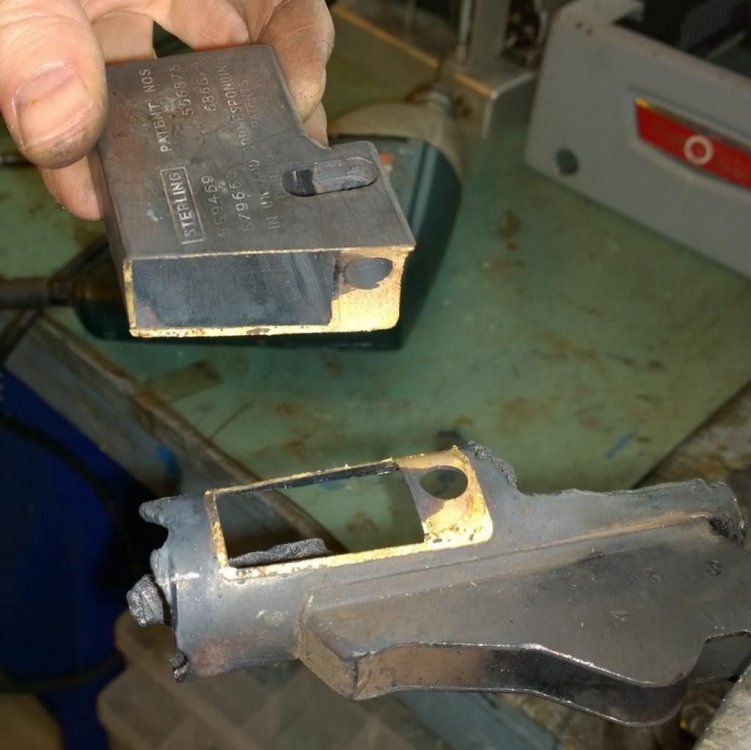
So let's start the build...The first thing is the Sterling kit I bought. The photo below is NOT the exact kit I bought but it's a good photo of a kit. My kit did not come with the internal working parts. I don't know gun part names so that's as accurate as I can get. Here are some of the parts you need to melt the braze joints on. You want to remove the front sight, rear sight, blast deflectors, magazine well, rear locking mechanism... I'm lucky and have a friend who has an Acetylene torch. All the external parts you need to remove are brazed in place using a metal made of Brass and other stuff. I used the torch to melt the braze joints. One important thing we found was that all the parts (sights, magazine well, etc) have a metal nub which was used to hold them in place as they were brazed. You need to look inside the barrel and grind down the nub BEFORE you try to melt the braze joint. Here are some pics Here is a pic showing a nub on the inside of the barrel. Grind these down before applying the welding torch Here is the nub ground down Here is melting the braze joint. You'll need to also tap the parts with a hammer to knock them off. Tap gently or you might bend/dent the part. This pic looks awesome but as it turns out the front site is two parts. The outer shell must have the braze joint melted. However the inner part of the sight slides out no braze joint.


-
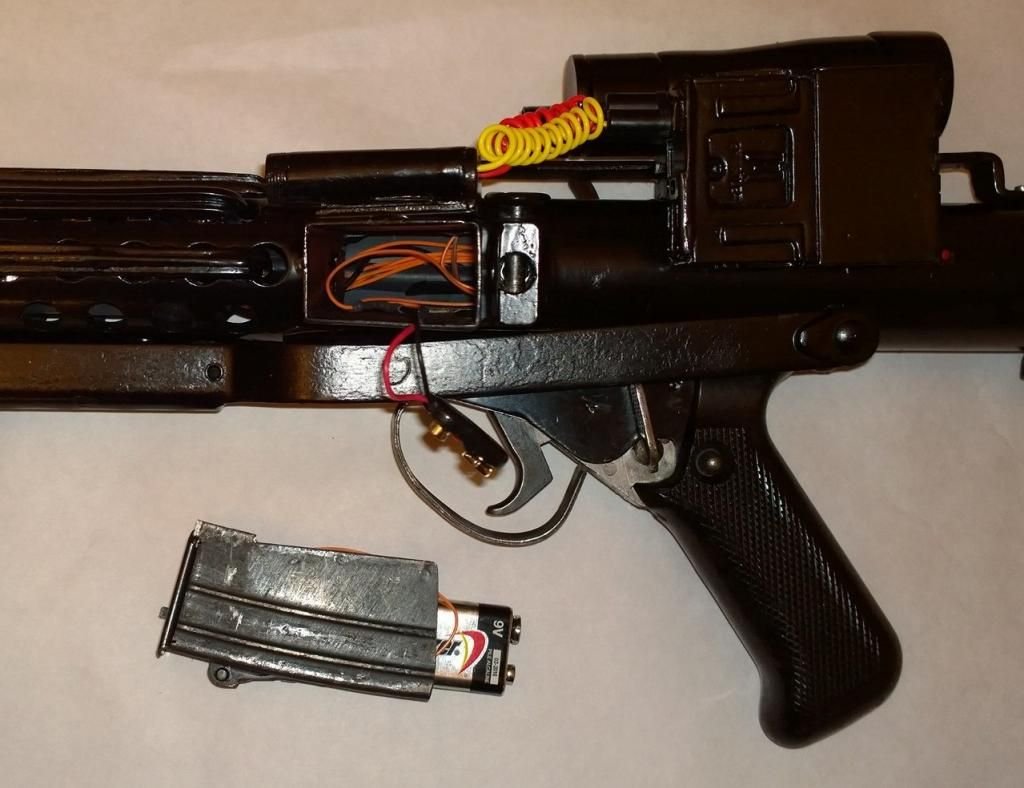
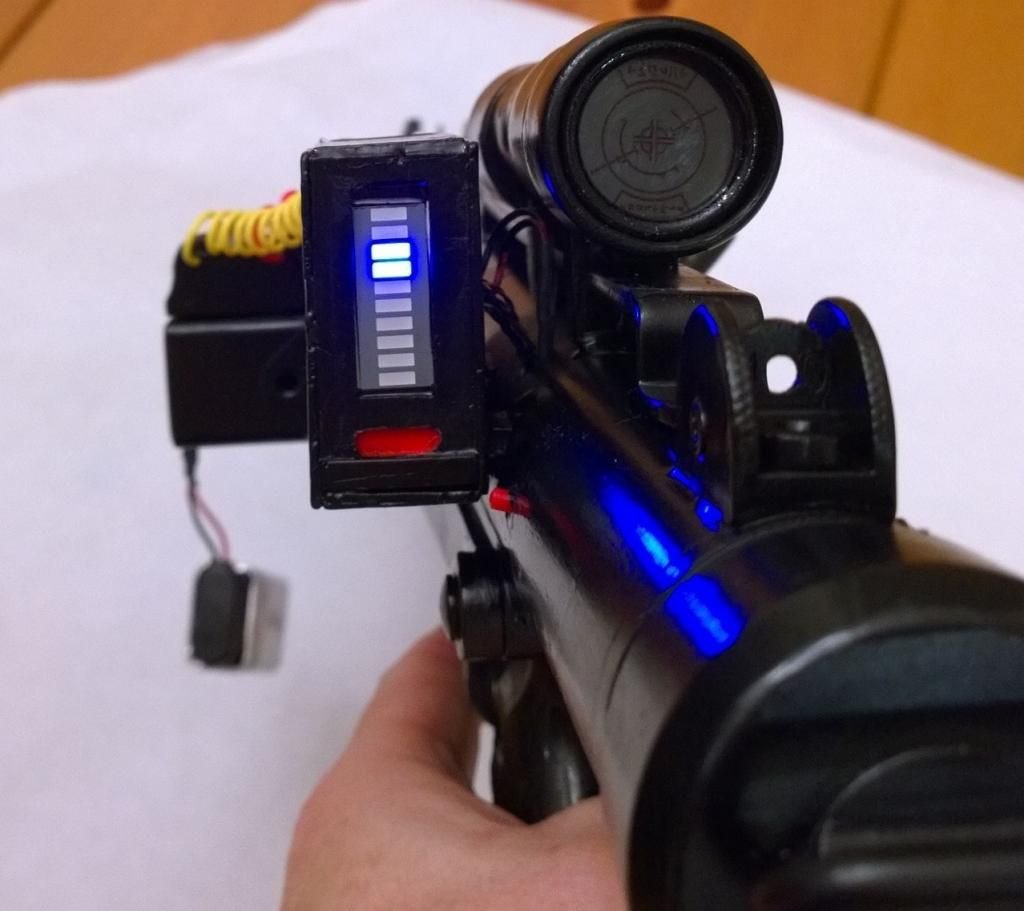
Thanks, I switched to photobucket. I used to use Image Shack but now they want to charge for full sized images. Before anyone says it I know the wires are supposed to be black but I wanted to add some color to the blaster.
-
More pics

-
Here are links to pics.


-
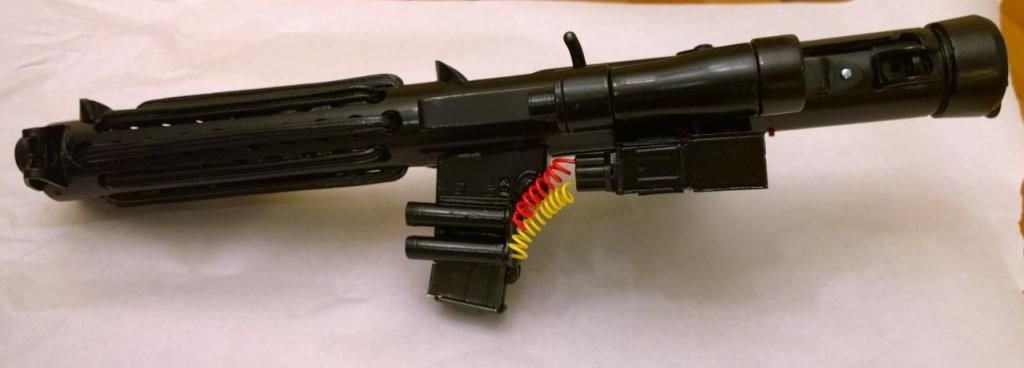
Hi All, I've been looking to build my own blaster for some years now and I finally finished it. I bought a kit of used Sterling parts. I also bought a sound/special FX controller so my blaster would have lights and sounds when it fired. It was one hell of a project. I'll start with some pics and then add more details. I need to figure out how to post photos on here. I haven't done it in years. My blaster uses the following parts from a Sterling: Both barrel ends, all sites, 2 blast deflectors, magazine, magazine slot, trigger assembly, folding stock. I made the barrel out of PVC pipe to reduce weight. i used a Blaster Core made by Plecter Labs: http://www.plecterlabs.com You can select between having a red LED flash and white LEDs (stun mode). When you fire it makes cool blaster sounds from the movie.
-
Bummer. I guess I just doubled the number of TKs in Ireland. I had no idea I would have such an impact here:))
-
Hi all I'm visiting Dublin this week. Any troopers there want to meet for a pint?
-
I'm heading to Bangkok for work in July and I was hoping to meet some of the local troopers there. Anyone know any there? I've posted on their boards but I have not heard anything from anyone yet.
-
someone posted a vid of these scenes in super slow mo showing the shell casings flying on youtube but I can't find it anymore. If anyone finds the link to that vid let me know.
-
sounds like it would just be very hot and sweaty.
-
when you saw the final product on screen, was there anything that was changed from your original design that disappointed you?
-
I just discovered that the post size in snaps varies depending on if you buy them at a fabric store vs. Tandy Leather. If you need to add snaps to ABS (as in thru a hole drilled in the abs) or if you are working with leather such as making a holster, you need to use the Tandy Leather snaps. The post on their snaps is about .33" tall. The standard snap sold for fabric use is about .21". The standard snap is too short to work with leather straps. I've also found them it very challenging trying to make them work with ABS. It all depends on how thick the abs is. The leather snaps work great!!!. My TK armor was finished long ago but I did just make a new holster and I'm now building a clone so this will be helpful.