
Leaderboard


Popular Content
Showing content with the highest reputation on 12/14/2025 in all areas
-
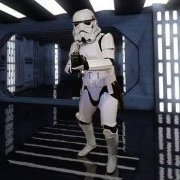
So I decided to return to the helmet..... I moved the faceplate up about .300" as I determined this is where it appears "happiest". It isn't too far up the brow (some minor trimming where I have the black lines needed though) and the side gaps should be able to be dealt with normally. Any feedback before permanent attachment is appreciated! Sent from my moto g 5G - 2024 using Tapatalk1 point
-
File Name: Gingerbread AT-AT Designer: SKeN3Ds Last Update: 13/12/2025 File: https://thangs.com/designer/KeN3Ds/3d-model/Gingerbread AT-AT! (No Need for AMS%2C or Supports!)-1477762 Description: We designed this Gingerbread AT-AT to be a realistic representation of the real thing! It has 13 joints (3 per leg and 1 for the head)! This requires No Supports and No AMS making the process of printing super easy, all you have to do is print and assemble! We designed all of the parts to use no glue, but the Candy Cane will need some glue! The filaments we used are: Polymaker Earth Brown Polymaker Cotton White Polymaker Lava Red Polymaker Forest Green Polymaker Lotus Pink Image:1 point
-
File Name: Star Wars Holiday Slider + Flip Fidgets Designer: SpacedOut Last Update: 10/12/2025 File:] https://makerworld.com/en/models/2094867-star-wars-holiday-slider-flip-fidgets?from=search#profileId-2264899 Description: Thank you for your support! If you like our family's designs - you can sell the physical prints through a paid Patreon membership: https://www.patreon.com/c/SpacedOutStudio Let this fully cool after print (you can remove from the build plate) and gently twist the pin until you feel a little resistance, then twist the other way gently until it fully loosens. The hinges should move just fine. The more you play with it, the more it will loosen. PLA will work great. Some filaments will allow movement right after the print. You can also use a technique to rotate the hinges and then press the pin between your fingers to break the supports (don’t twist the pin in this case). Images:1 point