
Leaderboard


Popular Content
Showing content with the highest reputation on 10/27/2025 in Posts
-
I somehow missed this but thanks It would be my honor Currently working on the @TKModder421 version of the ”nico-helmet”, it’s sooooo much better than the other one I got.3 points
-
Thanks for taking the time to chime in. Yes, I'm 5'7" and 160lbs so a big difference. I've looked at the guides and also the advice given in the last few days and decided against building and go as something else. I'll probably go ahead and sell this after Halloween (possibly for May the 4th next year). Thanks for all the info and assistance!2 points
-
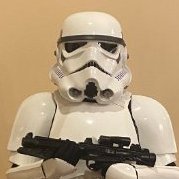
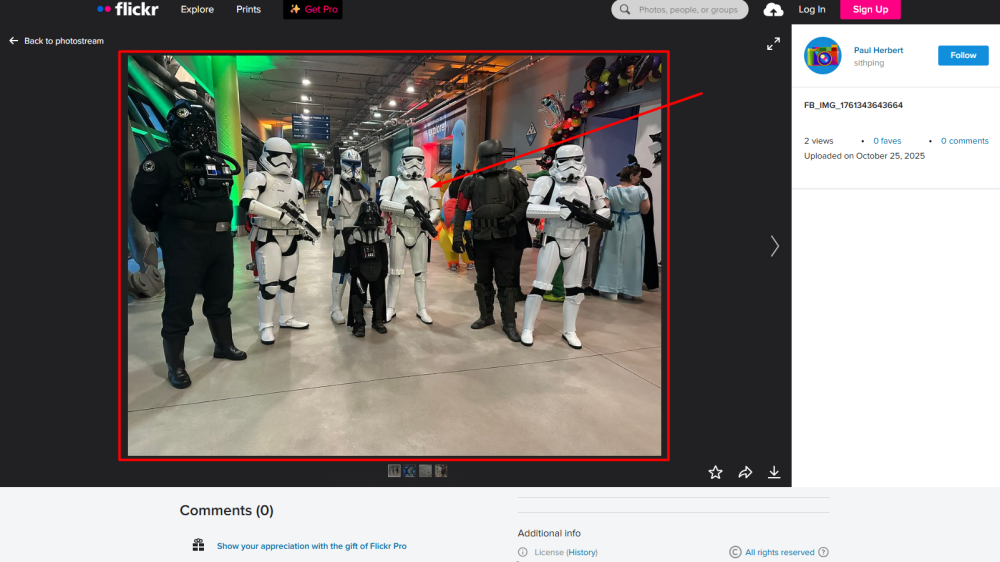
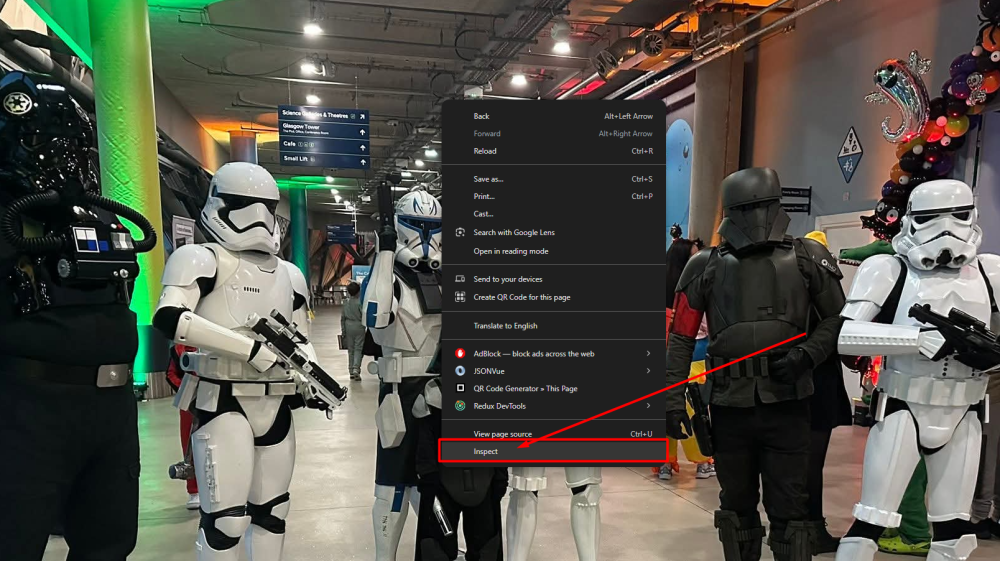
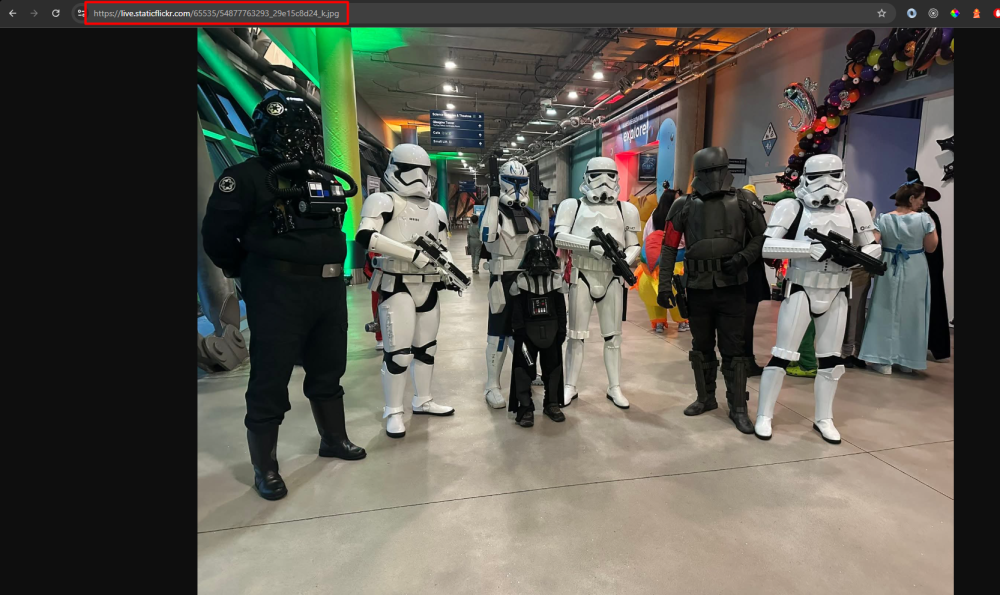
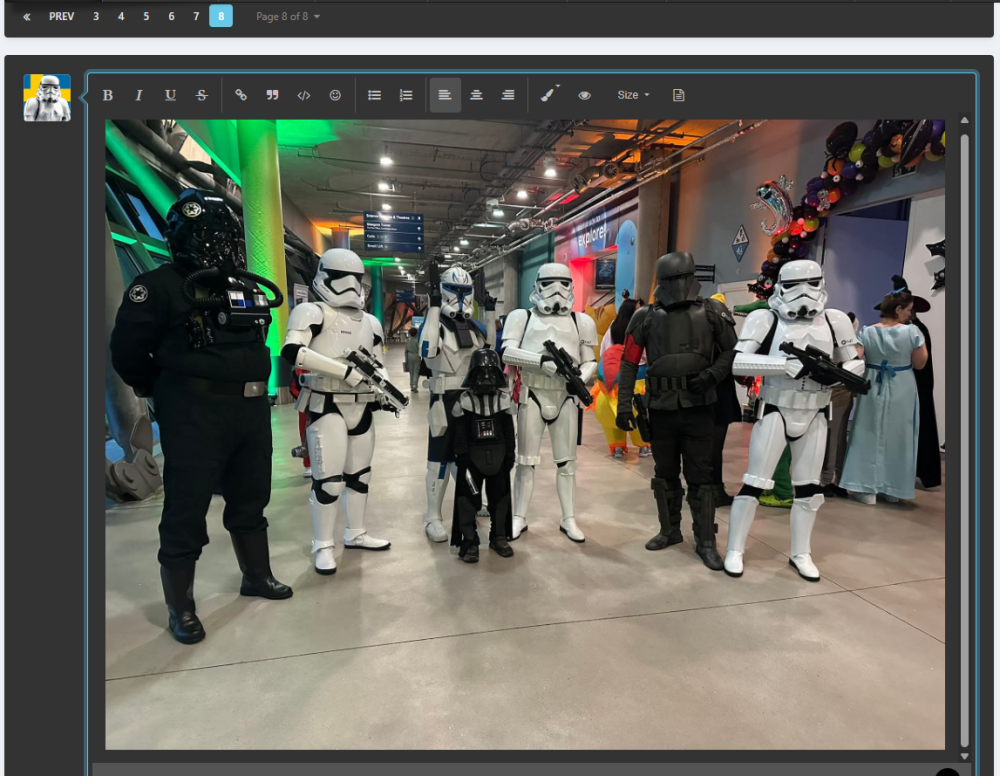
With imgur currently being blocked in the UK because of the data investigation that is going on, there is a way that you can get your photos into your posts! Some background information: What the forum needs to display an image in posts For an image to be displayed in posts on the forum, it needs an image url. When we drag images from our device into a post, the forum itself uploads that image and becomes the "host" of the image. We used to have very limited storage allocated to each account on the forum, that's why using imgur on the forum became a thing in the first place. When you upload an image to any platform e.g. Flickr, that platform becomes the host of your image, you take up storage on their servers. Every image has a link to where it can be accessed, this is called the "Image url". It's this "Image url" that we now need to go fetch from the Flickr platform, lets go!! We need to do a little more work here compared to the imgur tutorial, so sit down and get comfortable! Getting the Image url On your Flickr post. Click on the image you want to add to the forum - to zoom it. Right click on the enlarged image and press on "Inspect". This will open up the enlarged container, it holds the thumbnail image (the first in this container) and the original image (the second in this container). Double click on the second img src link to mark it, and press Ctrl+C/right click and choose "Copy" Open up a new tab in your browser, and paste the link in the Address bar. This will append "https:" to the front of your image url, since the image url that we copied in stage 4 just started with "//". Final step, copy the url from the Address bar and paste it to your post, and voila - you have an integrated image from Flickr! TL;DR (condensed version without images) On your Flickr post. Click on the image to zoom it. Right click on the enlarged image and press on "Inspect". This will open up the enlarged container Double click on the second img src link to mark it, and press Ctrl+C/right click and choose "Copy" Open up a new tab in your browser, and paste the link in the Address bar. Final step, copy the url from the Address bar and paste it to your post Thank you to Paul @Sithping for being the involuntary example in this guide! Example image from this troop log.

 1 point
 -
It´s so pretty I wanna build a 100 of them.....heck..a 1000 wouldn`t be enough!1 point
-
Thanks for doing this Jonatan! I really appreciate the time you have taken to make this thread. I'll be sure to use this on my forthcoming troop log updates. Many thanks! Paul1 point
-
Hmm.. it seems I wear the neck seal other way around. I thought the back is more visible than the front, but apparently the opening/velcro should be on the back1 point
-
Whilst wet sanding as the prep for painting, you can also pause there for a moment to see if enough white comes back by the wet sanding alone - and if it does, skip the painting if you feel like it's enough!1 point
-
Truly amazing work on all of this. CRL model here we come!!1 point
-
Many of the FOTK and ROTK are painted, just means you have to be a little more careful wearing and packing, I have soft pouches for all the armor pieces. Also try not to rub areas while wearing, like forearms on belt. Make sure you prep the surface so the paint has something to grip too, warm soapy water and wet and dry sandpaper, 400 grit, some prefer to use finer. Here's the paint code for FOTK Personally I used a basic white from automotive store, acrylic as it dries quicker and can be sanded polished, I find enamel paints a little soft and can take a while to dry. The paint I used also matched my helmet well. Some use Rustoleum white gloss, other Krylon white gloss1 point


