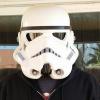
Darkpain714[TK] Posted August 22, 2016 Report Share Posted August 22, 2016 (edited) Please consider the attached for EIB status Name: Brian PayneLegion ID: TK-50976Forum Name: Darkpain714Garrison: Southern California Garrison501st Member Page: http://www.501st.com/members/displaymember.php?userID=22178&costumeID=124Height: 6'0"Weight: 215Armor maker: AnovosHelmet maker: AnovosBlaster: QuestDesignCanadaCanvas Belt: KittleHolster: AnovosHand Plates: AnovosElectronics: TK Talkie /Pyle AmpBoots maker: TK Boots/Size 11Neckseal: Anovos Photos: Front: Back: Left: Right: Right Detail: Left Detail: Abdomen Detail: Cod/Butt: Interior Strapping: Helmet: Front: Sides: Back: Hovi detail: Lens: Neck seal: Thermal Detonator: Belt/Holster: Blaster: Additional Detail: **EDIT*** Adding in action shot Thank you! Edited November 22, 2016 by Darkpain714 Quote Link to comment Share on other sites More sharing options...
pattrooper Posted August 23, 2016 Report Share Posted August 23, 2016 nice 1 Quote Link to comment Share on other sites More sharing options...
Sly11[Admin] Posted August 29, 2016 Report Share Posted August 29, 2016 Hi Brian, thank you for your EI application and your patience, lets get into it!! CRL and EIB Application Requirements: All submission photos are present except for your action shot, so please add it in. Your armor displays all the necessary elements to qualify for Expert Infantry , congratulations Trooper and welcome to the rank. Other-Armor Fit/Assembly: In this section we review observation made by us and your fellow troopers, if any of these observation would affect a future application, they will be made in the above and or below sections. Nice work on this Anovos kit, you look great, but the list of things we have to go through below, will have you looking even better. We shall start with your shoulder bells. There is still some room to bring these in so they are almost touching the plastic bridges. Thanks for this excellent side view image, it shows clearly that these straps are too long. Reference image So if we swing around to the back, you have quite a gap opening up between the back and kidney plate. With further nspection we found that the two inturnal straps are way too long and need a good shortening up to bring those plates together. Again, thank you for this great internal strapping photo. Reference image Now we shall get down to some finer details. The grey abb buttons on both the ab plates are considerably smaller than the blue. These should be a similar size so we are suggesting to make the grey buttons larger than they currently are. They are painted very neatly, but need to be bigger. Reference image Centurion Suggestions: In this section Uk or myself may suggest recommended or required repairs prior applying for the Centurion level however, the accuracy it is ultimately up to the trooper. We all know the Anovos helmets can look so much better with a little TLC, so here I will discuss those little things that make a big difference to the look and accuracy of this helmet. The ear screws used on original buckets were of the V or tapered head variety, where these guys are a domed head Reference image I would also like to mention the frown. Yours finishes abruptly and with a square end, where it should gradualy taper out to a point like these below screen used images. Take your pick and lastly on the helmet is the screen mesh. As you can see the Anovos helmet has a fine mesh where the originals had a more open style mesh. I believe many are buying a cheap strainer from a kitchen or hardware store and cutting out sections to use as a closer replacement. Reference image Onto your blaster, and something that we do see from time to time specially from pre assembled E11's, and rarely from build kits. We have two parts incorrectly mounted. 1. The charging lever. It should curve towards the front of the blaster, and not away to the rear. Secondly we look at the rear sight. There are a series of ridges,like the teeth on a cog, that are visible on the back of the sight. In the picture below, we must assume that they are on the front as they are not visible. as seen in the set on images below. Justjoseph73 has a geed fix for this without the need to remove it. Check out his EIB application he has photos, or drop him a PM I know he will be more than happy to assist you. Thanks again for a great build and detailed application. Your armour fits you very well, and with those strap adjustments and minor mods, you will look superb. Congratulations and hope to see you in Centurion soon Quote Link to comment Share on other sites More sharing options...
Darkpain714[TK] Posted August 29, 2016 Author Report Share Posted August 29, 2016 (edited) A HUGE THANK YOU for the detailed feedback! Most of the fixes I was expecting: the bucket tweaks, the blaster rear sights, the back strapping, shoulder bells. But a couple were new to me! Blaster charging lever could be a showstopper. The button paint went round and round on various forums and discussion groups with some saying they were fine and others saying they needed touched up. I'm very thankful to put that debate to rest finally! I will touch up the gray for sure. A couple of items not mentioned, but I know are required: the latex handguards and the side shim seam removal that I'm actively working on. I hope to get this all done by the end of the holiday weekend. Thanks again so much! See you in the next round! Edited August 30, 2016 by Darkpain714 1 Quote Link to comment Share on other sites More sharing options...

Recommended Posts
Join the conversation
You can post now and register later. If you have an account, sign in now to post with your account.