
Sea_Marshall
-
Posts
77 -
Joined
-
Last visited
Content Type
Profiles
Forums
Gallery
Articles
Everything posted by Sea_Marshall
-

Sea_Marshall: Captain Phasma TFA
Sea_Marshall replied to Sea_Marshall's topic in Captain Phasma Build Threads
This metal holster clip came with the Phasma kit from Shawn Thorsson. Super stoked to see that kind of detail on the costume. If I ever get a pistol, it should slot right in, and if it scratches, would just reveal the aluminum beneath. The screws and lengths through the metal and fiber glass is a little tight. I may just lock down a few screws and lock-tight the rest. Got the holes drilled, filed, and did a test fit. Today was an 800 day! I used the entire pack of sheets but managed to sand everything except gauntlets, hands, and blaster rifle. Soon. I'll need another pack. I believe I spent at least 6-7 hours dry sanding the kit to 800. My next major session will be a wet sand at 2k. -
Sea_Marshall: Captain Phasma TFA
Sea_Marshall replied to Sea_Marshall's topic in Captain Phasma Build Threads
I got a jump start on my checklist. Final base coat is down, greeblies attached, and the great sanding of 2020 approaches. Next weekend will a long day of detail sanding in preparation for the Uni-Coat gloss base. Whoop whoop. Progress continues. These were the best clamps on hand, lol Three cans of sandable filler primer about to go down And now I wait for the day I can hunker down for surface prep and gloss coat. -
Sea_Marshall: Captain Phasma TFA
Sea_Marshall replied to Sea_Marshall's topic in Captain Phasma Build Threads
Onward! Prep is ramping up as I near the final stages of the build and prepare to chrome. Speaking of chrome, the basic chrome kit from Angel Gilding has arrived! I have yet to open it, but it's time will come. 3D printed F-11D base coats are down and nearing completion. Probably going to give it another once over to really clean up the nooks. New gauntlets from KB Props were prepped and primed. They fit my forearms well enough to be slip on gauntlets once assembled. Gloves got a 2nd coat and are awaiting the Great Sanding Session of 2020. Nice to have pieces out of the box for work! Not much more to report, but I'll get more bench time tomorrow. Got the torso and thigh greeblies glued and clamped down for the night. One more step finished. -
Sea_Marshall: Captain Phasma TFA
Sea_Marshall replied to Sea_Marshall's topic in Captain Phasma Build Threads
KB Props Gauntlets came in wicked fast once they were ordered! For those of you not keeping up, the T&A Gauntlets that came in the kit didn't quite fit my forearms, so I ordered a pair from KB Props, and here's the big diff: The extra inch or so at the front of the gauntlets allows for the back end to be wider. The tapered resin gaunts are great, but I couldn't do the size. Having both sets now, I've found that I can use the Resin top shell and the KB Props lower panel has enough abs on it to make a gauntlet mod. Likewise, the abs gauntlet can use the resin lower panel. Huzzah. I think I'm coming out of this with two functional gauntlets, where I only expected to get one. Here's the side by sides if anyone's interested at all. Really glad I don't have the modify the gauntlets beyond a simple swap of parts. I've pulled the blaster off the shelf and may start some work on that to pass the time. The next time I get to work on the armor, I hope its a three or four day stretch so I can do all the final prep and chrome the last day. So close, but so far. -
Sea_Marshall: Captain Phasma TFA
Sea_Marshall replied to Sea_Marshall's topic in Captain Phasma Build Threads
Thought this was an interesting image of the boots armored up. Phasma Pheet. -
Sea_Marshall: Captain Phasma TFA
Sea_Marshall replied to Sea_Marshall's topic in Captain Phasma Build Threads
Well. I've managed to find time in the doldrums of quarantine. I hope everyone is doing well and remembering to wear a mask. I found it amusing that I put on a mask to start sanding. I've decided to use Angle Gilding's Silvering kit and as such have sanded my helmet back to square one. It, and all the armor, is at 400 grit. I think I'm going to do one more layer of primer, then I can order the chrome. I'm thinking wet sand the finish to 1200 and that should be it. I still have to attach the belt parts, resin greeblies... And I need to sort out my gauntlets. I've heated them up and reshaped them for a better fit on my wrist, but my forearms require a modification of some kind to extend the width of the gauntlets. Bleh. There's a long way to go but its nice to have picked this up again. -
Sea_Marshall: Captain Phasma TFA
Sea_Marshall replied to Sea_Marshall's topic in Captain Phasma Build Threads
Definitely saw this effect when I worked on the helmet for the first time. I do plan to lightly weather the armor so a little wear and tear is acceptable, but I will be revisiting some of the bigger blemishes for sure. -
Sea_Marshall: Captain Phasma TFA
Sea_Marshall replied to Sea_Marshall's topic in Captain Phasma Build Threads
One more step! A coat of filler primer is down: I think that covers the major armor work. Going to wait on sanding this until Chrome is ready. I've planned to go for Angel Gilding for the silvering stuff. I started a spread sheet months ago, but will revisit my notes. Very exciting to get here. I think until I'm ready to pull the trigger, I'll be working on the belt, gaskets, and see about attaching the lowers to start. If anyone can offer suggestions for how to attach all this stuff, it would be helpful, but I intend to stumble my way through it the best I can and will share progress. I'm not sure if there's a specific way to do anything. I haven't even really looked at anything yet so I don't know what to look for. I hear snaps are cool, but strategically added to prevent armor lift. -
Sea_Marshall: Captain Phasma TFA
Sea_Marshall replied to Sea_Marshall's topic in Captain Phasma Build Threads
Well holy cow, I was genuinely caught off guard when I got home at 5pm and it was 70 degrees. So, I carped them diems! Plasti-dipped Phasma's interiors! So long fiberglass remnants! AND I got coats down on the gaskets. woop woop. For some extra bonus material, here's a few other items on hand! Imperial Boots, Spec Ops. I think they were renamed after I bought them: TK Boots Dry Fit of the boot and lower shin armor! Looks good. We'll see how it'll go once I incorporate my foot lol. -
Sea_Marshall: Captain Phasma TFA
Sea_Marshall replied to Sea_Marshall's topic in Captain Phasma Build Threads
Quick update: Trimmed the gaskets. These will get a wash and a fresh coat of plasti-dip to rejuvenate the black color. For kicks I tried on the yoke, chest, and torso. I could stand to drop some weight, to say the least. At least the yoke can be put on now. I may have to extend the wings of the chest plate to reach the yoke as it was barely making it now. I've decided to diet until this build is over. Here's hoping! -
Sea_Marshall: Captain Phasma TFA
Sea_Marshall replied to Sea_Marshall's topic in Captain Phasma Build Threads
Another step complete: Uppers are sanded to 220! Following a test fitting, I found that my shoulders were too broad to reliably slide into the yoke. As you can see in this photo, the yoke's arms are connected and this prevented any flexible movement for fitting. You can kind of see where I took a sharpie and traced the coverage of the front chest plate in the 2nd photo. I took a dremel cutting tool to the chest plate can carved out what "should" be covered when the chest is attached and allow for me to slide the yoke on over my shoulders like a backpack. It appears there should be enough room on the sides to reliably secure it shut via snap or velcro. Not sure which. Snaps would probably be more reliable. I rounded out the edges and sanded them smooth (not pictured). It appears to fit correctly... Man, I hope this works... Last step was to finally rinse and wash each piece to clear out any fiberglass residue from cutting and sanding. I used a wash basin large enough to fit the pieces in and gave each individual piece a quick bath. This was a momentous occasion in the build process akin to cleaning up the edges. This step concludes all the major body work of the armor! My next steps are to filler prime each piece to tamp down/cover up the bare fiberglass as well as fill in the surface imperfections. Following how many ever coats required, I'll likely coat the interiors with a black paint and finish the surfaces at 400 grit. Somewhere along this path I'll have to test fit everything. I have some compression pants and shirts lined up on Amazon: Shirts: ATHLIO Men's Compression Shirts Pants: ATHLIO Men's Compression Pants I still need to attach the boxes to the abdomen and make the belt, but its a comforting thought knowing that's coming up. Following the base primer layers I should be able to suit up! Can't wait to see if that yoke modification will work out. -
Sea_Marshall: Captain Phasma TFA
Sea_Marshall replied to Sea_Marshall's topic in Captain Phasma Build Threads
Minor minor progress. It's hard for me to find time where I can get dusty for a reasonable amount of time, but I got some time in on the armor. I took an 80 grit sandpaper to all of the edges of the plates and smoothed out the dremel trimming. They're softer to the touch now. I squeaked out some time today to sand the lower armor to 220 grit. Next step is to rinse and then base coat in filler primer! WOO! Stoked! ...then I have to sand it again. But I can start assembly and test fitting! Huzzah. Stoked. Hopefully on the same day that these get their primer coats is the same day I 220 grit the upper armor. Getting there. -
Sea_Marshall: Captain Phasma TFA
Sea_Marshall replied to Sea_Marshall's topic in Captain Phasma Build Threads
Oh, and this. Mannnnnnn. My forearms are beefier than is allowed in these gauntlets. I need to tone them to hopefully dial back some of my flesh. Dang it. I've also hit up KB Props for a future run and they quoted me for a pair of ABS gauntlets and an FOTK kit. They said they'd put me on the next run's list. Really I just want another set of gauntlets so I can check fitting, but I wouldn't mind an FOTK kit... ugh. We'll see. Gauntlets and glove looks great, feels great. But doesn't fit. -
Sea_Marshall: Captain Phasma TFA
Sea_Marshall replied to Sea_Marshall's topic in Captain Phasma Build Threads
Wild success today, but first! Some minor details to fill some space. Cleaned up several of the washed resin bits. I had requested an additional nose for this kit because I had bought a buddies Phasma helmet (made by T&A) and I took great care to dremel, sand, wash, and prep the helmet, but for some unknown reason, KNOWING the nose was resin... I didn't prep the nose... So I primed the nose without the proper prep and oh man. What a mess. The paint didn't cling, I tried to sand and restart, but it got worse and worse, and eventually I started losing detail in the umpteen coats that simply wouldn't stick no matter what I did afterward. So it got trashed. But now! Proper prep. This is probably old news to a lot of folks, but I like to have these tips in my WIPs for people who may not already know, but I wrapped a bit of 80 grit sand paper around a piece of plastic and use it as a file to clean up the edges instead of using something as destructive as a belt sander or dremel. Also super minor is sanding the surface to smooth it out for paint prep. Chrome is super finicky and tends to magnify the imperfections of the finish, much like my initial post showed, and even after this sanding smooth, it'll get some filler primer to fill some other imperfections deeper than the surface, and it'll get sanded again. I was surprised to see this nose was as rough as it was, but it was a spare. The other nose I got was near perfect. Notably in this piece, the channeled groove around the nose had bits of junk in there. I tried a few things like a groover, even bladed tools to scrape this stuff clean, but eventually upgraded my dremel set with a diamond detailing kit. Diamond dremel stuff is amazing. It's requires patience to sit there and tool this stuff out, but worth it in the end. When I work on my 2nd helmet I'll be sure to highlight some of the resin residue that this kit will be awesome at cleaning out. Again, it comes down to the surface being pristine, but really its just me being a critic and making sure I got some nice detailing so when it's photographed in HD, I know it looks sharp. And NOW. BEHOLD. lol. My before and after from box of rough cut, "serviceable", fiberglass armor, that I was told, quote, "You've got a lot of dusty work ahead of you", and it's rinsed and cleaned state! This took me four hours with a diamond blade to further trim the rough cut and then swapping out to an 80grit tool on the dremel to dial in the rest. I had considered using a belt sander, but that would have been a lot of getting up to use it, then having to get the dremel to get the details, so I just hunkered down listening to The Mandalorian soundtrack for four hours trimming this stuff. What a great afternoon! Four hours and I'm damn proud cause this mess has finally come to fruition and I got it done. ... Well... I still have to give these a proper bath and scrubbing, all I did was rinse the fiber glass dust off so I could transport this without killing my lungs, lol. But! the bulk is done. Following the bath, I can revisit the edges by hand and give it a once over to sand the surfaces so I get better paint adhesion, and then! THEN! Filler Primer to my hearts content so its beautiful and less fiberglassy. I didn't take detailed images of the raw kit cause I just wanted to knock this thing out. Woo hoo! A leap forward in the marathon. Here's a before an after victory photo. I earned it. PS: the last song that played on the soundtrack as I dusted off was, "Celebration", the jam where the Jawa's were eating the Mudhorn egg. It was perfect. Big stupid smile under my respirator. -
Sea_Marshall: Captain Phasma TFA
Sea_Marshall replied to Sea_Marshall's topic in Captain Phasma Build Threads
Picked up a cheap belt sander from Harbor Freight today, got to work cleaning up the greeblies. Will likely use this for the armor too, but I haven't seen those parts for a while since they're sitting in storage while I tinker on the resin. Progress! Trimmed back the extra resin on the clips and hand armor. Another dusty bit of work. Dry fit on the gauntlets looks like they check out. If I were to go slimmer, I would have gotten to the recessed detail. One of them got close, so I stopped here. Satisfied with the trimming, all the greebs get a soapy degreasing bath in warm water while I type this up. I'll be scrubbing them clean and they'll be ready for a 400 grit sanding to clean up excess flash before filler primer coats go down. Freshly cleaned bits for competed gauntlets and armored gloves. (and two noses). Next session will see these sanded to 400 grit and filler primed. Sanded. Filler primed, sanded. I'm pretty sure gloss black is the next step, but I think I'm going to get all parts to sanded primer and assembled to fit. Once assembled and wearable, minor surface touch up followed by gloss black and chrome. Huzzah, another step in the marathon. -
Sea_Marshall: Captain Phasma TFA
Sea_Marshall replied to Sea_Marshall's topic in Captain Phasma Build Threads
Took a dremel to the resin Gauntlets and a few other bits. Here's the gauntlet kit raw, out of the box. I took a diamond rotary blade to the chunky bits of resin and followed it up with a standard sanding bit. In the flat area where the bottom detail part will attach, I left a small bit on the sides to create a shelf for the detail part to sit. I'll figure out some kind of mounting rig. Maybe a velcro strip on the arms. Ceramic block magnets have worked in the past. Huzzah. One step down. I need to get to a belt sander to get the next set of details handled. I suppose I could just sand for days too. We'll see how impatient I get. Dry fit! Just need to find some time to sand the glove armor and I can get those done next. "You've got a lot of dusty work ahead of you". Listening to 'The Mandalorian' sound track while working on armor is my new jam. -
Sea_Marshall: Captain Phasma TFA
Sea_Marshall replied to Sea_Marshall's topic in Captain Phasma Build Threads
Started with the resin bits. Looks like Gauntlets and Gloves will be the first to be prepped! Trimmed out the clips and finger armor to start. Planning to soak and degrease these in prep for paint. The clips have a lot of bulk resin underneath the detail so I may have to run these through a belt sander to fit them to the armor, but will have to dry fit them and see how that goes. Glad to see some progress, if even minor. Clips and chest greeblies T&A was kind enough to supply an extra set of fingers if any pieces got lost. Somewhere in this mess is a pair of armored gloves. -
Sea_Marshall: Captain Phasma TFA
Sea_Marshall replied to Sea_Marshall's topic in Captain Phasma Build Threads
Alriiiiiiight. Big box of fiberglass and resin showed up! This is the raw kit from Shawn Thorsson. Taking inventory, I found a few things missing, but are being sorted out. I was given an extra set of fingers just in case I need replacements and a spacer for the back of the abdomen section. Lots of work to do to trim this up and clean up the parts. What a project this will be! I have Spec Ops boots coming in from Imperial Boots and once in hand can start working on the lower parts from the waist down. Exciting, but it will be a while. I still have to order a jump suit / undersuit. Any recommendations? I'll be looking into options but personal favorites are welcome. Will also need to look into a strapping system and will check out other builds and FOTK sets on how it's secured. There's no ONE way to do this right? Just black webbing/belting? Also, took a crack at the chrome for the test helmet. Still learning, but it will be a good test bed. A long way to go before I decided on a method. This was just the black gloss primer/paint layer, then two coats of Spaztix spray can. Buffed between layers. But 2nd coat went down and haven't revisited this yet. Needed to get another can, rofl. One can not enough. Major part of the kit is here! Just need to sort out the undersuit and wait for boots to roll in, then can start prepping the fiberglass for paint. Likely dremel, sand, primer to gray for starters. Dang. Hopefully by Anaheim Celebration? Here's to square one! -
Sea_Marshall: Captain Phasma TFA
Sea_Marshall replied to Sea_Marshall's topic in Captain Phasma Build Threads
I feel like I've made some kind of progress. I sanded the filler primer layer to 400 and put down a layer of gloss black paint. I then found a few smudges in the layer from too much wet paint. I sanded it down then wetsanded the surface to 2000 and got a nice coat back down. Feels like I did something right. Decided to gloss coat the whole thing again with the touch ups. Looks good from here and I will likely wet sand this surface to 2000 and then I can be happy with laying down the Spaztix Mirror Chrome. I plan to weather the surface using Elmer's Glue and some Black Acylic paint, as done in the Gordon Tarpley videos. Speaking of Gordon Tarpley. I'm thinking of getting a chemical chroming kit. I've at least priced it out. But then comes the question of just spraying a chrome and weathering it as originally planned. Does anyone know the life expectancy of a chemical chrome job vs. paint job and protect? Also wondering if the glue/acrylic weathering layer will protect the finish without need for a protected top coat. Noted that spaztix will go one in light layers, buff, then layer again. I've also conceded that this is a test helmet since the new kit will come with a fresh helmet. I'd likely need to decide the chroming process before I move on to the armor, but I'd imagine these things take time to prep and fit, so I have some time. I've never had a set of TK/FOTK armor before and it looks like a long process of fitting, trimming, and in this case, surface paint prep. To kind of rattle on the topic of chrome, I suppose if I can't stand the process or upkeep, I could change the armor to either A) Cardinal B) FOTK C) Pyre They're generally the same I think? I've never looked at the comparisons. I recall Phasma being an FOTK with extra steps. Cardinal doesn't appear to have a CRL, but I'd imagine is a red Phasma with the cape on the other shoulder? -
Sea_Marshall: Captain Phasma TFA
Sea_Marshall replied to Sea_Marshall's topic in Captain Phasma Build Threads
I sanded the latest filler primer coat to 400 grit and noticed a significant difference in pitting. Success! I laid down a second coat of Filler Primer and it's currently drying. After drying I'll get another 400 grit sand session. On another note... I put in the deposit for a Thorsson set of armor. I should have it in hand in a few weeks! I'm all in. Thorsson's buy-in also includes a helmet! So the one I'm currently working on will either prove to be a success, or test subject for the real deal. Very exciting! -
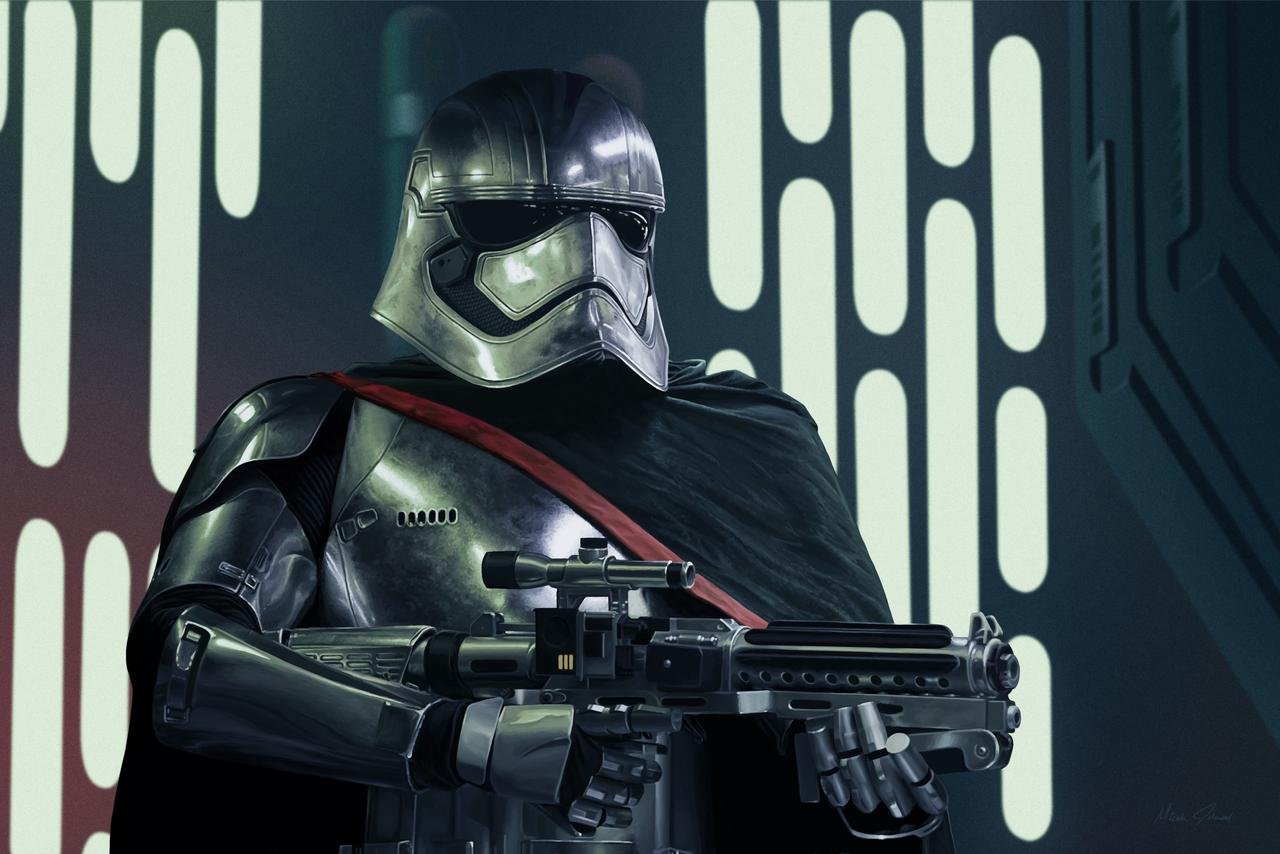
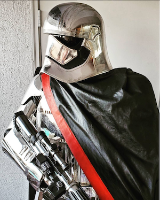
Hi Folks, I'm Chuck and am embarking on a Captain Phasma build. Well... I'm hoping to build the kit. It's a complicated situation. My wife has put me on a costume ban because, well, I didn't disclose my costume habit and flew under the radar, haha. Easier to ask for forgiveness than permission? Anyway, since I let the truth out, and I wasn't allowed to get new costumes, I funded her TFA Kylo Ren and she got approved in the 501st. Hah. So now, "Phasma would be a nice compliment to Kylo, right?" And she didn't react when I picked up a Phasma bucket by Shawn Thorrson. So I'm in the clear right? I haven't pulled the trigger on the armor yet, but I'm confident I'm going with a set of Thorrson armor to compliment the helmet. I've met him several times, followed his build threads, and spoke with one of the few owners of his kits. From what I've gathered, he's begun pulling full kits as a one stop shop. I've thought about this for over a year and now that I have a helmet in hand, time to prep and paint one. If I can pull off the helmet, I can pull off the armor. I wasn't going to document the build because I don't want to lead anyone astray. I'm terrified of the chrome finish and the general upkeep and maintenance of the costume. I've decided to go TFA to compliment my wife's Kylo, but I also like the gritty look of Phasma's weathered armor. Additionally, I hope the light weathering of the kit will be more forgiving with the maintenance of the chrome. Realistically this thing is going to get trooped in and it's going to wear over time. Speaking of chrome, I'm going with Spaztix Mirror Chrome, rattle can version. I've used Rustoleum Mirror Chrome and it's not very impressive. Spaztix, in the images below, has a look I can live with. It's aerosol, so easy to apply, and it dries quickly. I guess it's the medium quality? I don't want to break the bank chroming this thing. Maybe one day if I want to liven it up. Alright, so, disclaimer: This isn't a tutorial. It's my attempt at wobbling through this build. If you don't like what I'm doing, don't replicate it. Learn from my mistakes, as I will likely make lots of them. Feel free to offer suggestions, I have a million questions and will ask them as I go. My first question is: What can I use to protect the chrome coat without dulling the finish? On to the build notes! Helmet cast by Shawn Thorsson: I sanded this thing to 400 grit and put down a black gloss coat. I sanded it again, and put down a 2nd black gloss coat. I thought it looked good enough to chrome, and well, I thought I'd give it a go. The chrome is so pretty. Under closer inspection, however, I noticed pitting and speckles in the finish that I hadn't noticed previously. It felt so smooth! But nope. Chrome will show you how bad the surface really looks. I stopped spraying after about 20 seconds and in that time, I learned a lot... From 5 feet away, it looks fine, even in this unfinished state. The subtle weathering would also help with the finish, but I just wasn't happy with it. Part of the problem was my dusty balcony and debris got into the finish. So that's something: Cleaner work environment. The pitting of the resin, despite the sanding, was still evident. I even filled some of the more obvious pits, but still not good enough. So I sanded off the chrome to start over. Sanding off the chrome created an inverse color effect and the pitting revealed itself. I've 3D printed a bunch of helmets and I dump cans of filler primer into the projects to fill in the print lines to compliment the surface sanding, then sand the filler primer, coat again, sand, and repeat until I'm satisfied with the finish, then top coat the colored primer. So... that's where I'm at. I hit the helmet with filler primer so I can skip to a finer grit sand and will decide if I want to put on a black top coat before I revisit the chrome. I feel this will do the trick to address the pitting issue. Speaking of 3D printing, I picked up a file for Phasma's F11-D blaster and whipped it together. This is listed as optional, but I'm looking to keep myself busy before I commit to the buy in, and the blaster and helmet will hold me off for a little while. In either case, the helmet and blaster would be a nice display piece. The blaster will likely get the same 3D printing treatment: sand, filler, sand, filler, top coat, chrome. And that's where I'm going to leave my progress for this initial post! Making a WIP helps me get through the build and hopefully the feedback, encouragement, and comments will tide me over while I move forward. I'm confident I'll pick up the rest of the kit, it's just a question of "when?" I imagine the whole kit is the same process over and over. What kind of armor attachment methods are used for this costume? Does it use the TK strapping method? Is it the same as FOTKs? I've only assisted one FOTK with a series of snaps and velcro, and despite that, really have no idea. I imagine the kit will need all the attachments laid out before paint goes down. Since I don't have the armor in hand and prep will take some time, I suppose I'll cross that bridge when I get there! Thanks for following along.
-
https://www.501st.com/members/displaymemberdetails.php?userID=28514 TKID 32117 requesting access please. Thanks!
