Zel
-
Posts
22 -
Joined
-
Last visited
Content Type
Profiles
Forums
Gallery
Articles
Everything posted by Zel
-

Zel's Anovos Stunt Build for the Mini and Vertically Challenged
Zel replied to Zel's topic in ANH Build Threads
yes, ever so slight so I dont wobble too much, I adjusted the angle of the sides to maintain the straight closure lines on the clam shell. -
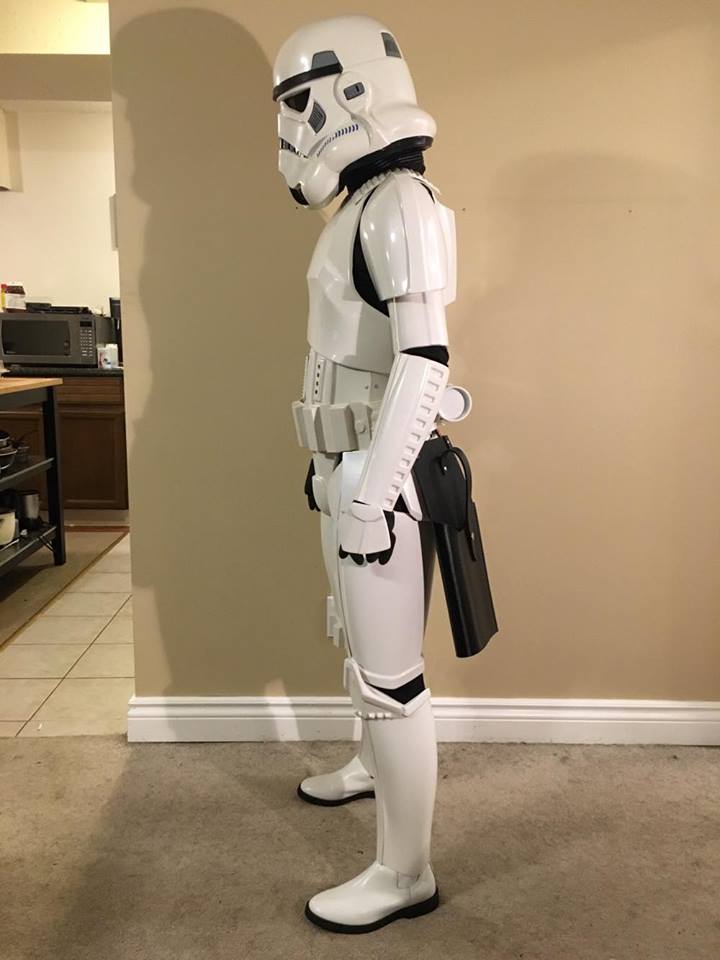
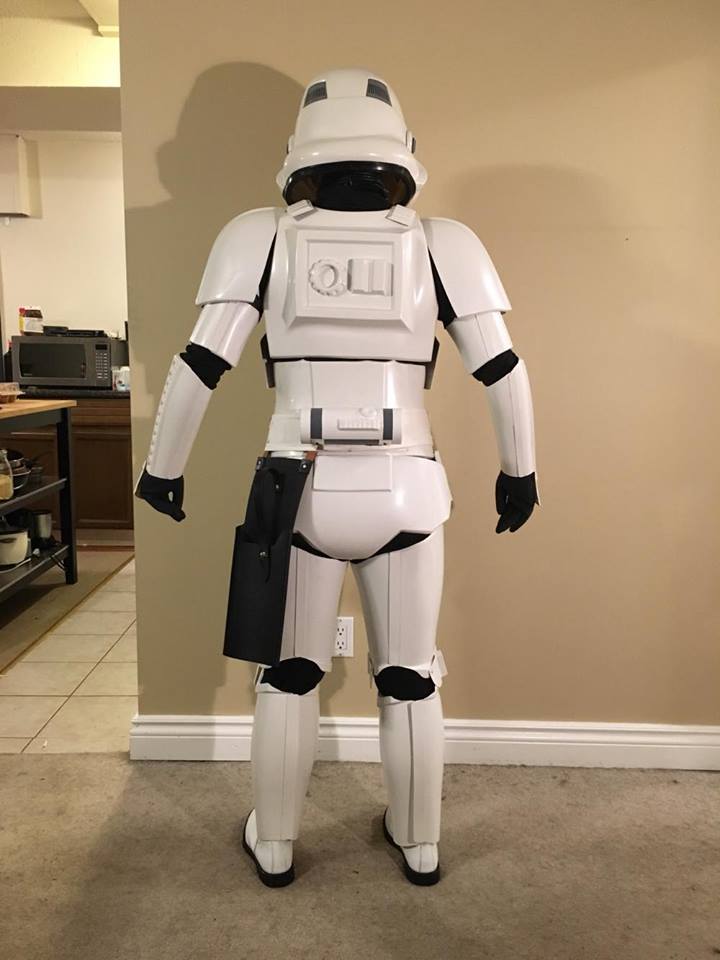
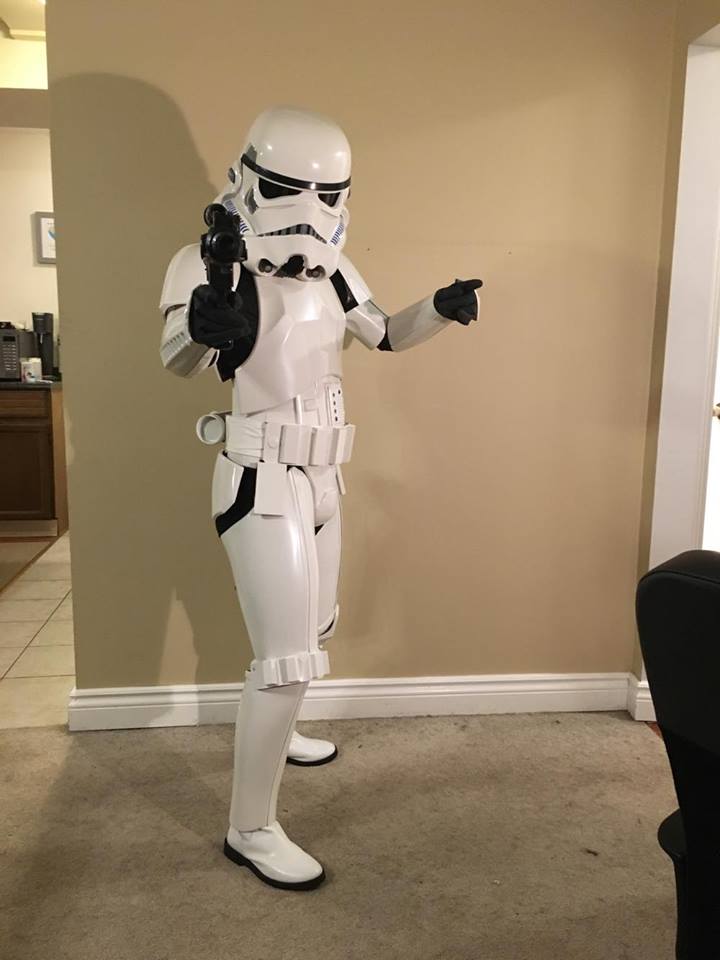
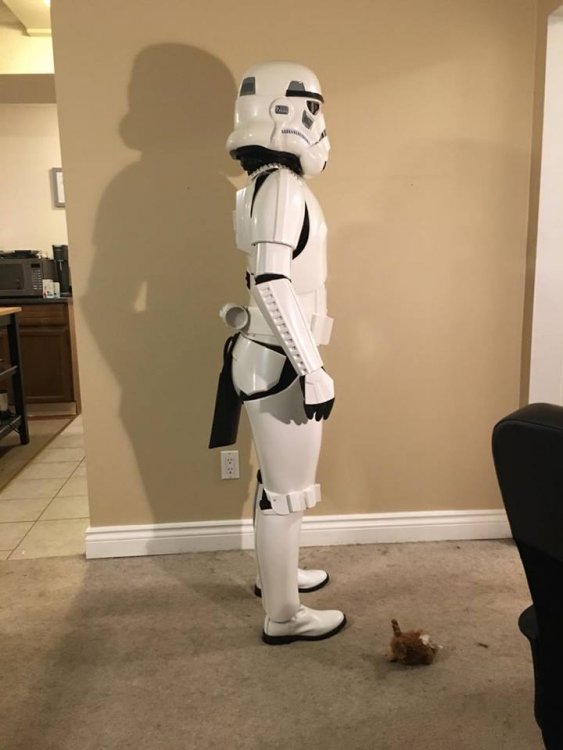
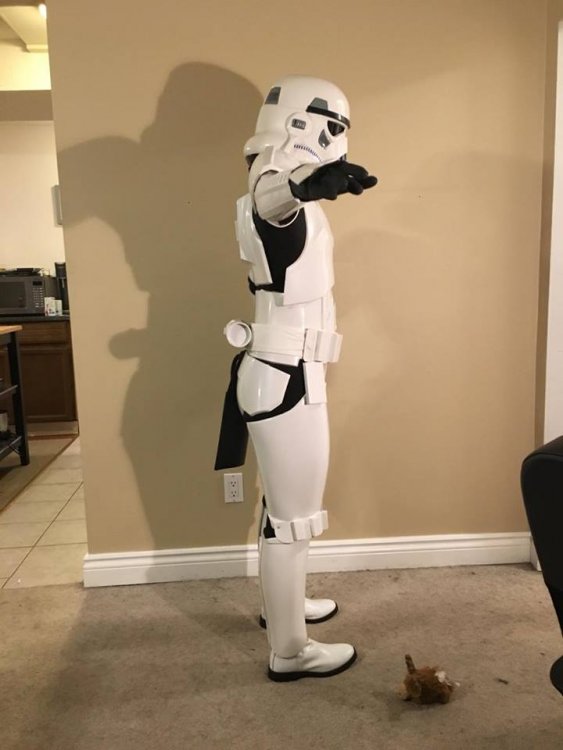
TK- 62639 (TK-Mandy) reporting for service!! Even though I'm little, I still can't aim! but at least I'm a smaller target!

-
Jeff's ANH Stunt Armor Build Thread (High Anxiety Edition)
Zel replied to Wozza's topic in ANH Build Threads
Welcome to the FISD forums! Hope you enjoy your build! Don't stress too much about it, building is suuper fun and something to look forward to! As far as snuggness is concerned.. I have 0,5 inch of room around all my limbs, and very much varying in my torso, up to 2+ inches in my abs. Most of this is due to my being a curvy girl though. Good luck! Zel -
Zel's Anovos Stunt Build for the Mini and Vertically Challenged
Zel replied to Zel's topic in ANH Build Threads
9. Strapping Part 2: Ab Width Sizing for Curvy People, Split rivets, Han Snap and Other Particularities. While I hover around 125lbs and 130lbs, I have a relatively wide frame for my height. I have fairly wide shoulders and hips, and a relatively narrow waist. TKs however, have a torso that is almost perfectly tube shaped. This means that I have a LOT of room width wise between my abs piece and by kidney piece; and much more on the top part of the armour compared to the bottom. I want to accommodate for this and have a set of armour that moves with me, while still keeping the TK look and not look too curvy. I first taped all by torso armour together, and then fitted my abs and kidney armour to where it fits me more comfortably, while not looking too "curvy" for the TK look. I overlapped the kidney over the extra material that I need to remove from my abs. I quickly realized that the joint of the overlap is a diagonal line as I am wider on the bottom than top, and not a straight one. uh-oh, that is no good. To correct this, I first measured the angle of the diagonal line, then replicated that angle into a line on my kidney, and then drawing a line from the top to bottom. I then trimmed off this "triangle" piece of armour. Then, overapping my abs armour with my kidney again, I doubled checked to make sure that the seam line is now straight, which it is. I then marked the line of the overlap and trimmed by abs piece to it. All in all, I removed almost 4 inches of width from my abs. I still have room where I will be securing my AKER and phone for TrooperTalk as I do not have enough room in my chest piece to do so there. Then, on the left hand side of my ab armour, I measured 10mm from the edge, and 20 mm from the top and bottom of my abs to mark the place for my top and bottom rivets. I then took the middle between those two rivets and then marked my middle rivet. I lined up my abs and kidney and did the same marking on my kidney, 10mm from the edge. Then, after double checking my marks, using a small drill bit (I eye-balled the size, I'm not very familiar with power tools in general ) and drilled holes. I then used 3 1/2 inch black nylon webbing, cut it to 40 mm long and sealed the edges. I marked two spots ( 10mm from the edge, 20mm apart in the middle) and poked holes with the same method described in Part 1 of strapping. I connected my ab and kidney on the left size using these webbing and the split rivets. I threaded the rivets through the armour, then the webbing on the inside and hammered flat. TA-DAH! ^Inside ^Outside Then, I measured around 10mm from the edge of the bottom of the cod, and eyeballed the center. I then drilled a hole there and put in a split rivet there. I put in a small piece of black webbing in the back to add some thickness and protect the armour from the rivet. For my Han Snap, I measured the marked the spot on the top right hand side of my abs. I then drilled a hole and assembled the male snap facing the inside of the armour. I am actually using this snap functionally as well for closing the right side of my armour. (note how short and little my abs are after sizing ) Then, after looking at the reference imaged I placed two hole on the bottom of my posterior plate, then drilled holes and assembled two male snaps facing inwards. These two snaps will be functional as well for me, connecting to the snap plate in my cod. To be continued.. Sorry life has been really busy and will be even busier soon. So I will try to catch up this thread as fast as I can but it may take a while. In the meantime! I LOOOVED my first troop as TK-62639! here's a cheeky photo of me (shortie) with the ever so handsome TK-21887 at the Canada Day parade! Outer Rim Garrison ROCKS! -
Requesting access: TK 62639 (tk Mandy) https://www.501st.com/members/displaymember.php?userID=25304&costumeID=124
-
Zel's Anovos Stunt Build for the Mini and Vertically Challenged
Zel replied to Zel's topic in ANH Build Threads
8. Strapping.. Part one: Zel's tutorial on making snap plates! Woooow.. its been a while FISD, and I miss you! It's been three busy tk days here! I've actually "finished" my tk for basic approval last night so I can troop in the Canada Day parade this Sunday. Heres a sneak peek: (YAY for basic approval! and YAY for first 501st costume! here to many more!!) Alright where were we.... Lets talk about strapping today! I have decided to go with snaps as my strapping method, and this is for a few reasons: Easy to make and assemble, and does not take too much time a lot of adjustment potential, if a strap is too long/short, simply make a new one and snap it on! no gluing required! Comfortable and relatively tidy interior Reliable, out of the few local TKs around my area, non of us has had any snaps fail on us (knocks on wood) The first step to strapping is to make some snap plates! these are nylon webbing squares with a male snap in the middle, and these will permanently glued to the armour with e6000. These will be what the straps with female snaps attaches to. For my kit, as I have a few extra pieces of armour (cod and I decided to use snaps for all my arm attachments too); I went very generous with strapping, I used around 40 snap plates. Many tks get away with around 20-30, its all about how you want to personally strap your armour. *Note: All of the techniques and methods below belongs to CoasterTK (Jay) in the Outer Rim Garrison, I am just writing a tutorial and showing how I assembled my kit* Supplies: For Creating snap plates, you will need. 1.5" While Nylon Webbing cut into 1.5" x 1.5" squares. Some tks and Anovos mounted male snaps on small abs pieces,but nylon would attach so much nicer to your armour as it bends and molds to fit the shape of the armour. Personally I preferred white nylon as it blends in with the white armour and looks better with the straps removed, however, theres nothing to stop you from using whatever colour you want as no one sees the inside of your armour! Male snaps, both top and bottom Male snap assemble kit, usually comes with purchasing the snaps themselves, or can be bought seperately Torch! (the fun part) A fire proof clamp holding a nail... ^torch+clamped nail. IMPORTANT Safety Note: please do not do this in a non-ventilated environment, make sure there isn't any thing flammable in the proximity, wear PPE and common sense!! Please please please be careful <3 Step 1: Draw and X on the square nylon from corner to corner and mark the middle of the square Step 2: Fire up the torch, then carefully use the fire to seal the frying ends of the nylon squares. it only takes a split second n the fire to seal the edges! Step 3: Holding the Clamp, heat up the nail on the fire, then carefully poke the nail through the center of the white nylon. This will create the hole where the male snap fits through, and seal the hole from fraying in one step! Step 4: Turn off the torch, then insert the backing of the male snap through the hole made by the nail. Step 5: Put on the top of the male snap and hammer everything together on a concrete surface. Step 6: Voila! Now repeat 20-40x as you need! Making more than less at once is always better, plus I'm sure fellow tk builders if your area would love some too! I made around 80 snap plates in around an hour. After the snap plates are finished, I glued them on to my armour using e6000 and held in place with clamps and/or magnets. I left the snap plates to cure for 24 hours. Here's where I placed by snap plates: Here are also the promised photos which shows the torso armour post heat molding and sizing(trimming). 2x on shoulder bells to connect to shoulder bridge straps 2x on the middle of the shoulder bells to connect to bicep 2x on biceps to connect to shoulder bell 2x on forearms to connect to bicep. ^The snaps on the arms are all optional, as many troopers simply glue the strapping on to the armour, I did this so I can easier adjust and switch out pieces for future plans. (I plan on owning many shoulder bells in the future which I can swap in and out, each painted to represent a charity/ cause to support. Ex. rainbow shoulder bell for pride, puzzle shoulder bell for autism etc.) 2x on top of thighs to attach to garter belt. 4x on top of chest and back armour to attach to the shoulder bridge elastic strapping 4x on top of abs and bottom of chest to attach to them to each other (2 straps) 8x on the abs and top of cod to attach them to each other (4 straps) 1x on the bottom of the cod to attach to the butt. 5x on the right side of abs and kidney to make them join together (3 straps) (I used the han snap as a pair for the top snap plate on the kidney) 8x on the kidney and butt to attach them together (4 straps) 6x on the kidney to attach to the back plate (3 straps) I then named the pairs of snap plates. this will come in really really useful later on. I don't know why but I lost the images took at this stage of my kidney and back plate, but the images of everything strapped together makes it quite obvious (see strapping part 3) To be continued.. -
Cricket's WTF Hero Build (even more TK for the Vertically Challenged)
Zel replied to Cricket's topic in ANH Build Threads
HAPPY BBB!!!! I'm sooooo happy for you!!! Can't wait!!! (short trooper to short trooper FTW) -
Hey Roy! I had the exact same problems with the forearms!! hahaha. the local TKs were joking that I accidentally sat on my forearms and squashed them . Are you using inside coversstrips? they are very important for strength at the butt joints, especially if there is a little pressure on the armour. What I did was to first make sure the seams on both sides of the forearms lined up perfectly, trimming with scissors as neccessary. My v1 Anovos kit had some problems with the butt seams lining up as perfectly as I would like. Then, one side at a time I put on my inside coverstrips first and made sure everything is totally in line. I sanded the coverstrip as well as the armour where the coverstrip goes on with a criss cross pattern to make sure they attach well. Then I attached the coverstrip centering the butt joint seam with e6000 and lined as many clamps and magnets as I can fit across. I then left it to cure for at least 24 hours. I did that for both sides and then did the same thing for the outside coverstrips. So with the "brute" force of gluing, the coverstrips forced the armour to become round (as the seams are flat with each other). I don't know if this is the best idea however, as gluing was a bit of a pain. In the future, I was thinking of shaping the armour itself with a heatgun before gluing. using the heatgun is easy, but requires a lot of patience and practice so you don't warp the armour. I have a tutorial on heat guns and shaping in my thread. Make sure to practice on spare abs first and think twice, heat once. Best of luck! Zel
-
Hey Roy! Love your progress! you are building at lightning speed!! For shortening your ab/cod armour, I would definitely recommend trimming off the cod and then either reattaching the cod or "floating" it with strapping. If you trim the top of the abs, the chest piece would ride too low on your ab piece, and it may even cover your "buttons". it's little hard to tell from your photos, I think moving your cod up 1/2-1 inch would do it wonders. -Zel
-
Zel's Anovos Stunt Build for the Mini and Vertically Challenged
Zel replied to Zel's topic in ANH Build Threads
7. Cutting off the cod This is the part of the build that scared me the most from the second I owned my big brown box... are we ready? The ab and cod “complex” was too long for my torso. Out of the box, when the bottom is “where it’s supposed to be” the top of the piece fits above my chest… while this may be the right size for a Rouge One tk, it is much much too tall for me. Therefore, I will need to take the plunge and cut my codpiece off my abs. *deep breath* I took some scissors to cut along the return edge between the cod itself and the abs. (note: I have not yet shaped my armour with heat gun in this picture.) After the cod separated, I used the scissors again to clean up the cut edges themselves and then used some sandpaper to make everything nice and smooth. Then I fitted the armour where it is supposed to be on my body.... wow.... big difference but much much better! (hi Bith! ) Originally, I was planning to re-glue cod back on to the ab piece on the inside. However, once I cut off my cod, I realized that the pieces would look good strapped; especially as the joint between the ab and cod piece will be covered by my belt. No one will know! Strapping will also give me a lot more movement, and make my kit a lot more comfortable. Overall, while cutting off the cod felt scary, it wasn't difficult to do. Wow, what it different it did to the fit! So, my recommendation is to just do it if your ab piece is too long! Remember to measure twice cut once!! To be continued! -
Zel's Anovos Stunt Build for the Mini and Vertically Challenged
Zel replied to Zel's topic in ANH Build Threads
Agreed! love Cricket's build! its of great help! -
Zel's Anovos Stunt Build for the Mini and Vertically Challenged
Zel replied to Zel's topic in ANH Build Threads
Thank you! I will take pictures and make that post as soon as I get home! Unfortunately, I totally forgot to take any before pictures, but the shaping and changes are pretty obvious -Zel Sent from my iPhone using Tapatalk -
Zel's Anovos Stunt Build for the Mini and Vertically Challenged
Zel replied to Zel's topic in ANH Build Threads
Wow!! Thank you so much for pinning this post! I'm currently bouncing in excitement! I am so honoured!!! I will try to make this build as informative as possible!! -Zel Sent from my iPhone using Tapatalk -
Zel's Anovos Stunt Build for the Mini and Vertically Challenged
Zel replied to Zel's topic in ANH Build Threads
6. Torso shaping (using a heat gun) The Torso really is the scariest part of the build for me, as I know I need to make quite a bit of size and shape adjustments to the torso. I taped together the torso as it came out of the box on me… well nothing fits. Everything was too wide. After reading on this forum as well as asking around, generally people shaped their armour using either a hot water bath or using a heatgun. The idea of a heat gun scared me as I have seen horror stories of warped armour and the anovos it is already quite a bit thinner than many other kits. So I’ve decided to start by try using the hot water technique first on some spare abs from the trimming process. Personally, I found the hot water method only works when it is right after boiling, any cooler and the abs wouldn’t budge. While it worked with smaller pieces, I realized that I couldn’t boil enough water to get it hot enough to us on large pieces such as the chest and abs… so on to heat gun I go. Heat gunning my armour: The best method I’ve found with using the heat gun without warping armour can be summed in two words…GO SLOW! I would put the heat gun on low, and move it in sweeping motions around the area that I want shape with one hand, while bending the armour to the desired shape with my other hand, usually with the help of my legs holding the armour in place. As soon as I felt the armour that I am bending is loosing a little bit of “spring” I immediately remove the heat. Then I use both hands on the heated area to keep the plastic at the desired shape as it cools. The plastic should never be too hot to touch, as that I find is too hot. The plastic may not bend enough the first time, but go slow and repeat. The key I find is to never hold to heat gun in one place, as well as to remove the heat as soon as the plastic starts to give. According to abs expert Pandatrooper, abs only have a few second in the workable range, between not bending to being too hot and warping. Think twice heat once! After practicing on the few spare abs pieces, I found the technique quite easy, as was able to get all my torso shaping done in around a hour. Here’s what I did. Chest: -Slightly bring down the shoulder tabs to shorten top of the chest piece. -bring in the “wing” on the side to reduce width Back: -Slightly straighten the shoulder tabs. ^I found that the back armour is the only piece that I had to LENGTHEN. For whatever reason, the Anovos kit comes with the back shoulder tabs pretty much at a 90 degree angle. This would leave around a half of inch of gap between my back and kidney armour. I slightly straightened my shoulder tabs to around 60 degree angle. Kidney: -bring in the sides Ab+cod: -bring in the sides Posterior (butt J): -bring in the sides -bring up the bottom ^brining up the bottom helped me to shorten the length of the butt armour, as well as to help shape it to my more “rounded” shaped butt. To be continued. -
Zel's Anovos Stunt Build for the Mini and Vertically Challenged
Zel replied to Zel's topic in ANH Build Threads
5. Sizing and gluing the front of my Thighs and Shins First, I would like to apologize for my lack of post in the last two weeks. I have been busy! I have been working on my tk too, as it needs to be done in 5 days before the July 2nd Canada Day parade! My local garrison (Outer Rim Garrison) have been amazing at providing me with help, support and supplies with my tk build. Thank you to CoasterTK (TK-73427) for lending me your time, expertise and tools, you have been amazing and the reason why I have been able to build at such a speedy pace. Thank you to Pandatrooper (TK-2886) for giving me amazing tips and some spare abs and Stvd201 (TK-42200) for your tips as well as magnets. Last but not the last thank you to CaliMatt (TK-21887) for everything When CoasterTK and I sized and glued my forearms and biceps, some of the seams were quite tricky to get perfect as the armour was reduced a lot in width (around 3 inches per piece!). So for the legs, we’ve decided to glued the front my thigh and shin armour before sizing. For any length adjustment, we would remove material from the top of the thighs and bottom of the shins. For that too we’ve decided to do after gluing together the front seam. For my leg armours, like my arm armours, I am using both inside and outside coverstrips. I highly recommend this method as it really helps to strengthen the armour, especially important if you are as accident prone as I am. For my inside coverstrips, I made them mostly identical to my outside covers, mostly for a cleaner look inside of the armour. Here we go with some pictures. Right Thigh Left Thigh Mistake!!! It was only after the e6000 cured that I noticed that the outside coverstrips on the thighs are only supposed to reach the ridge, but not anymore. As my coverstrips are too long, the ammo pack would not attach well on my right thigh and I would need to shorten my left as well for higher certifications. CoasterTK said that this is also one of the adjustments he had to make on his centurion app, and that he knows of an easy fix… He will come over and help me build tomorrow, so hopefully we can resolve that then. Also, I’m not sure if this is specific to the Anovos kit, but at the bottom of the inner left thigh piece, the ridge goes all the way to the trimline, requiring me to use a smaller inside coverstrip to achieve better strength. The Shins are easy to glue together and problem free after I read ukwrath’s guide on his anovos kit. Anovos mislabeled the shin pieces, so please refer to his tutorial as to which piece goes with which. As there is debate over which anovos shin is which leg, I’ve decided to use the shin that fits the sniper plate the best as my left and the other shin as my right J Inside and outside of my left Shin, forgot to get pics of the right, but the look is similar. To be Continued. -
Zel's Anovos Stunt Build for the Mini and Vertically Challenged
Zel replied to Zel's topic in ANH Build Threads
Hello Sha Sha! I saw your BBB post on the A little short for a storm trooper fb group!, I'm very excited for your build! Zel -
Zel's Anovos Stunt Build for the Mini and Vertically Challenged
Zel replied to Zel's topic in ANH Build Threads
4. Finishing Arms and Ready for Strapping! After finishing with gluing my forearms and biceps, I took a pair of abs scissors and did some trimming on the return edges. I removed all return edges on the wrist portions of the forearms and took off most of the return edge on the "U" portion of the forearms facing my elbow to allow for better movement. I then evened out all other return edges on my forearms and biceps to a little under half of a centimeter. Then I took some 120 grit sandpaper to all the edges to smooth everything out then finishing with 320 grit then 400 grit. Nice and smooth edges! YAY! I then took off the protected plastic covers that came with the Anovos armour on the forearms and biceps, and cleaned up some of the excess e6000 around the glued cover strips. I'm pretty happy with how the forearm and bicep pieces turned out. ^left forearm ^right forearm. You can see the much less pronounced top "edge" on the top of thee right forearm as compared to the left. Overall, I'm pretty happy about how the forarms turned out, considering the 3+ in Iches I have had to reduce on the width and the gap that I had to overcome. (See post 1) I did not end up needing to heatgun/ hot water bath my forearms, as careful lining up and gluing was sufficient and made the forearms round. Here's a picture of my finished forearms and biceps together. Then, I decided to try on the arms pre strapping along with the should bell. held together with some blue tape. I put on the anovos undershirt, it is the smallest size they come in, but still a bit too bit for my liking. I think I will just be wearing my black underarmour base layer instead. ^Please do not show this to Lord Vader, I heard he doesn't approve of happy tks. To be continued.... -
Zel's Anovos Stunt Build for the Mini and Vertically Challenged
Zel replied to Zel's topic in ANH Build Threads
3. Finishing Sizing Biceps and Forearms. After gluing the inner cover strips on the biceps and forearms, I glued on the outer cover strips. The outer covers are provided by anovos and roughly pretrimmed for size so it was really easy to tell where each strip would go. I trimmed my outer cover strips to the exact lengths that I needed and rounded the edges with some sandpaper. I then gentle sanded the armour, taking care not to have any scratch any areas that would not be covered by the outer strips. I also criss-cross sanded the back on the cover strips. it was easy to tell which side is the front and back of the anovos cover strips as the fronts have a protective flim on it. 3-a Right Forearm This is what my right forearm looked like after the gluing. the strips have a bit over overflow e6000 that I will need to clean up. The armour may look dirty, mostly from the lighting of the protective cover. ^bottom ^Top ^The forearm passes the standing test! I have also removed all the return edges on the edge facing my wrist. This forearm (right) is the "problem" forearm, I had to do a bit of trimming on the wrist section to make it stand up. 3-b. Left Forearm My left forearm is the more symmetrical forearm and caused me much less issues with gluing. The left forearms is also a bit shorter than the right forearm. The right forearm have a more defined ridge on the top butt joint. The anovos forearms are quite different and asymmetrical. ^bottom, I've been able to get cleaner glue lines on the left forearm. I forgot to get picture of the top butt joint. but the glue job is very similar. Also passes the stand up test! Very little trimming was required to achieve this. Inside view, not as perfect on the inside as I would like.... 3-c. Right bicep The bicep is much easier than the the forearms in the trimming and gluing. My left bicep is still gluing so these are pictures of the right bicep. ^and...inside To be continued..... -
Zel's Anovos Stunt Build for the Mini and Vertically Challenged
Zel replied to Zel's topic in ANH Build Threads
Thanks! I'm trying to be careful no cutting too much material! I am actually using inside coverstrips for all areas with an outside cover. Better be stronger bond than not, especially with me needing to bend the plastic to fit me! I have shins and thighs gluing inside strips on the front butt joint right now. Update soon! Sent from my iPhone using Tapatalk -
Zel's Anovos Stunt Build for the Mini and Vertically Challenged
Zel replied to Zel's topic in ANH Build Threads
2. Sizing Biceps After sizing the forearms, I started sizing the biceps to me. During this process I realized that biceps are totally easier to miniaturize than forearms. Darn it! Should've started there... Oh well. As with the forearms, I taped the butt joint on the outside of the biceps closed, and then fitted the armour to my arm, leaving 0.5 inch of room. I over lapped the excess and measured the amount of overlap. Due to the lack of climbing, my biceps are sadly tiny.. I have 3 whole inches of overlap on both of my biceps. (Taping together the butt joints for sizing on my arm) Unlike the forearms, for each of the biceps I evened the cut length to both sides of the butt joints, to 1.5 inch per side. I am cutting only the "square" back half of each bicep, in order to preserve the "U" shape of the plastic on the other half. I cut the bicep after measuring what seemed to be 10000000 times. Better be safe than sorry I guess. (don't stress about the crooked line, this photo was taken before I did my final measures. But you can see how much plastic I trimmed on each side xD) The bicep shapes after the cut was much, much better than the forearms, and the joints fit together nicely. Other than the fact that the top front "U" is higher than the "square" in the back. I easily trimmed them to be equal, I did loose the return edge on the "U" piece. But since this area of the armour is hidden by the shoulder bell anyway, I'm not going to stress about it. I cut out the inner cover strips from some spare abs that Pandatrooper gave to me (Thanks!!) to the same dimensions of the outer cover strips. Then I easily glued those on. Easy peasy! at least the biceps are going according to plan! Continued.....This will be -
Zel's Anovos Stunt Build for the Mini and Vertically Challenged
Zel replied to Zel's topic in ANH Build Threads
1. Sizing Forearms. Since the armour came pretrimmed (Thanks Patrick), I can start right away on sizing and building! Faced with a mountain of oversized white plastic, I wasn't very sure where to start. I have decided to start on the biceps and forearms as they are rumoured to be the easiest pieces to build. This also gave me an opportunity to practice sizing and gluing on relatively more simple pieces rather than starting with the daunting task that is miniaturizing the torso. Side Note: I got too excited during this process to take many pictures, sorrrry! I will work on this!! For the forearms, I started by attaching the "flat" butt joints of the forearms together with masking tape. As this joint would be facing up from my respective forearm, I'm not going to take any materials out here to accommodate for the width. This helps maintain the shape and look o the armour while effectively miniaturizing it. With one side of the forearms joint, I measured the forearm piece on my respective forearm (left and right) and left 0.5 inches (what I heard is a good space, according to Cricket's RS build thread) of space between me and the plastic armour, overlapping the excess plastic. I then measured the overlap on the top, middle and bottom of my forearm. Which is 3-2.5-2.5inches for my right forearm and 2.5-2-2 inches for my left. Holy moly thats a lot more than I expected..... Side note on anovos armour: The left forarm it together fairly well, with little issues. However, the right forearm halves are VERY different to each other, with the butt seams not matching well as well has having a different length. This drove me a bit crazy, but ukswarth guide on anovos is amazing and of great help. Religiously following the golden "Measure Twice, Cut Once" advice, I proceeded to cut the armour to my size. I first practiced by cutting spare abs with the score and snap method with a metal ruler as I'm not very good at using sharp objects (bit of a hazard, really, but I've gotta learn) During this process, I've been lucky to have Jay (Coastertrooper) of the Outer Rim Garrison helping me with his expert advice and expert cutting techniques. I decided to trim half of the amount I need to trim on each half of the armour, therefore still maintaining the shape and position of the notches while miniaturizing the armour. So.. here come problem #1 of my build, once I trimmed the amount of widths that I needed, I realized that my armour piece are really "flat". I would definitely need to do some shaping of the plastic in the future. I've then decided to first glue the inner cover strips on my forearms, then assessing how much shaping I would need to do. wow thats a big gap.... hopefully the gluing and shaping will hold it together..... ....to be continued. -
Helloo fellow amazing plastic space people, I will try to keep this thread up to date as I attempt to build an Anovos kits to fit my small and disproportionate (xD) 5'4" frame. I've been loving this forum and community and look forward to start this journey of building a new kit! My introduction to Star Wars costuming have been deciding build a "mandalorian" kit one week before the first convention I have ever attended (Fan Expo 2015). I honestly looked pretty rough, with foam "armour" cut from kid's playing mats and a paper mache helmet (I'm the one of the right). After a year of working on my mando kit, I was approved as an official merc! Since then, I have been trooping fairly frequently with the mercs as well as when I am invited by the local 501st garrison to their troops (Shoutout tp Outer Rim Garrison! you guys rock!) I absolutely love trooping, and the feeling of being in armour. I looooove the way kids' face light up when then see you and I can really let my inner cheeky self shine when I'm in armour! (At a recent 501st troop benefiting children with special needs) For our anniversary, my tk bf decided to put in on the list for a ATA kit (how sweet!) but the shipping time meant that I would have to wait until at least November before the kit would be ready. Being very impatient and excited, opportunity struck about a week ago, when a local garrison member expressed that he was trying to sell his un built anovos kit. This is my chance! I can start building now! being very excited, I decided to try on my bf's kit (tk-21887 also anovos, but he is 6'2" and definitely not mini sized.) My legs are tree trunks and everything is too loose, but it looks alright! I can make an anovos kit work! So I took the plunge and bought the kit! The box it came in is huge! I can actually fit inside the box with plenty on room! Soo I have tk boots in order, armour pieces all trimmed to the trim line when I bought it ( Thanks Patrick!) and ready to get this show started!!! Contents: 1. Sizing Forearms http://www.whitearmor.net/forum/topic/42043-zels-anovos-stunt-build-for-the-mini-and-vertically-challenged/?p=563394 2. Sizing Biceps http://www.whitearmor.net/forum/topic/42043-zels-anovos-stunt-build-for-the-mini-and-vertically-challenged/?p=563397 3. Finishing Sizing Forearms and Biceps http://www.whitearmor.net/forum/topic/42043-zels-anovos-stunt-build-for-the-mini-and-vertically-challenged/?p=563600 4. Finishing Arms and Ready for Strapping http://www.whitearmor.net/forum/topic/42043-zels-anovos-stunt-build-for-the-mini-and-vertically-challenged/?p=564182 5. Sizing and gluing the front of my Thighs and Shins http://www.whitearmor.net/forum/topic/42043-zels-anovos-stunt-build-for-the-mini-and-vertically-challenged/?p=565270 6. Torso shaping (using a heat gun) http://www.whitearmor.net/forum/topic/42043-zels-anovos-stunt-build-for-the-mini-and-vertically-challenged/?p=565282 7. Cutting off the cod http://www.whitearmor.net/forum/topic/42043-zels-anovos-stunt-build-for-the-mini-and-vertically-challenged/?p=565343 8. Strapping... Part one: Zel's guide to making snap plates http://www.whitearmor.net/forum/topic/42043-zels-anovos-stunt-build-for-the-mini-and-vertically-challenged/?do=findComment&comment=565661 9. Strapping Part 2: Ab Width Sizing for Curvy People, Split rivets, Han Snap and Other Particularities. https://www.whitearmor.net/forum/topic/42043-zels-anovos-stunt-build-for-the-mini-and-vertically-challenged/?do=findComment&comment=566134