Albaz
-
Posts
59 -
Joined
-
Last visited
Content Type
Profiles
Forums
Gallery
Articles
Everything posted by Albaz
-
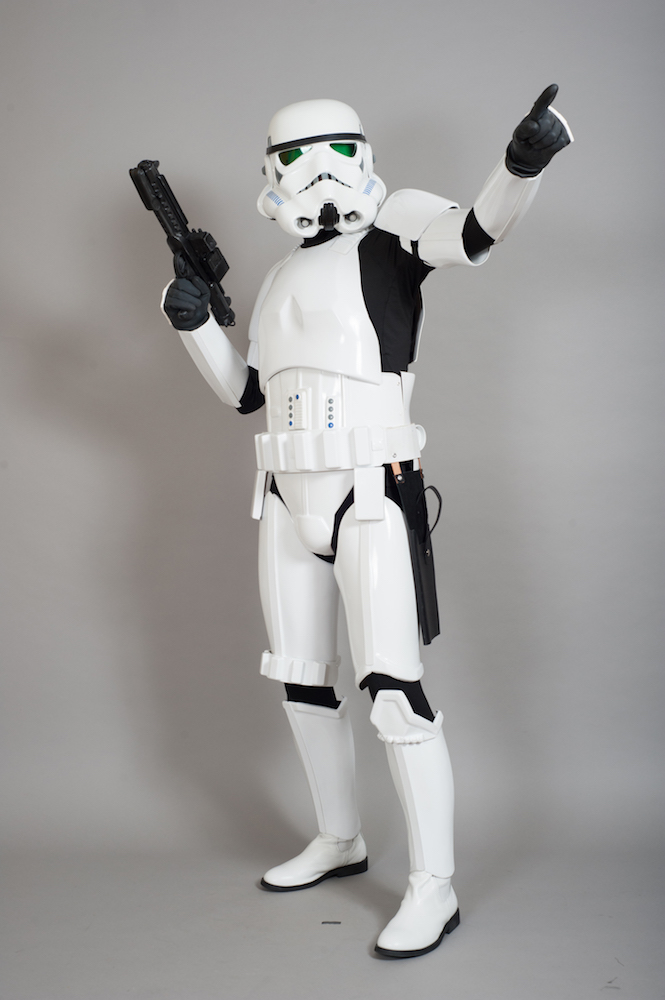
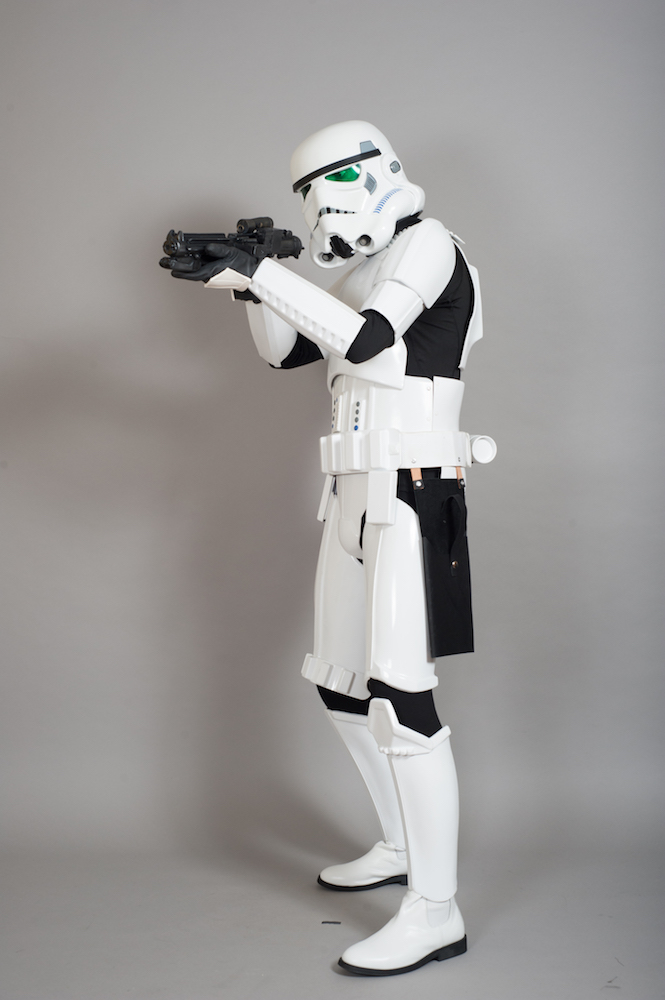
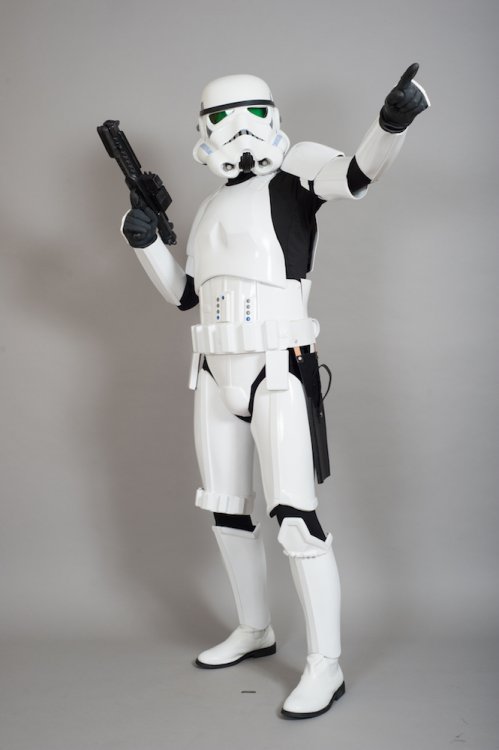
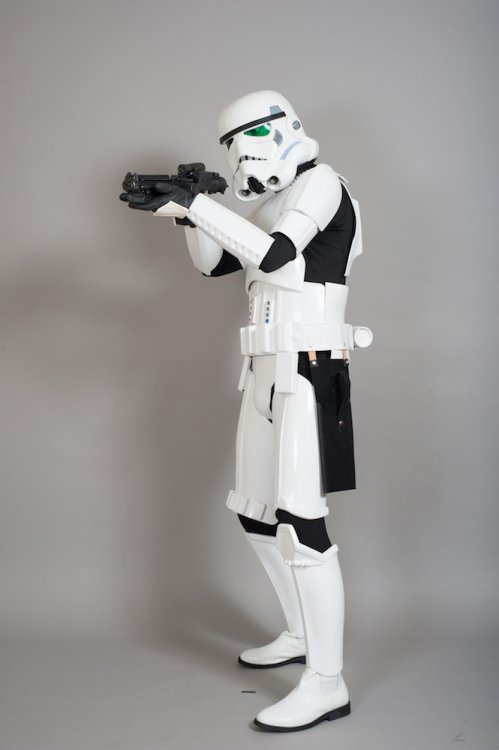
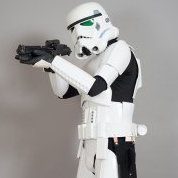 Basic Information Name: Alberto Oscarelli FISD forum name: Albaz 501st Member Page: http://www.501st.com/members/displaymemberdetails.php?userID=24123 501st ID: TK-20055 Garrison: Empire City Garrison (NYC-US) Mandatory Information Armor Maker = AP Helmet Maker = AP Blaster Type = Hyperfirm E-11 Optional Information Height = 6'1" Weight = 173 pounds Boots Maker = TK Boots Canvas belt = AP Hand Plates Type = TrooperBay Electronics = iComm + AKER Neck Seal Type = DarmanProps Holster Maker = TrooperBay Cod piece Butt plate Connections Thermal detonator Belt Ammo pack (knee) Sniper plate Rivets, side - detail Buttons Shoulders Helmet Paint Blaster Boots Gloves Action Shot
 -
Hello, I would like to get my status updated (and be granted Detachment access): https://www.501st.com/members/displaymemberdetails.php?userID=24123 Thanks!
-
It's official, my TK is now listed on my 501st profile! I can't wait to wear it next weekend!

-
I just finished building my AP and submitted pics on Sunday. Painting was the first thing I did, and you are right the CRL doesn't say what color you should use exactly. I tried to use the blue button decals but would not stick perfectly to the plate, so I bought the blue paint as well. The helmet decals stuck just fine by using the "soapy water" method. Have fun! Sent from my iPhone using Tapatalk
-
I might be wrong but I think you need the black "satin", not the gloss. Maybe someone else can't pitch in on this Sent from my iPhone using Tapatalk
-
So....not much of a build thread...I forgot about taking pictures and updating this completely. I finished my armor yesterday and sent images to the GMLs. Hopefully I'll be approved soon. I want to thank @starsaber25 and @Redforce for the help, support, and patience!
-
Authentic Props Stormtrooper Armour
Albaz replied to gibbygilbert11's topic in Getting Started - Read this First!
I have an AP, and it's fairly easy to build. One of the issues I had was how the left shin is slightly misaligned, so when you glue the sniper plate, it'll be crooked. There is a workaround for this. No other issues. If you are skinny like I am, you are gonna have a lot of trimming to do (I am 180lbs), but it was the best armor I could get since I am 6'1" Good luck! -
Requesting 501st access please DS-20055 http://501st.com/members/displaymemberdetails.php?userID=24123 Thanks,
-
I tried...it looks ok. I think I am gonna have to fill in the gaps with some ABS paste. If you do find a spare one, let me know
-
Trimmed it to much. Since I am going for centurion it might not be approved
-
Yep he doesn't think he has any spare ones
-
I know this is idiotic but I messed up the larger button plate. Does anyone here has an extra one...maybe someone who decided to put together a sandy? I have an AP armor...or any maker will do if it fist. Please help!
-
Which glue for the silicone shields on gloves
Albaz replied to Dauph197's topic in FISD Centurion Requirements
I recommend zap-a-gap -
Is it ok for centurion approval? Besides adding a D-ring, what else needs to be modified/added?
-
Built level: GOD This is insane!!!!
-
I actualy used zap-a-gap glue. I know, not the right thing to use for a complete novice. I started the wet sanding process and it's now gone. Now I am using the novus but the original shine is lost....I dont know. We have an armor party on 6/3, I am sure other people in ECG can help me figure it out once they see it person
-
I just bought an AP as well, I am going for Centurion. It's fairly straight forward and I feel like it's better to go for it right away...rather than making improvements later on. At least that is how I feel. I think it's the OCD speaking lol
-
So I have a few scratches on my armor that I am trying to get rid of, and a few tiny drops of glue here and there that I wet sanded (1500 sand paper). I am using the 3-2-1 novus and I cannot polish the ABS, no matter what I do. I tried several times but nothing happens. A lot of people told me it work wonders...so I must be doing something wrong...
-
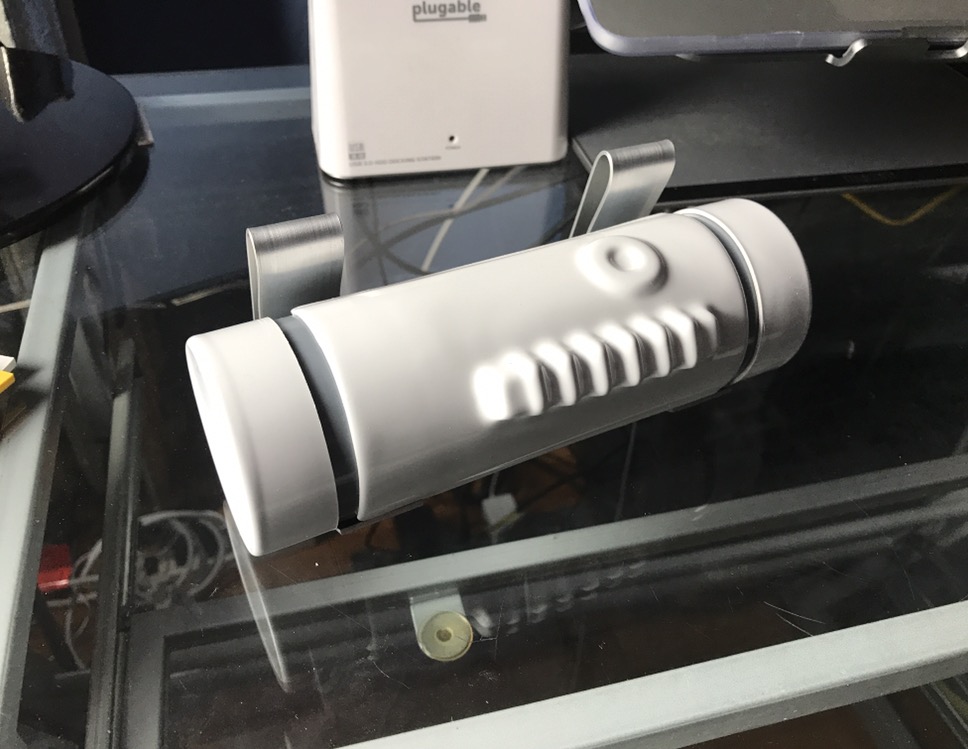
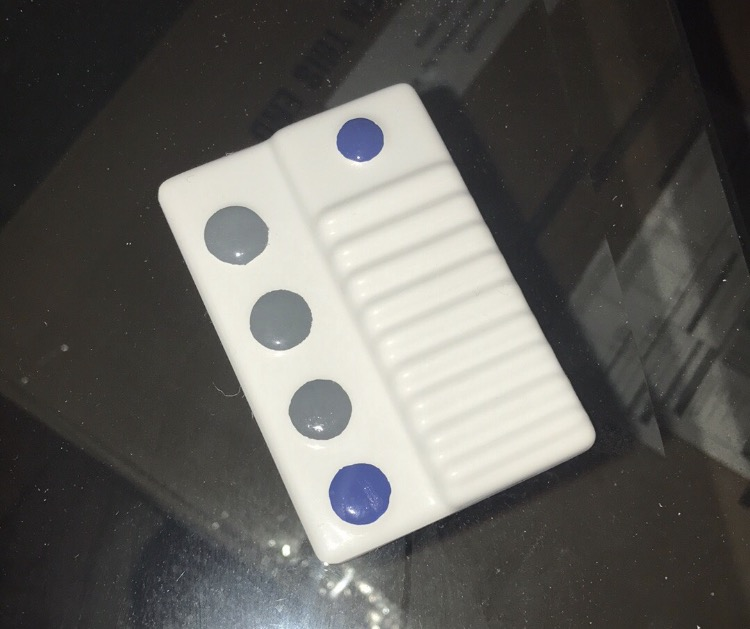
Today I decided to put together the thermal detonator. I first had to cut the pipe so it would be 7.5" long with caps installed. It was fairly easy, even thought I had to use a saw and made a mess. Edges weren't perfectly straight but I figured once I put the caps on, who cares lol. I glued the white plate on with some zap-a-gap and it was good to go in 20 seconds. What do you guys think? I wanna go for level3/centurion so I tried to stick to the guidelines as much as possible.

-
I also think I posted this in the wrong section. What a Noob! Lol
-
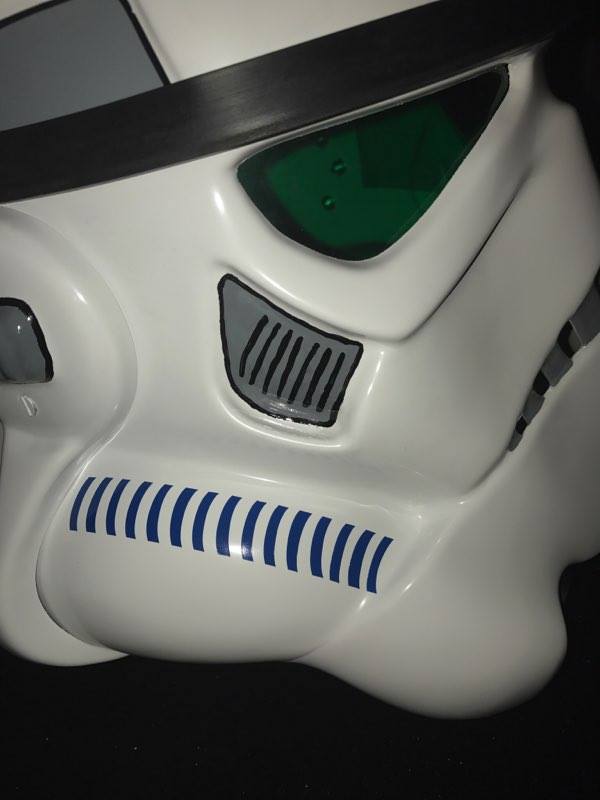
So here I am, starting my thread. I've actually completed my helmet already, and it was pre-trimmed so there wasn't much to discuss. Also, I felt like posting my thread was going to be redundant, seeing how many people have similar threads. Anyhow, here's my helmet: I started with paint (I actually thought I did good with my teeth, and I used no masking!), but I soon realized how difficult it was to paint nice tears, etc....so I went with painted looking decals (the ears are painted though). I started trimming the rest of the armor for now since I bought an untrimmed kit
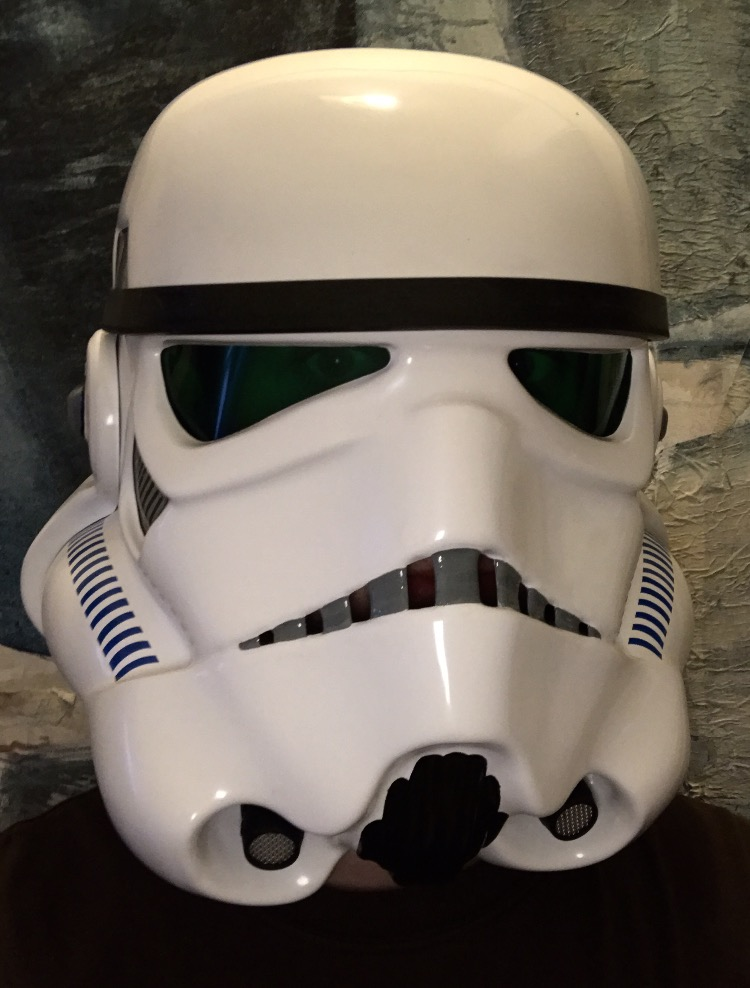
-
I suck at masking. I tried and my paint bleeds under it. I did a fairly decent job around the ears...maybe I should stick to "painted looking" decals. They are ok for centurion right?
-
this looks amazing. even the outline....damn! Nice job!
-
Thanks! Yeah, I used a short brush, that is my first issue. So I'll go for a longer one. The marker is a great idea too!
-
Hello, I started building my AP kit and painting my helmet. I started with the tears but every time I look at them I feel like I should just buy the "painted looking" decals. Besides using stencils (I tried and the paint bleeds) are there any specific techniques for painting a decent straight line? :-/