Lucy
-
Posts
79 -
Joined
-
Last visited
Content Type
Profiles
Forums
Gallery
Articles
Everything posted by Lucy
-
We want your Troop photos for our 15th anniversary project
Lucy replied to Sly11's topic in Announcements
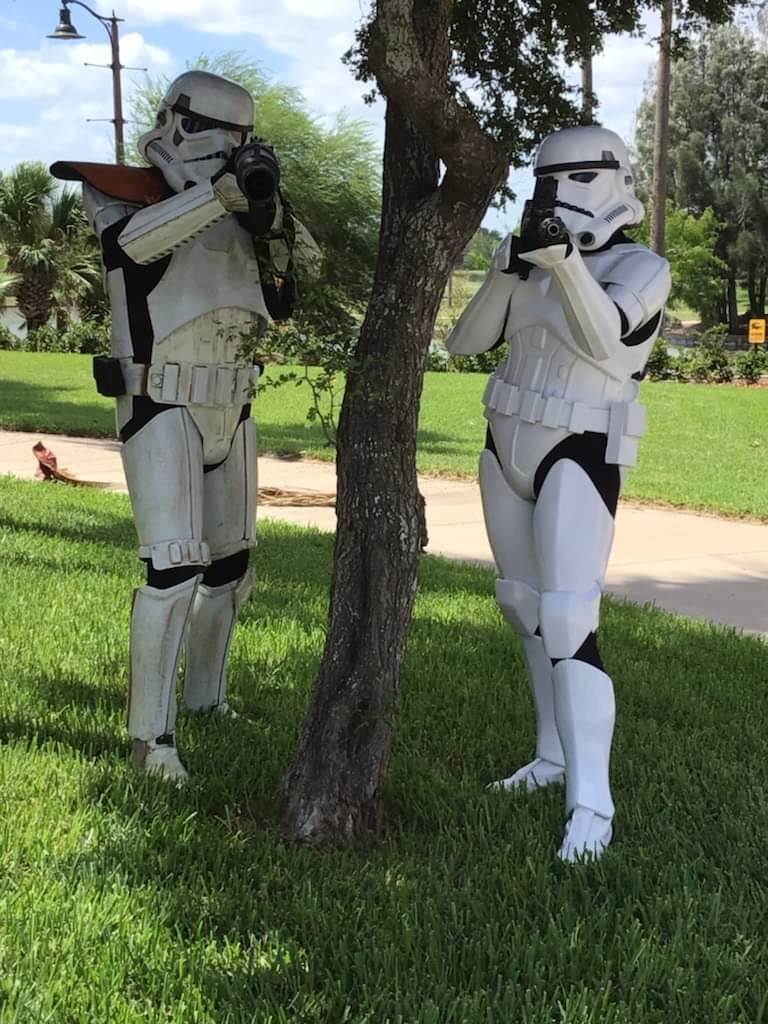
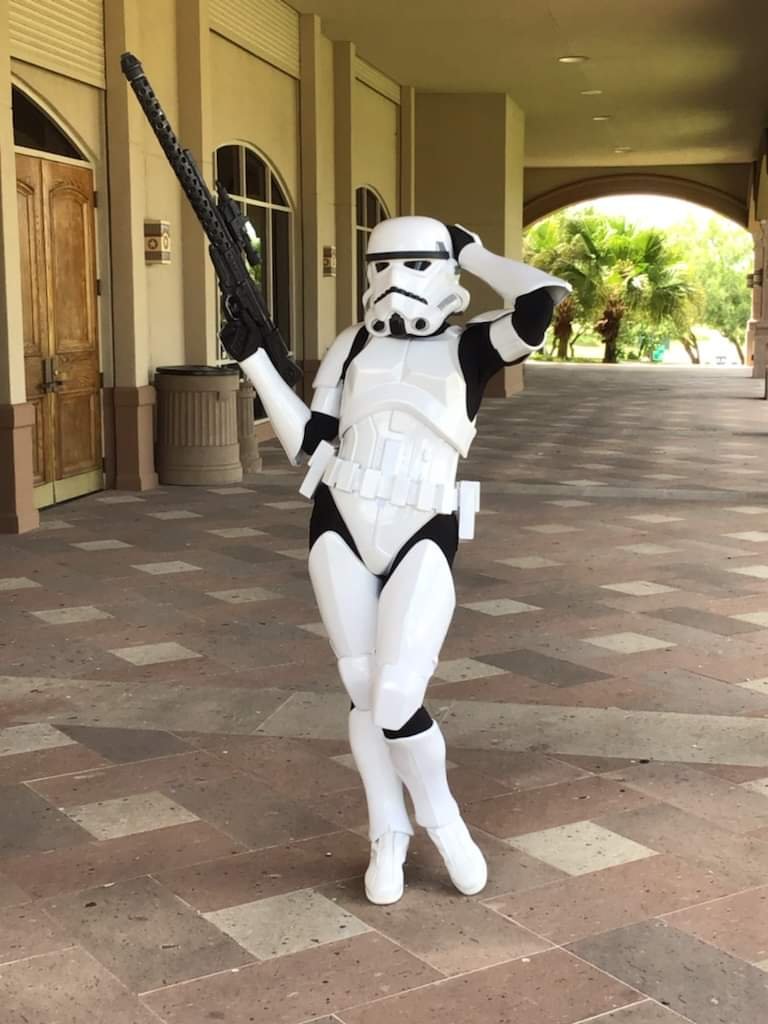
POST 62 TK68272 Star Garrison Texas Gulf Coast Squad July 2018 Pic taken at South Padre Island, TX 1.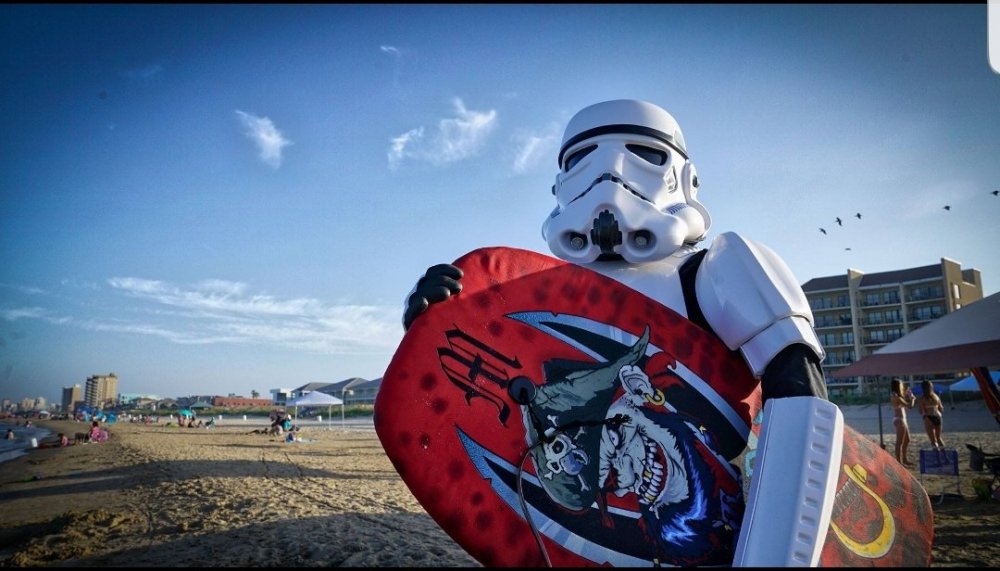
-
We want your Troop photos for our 15th anniversary project
Lucy replied to Sly11's topic in Announcements
POST 5 TD78596 and TK68272 Star Garrison Texas Gulf Coast Squad Pic taken 8-8-21, by Secylia Garcia 1.
-
We want your Troop photos for our 15th anniversary project
Lucy replied to Sly11's topic in Announcements
POST 4 TK68272 Star Garrison Texas Gulf Coast Squad Pic taken 8-8-21, by Secylia Garcia 1.
-
Made my boxes. The lid didn't want to fit over the box, so I had to dip the whole top half in boiling water for about 20-30 seconds. I did the hot water bath after I screwed the lid on so that I could immediately force the lid on before it cooled. Worked well. I then painted the gold screws white to match the box. Sent from my SM-G950U using Tapatalk
-
Used a tape measure to space the small boxes out as evenly as I could. Bolted them on from the inside. Also used velcro to attach front and back belt pieces. Sent from my SM-G950U using Tapatalk
-
Thank you so much! Sent from my SM-G950U using Tapatalk
-
Continued with the strapping this evening. Went with black, wide elastic to attach kidney to butt plate, and used snaps for chest/abdomen plates. Also attached soft velcro to chest plate. Once straps on back plate are permanently glued, I will measure and adjust accordingly. Sent from my SM-G950U using Tapatalk
-
Thank you so much! Sent from my SM-G950U using Tapatalk
-
I appreciate that! Thank you. Sent from my SM-G950U using Tapatalk
-
Gonna attempt the strapping. Also added a bit more plastic to the shoulder bridges so that they really catch the chest plate. Otherwise there will be a huge gap between the two, requiring a YUUUGE glob of glue. Sent from my SM-G950U using Tapatalk
-
Ok, most of it is trimmed and sanded and put together, except for the belt. Tried it on. Looks ok, I guess! Sent from my SM-G950U using Tapatalk
-
Forgot to take progress pics, except for these here. Sent from my SM-G950U using Tapatalk
-
Had help with the sizing of my calves. Was advised to make wider finishing strips, so we measured and I cut 2 strips, 1 3/4 inches wide. Because the calf is so curvy on this kit, I dipped the finishing strips in boiling water and shaped them into a loose "S" shape. That worked beautifully. Was able to glue them on with little effort. Oh, and I got to meet this cute pup named Winnie. She didn't like me at first, but she accepted me eventually.
-
Problem!!!!! The lower leg pieces are too slim for my big legs. Crikey!!!!! Sent from my SM-G950U using Tapatalk
-
I scored and snapped the edges of the front part of the thigh. I removed only the curved edge on the back part of the thigh and left the extra ABS and used it as a finishing strip. My mind went blank for a moment and I accidentally removed the extra part on one side. So, I used the extra lip on the back thigh piece as a finishing strip, and used an actual strip on the part I accidentally cut off. Glued, and set for 24 hrs. Sent from my SM-G950U using Tapatalk
-
So I did the score & snap thing on the calves and shins. They came out very straight, but in hindsight, I shouldn't have dremeled them smooth. I should've just used plain sandpaper, as I think I dremeled too hard in some areas and made the smooth edges wavy. I glued them to the special curved strip and used clamps and magnets tk to hold them for 24 hours. Sent from my SM-G950U using Tapatalk
-
I used tin snips to carefully cut out the lenses. Attached them with hot glue. In hindsight, I should have used e6000 because I think the heat caused the edge of one of the eye sockets to warp a little. Hardly noticeable, but still there if you really stare. Sent from my SM-G950U using Tapatalk
-
Bought a screen repair kit because I didn't want to buy a whole roll of screen. It came with a tacky adhesive backing which I just rolled off. I then placed it over the frown and used a silver sharpie to mark the corners. I pretty much eyeballed it, trimmed it, and smeared e6000 on the edges. Sent from my SM-G950U using Tapatalk
-
Teeth and vocoder are not as good as I'd like. But I will keep adjusting and repainting as I have the time. Sent from my SM-G950U using Tapatalk
-
Did a little more work on my bucket today. Attempted to fix the teeth paint, vocoder paint, and also taped up the ears and painted those. Oh, I also respaced the stripes.
-
Hovi tips were a lot easier to make than I imagined. I found that the butt end of my mini screwdriver fit perfectly into the hovi tip hole. So I cut the mesh in half and made two little "cups" using the screwdriver handle. I trimmed off excess mesh and it fit perfectly. Before I glued them in, though, I drilled a hole into the black tip, right in the center. I also drilled a hole into the mask where tips attach. I screwed them in and painted the screws black. Then I smeared a bit of e6000 on the inside of the tip and applied the mesh. Sent from my SM-G950U using Tapatalk
-
Awww snap. Ok, i'll try that. Thanks!!! Sent from my SM-G950U using Tapatalk
-
Didn't have the confidence to paint the tube stripes, so I ordered them from Trooperbay. Pretty easy to affix. Went with the edge of the cheek and went straight back to the ear from there. Went with 11 stripes. CRL says between 9 & 16. 11 just felt right. Sent from my SM-G950U using Tapatalk
-
I appreciate that very much! Im at Aurora's right now tho Sent from my SM-G950U using Tapatalk
-
Removed the tape this afternoon. Traps came out pretty good, I guess. Teeth need some cleaning up. Will buy mineral spirits tomorrow to fix them. Sent from my SM-G950U using Tapatalk