


Tee-Kay Fisto
-
Posts
269 -
Joined
-
Last visited
Content Type
Profiles
Forums
Gallery
Articles
Media Demo
Posts posted by Tee-Kay Fisto
-
-
You'll have the same trouble as importing any other RIF. it's going to be a massive nightmare. You'd need to convince customs to release it, there was a member who classed the UKG as theatre or reenactment group and they got their weapon released. You may not be that lucky.
They posted their letter on the forum if you have a search.
Figured it would be a pain in the chucks to import. Hadn't considered a rubber blaster seriously before as the details weren't as sharp as resin or pipe builds but this one had me considering it. I think I'll stick with my doopydoo for trooping and build other pretty things for display

Sent from my iPhone using Tapatalk
-
Just found this thread and it is a goldmine of information for me as I'm intending to start a sterling conversion soon and this is the first time I have found someone showing how they drilled a genuine hengstler for mounting.
Fantastic work and an awesome looking blaster.
Sent from my iPhone using Tapatalk
-
 3
3
-
-
I used hammerite on my doopydoo resin blaster after laying down a good even undercoat/primer. Gave a good look. As Joseph said make sure you mask off well to avoid getting it everywhere. It is a pain in the wookie to get it off the little intricate areas if you overspray.


Sent from my iPhone using Tapatalk
-
1
-
-
This is what put us all here. Thank the Maker.
Sent from my iPhone using Tapatalk
-
The nerves will fade as you get further into your build. I took me over a year to finish my armour as I was scared of messing it up but the support you will find here will help you get past any obstacle.
Sent from my iPhone using Tapatalk
-
It's all cool Brian. Am happy to wait until you're sorted.

Sent from my iPhone using Tapatalk
-
Welcome future trooper.
This is a fantastic community who will help you every step of your journey all the way to centurion.
Sent from my iPhone using Tapatalk
-
1
-
-
Got my form filled in Brian
Sent from my iPhone using Tapatalk
-
1
-
-
This is like waiting on Christmas. Hurry santa Brian
Sent from my iPhone using Tapatalk
-
1
-
-
You're doing great here and you're following some great threads. I followed the same people's work and made it all the way to centurion. You can do it too. Looking forward to seeing this all come together for you.
Sent from my iPhone using Tapatalk
-
I don't think anyone would even notice if the lenses are not perfect as they will be too busy just admiring your scopes
Sent from my iPhone using Tapatalk
-
2
-
-
The more work that goes into this project, the more money I feel myself HAVING to spend.
-
1
-
-
Lovely armour. Well done and congrats on your centurion approval
Sent from my iPhone using Tapatalk
-
1
-
-
nice clean build Brian...welcome to Centurion
Thanks Bro. Pleasure to be aboard
Sent from my iPhone using Tapatalk
-
Congrats Brian and welcome to the centurion rank!

It's an honour to join the elite ( and a dream come true)
Congrats and welcome to Centurion!
Thanks. Pleased to be here sir

-
Brian McDavid 18910 Centurion A4 Andrew
Thanks in advance sir
http://www.whitearmor.net/eib/certificates/18910-centurion.png
-
Brian McDavid 18910 EIB A4 Andrew
Thanks in advance sir
You are very welcome! http://www.whitearmor.net/eib/certificates/18910-eib.png
-
Holy cow, I have got to start one of these. That looks amazing. I just need to buy a kit and get started. Seriously, that is a beauty.
Thanks Shane. This was my first venture into prop building while waiting on the courage to get stuck into my armour. I took my time and this was the end result. Doopydoo are brutal for non-communication but the kit is good if you are prepared to work at it. It would appear that parts of some of their molds are starting to give up with details being lost. That is the reason I started replacing parts. I have spent lots more money on more blaster parts for my next two builds. Kinda habit forming

Outstanding! Rebels be feared! Great attention paid to all the details.
That is high praise indeed coming from someone as dedicated to blasters as you.
thank you sir
Looks really great, Brian. Pity you didn't document your build - I've got many of the same after market parts

Sent from my DH77 using Tapatalk
I now really regret not doing a build thread Rudi. It would have shown me where not to go wrong again
If I can do this first time (second for a few of the parts) I'm sure yours will turn out fantastic. Start a thread and I'll watch eagerly the development of your blaster (and throw in any advice I can, limited though it will be).
-
1
-
-

Waiting eagerly Brian
Sent from my iPhone using Tapatalk
-
2
-
-
Loving the look of this for a rubber blaster. Very difficult to get a hyperfirm in the UK I'm led to believe but this would be worth trying for
Sent from my iPhone using Tapatalk
-
Wow, that was fast! Sweet build, Brian, Centurion before your maiden troop
 Well done to you
 Thanks Mark. All seemed to come together very quickly. Centurion appeared in a blur but I feel honoured to be amongst the legions finest. Got confirmation from Sheranakin about my induction
Can't wait to wear the armour in earnest.
Sent from my iPhone using Tapatalk
-
Welcome Brian, thank you for your Centurion application lets get you approved.
CRL and Centurion Application Requirements:
All required submission photos are present. Your armor displays all the elements as set out in the level 3 CRL. Ukswrath and myself would like to congratulate and welcome you to the Centurion rank. Awesome job

Other-Armor Fit/Assembly:
Nothing to add except well deserved Centurion badge, this baby fits you so well, and the blaster is beautiful
Congrats and report to duty sir
Thank you Sir.
Onwards and upwards for the glory of the legion and the empire.
Thank you for your kind comments on my kit. It's now my duty to live up to the motto of Troopers Helping Troopers and help others in their journey into the ranks of the legion
Brian
Sent from my iPhone using Tapatalk
-
Looking good Brian , not submission related mate just passing on a pearl of wisdom pointed out to me. Add some felt or the fluffy stuff from Velcro to the clips on your TD will save marking up your back kidney plate as you suit up
Sweet idea. Got a roll of white Velcro in my armour bin. I'll make a point of doing that thanks
Sent from my iPhone using Tapatalk
-
Hi All
Yes this is another E-11 blaster build, or rather E-11 blaster built!
Got my Doopy kit in January last year and sat on it for a while before doing anything with it as I read so many brilliant build threads. This is what made me decide not to do a WIP for my blaster as with this being my first foray into building anything like this I was very reluctant to open my progress to the public (wish I had done a thread just to document what I went through). I'm not going to list all the builds I read constantly as there were so many brilliant people doing amazing things with this simple resin kit, but I feel I need to mention a couple at least. Christopher Pearson (themaninthesuitcase) came into my build in a big way due to his 3D printed parts I used and Tino (T-Jay) for his scary brilliant building skills.Also printed out the FISD E-11 Blaster Reference. Took loads of tips and tricks from this and put my own spin on some of these (hopefully they worked out).
Moving away from the standard kit I upgraded several parts and detailing. Got lots of new parts of which many were not used for various reasons
Completion kit from Tino – loved the haribo!
Magazine from Gazmosis – got 2 as one initially was lost in space but turned up the week after second one arrived.3D printed parts from Shapeways
Designs by: Christopher Pearson (themaninthesuitcase)
E-11 Power Cylinders
E-11 Stock Cube (not the edible kind)
E-11 End Clip
E-11 Front Sight with pin
Mag Power Cylinders by cboath - Not used - I preferred Chris' parts
E-11 Nozzle by gucabe - much more detailed than the Doopy cast nozzle
Front Sight Nopip by CFP214
Scope Mod by CFP214 – too short – Not Used
Ejector Port Guard by CFP214 – Not Used - ended up sanding and filing the doopy parts.
3D printed scope, lenses and retainer rings by toolguy301 - Not Used. Cool but not detailed enough. Lenses were frosted. Intended to use this after I messed up when I drilled out the original Doopy scope and glued monocular lenses into it with superglue which fogged the lenses and ruined the effect.
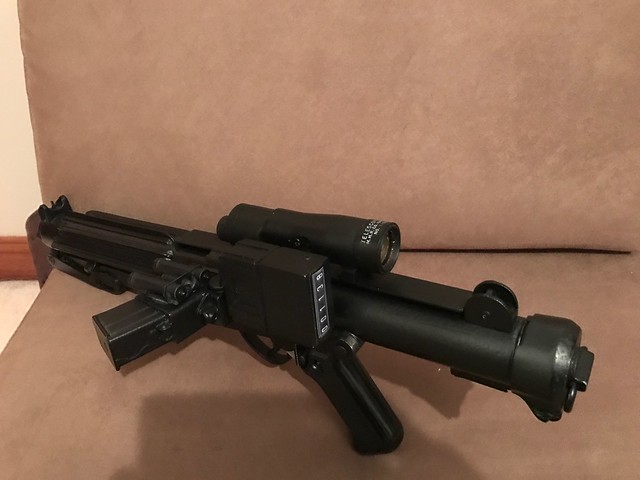
New Scope from Doopydoos which I drilled out and fitted the lenses from a Coolcase Compact Monocular from Amazon. (Larger lens than the one from Tino and looked more like my genuine scope).Worked hard to get the blaster to this point, filling and sanding and painting. Primer, Hammered finish (not on the t-tracks, grip or scope) then satin finish black. Gloss black on the grip with aluminium on the trigger mechanism. Ejector port had to be repainted as it was not right, got gunmetal spraypaint to re-do it. Not doing weathering on the blaster at the moment, as I am brand new to this so is my blaster
Made the inner bolt and charging handle then made up a spring with the wire that was in the completion kit from Tino.Next was to finish up the scope with detailing screws in the front and to highlight the writing.
Hengstler detail is a sticker from trooperbay or ebay, I can't remember which.
This leaves me with my finished blaster which I am quite pleased with.
Time for some photos now.
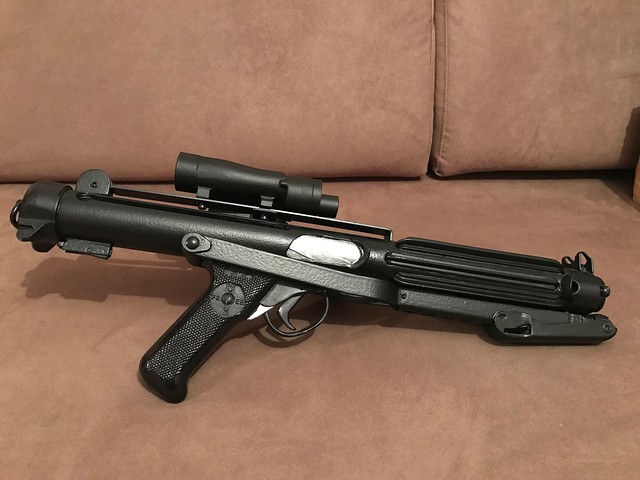 Ejector side by brian.mcdavid, on Flickr
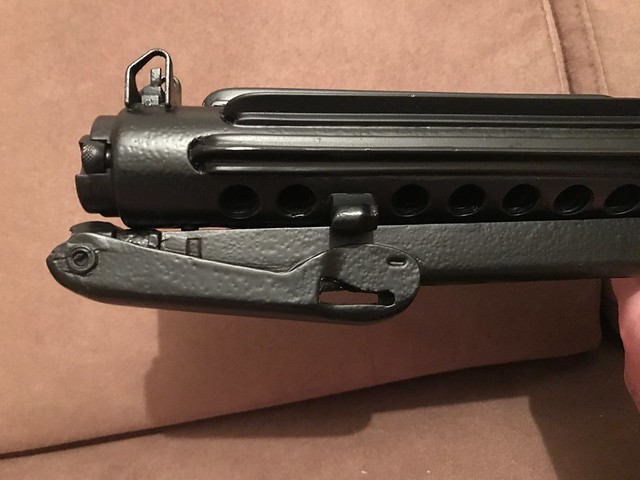
 Magazine side by brian.mcdavid, on Flickr
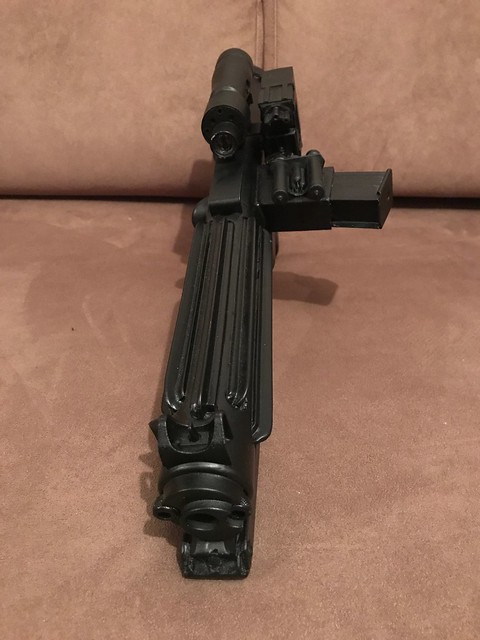 Top front by brian.mcdavid, on Flickr
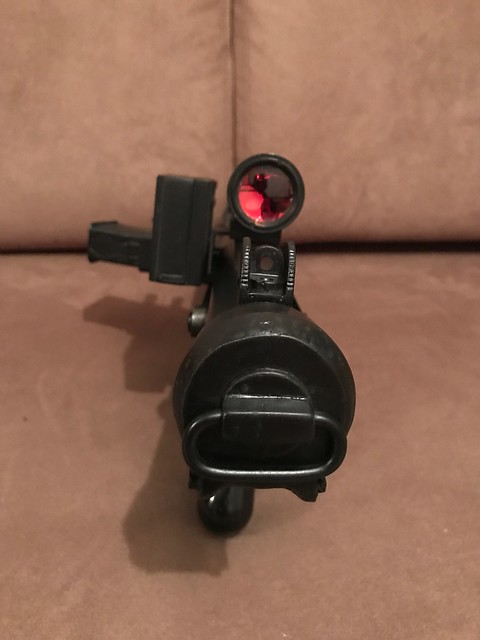 Rear by brian.mcdavid, on Flickr
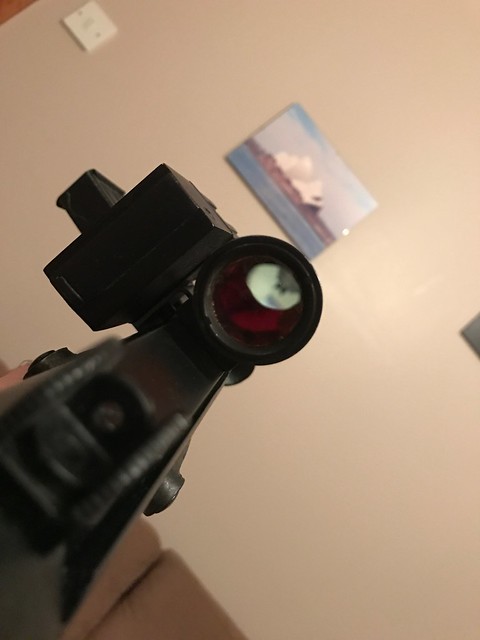 Through scope by brian.mcdavid, on Flickr
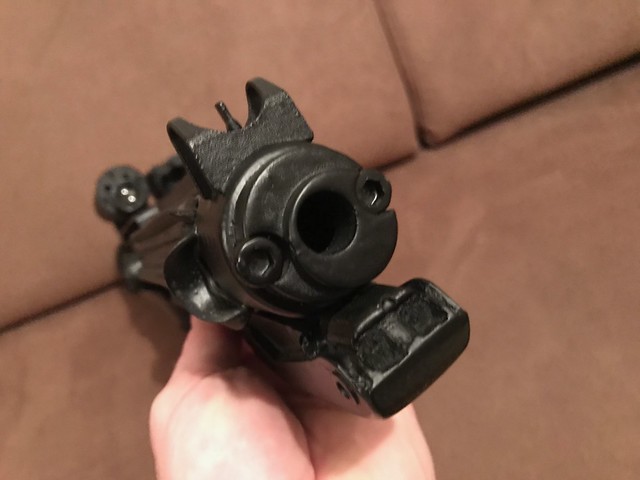 Muzzle and front sight by brian.mcdavid, on Flickr
 Power cylinders by brian.mcdavid, on Flickr
 Front stock detail by brian.mcdavid, on Flickr
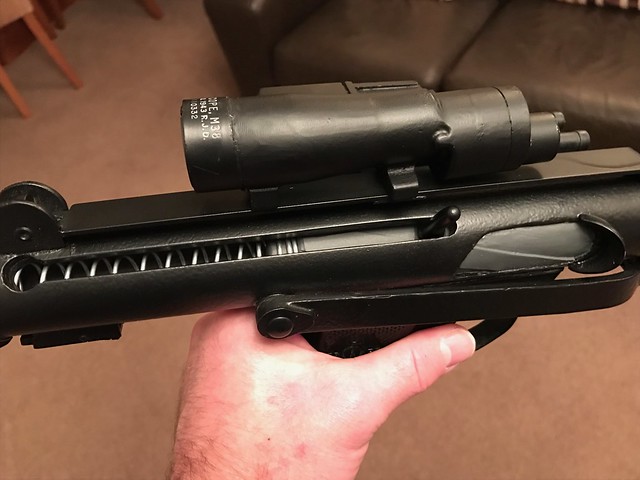 Bolt detail and spring by brian.mcdavid, on Flickr
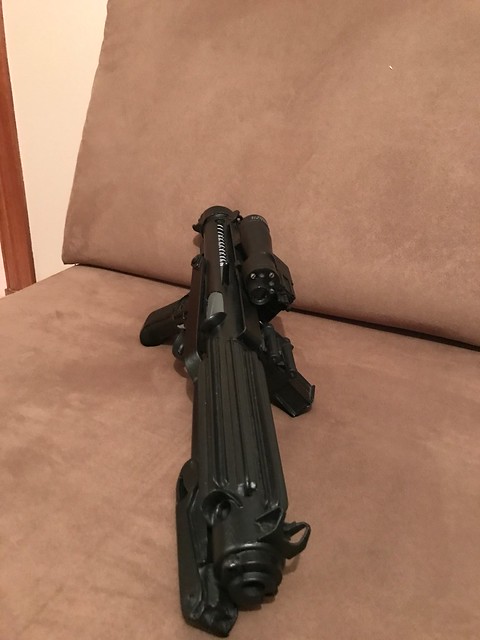 Front view withn screws in scope by brian.mcdavid, on Flickr
 Hengstler and scope detailed by brian.mcdavid, on Flickr
 Finished Blaster by brian.mcdavid, on Flickr
Thanks for dropping by for a look at my blaster. There are better ones out there but I am quite proud of my first build. Next one will be better I hope
Cheers
Brian
-
6
-
Hammerite Hammered Finish Spray on Resin/Plastic
in ANH BlasTech E11
Posted
I masked off the areas that were not being done with hammerite and sprayed that on top of the primer then removed masking tape and sprayed satin black where required as the hammerite was a gloss finish.
Sent from my iPhone using Tapatalk