

Tee-Kay Fisto
-
Posts
269 -
Joined
-
Last visited
Content Type
Profiles
Forums
Gallery
Articles
Media Demo
Posts posted by Tee-Kay Fisto
-
-
On 31/10/2017 at 2:43 AM, humperdingle said:
Ask Anna who painted short trooper’s battle buddy - they seemed to make a good job of that.
Reached out to Anna today as nowhere locally can help on this. As soon as I mention what I need painted the tone of convesation changes. Even people I've shown the kit to don't seem to know how they would go about the task of painting it.
-
I cheated and got mine from Teresa (geeky pink) and they were a perfect fit straight out the packaging. My next step is resizing the parts too so I'll be watching with interest how you get on

Sent from my iPhone using Tapatalk -
Ask Anna who painted short trooper’s battle buddy - they seemed to make a good job of that.
Thanks Mark. I'll see how I get on today. There are several places near me so I'll try a couple of them first. I'd rather get it in someplace local for ease of transport
Sent from my iPhone using Tapatalk -
Hi
Here is another small update. Hard trying to get the time to have a good run at this. Anyone who has assembled this armour will know how much work is involved.
Got time off booked from work to give me a good 10 days or so to break the back of this build
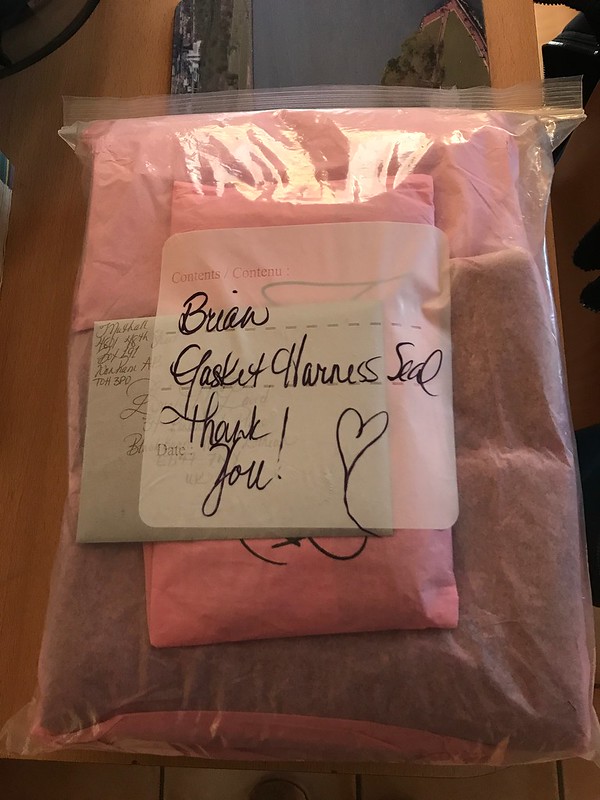
Happy start for this update as my gaskets arrives from Teresa (Geeky Pink). I have to say right out that I have never received anything that has had such care and personal touch put into it, and that's before I unwrapped it to find fantasic craftwomanship in every part of my order. It all fits like a glove. Now I can start sizing the armour to fit better.
 Sweet delivery by brian.mcdavid, on Flickr
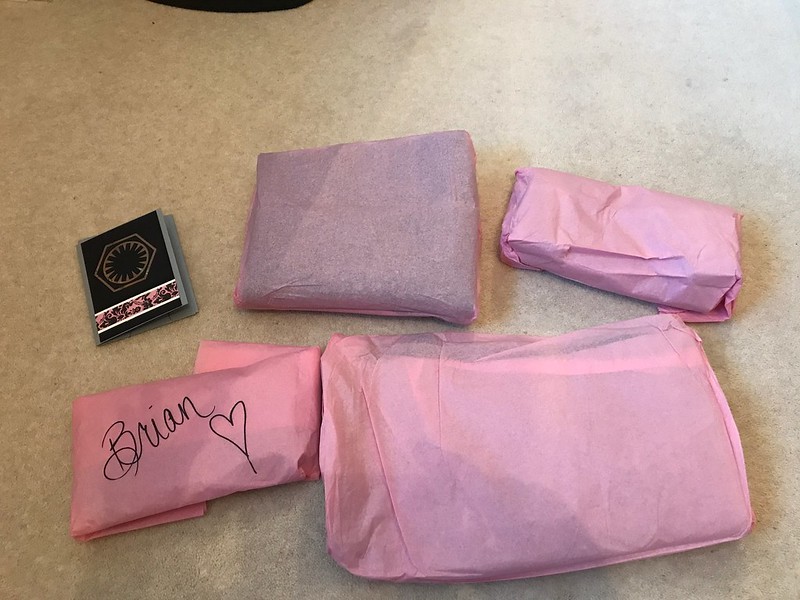 Best packaging ever by brian.mcdavid, on Flickr
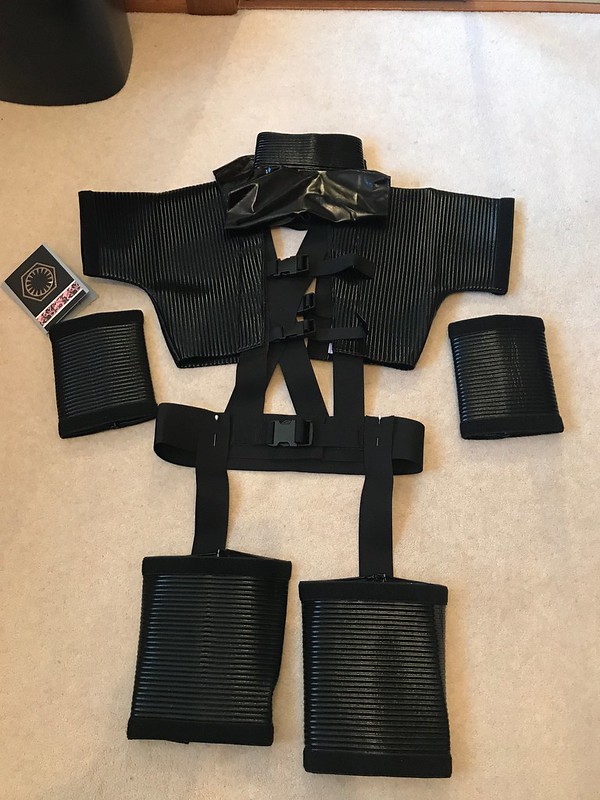 Baskets, harness and neck seal by brian.mcdavid, on Flickr
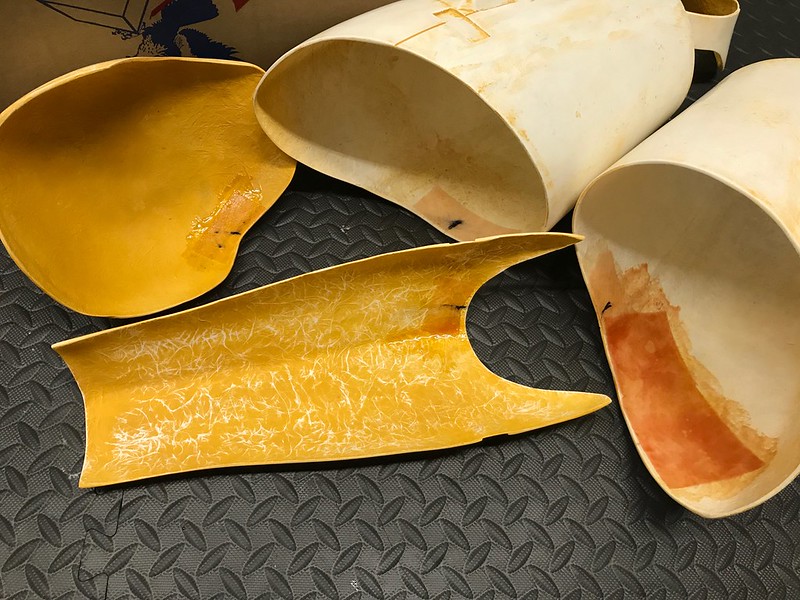
Now that's out the way onto the build. More filling and sanding. Luckily I'm not finding very many places that need filler. Filled where I have found so far and once the filler dries sanding back to 800 grit. Couple more small cracks found when doing initial sanding so repaired them with fibreglass repair tissue and resin.
Had some left over resin mixed up so painted it onto the inside of my replacement chest piece. After it dried it has strengthened the chest without stiffening it much and has made me consider doing it to the whole armour.
Thoughts? Has anyone else done this?
I'm not going to post lots of pictures of filled and sanded armour. We all know what it looks like
")
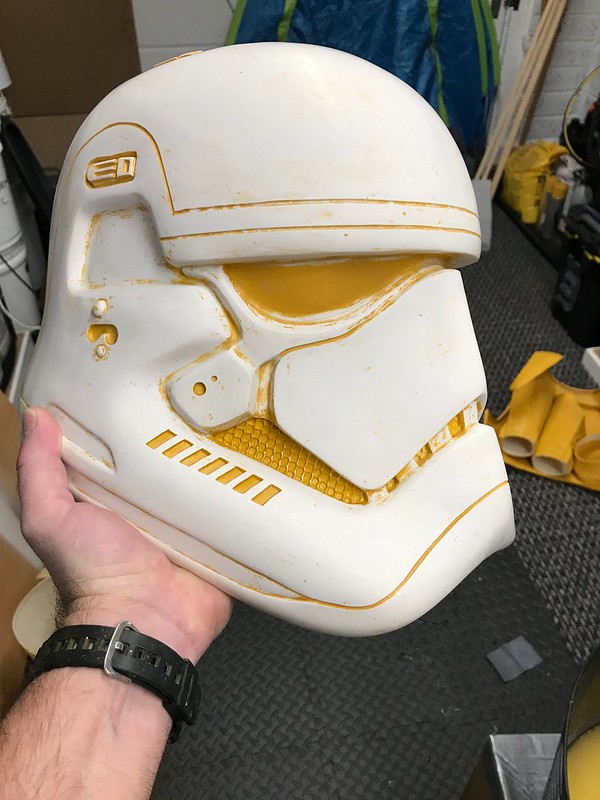
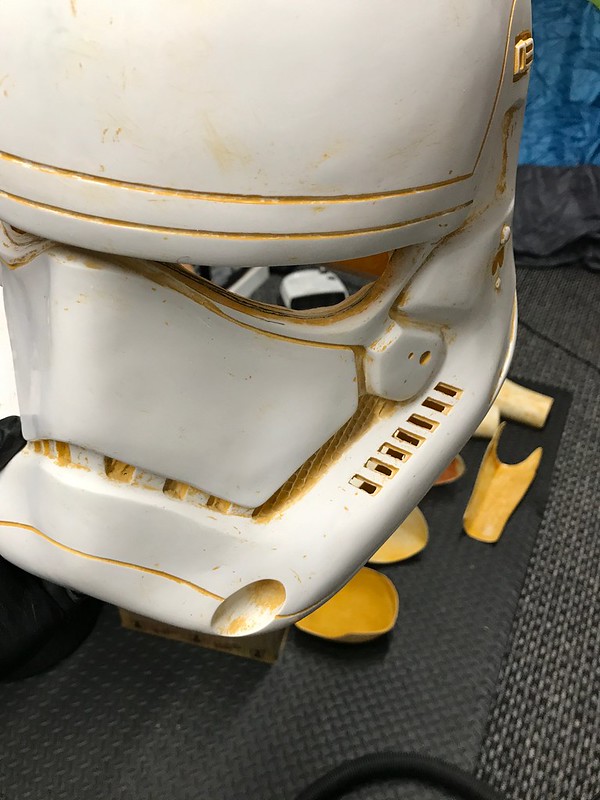
In saying that, here is the helmet only because I filed out the tube vents and eyes.
Do the eyes look OK or do I need to take them into the middle a bit more?
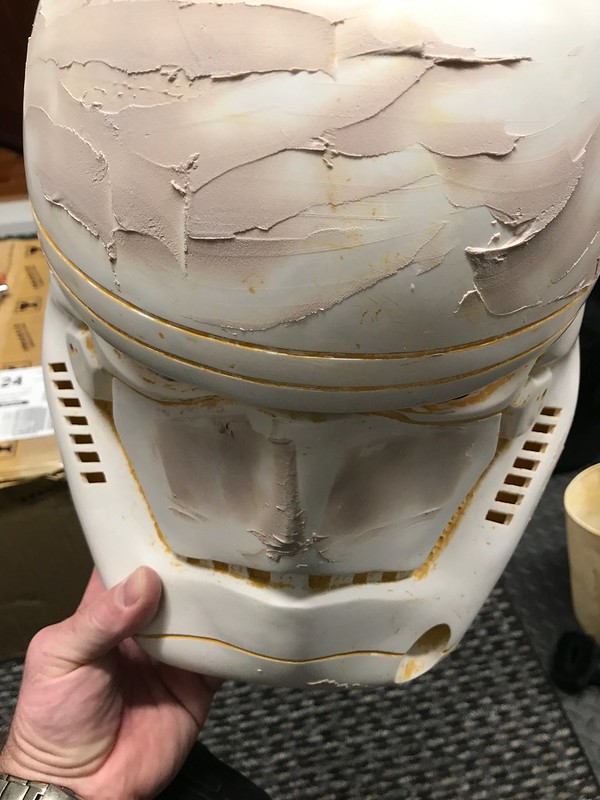 Vents filed out by brian.mcdavid, on Flickr
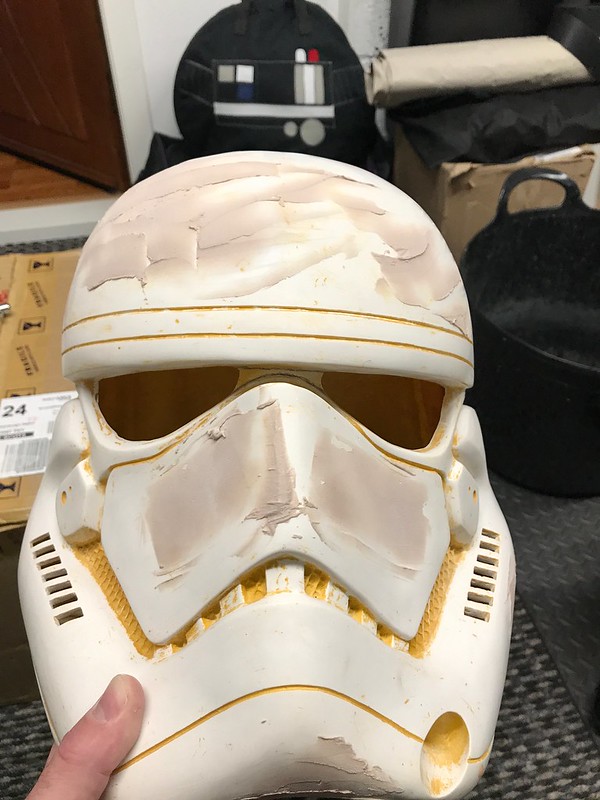 Eyes trimmed out by brian.mcdavid, on Flickr
Going to keep at this every time I get a chancebut I've come to the conclusion that I am not going to be able to paint this myself. I even bought a tent as suggested by Daniel (Ensi) but the way the weather is turning in Scotland it is not an option. I even tried putting the tent up in my garage but the fumes going through the rest of the house were pretty mean. Struggling to find a paint I was happy with too. Tried a couple of different types/brands but nothing I was happy with. Probably just the conditions that spoiled it for getting the finish I wanted.
Tomorrow I am going to visit a local bodyshop to see if they can do it. The guy on the phone laughed when I told him what I wanted painted and asked if they actually made stormtrooper armour in my size!!!!! Lets see how it goes in the morning

Started sanding and painting the parts of the F11d when I found a quiet ten minutes during nightshift last week. Bonus

Thanks for looking
Brian
-
 1
1
-
-
This is looking very promising!
 You can definitely do this before the premiere. I want to see many pictures!

Thanks for the encouragement. Not had time to post update lately but I'll try and get something up later.
Sent from my iPhone using Tapatalk -
Coming along nicely mate! Look forward to further progress

Thanks Darren.
Now it will slow down for a few days with work getting in the way. Gotta try and keep the momentum up as got my sight set on being able to troop the midnight premiere of TLJ.
Me and my big ideas always seem to just pile the pressure on.
Sent from my iPhone using Tapatalk -
Hello Again
Another installment already.
After ordering the kit from Jim started sourcing and ordering more goodies.
Undersuit from Strormtrooperundersuit. As everyone has said about this suit, order bigger than you normally take. I ordered an XL and it is a good fit.
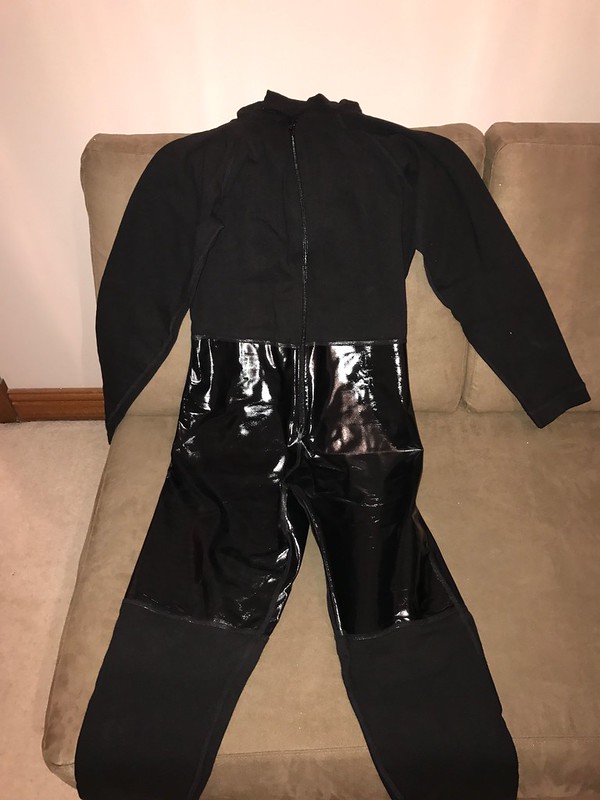 Undersuit by brian.mcdavid, on Flickr
I am excitedly awaiting the arival of my gaskets and neckseal from Teresa ( GEEKY PINK'S PHANTASTIC GASKETS). Hoping they will arrive this week to allow me to start sizing the armour.
Ordered a leg holster from R2Dan and waiting on shipping.
Contacted Darren (JAFO) about one of his fantastic belts and waiting on his next run.
Ordered a machined aluminium Aerator from Vaderpainter, really nice piece of work.
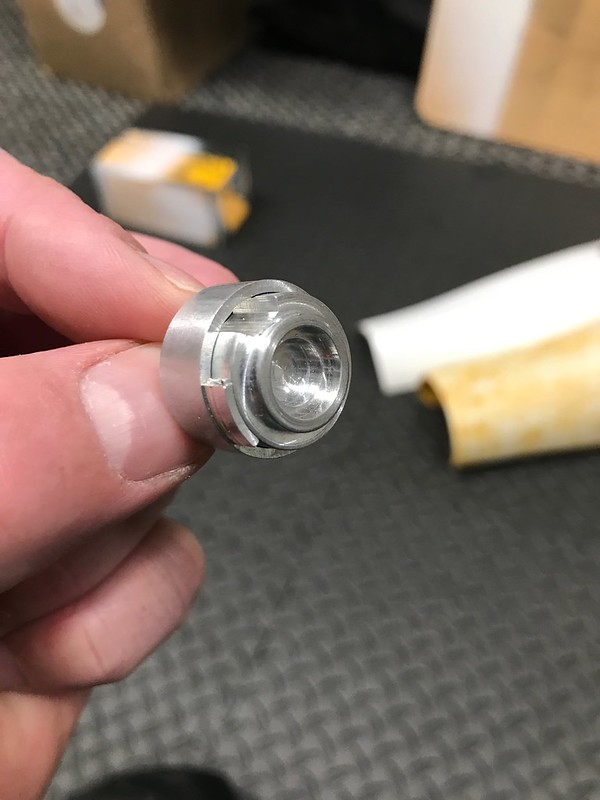 Aerator Tip by brian.mcdavid, on Flickr
Anyway on with the armour.
Sprayed the armour with a filler primer
 Armour Primed by brian.mcdavid, on Flickr
Bit of a shocking look but good as it really shows up any imperfections once you start sanding
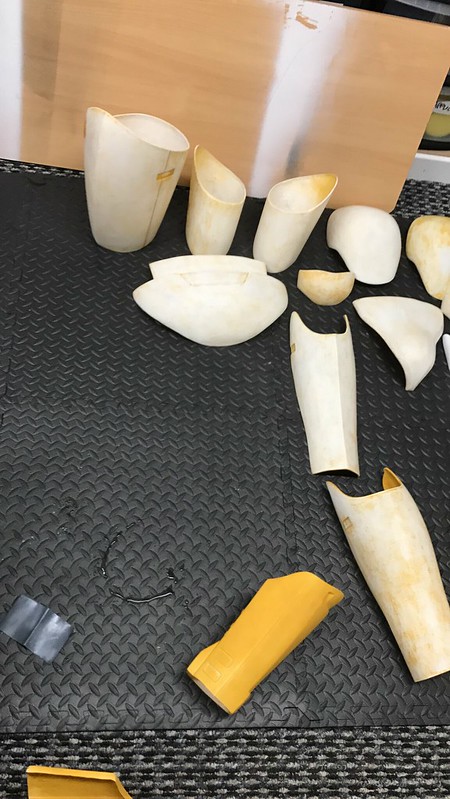 Sanding Started by brian.mcdavid, on Flickr
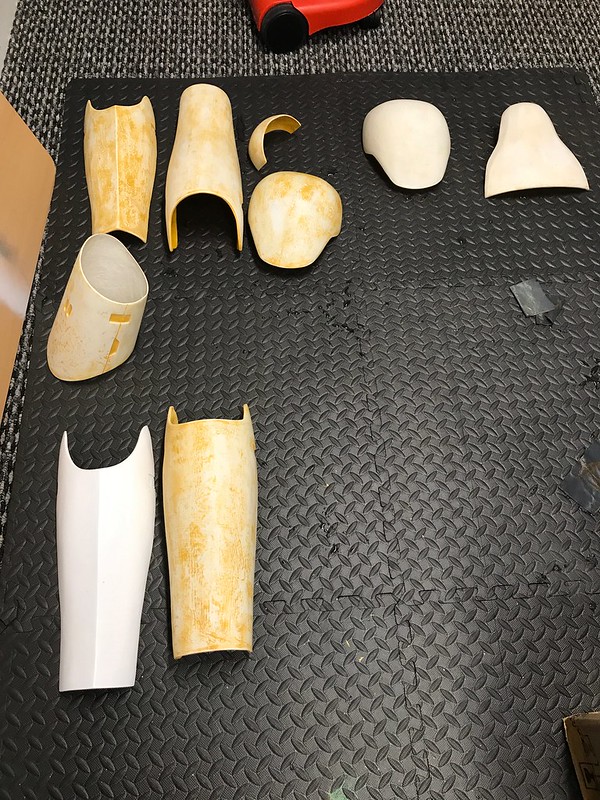 Test Finish by brian.mcdavid, on Flickr
Tested a bit of white paint on one shin to get an idea of the surface finish in that last photo. Need to have more tests to get the finish how I want it. This means more sanding. Just great fun sanding armour. Three hours of sanding and two really sore arms later my helmet turned out nice and smooth
 Helmet Sanded by brian.mcdavid, on Flickr
Made my first cuts to the armour by rough cutting the eyes and vent holes. Very therapeutic after all that sanding.
 First Cuts by brian.mcdavid, on Flickr
Made repairs to the cracked limbs so that I can get started on finish sanding before priming and initial trimming. Got to say that I'm not looking forward to trimming this armour. Never worked with fibreglass before so a bit nervous. Bit like my TK build I suppose but got more confidence now.
 Repairs Starting by brian.mcdavid, on Flickr
That's where we are now my friends. Starting nightshift tomorrow so not expecting much progress over the next 4 days.
Oh, before I forget, we bought a 3D printer and it has been getting worked hard over the last 2 weeks. Been printing Germain's F-11D and SE-44C
 Blasters, Blasters, Blasters by brian.mcdavid, on Flickr
With unquestioned loyallty
Brian
-
1
-
-
Hello my White Clad Brothers and Sisters
It's ages since I was active on here but it feels like coming home after a holiday.
Been busy building ...... sorry for this , Black Armour!!!! After I got my approval and started trooping my wife saw what it was all about and decided to join the empire. We got hold of ....... again sorry for this, a Tie Pilot kit. We put the helmet and chest box together and Lynn sourced the rest of her costume and after making sure it was all done right she submitted and was cleared. She now troops at my side as TI91810. She has been bitten by the bug now and is now working on a Jawa. Boy how things have changed around here recently
Anyway I digress. Like so many on here I had paid my money and (almost) happily waited for Anovos to ship their FO TK kits. With the delay announced I thought STUFF ANOVOS!
I'd been gathering the parts for the build hoping against hope that Anovos would deliver. I know, I should have known better but I like to be optimistic.
Imperial boots and gloves from a fellow garrison member who was selling.
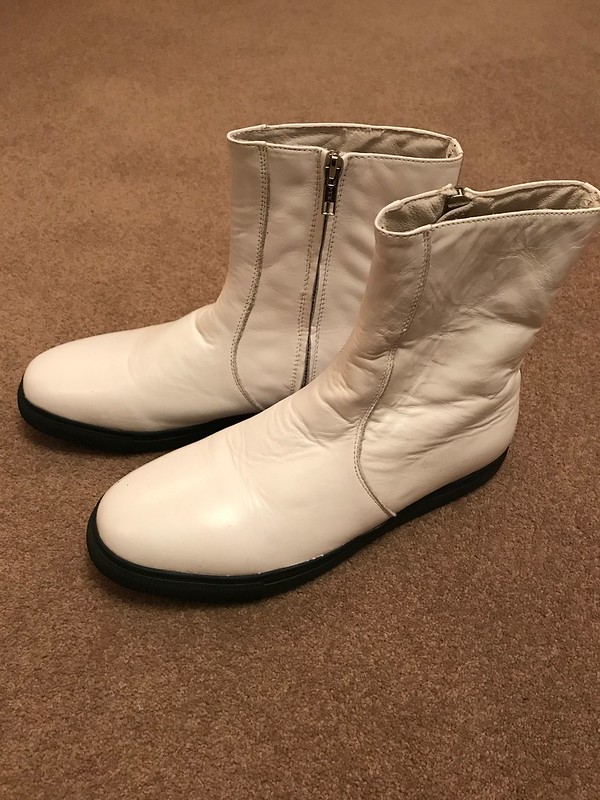 Imperial Boots by brian.mcdavid, on Flickr
 Imperial Gloves by brian.mcdavid, on Flickr
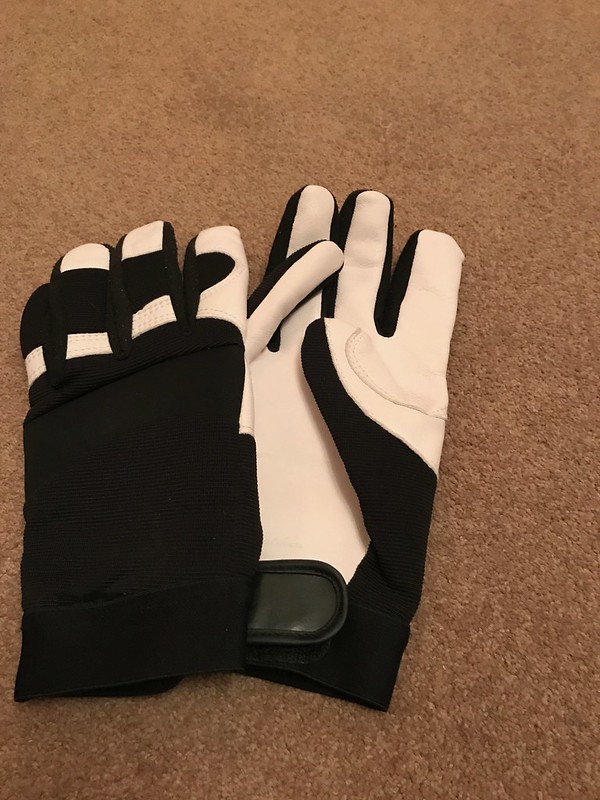
Imperial gloves were a wee bit big but luckily another garrison member was parting with a pair of Endor Finder gloves in a better size.
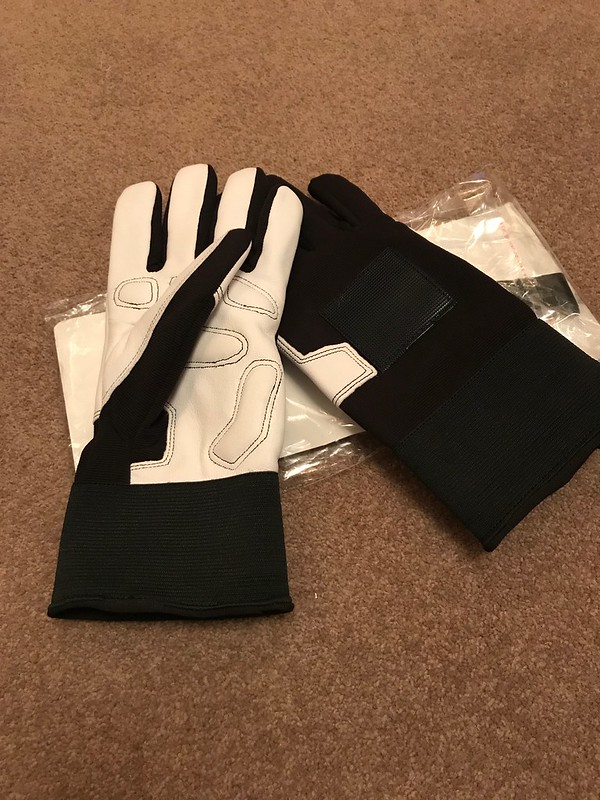 Endor Finders Gloves by brian.mcdavid, on Flickr
Looked at a couple of options in ABS and read reviews of several different kits and eventually settled on Jim Tripon's fibreglass kit.
Ordered the kit and was surprised how quickly this happened
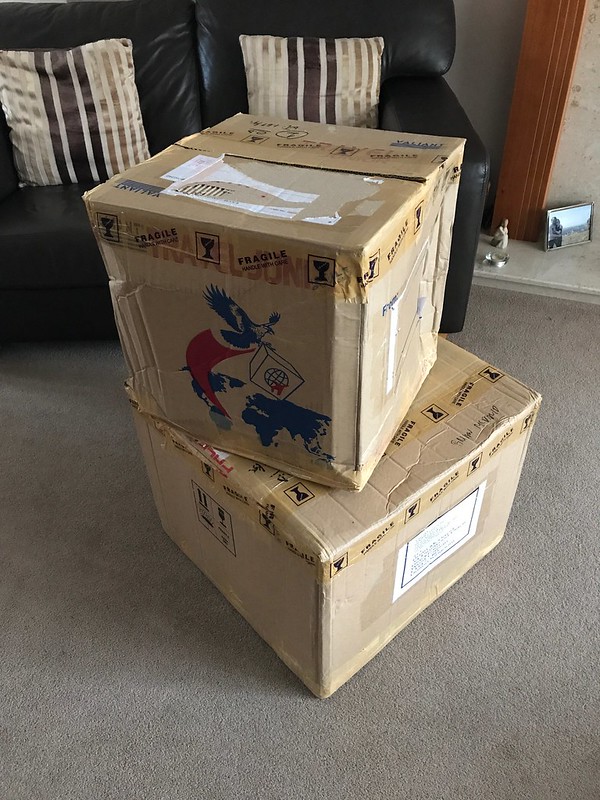 BBB Day by brian.mcdavid, on Flickr
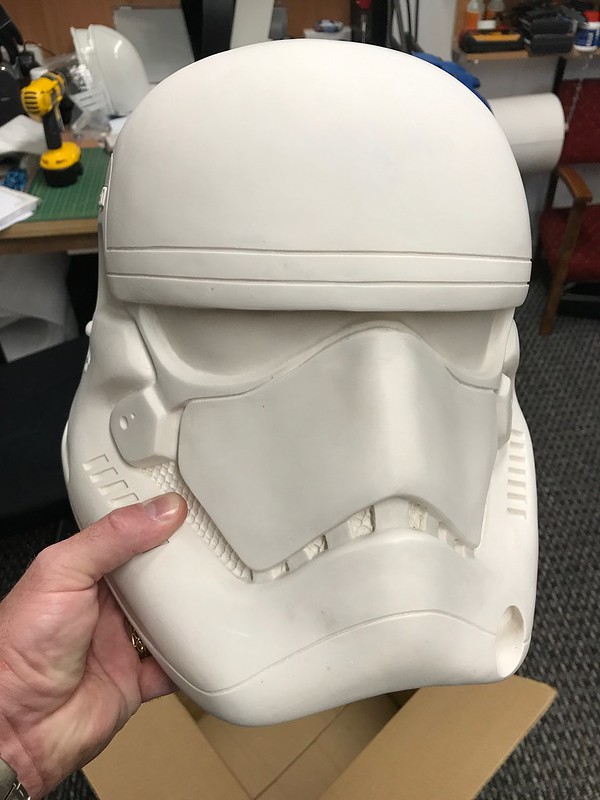 TLJ Helmet by brian.mcdavid, on Flickr
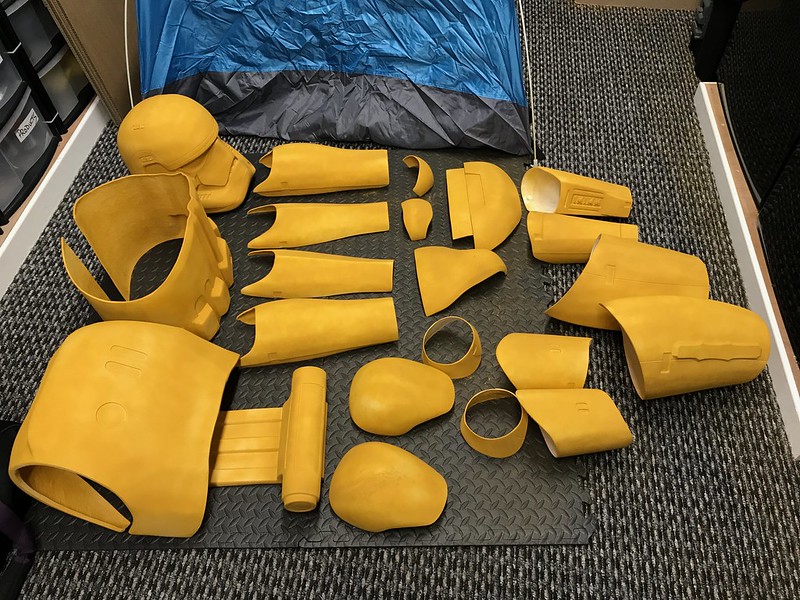
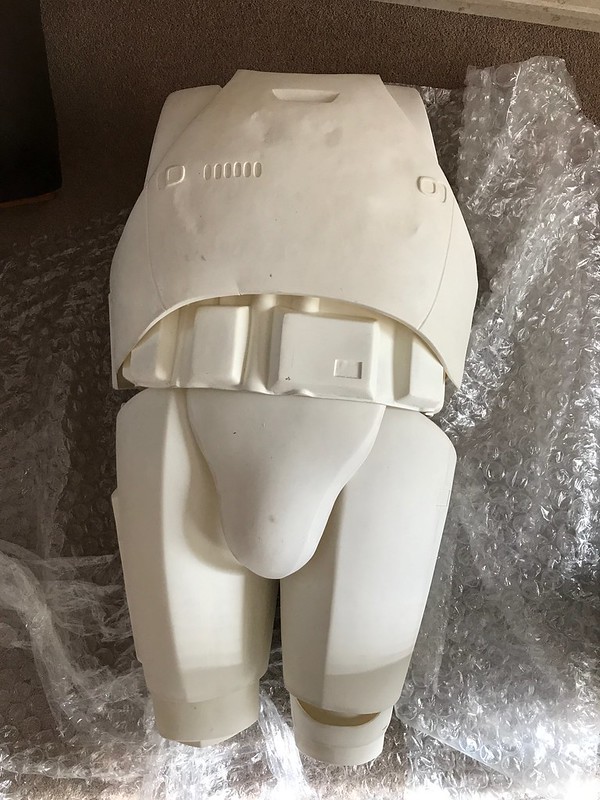 Armour by brian.mcdavid, on Flickr
The chest plate was damaged in transit when it collapsed inwards. I contacted Jim to let him know that the kit had arrived and advise about the damage. Chest collapsed and a couple of cracks in the edges of some pieces. Jim immediatelly offered to replace the chest plate. The cracks are easily fixed but the chest would have been more difficult. New chest arrived less than a week later in perfect condition
-
1
-
-
Some sort of filler for the surface imperfections, paint, and more sandpaper!

Great to see another Jim kit in the works
Change that to LOTS more sandpaper (800 grit wet/dry is my first go to then up to 1500)
I got a filler/primer spray paint for first coat and it was great for showing up imperfections as is is yellow and sticks in any cracks that you will have in the armour
Sent from my iPhone using Tapatalk -
I think I'm about a week ahead of you with my build. Got my kit from Jim last week and at the priming and sanding stage. Scottish weather is about as good as yours so I have the same issues for painting.
Good luck with your build
Sent from my iPhone using Tapatalk -
On 23 June 2017 at 9:41 PM, Risvang said:
50 gallon/190 liters Huskey og Stanley Box Works fine. Takes everything Including helmet.
Go to Amazon, I believe both .UK and .DE ( germany) has to about 100 pounds. I live in Denmark and ordered it on Amazon.de. They had a special offer with free shipping within the EU.
But it is the bomb
Sent from my iPhone using Tapatalk
A very big bomb Nicholai. I needed something a bit smaller
-
1
-
-
Good choice on Geeky Pinks! Can't go wrong with her.
Awesome that you're gonna start a thread, takes a while to document everything but it is so worth it. Plus you dump a lot of knowledge and information out to those new builders and get the chance to get answers from the more experienced ones on that costume. The tent I used was a small 2-person "go to a festival and leave it there" type of tent, it's really cramped and not a lot of space so I could really just paint a big piece at once or both thighs/shins etc.
Also if you don't have a proper respirator and you're going to do this, GET ONE. Painting inside such a confined space without a proper respirator with filters is just asking for trouble, also wear clothes you don't care about.


Thanks for the info Daniel. I'll get a tent ordered. I have a massive list of things to order, from wet & dry paper to filler and fibreglass repair kit and beyond. Safety gear is all there already (courtesy of my employer )
)
I'll try and get my thread up and running before armour arrives to give myself a head start (I'll need it as we are doing a Jawa for wife at the moment too). Never enough time to do far too many things
Sent from my iPhone using Tapatalk -
Hey Daniel.
I am stealing so much from your build for my own when all my stuff arrives. Deposit paid for armour so hopefully Jim will be casting soon. Gaskets ordered from Geeky Pinks gaskets on FB.
I will be starting a thread soon asking lots of questions but for now I have one for you if you don't mind. You said you were doing much of your painting in a tent. Absolute genius move and I'm thinking that I will have to do the same due to horrible Scottish weather. I have been looking at the upright changing/shower tents but don't know if they would be large enough and just wondered what size of tent you used.
Sent from my iPhone using Tapatalk -
I had seen this technique discussed several times across many different threads but this is brilliant.
Thanks for putting this out there.
Sent from my iPhone using Tapatalk -
This is a fantastic build. I've just started researching FOTK builds of Jim's kit as I'm about to pull the trigger on buying one. Anovos obviously did their usual and started with their first of probably many delays of the FOTK kit.
This is going to be a goldmine of information for me. Thanks for putting together such a great thread. And congratulations on taking your first build into the legion.
Sent from my iPhone using Tapatalk-
2
-
-
How is the blaster electronics bro?
Hi Ted
Had a root around and found the electronics. I was right about them being on the quiet side but you could probably fit a louder speaker.

Blaster sound with red lights
Stun sound with blue lights
Sent from my iPhone using Tapatalk-
1
-
-
^ ^ ^ ^. This. I've Han a couple of sets from Roy ( wannawanga ) and they are great
Sent from my iPhone using Tapatalk -
I have all manner of stuff velcroed in my bucket and chest plate but the best storage facility I've found is a wife in an Imperial Officer uniform with belt boxes.
A wife in a tie pilot flightsuit has lots of pockets
Sent from my iPhone using Tapatalk-
2
-
-
How is the blaster electronics bro?
Have only tested the electronics when they arrived, which is ages ago now. They are in one of the boxes of blaster parts that I keep adding to promising myself that I will start a blaster build this weekend, no next weekend, no next weekend, no next weekend.
I'll have a dig around and give them another test for you Ted. If I remember correctly I thought they were a little bit on the quiet side but I will confirm this week. I'm working nights so please bear with me bud
Sent from my iPhone using Tapatalk-
1
-
-
I bought a couple of bits from him. I got his folding stock and the blaster electronics. Good parts.
Sent from my iPhone using Tapatalk-
1
-
-
I would love this to be shipped on time and you would think that Disney would want a load of FO troopers out and about in time for EPVIII hitting the cinema. Here's hoping
-
Oh boy is this going to be good. I will follow this with eager anticipation of what's coming next
Sent from my iPhone using Tapatalk -
A small update. No closer to actually turning this into a build thread as time is still against me but ordered another set of t-tracks from Roy which arrived today. These will go on the sterling.
I have the feeling the sterling conversion is going to be the first thing I tackle to get my blaster mojo burning again.
Not going to post a picture of these as they are exactly the same as the first pictured above somewhere
Hope to have more to post soon and hopefully it will be a bit more interesting.
Cheers for now.
Brian
-
1
-
-
Wanted to share with you all a little something that Brian and I are collaborating on...
As we can't post videos in here I'll share a link to it:
https://www.facebook.com/trooperamp/videos/1662906863749319/
My wallet has just gone up in flames! Thanks for that

Sent from my iPhone using Tapatalk
-
1
-
Newbie hi folks
in New Member Introductions Archive
Posted
Hey Cameron

That kit looks familiar
Looking forward to assembling it now
Sent from my iPhone using Tapatalk