

ayen_s
-
Posts
213 -
Joined
-
Last visited
-
Days Won
2
Content Type
Profiles
Forums
Gallery
Articles
Media Demo
Posts posted by ayen_s
-
-
Congratulations Andrew
Sent from my iPhone using Tapatalk Pro-
 1
1
-
-
CongratulationsAttention Troopers!! please welcome to the ranks Centurion # 497 - Jakob (Yacorp) of the German Garrison. Congratulations sir!

Well, Now we are in the final stretch of making this happen only 3 spots to go !!
 . Almost there.
Sent from my INE-LX2 using Tapatalk
-
2
-
-
Went R1 ISB for a while. OTTK still in my heartWe miss you, what took you so long! .
.
Sent from my INE-LX2 using Tapatalk
-
It has been a while since I log in here. Nice to be around my stormtroopers brothers again.
-
1
-
-
On 12/18/2020 at 4:39 PM, Rizman said:
I’m from malaysia !
Hi Sharizman, my name is Syahrin, Commanding Officer for Malaysia Garrison. Welcome onboard.
-
Congratulations David
-
1
-
-
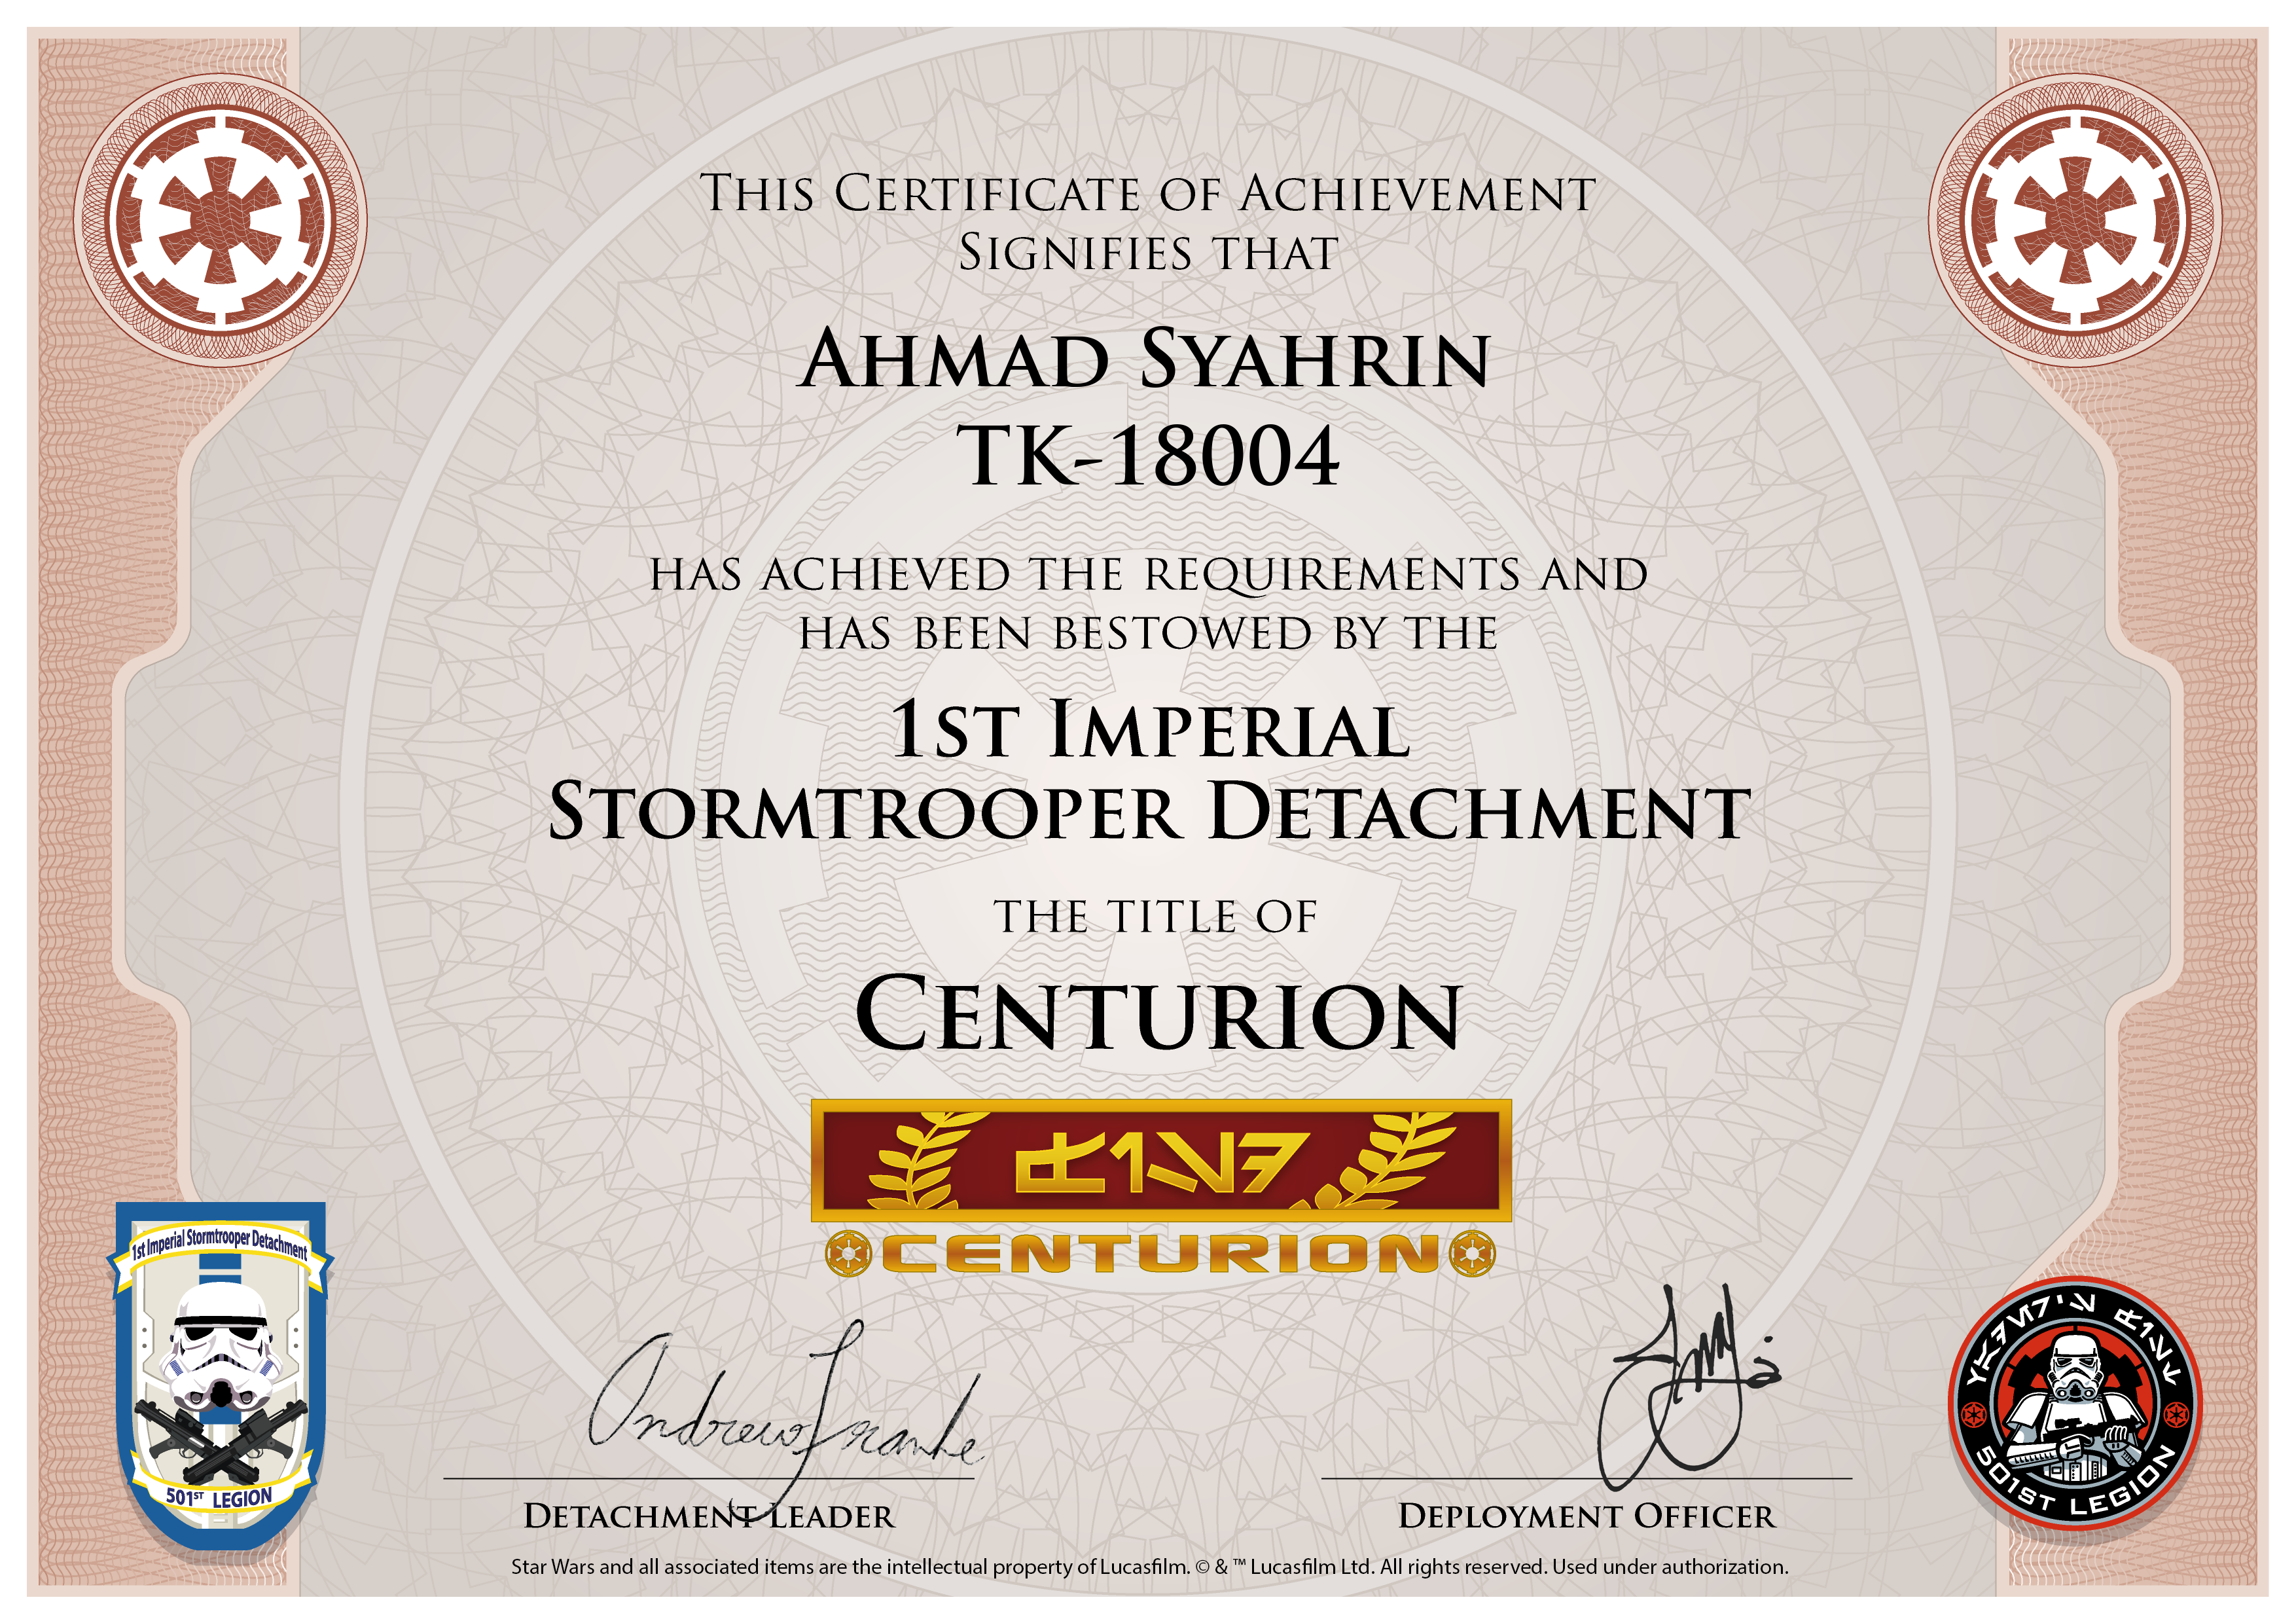
Ahmad Syahrin
TK-18004
Centurion
A4
Tonyhttps://www.whitearmor.net/eib/certificates/18004-centurion.png
-
1
-
-
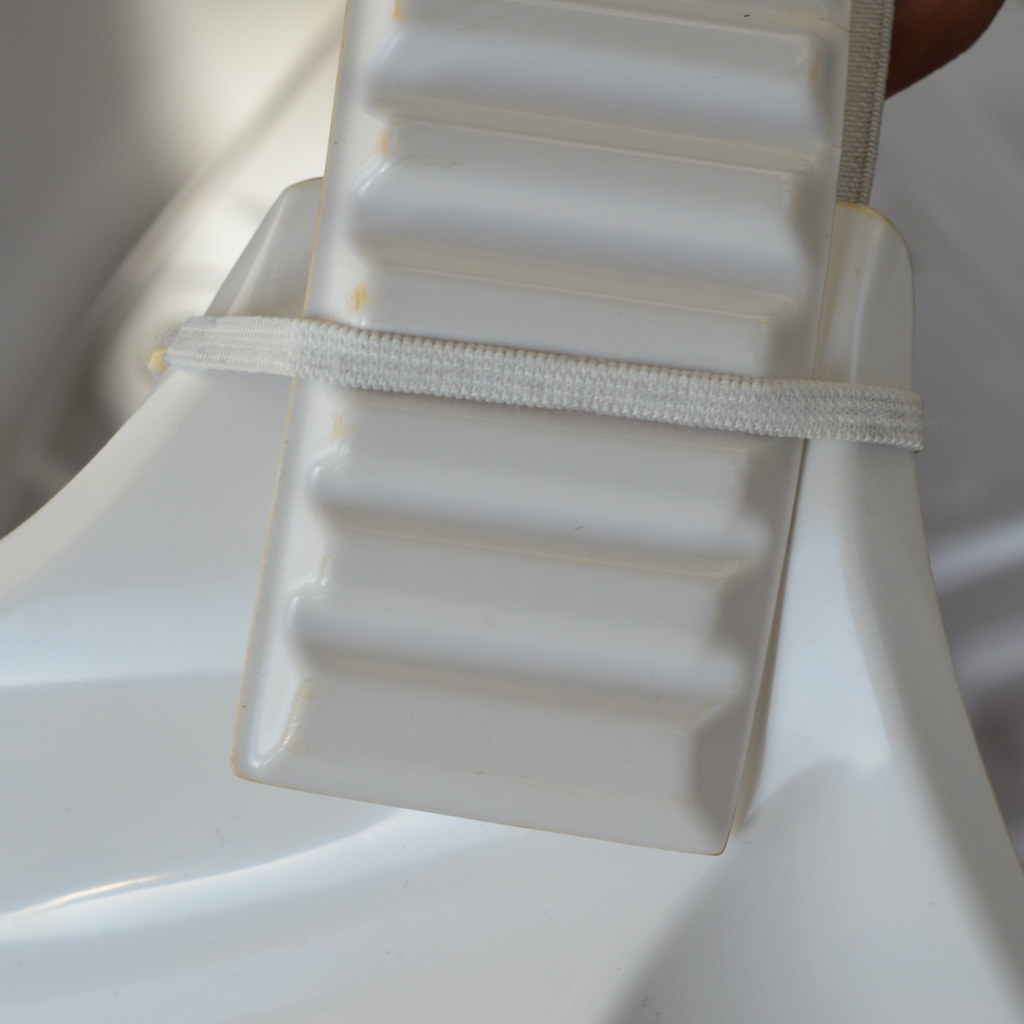
Rear sight ready. Links in first post.

-
1
-
-
Bayonet lug ready. Links in first post.

-
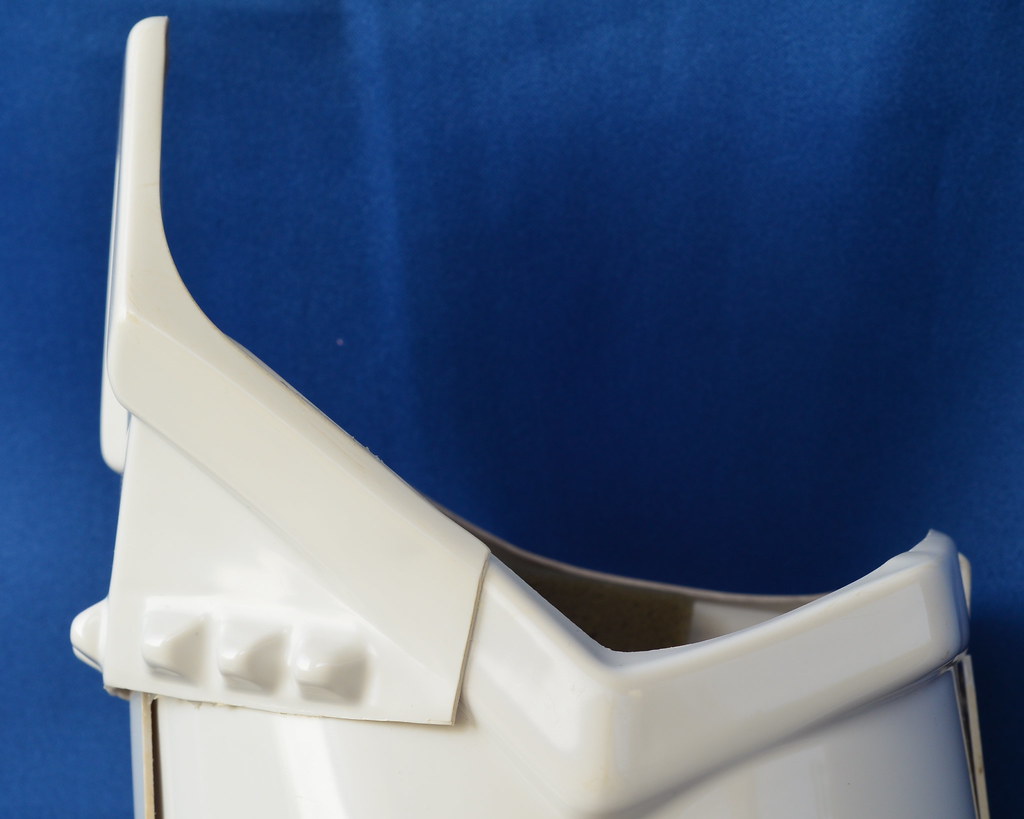
Updated main body receiver with holes:
-
You are a very cool dad. I tried pepakura before. But stopped halfway because I don't know how to make it rigid. Elmer glue does not work out and I am not resourceful enough to have it fiberglass. Congratulation on your build.
-
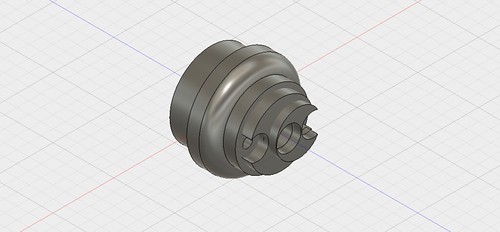
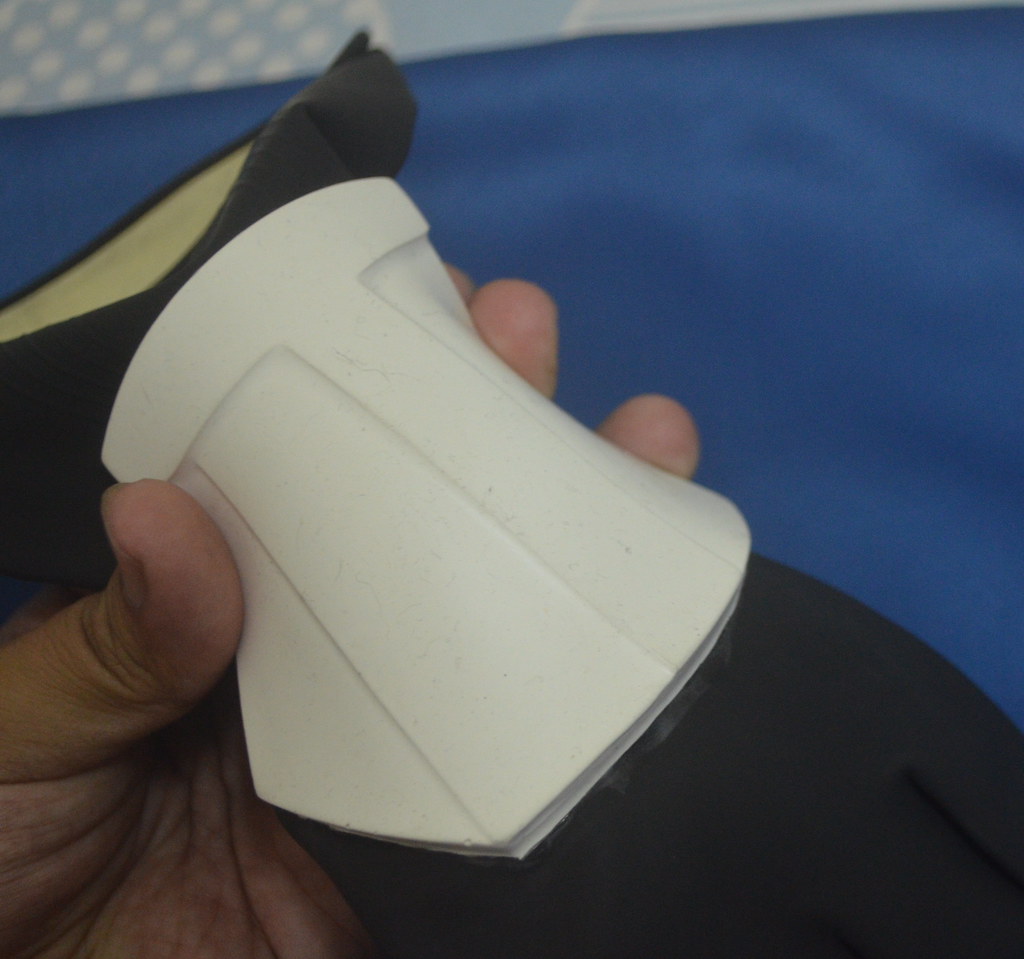
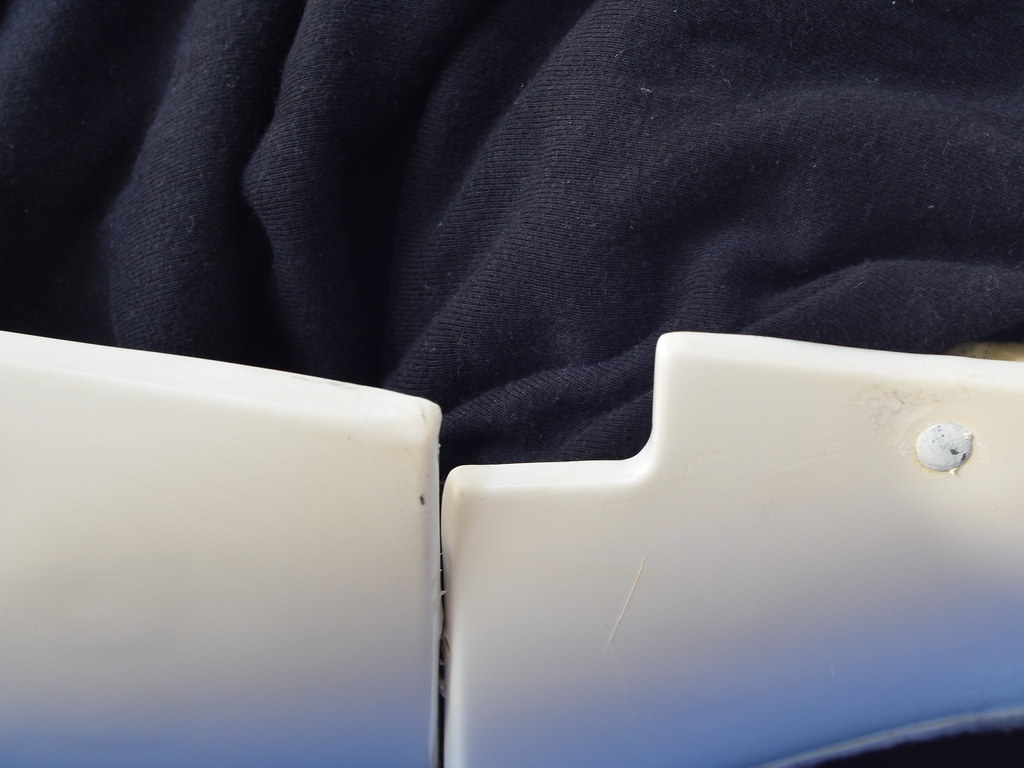
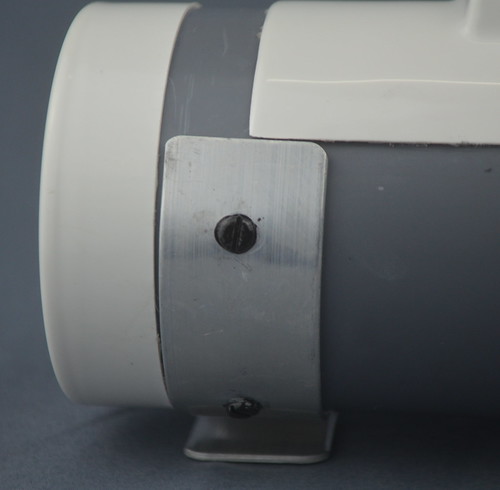
Front cap:
Front cap for PVC pipe with outer diameter, OD 40mm, Inner diameter ID 35mm or smaller.
-
Progress photos:
Power cylinder : Ready
Main body: In progress
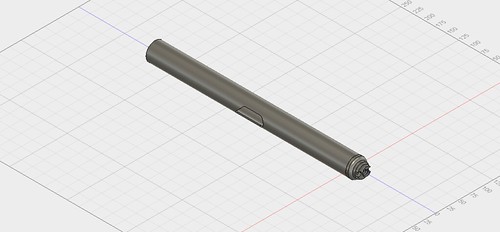
Front cap: In progress
-
Hello, I am currently learning myself Fusion 360 & 3D printing. I am choosing to model my E-11 blaster to understand how Fusion 360 works. My future plan is to have all the component modelled in 3D files and 3D print it. I am sharing the files for my fellow troopers.
My reference thread as below:
1. FISD E-11 BLASTER REFERENCE
2. E-11 PVC Pipe Build Templates (Imperial and Metric)
3. TrainWrecks 3D printed E-11 and T-21 parts.
Parts:
1. Power Cylinder (3D printing: Shapeways/ STL: Thingiverse)
2. Main body (in progress)
3. Front cap (3D printing: Shapeways/ STL: Thingiverse)
4. Bayonet lug (3D printing: Shapeways/ STL: Thingiverse)
5. Rear sight (3D printing: Shapeways/ STL: Thingiverse)
6. Others? Soon....
Note:
1. Accuracy: I am targeting for 70% accuracy for the shape and dimension. I am new to this 3D design/printing. Apology for any inaccuracies.
2. For ordering with Shapeways, I put in $0.00 markup. The price you pay 100% go to Shapeways for making the model.
3. I uploaded the STL files in Thingiverse . You can download it and print with your own 3D printer.
-
1
-
-
Looking good. Good luck in your application.
Sent from my M631Y using Tapatalk-
1
-
-
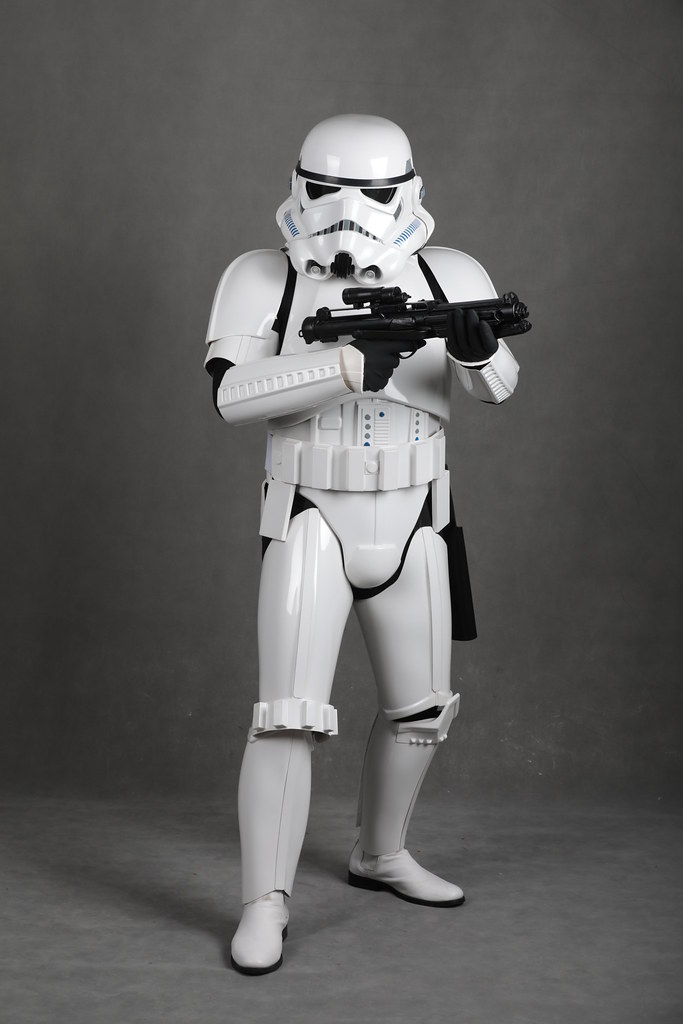
11 hours ago, ukswrath said:Hey Syahrin welcome back. Thank you for your Centurion application.
CRL and Centurion Application Requirements:
All required submission photos are present. Thank you for updating your hovi tip mesh mentioned during your EIB application, very nice. Outstanding job on your build
 . Andrew and I would like to welcome you to Centurion. Great job
 Other-Armor Fit/Assembly:
We have nothing to add here
Time to get out there representing the Empire as its newest Centurion
Thank you Tony.
11 hours ago, lucnak said:Congrats on Centurion!
Thank you Luc.
10 hours ago, gmrhodes13 said:Congratulations trooper
Thank you Glen.
9 hours ago, Frank75139 said:Nice job!
Sent from my iPhone using TapatalkThank you Frank.
This is a great news to me and Malaysia Garrison. Feeling proud.
-
9 hours ago, Shanester said:
VERY nice attention to detail here trooper. Good luck!
Thank you Shane.
-
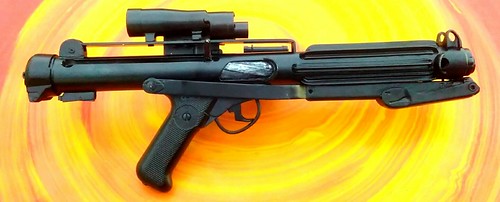
Name: Ahmad Syahrin
501st ID: TK-18004FISD Forum Name: Ayen_s
Garrison: Malaysia Garrison
501st Member Page: https://www.501st.com/members/displaymemberdetails.php?userID=22210
EIB Application Page:Mandatory Information:
Armor Maker: Anovos
Helmet Maker: Anovos
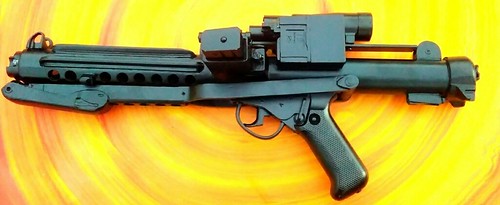
E-11 Blaster: Doopy DoosOptional Information:
Height: 5'5" (165cm)
Weight: 165 pounds (75kg)
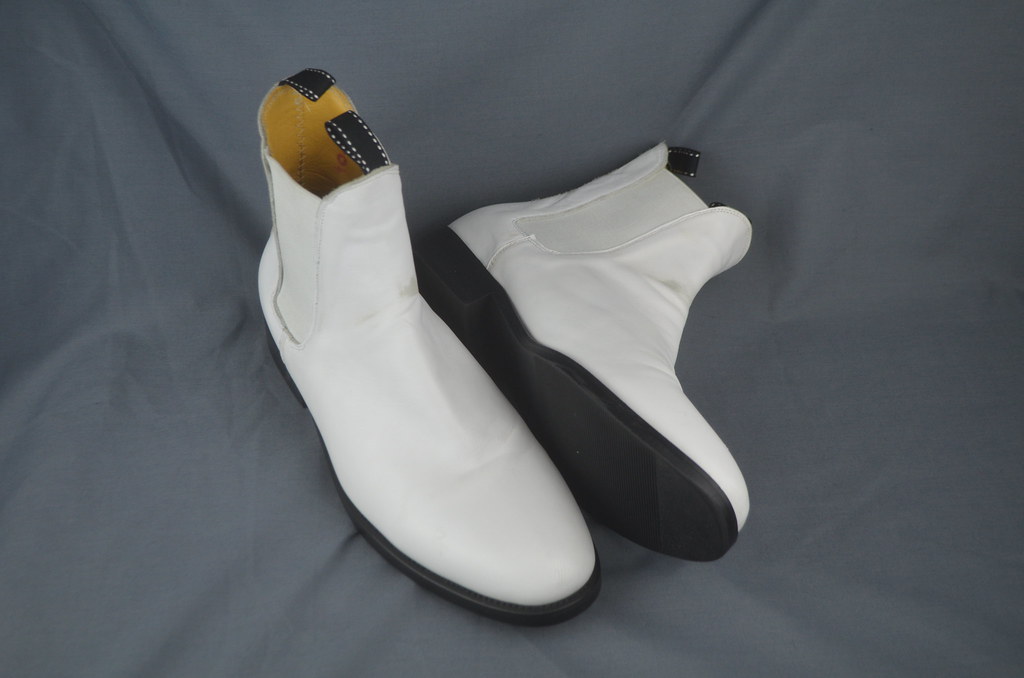
Boots: Imperial Boots
Canvas belt: I made my own
Hand Plates: Trooperbay
Electronics: Fan
Neck Seal: Anovos
Holster: AnovosFull Body
Front–Arms at side
Back–Arms at side
Left–Arm raised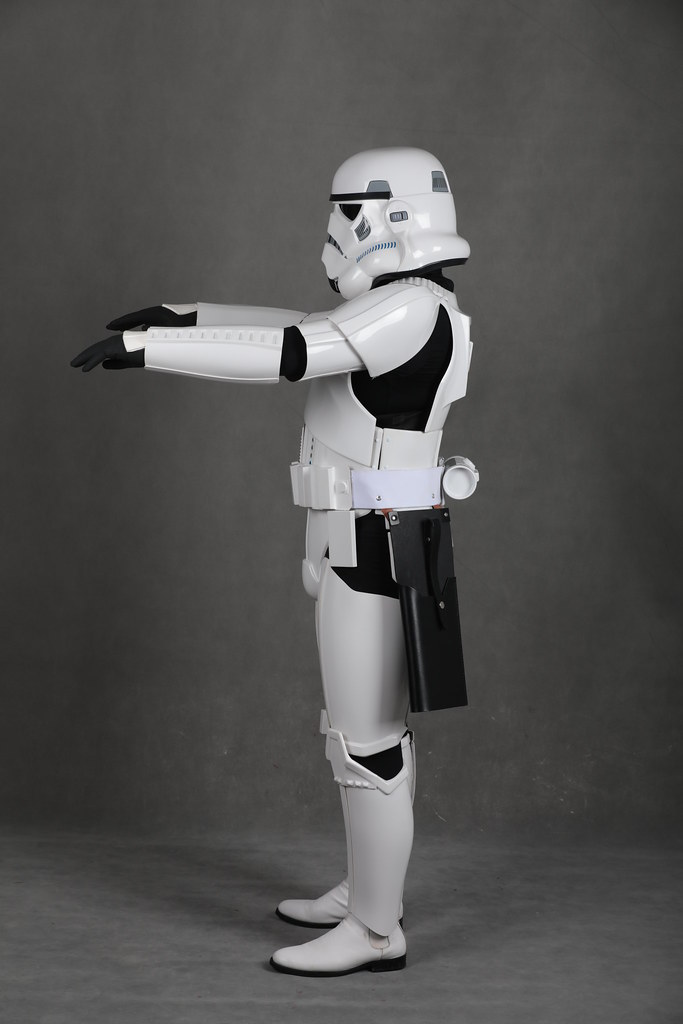
Right–Arm raised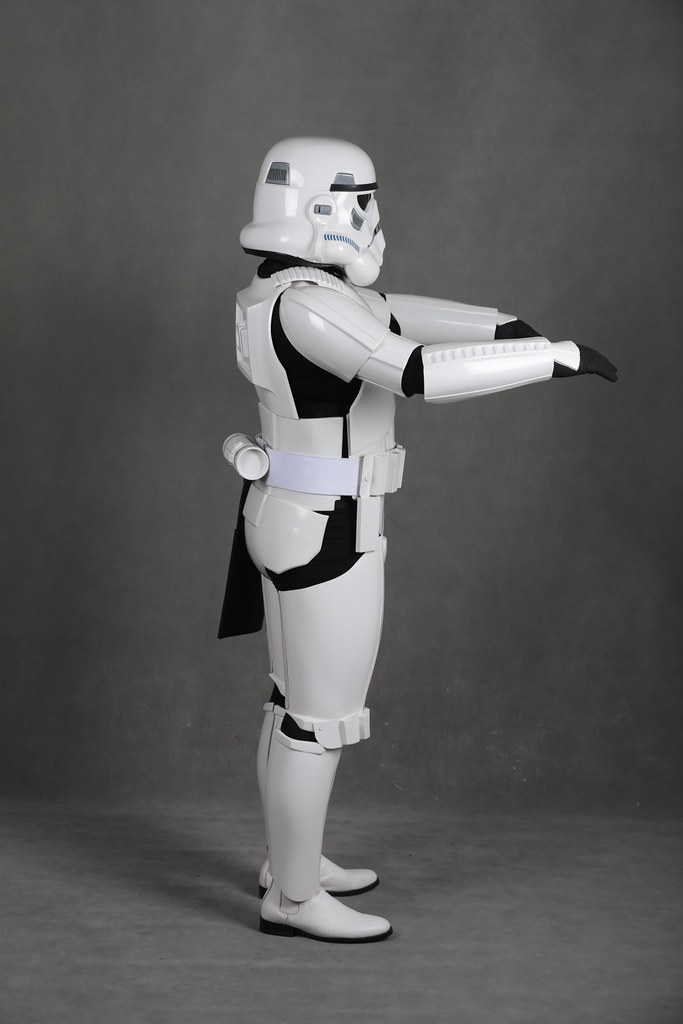
Left Detail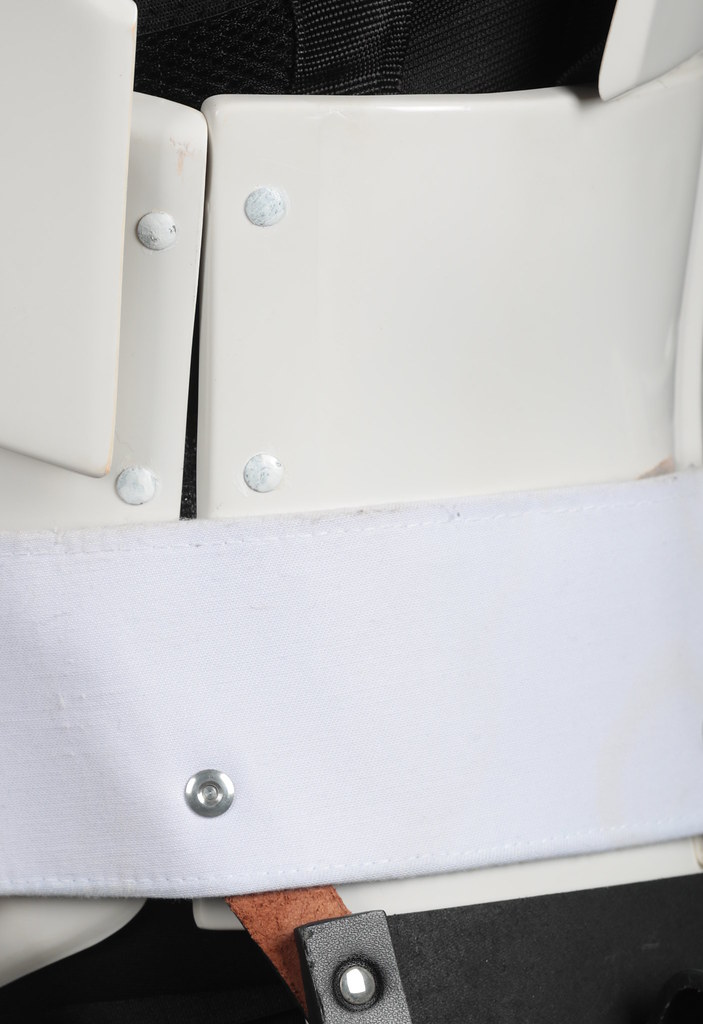
Right Detail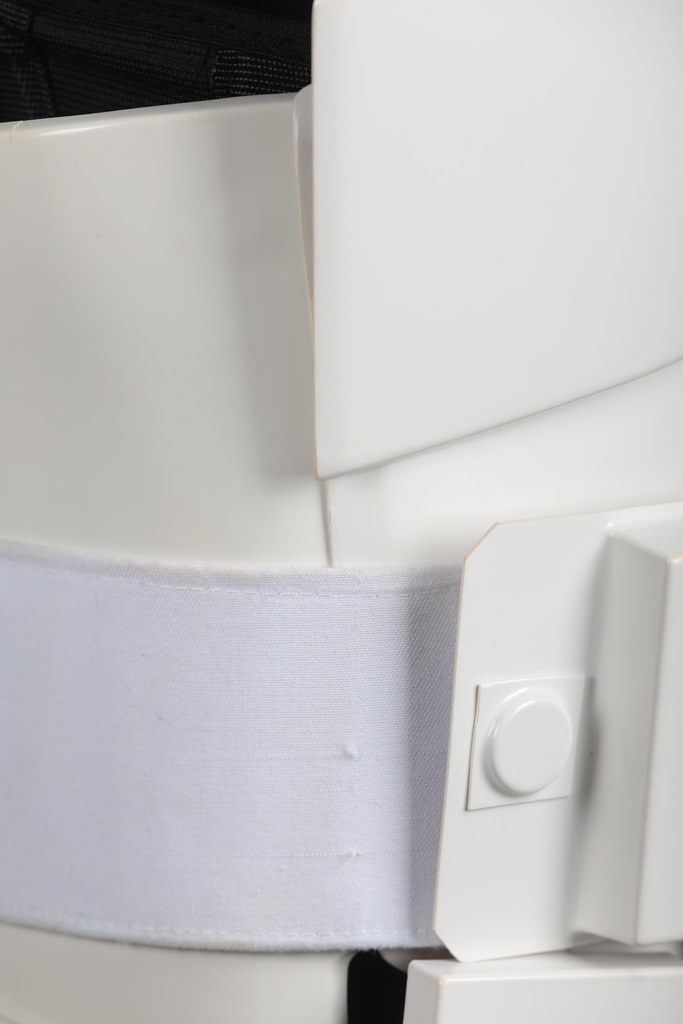
Action Pose
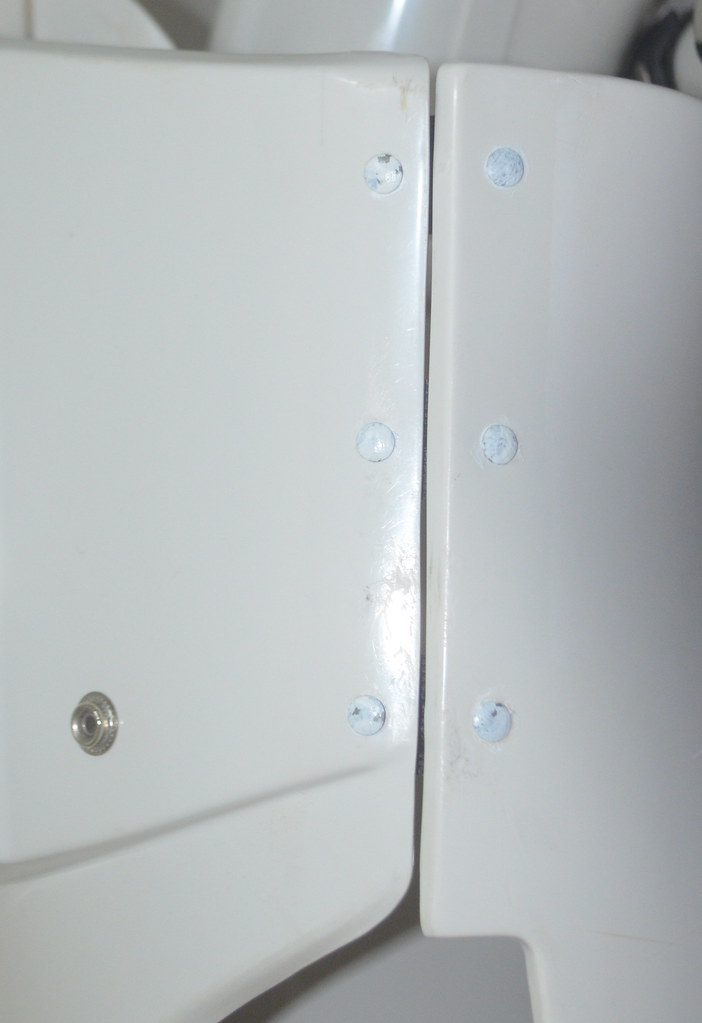
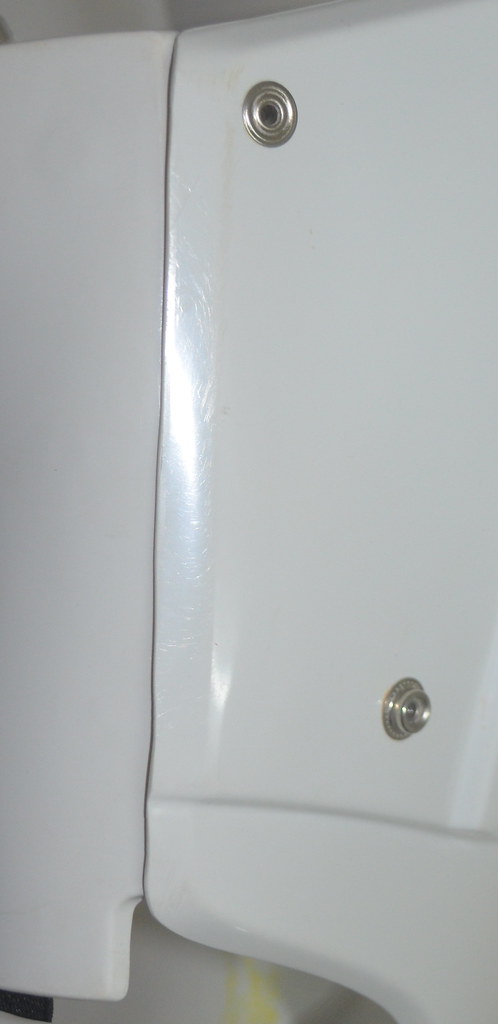
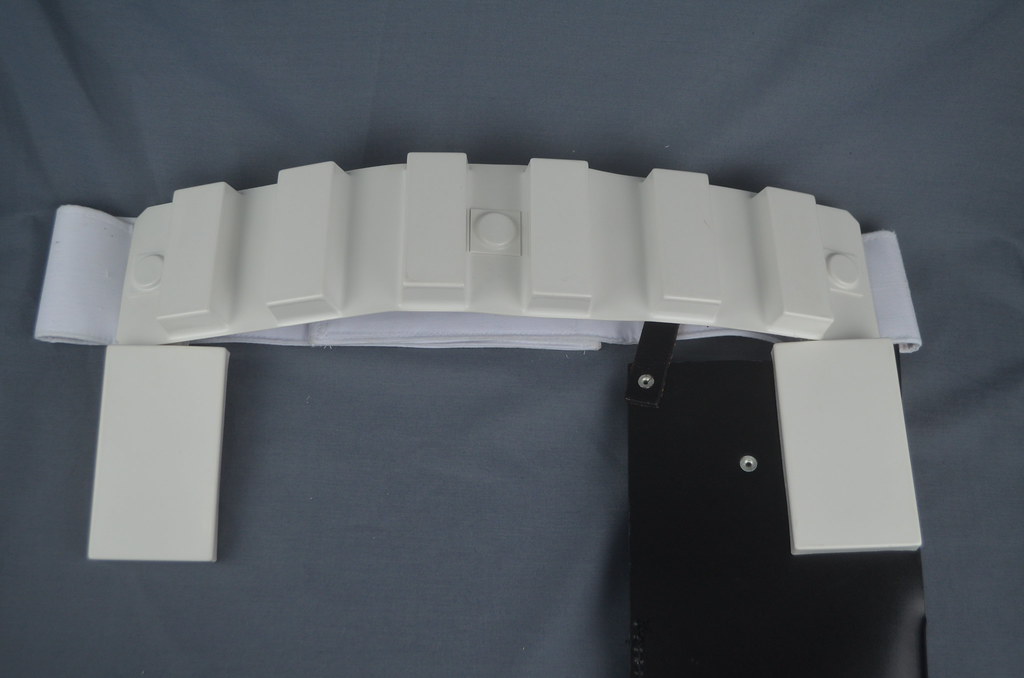
Armor Details
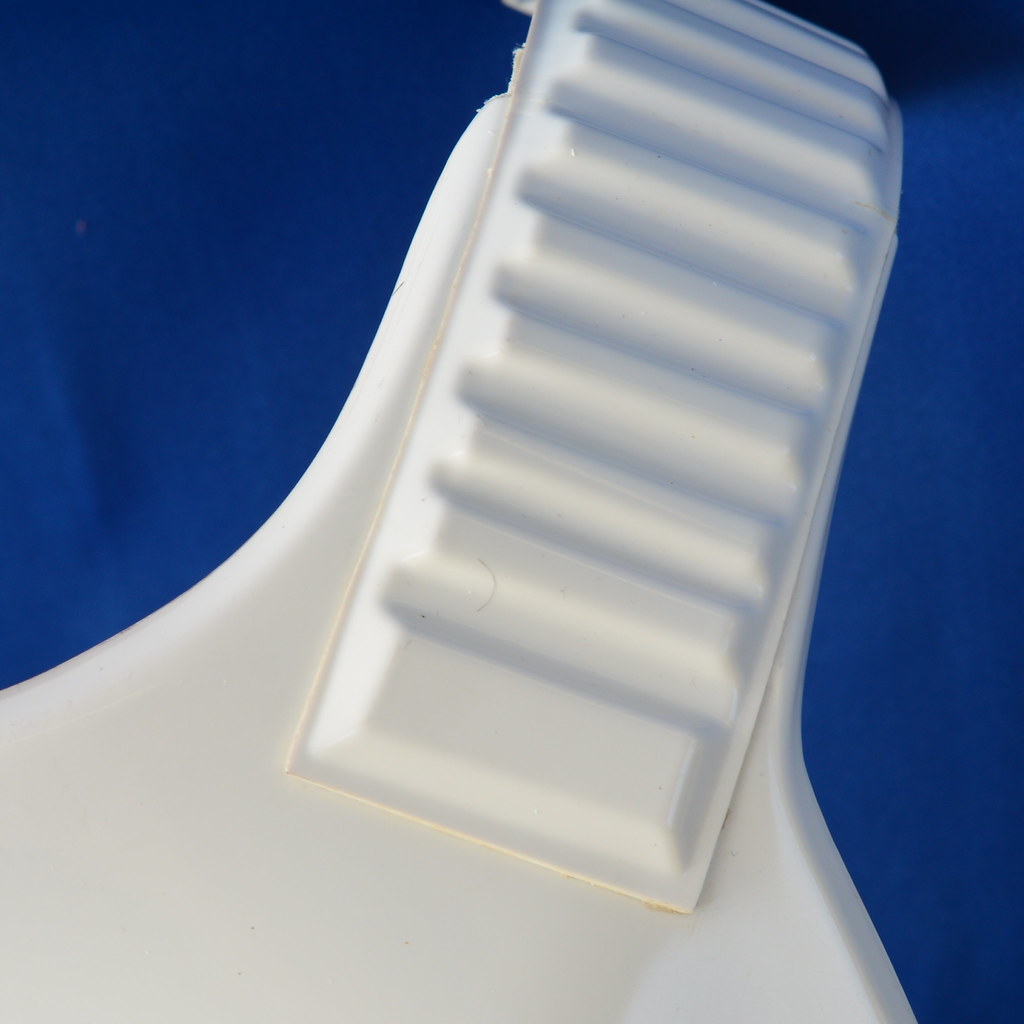
Button Orientation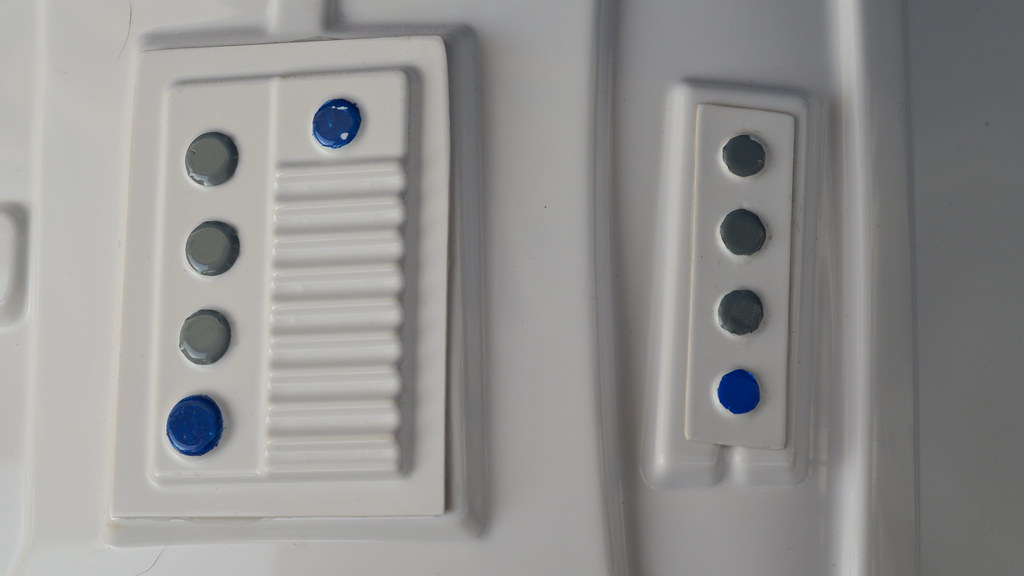 [/url]
Hand Plates
Shoulder Bridge Back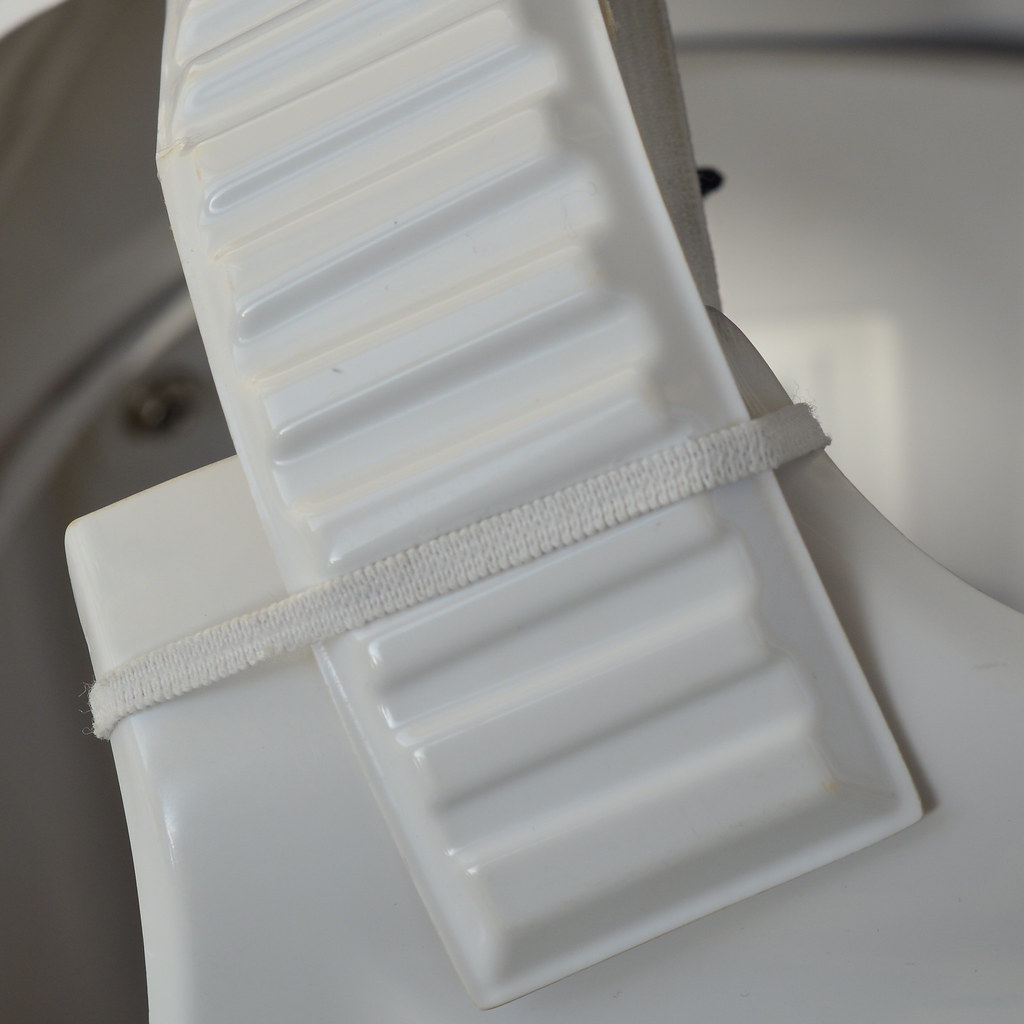
Shoulder Bridge Front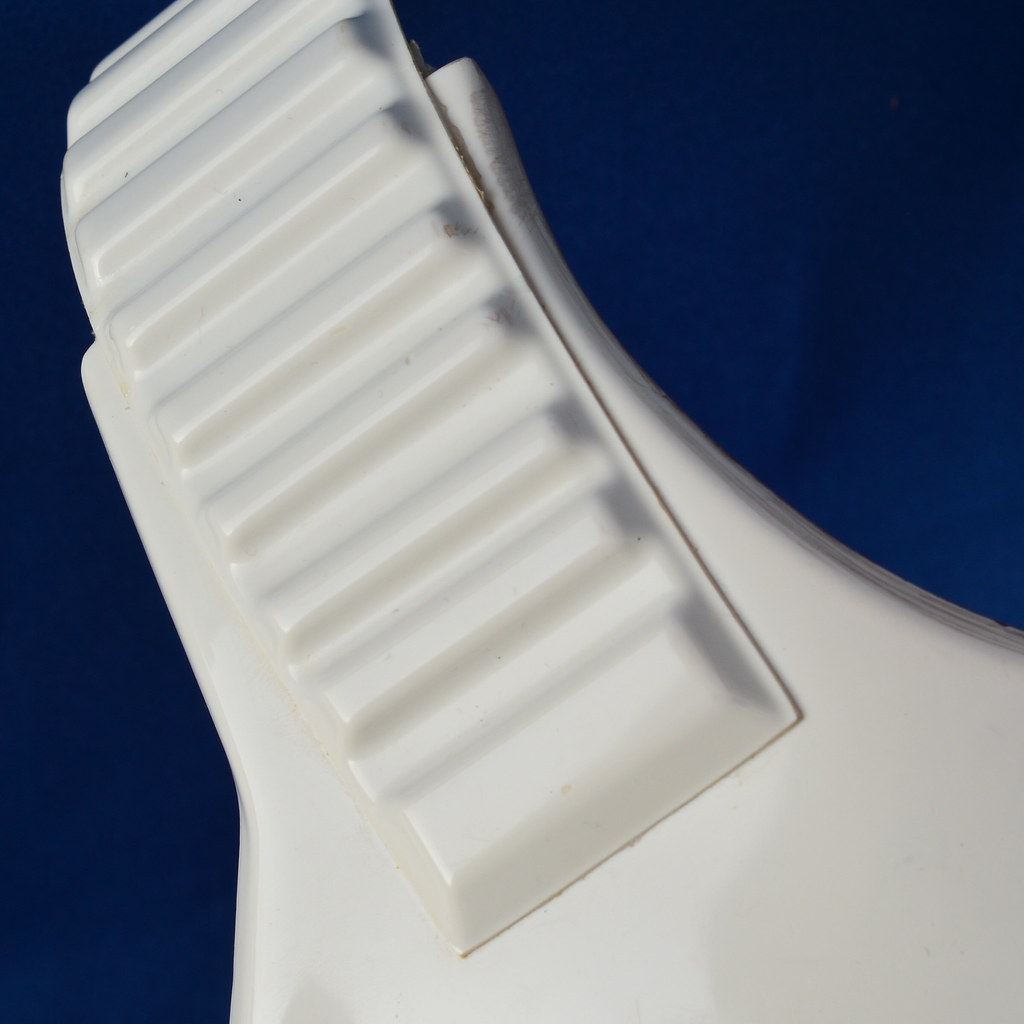
Back/Chest Connection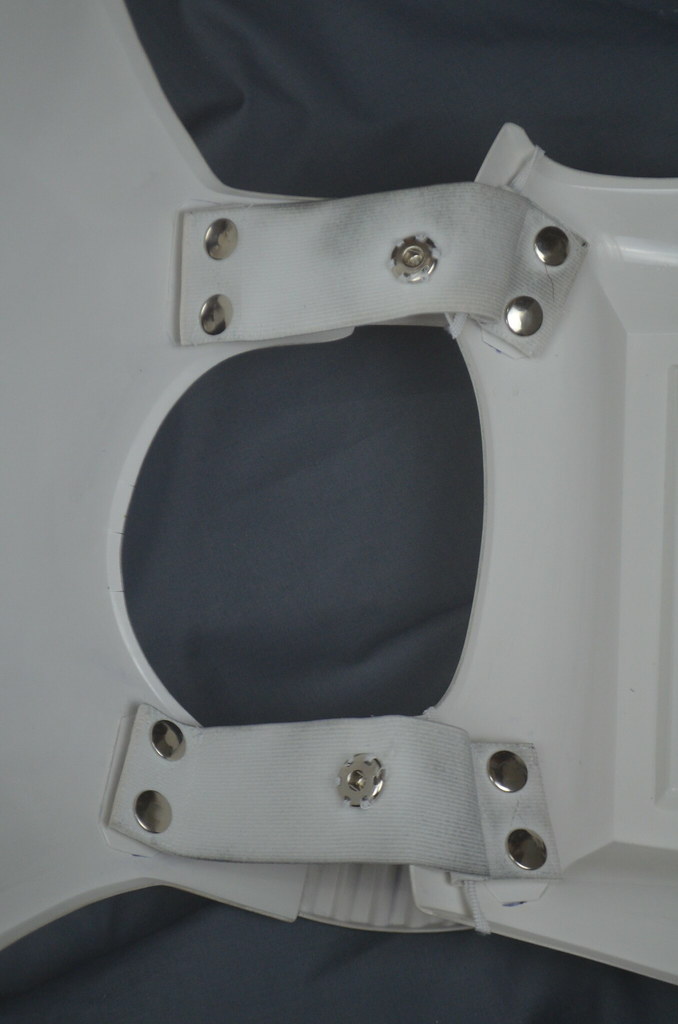
Thigh Pack Attachment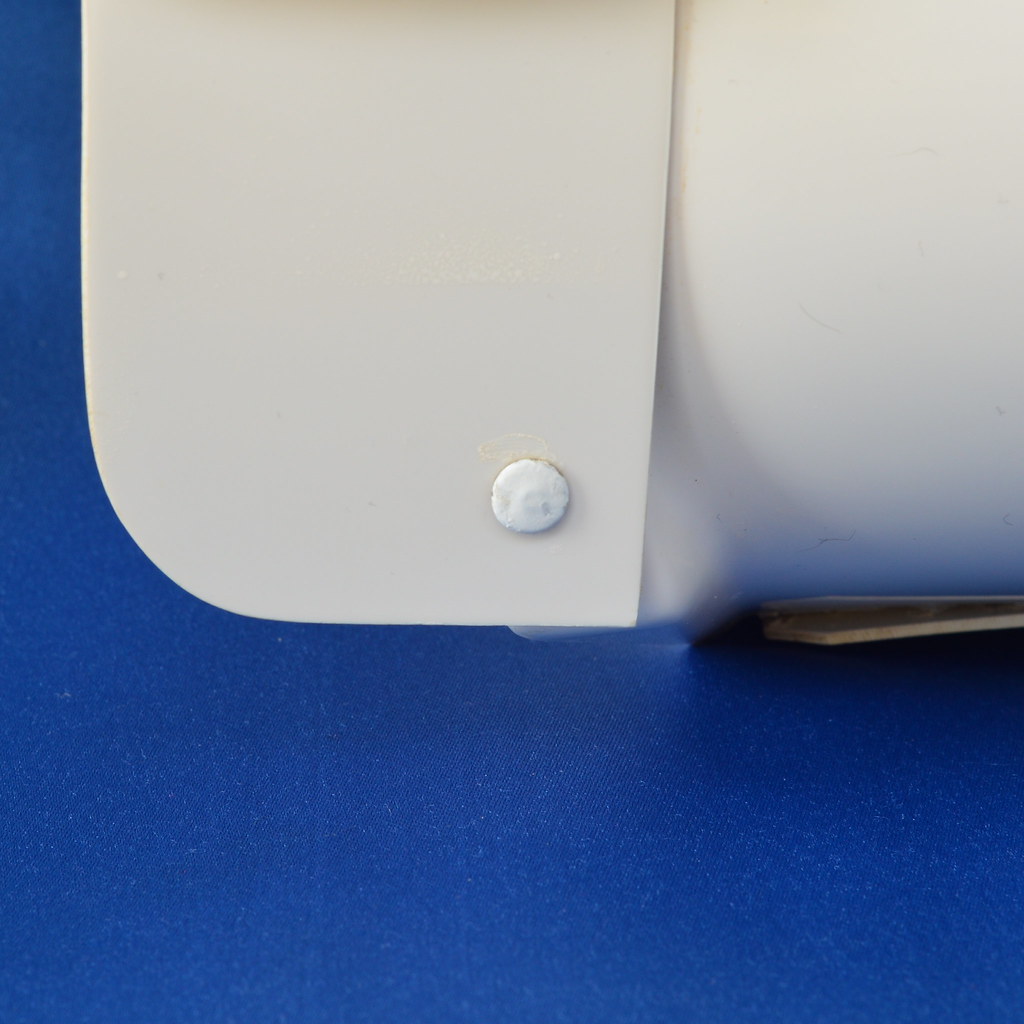
Knee Plate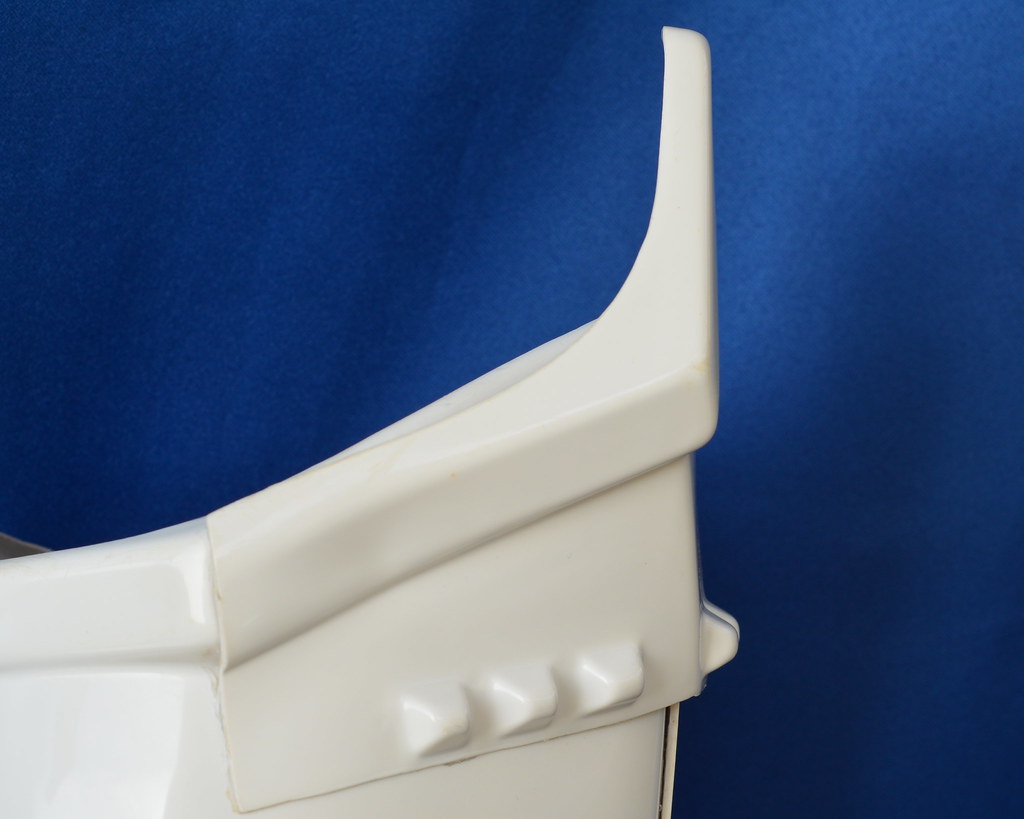
Drop Box Back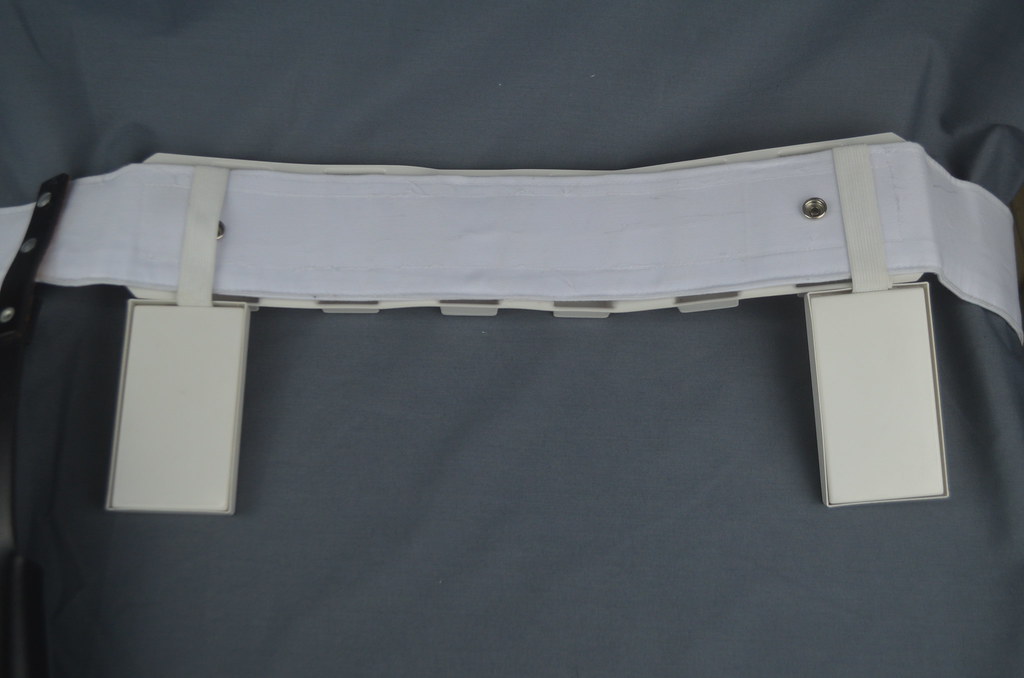
Interior Strapping
Kidney Plate Notch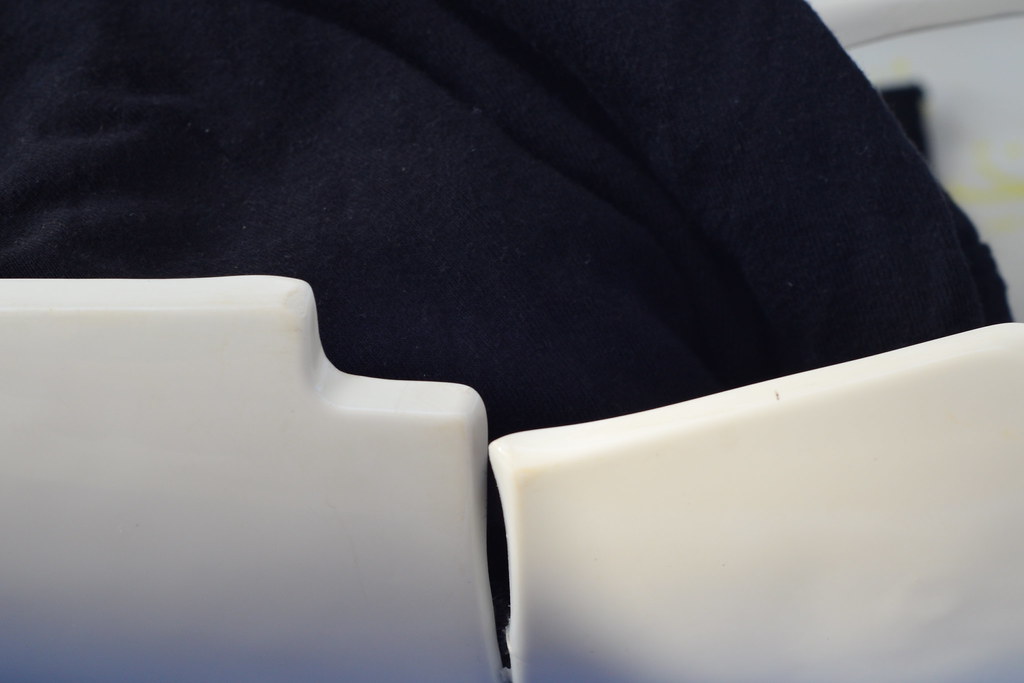
Wrist side of forearms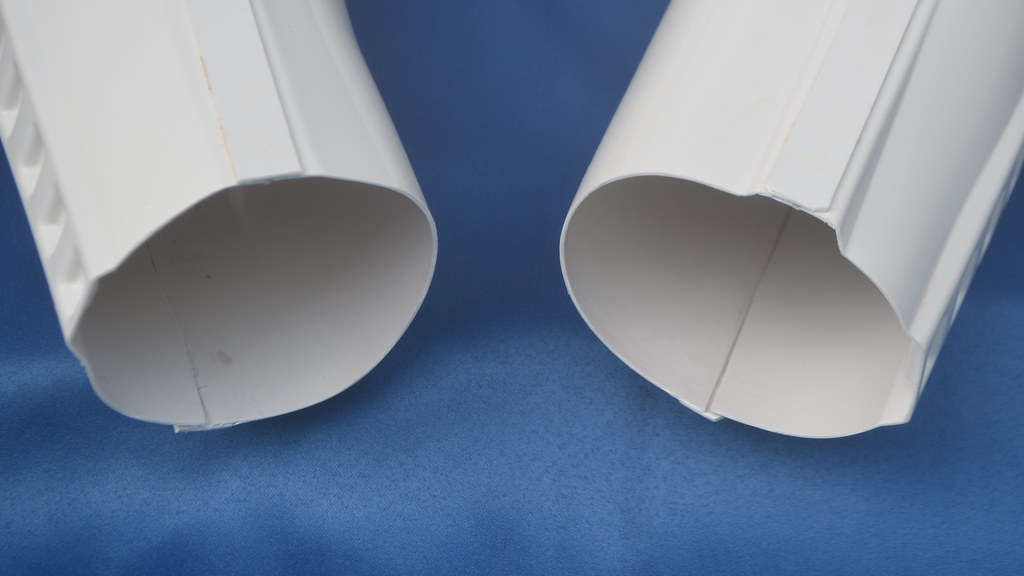
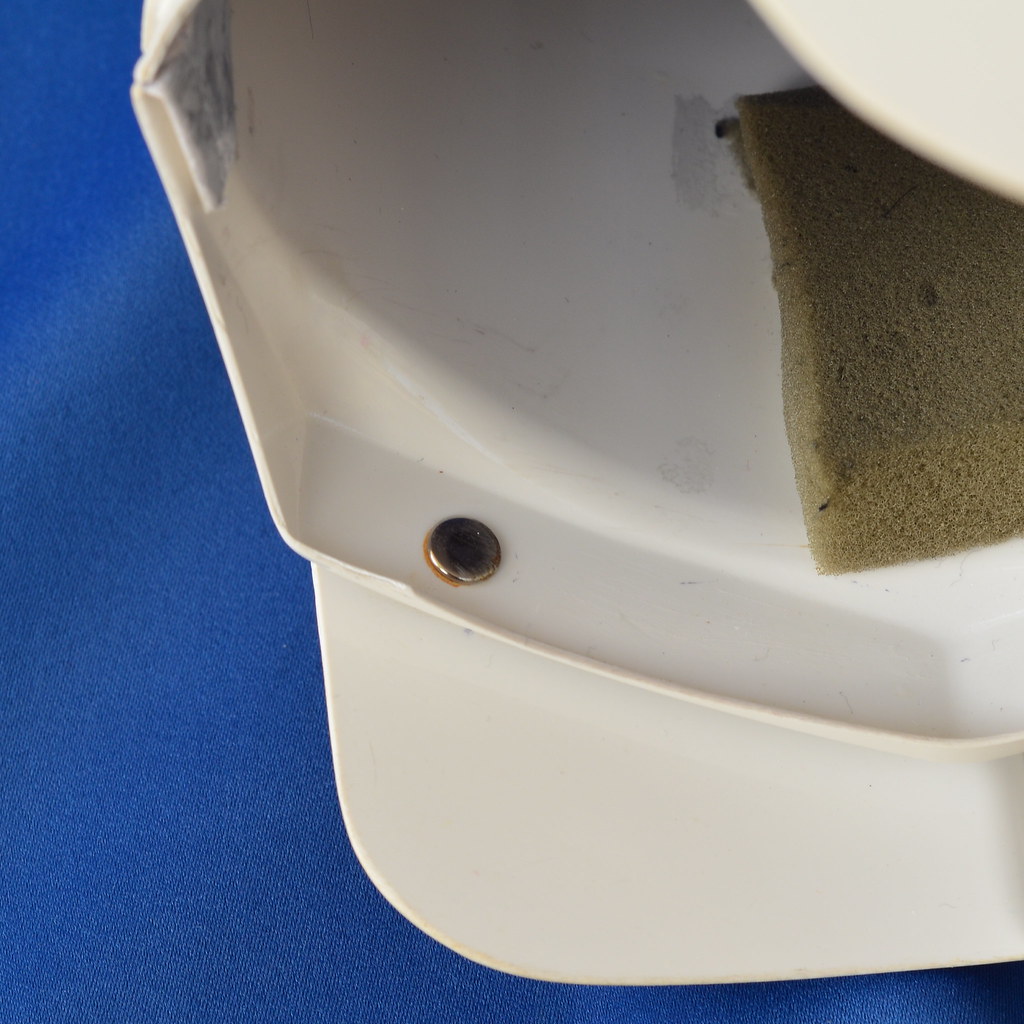
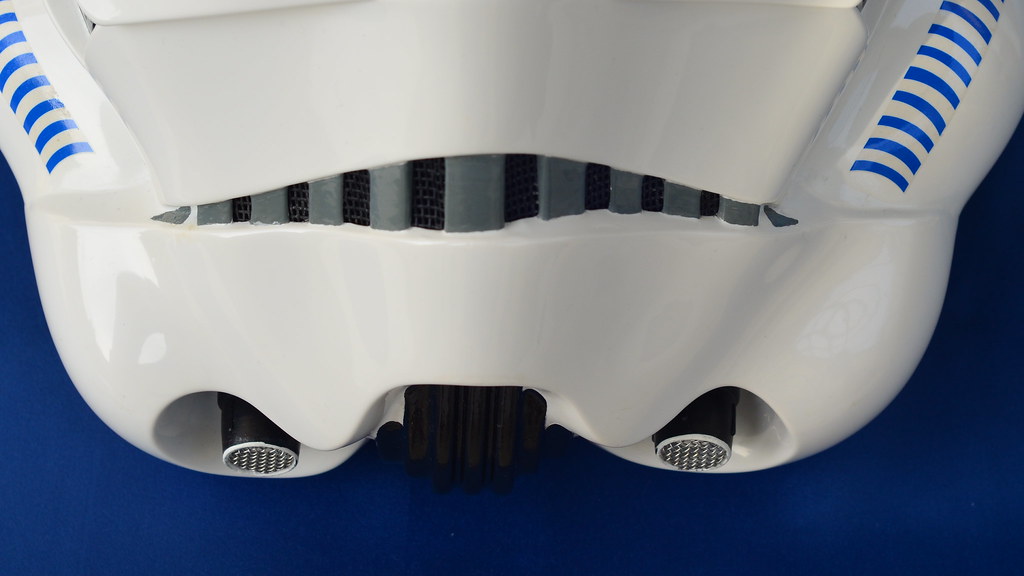
Helmet Details
Front
Left
Right
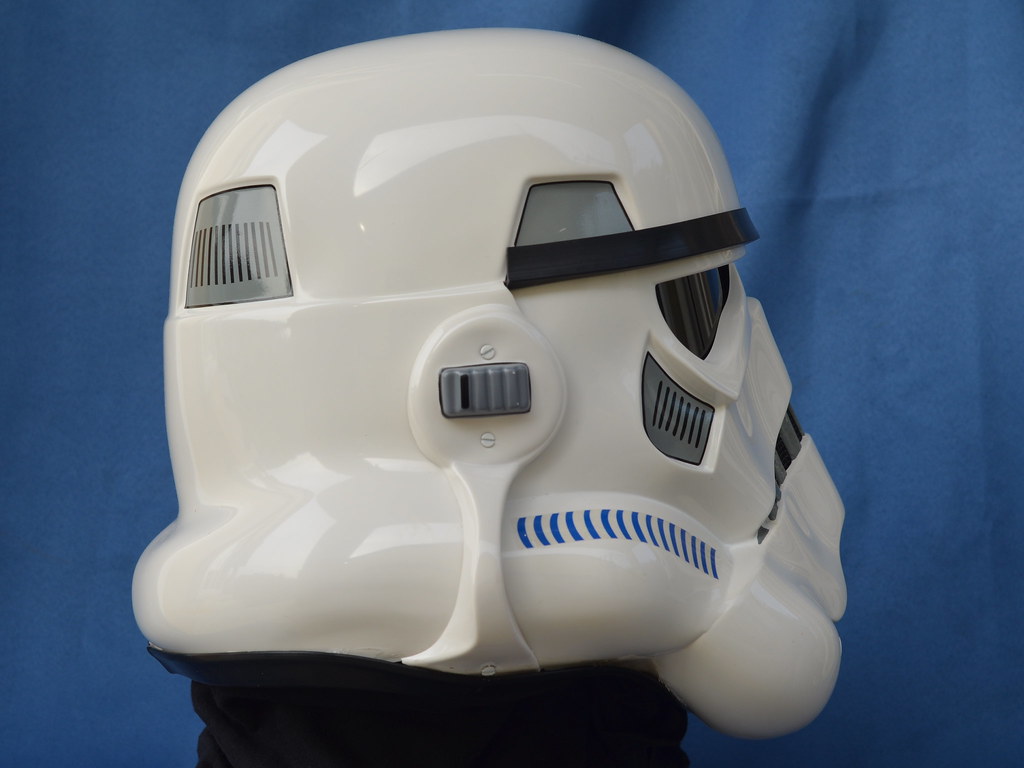

Back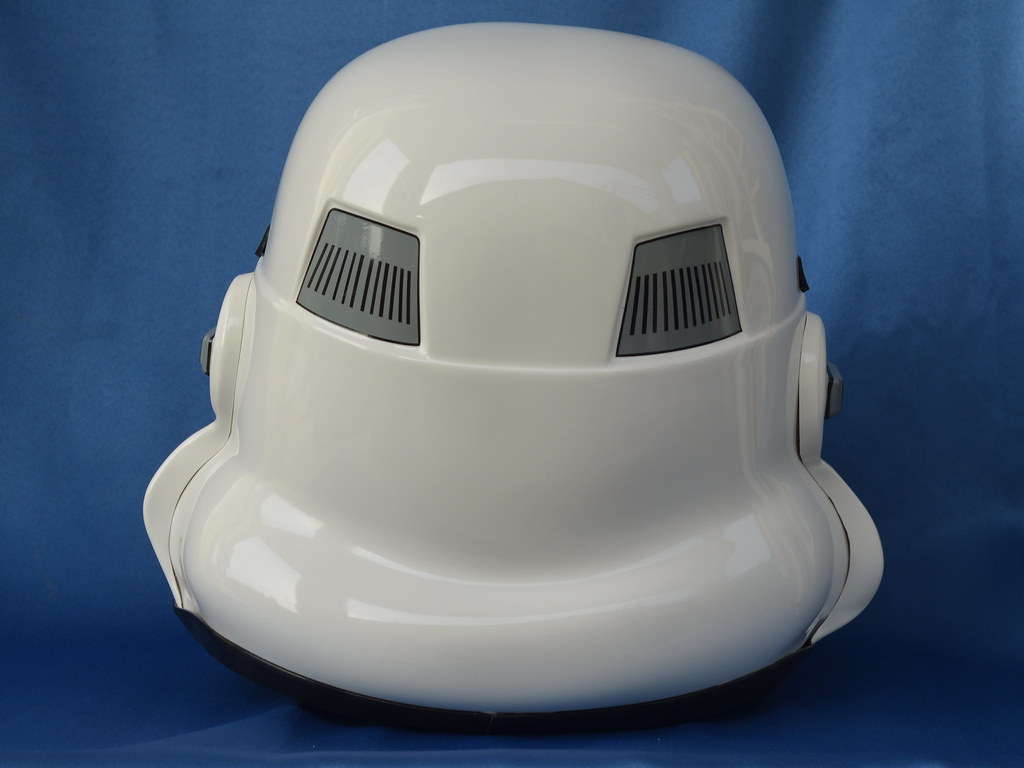
Hovi Mic Tip Detail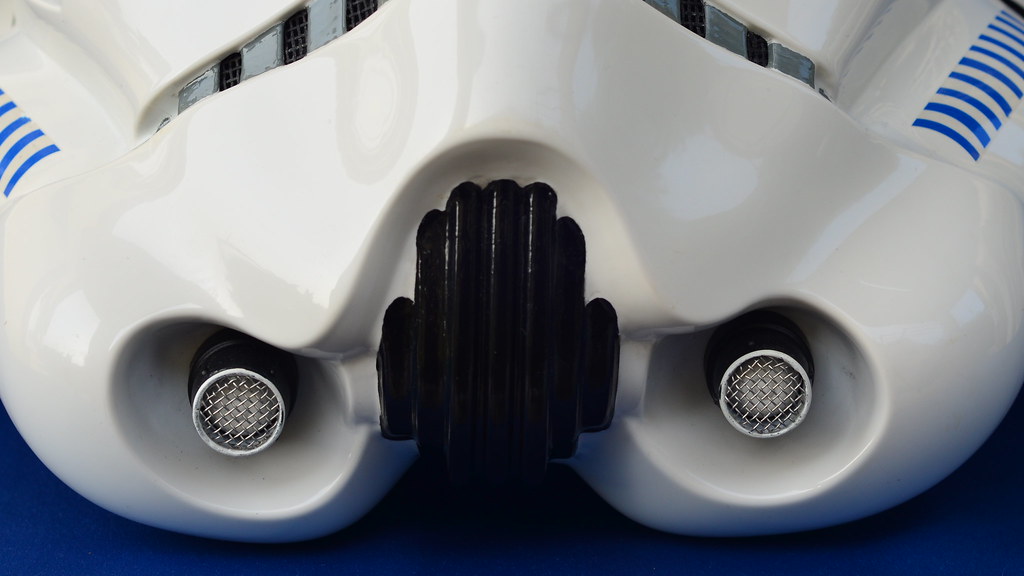
Lens Color (Backlit if required)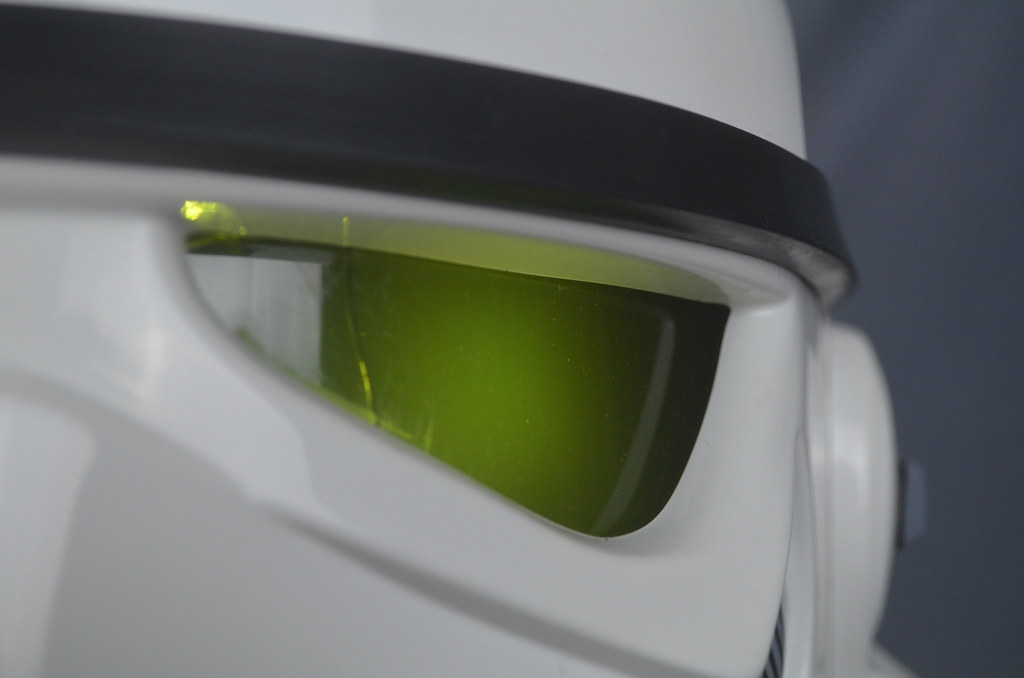
S-‐Trim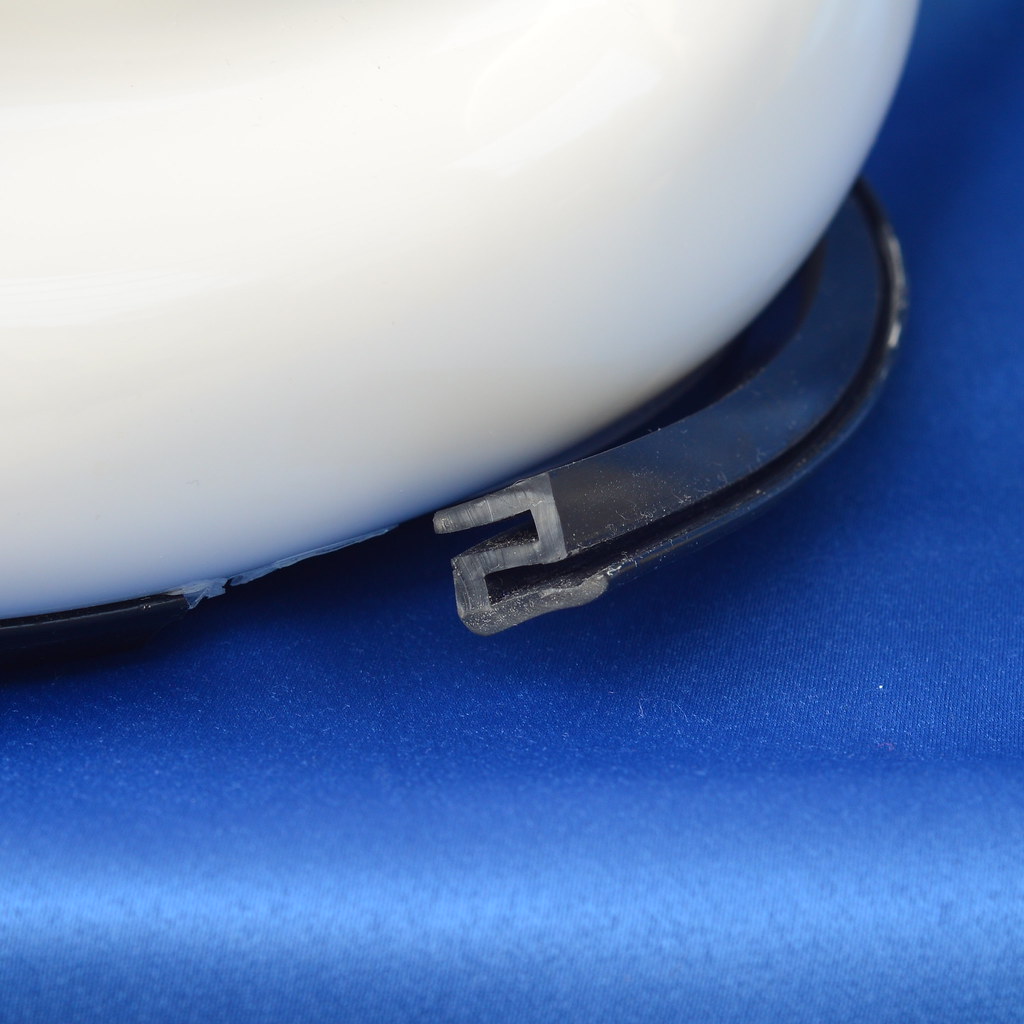
Blaster Details
Blaster–Right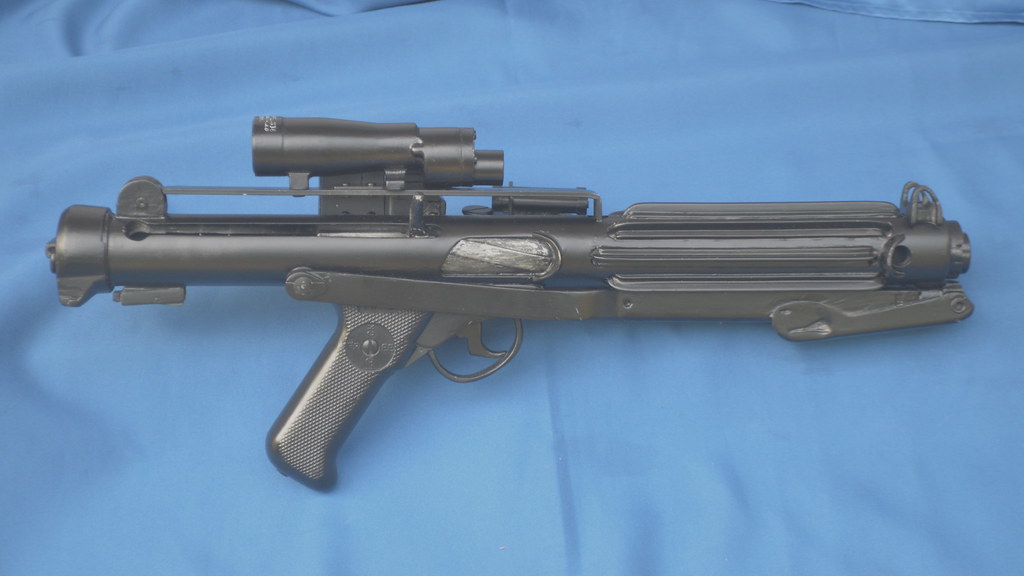
Blaster–Left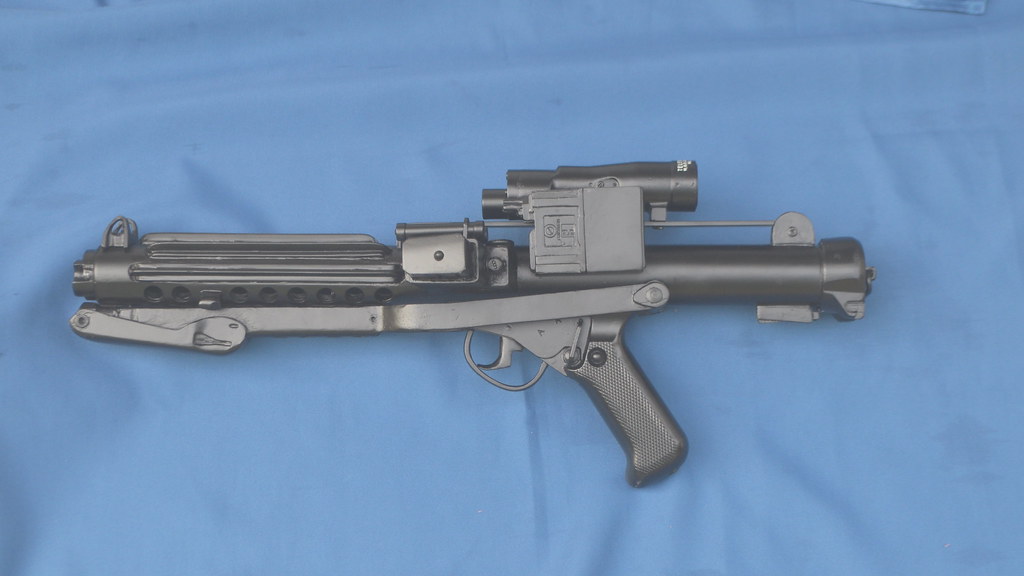
D-Ring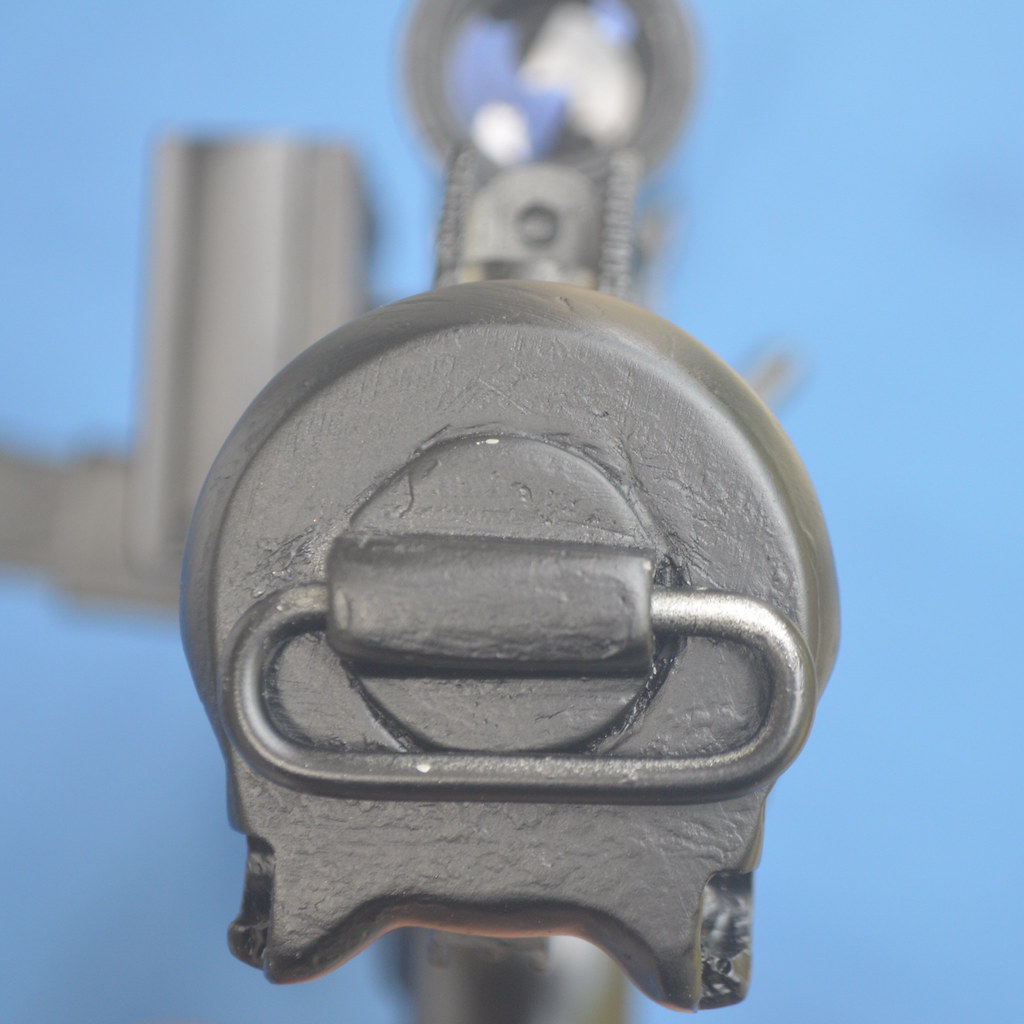
Accessories Details
Neck Seal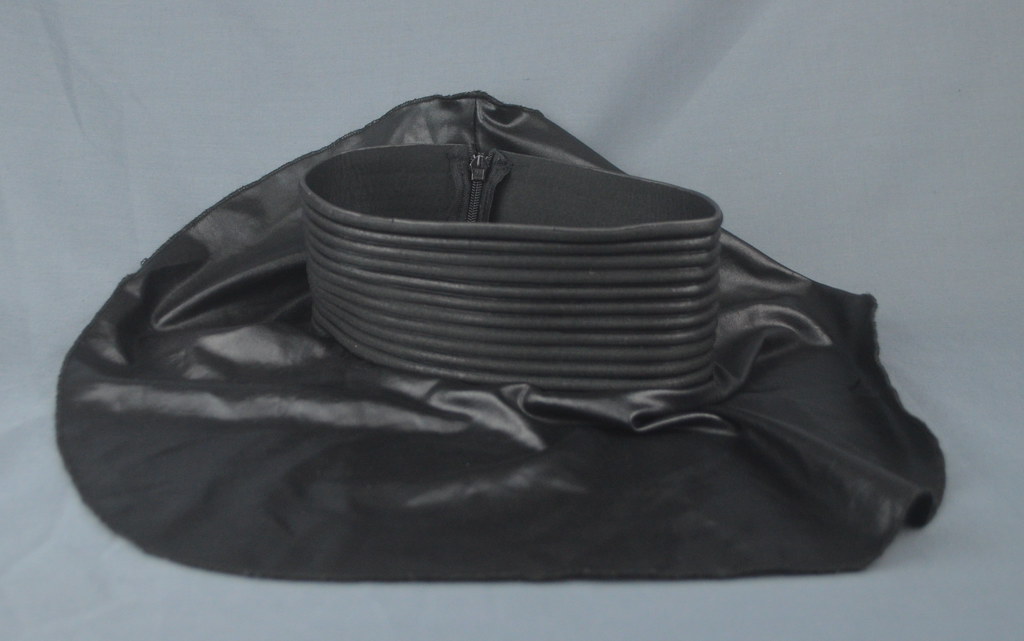
Thermal Detonator Back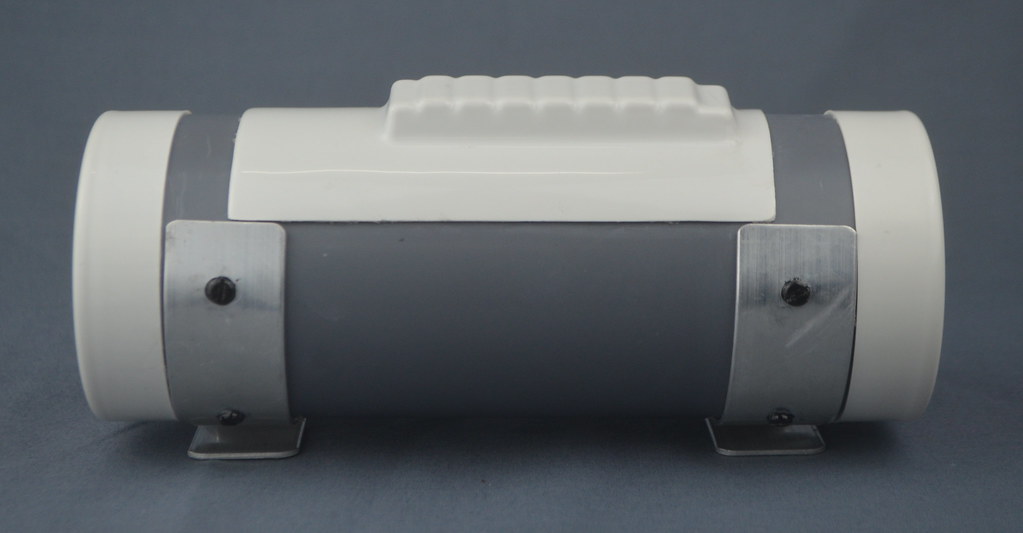
Holster Attachment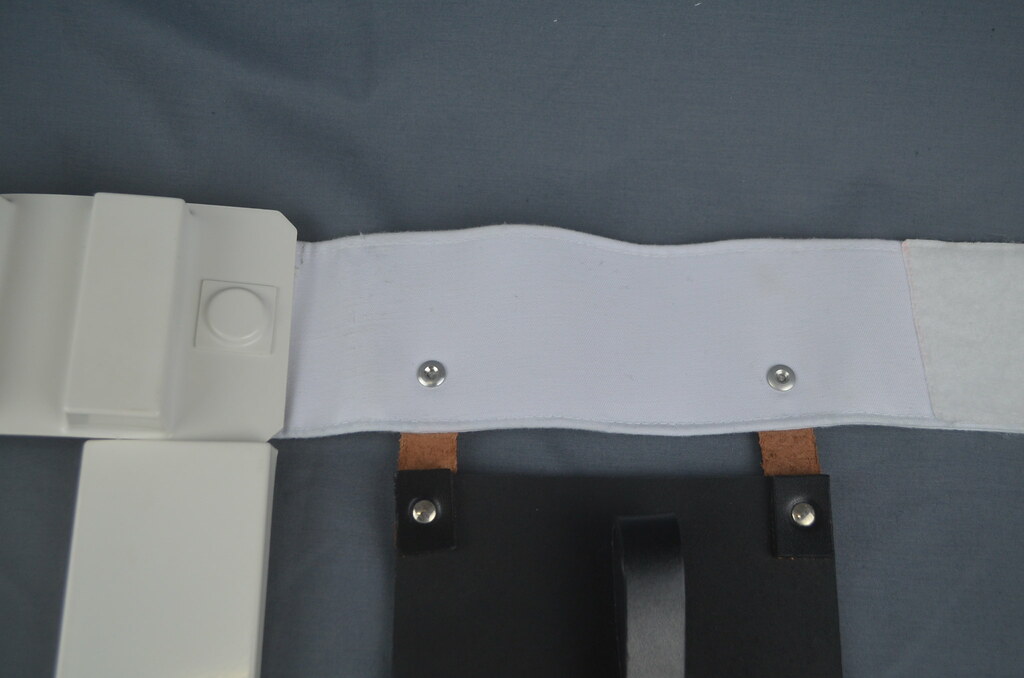

Boots
-
Good job Chris. I only plan to fit my Electronic only in the Hengstler. You are right that resin body Doopy doos inside are to small for putting in Electronic.
Sent from my M631Y using Tapatalk -
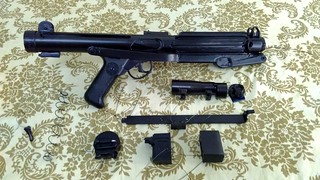
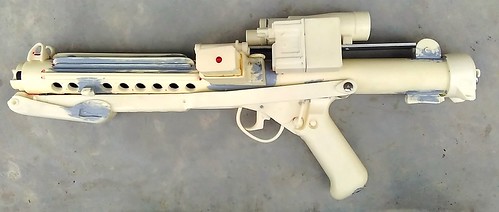
Reassemble after painting:
I love how the hollowed scope turn out.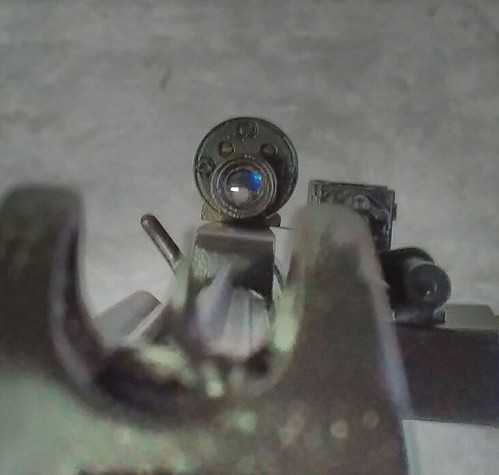

Sent from my M631Y using Tapatalk -
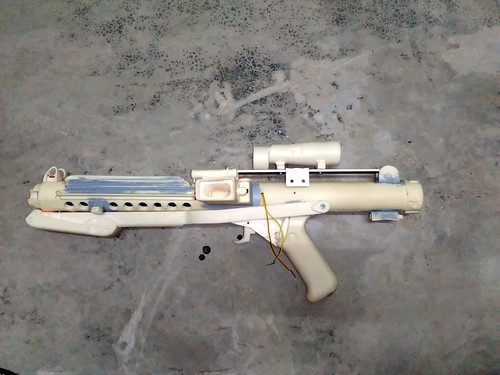
Painting stages:
First layer, grey.

Second layer, silver.
Third layer, black.
-
3
-
-
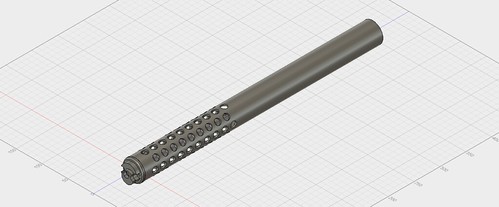
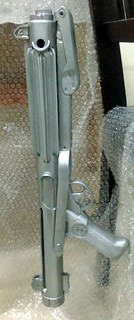
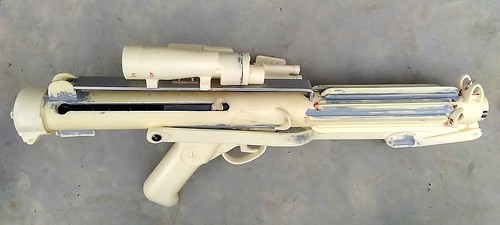
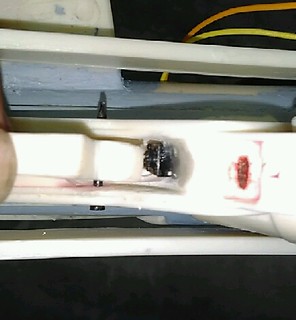
Folding stock:
Cover the screw with thumb tack.
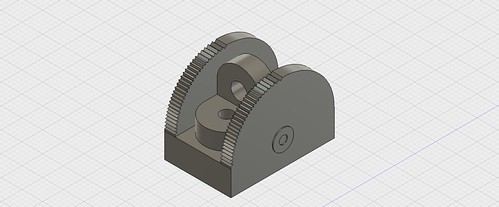
Hengstler:
I used magnets to make the internal accessible. I will put electronic inside it later.

Charging bolt handle:
I use magnet and tie nylon string to the handle.
Assembly picture before taking apart for painting:
-
2
-
-
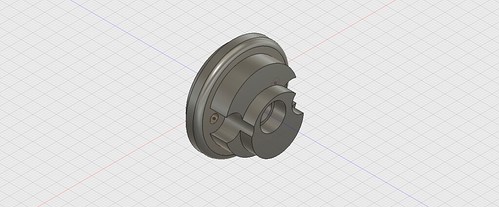
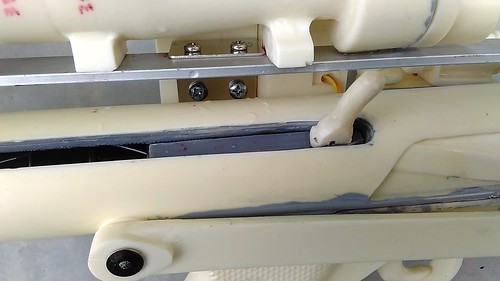
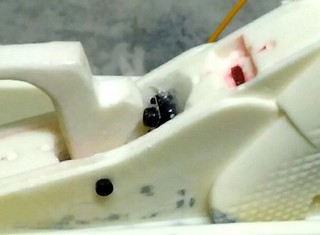
Scope rail:
Added support elbow for hengstler counter.
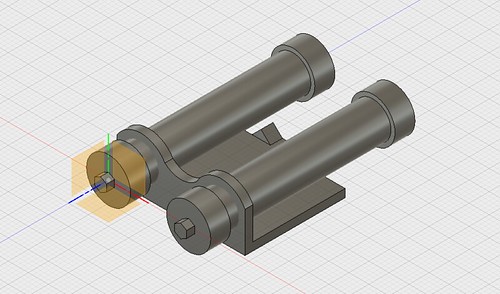
Trigger:
Added micro switch and wiring. I glue the switch using E6000. Route the wiring to barrel hole adjacent to hengstler.
-
2
-
-
Good luck.
Sent from my M631Y using Tapatalk
justjoseph is still alive..
in Announcements
Posted
Welcome back Joseph
Sent from my iPhone using Tapatalk Pro