

WhiteWalker
-
Posts
280 -
Joined
-
Last visited
Content Type
Profiles
Forums
Gallery
Articles
Media Demo
Everything posted by WhiteWalker
-
Mkjava's Anovos ANH Stunt Build
WhiteWalker replied to WhiteWalker's topic in Build Threads Requireing Maintenance
Oh no worries Ken and thank you for taking the time to work with me yesterday. I just wish I had more time to work on this stuff but sadly life keeps getting in the way! The biceps are together though and home drying now so that's another step closer. I figure I can clean up the edges on the shoulder bells now and maybe velcro up the shoulder - bicep - forearm pieces to see how those look and fit. I'm just happy to be working at a pace between 'finished it in a week' and 'haven't taken it out of the box yet!' -
Mkjava's Anovos ANH Stunt Build
WhiteWalker replied to WhiteWalker's topic in Build Threads Requireing Maintenance
Hey Ty, that reminds me, I want to get your thigh garter system, everyone raves about it! -
Mkjava's Anovos ANH Stunt Build
WhiteWalker replied to WhiteWalker's topic in Build Threads Requireing Maintenance
Armor party on Sunday just for us Anovos folks and there were only a couple of us in attendance so lots of individual attention. I was able to get my biceps, thighs, and shins sized, and the consensus on the shins was 25 and 28 were the left leg and 24 and 27 were the right leg, at least for me. I just need to do a little more sanding and I can start assembling these items I also had the chance with help from a friend this weekend to try and fit all of the torso armor. Excuse the insane tape job in places, not sure what my friend was thinking there! It's tough to tell with just tape but I think that once I get the return edges trimmed down I should be able to mostly close the gap between the back and kidney. As for the gap between the kidney and ab, I'm thinking I may end up with a gap of about 1" maybe a bit more when things are actually together. Some advice here would be helpful, should I trim up my return edges and begin the assembly process for these parts before thinking about shims? I plan to start with the Anovos strapping since I've got it already, and then over time switch out for snaps. My thoughts are this would give me flexibility to adjust things as needed and see if additional trimming or shims are needed. -
Mkjava's Anovos ANH Stunt Build
WhiteWalker replied to WhiteWalker's topic in Build Threads Requireing Maintenance
Also, thermal detonator done. Boom!! Next up is an armor party on Sunday where my goal is to get biceps, thighs, and shins sized, trimmed, and ready for assembly. Sent from my iPad using Tapatalk -
Mkjava's Anovos ANH Stunt Build
WhiteWalker replied to WhiteWalker's topic in Build Threads Requireing Maintenance
Forearms assembled! Here's the process: 1: Started by using scrap strips of ABS from the trimming as inside cover strips. I thought doing this first would make it easier to hold the pieces together when attaching the outer strips: 2: Assembling the 2 halves by gluing to inner cover strips: 3: Glued the outer cover strips and behold the finished product (still need a touch of cover strip trimming but that's easy): Sent from my iPad using Tapatalk -
Mkjava's Anovos ANH Stunt Build
WhiteWalker replied to WhiteWalker's topic in Build Threads Requireing Maintenance
Good advice, I'll put on the undersuit (which I have) before committing to any glueing! For someone new at this such as myself, there's a paranoia in cutting too much off since you can't put it back once it's gone. Right now I can slide my hand through the opening when i draw my fingers together. It's not tight, but it's not loose either. I certainly don't want the Popeye look but I figure if it feels a little loose some foam padding on the inside will alleviate that. -
Mkjava's Anovos ANH Stunt Build
WhiteWalker replied to WhiteWalker's topic in Build Threads Requireing Maintenance
I was back on this again this weekend as I relocated to the garage for my work (kicked out of the dining room, totally unfair!). Here's the new setup and the additional tools and items in use now: The glue, magnets, tape, sandpaper were all Home Depot purchases. Yes you can find the rare earth magnets at HD for an 'attractive' price! :-D The Dremel was a Christmas gift from my wife to help with my build, but since I'm not really experienced with using it I'm a little hesitant to learn my skills on my armor. We'll see on that. Since I don't own a belt sander and am too cheap to buy one, this is my flat edge 'sanding station' and I think it does the trick for what I need: I've made progress on the thermal detonator, the glue will be set later today and I'll be able to add the clips and mark at least one thing off my list! I've also been working on the forearms. The front butt edge are trimmed to size for the cover strip and I've trimmed down the back sides enough so that I think the look and fit is pretty good. I just need to do a little bit more light sanding and smoothing of the edges a bit. Anyone see any issues here before I break out the glue? -
Eager to see your approach to the 'belt transplant' procedure! Sent from my iPhone using Tapatalk
-
Mkjava's Anovos ANH Stunt Build
WhiteWalker replied to WhiteWalker's topic in Build Threads Requireing Maintenance
Weekend update. I had multiple Officer troops this weekend so didn't have the chance to do as much as I would have liked to with the armor. I really need to cut back on trooping so that I can get my armor done so that I can troop more. Hey wait a minute?? Anyway, I managed to get some trimming done on the front edges of the forearms, thighs, and shins to have them sized correctly for the cover strips. I'm not sure about the biceps though as there's no clear front return edge to measure from. Looking at ukswrath's build, he takes a little off both the front and back on those to get the proper front edge, so I need to look a little more closely at that. Question on forearm return edges. Since I need to remove the wrist returns completely, is there any good reason not to go ahead and do that now while it's still 2 pieces? Seems to me it would be easier vs. when they're glued together. I also received the soft parts this weekend and they fit pretty good. I think if I wear just those, the helmet, and the boots, it would make for a good 'Casual Trooper' CRL! -
Requesting 501st access: http://www.501st.com/members/displaymemberdetails.php?userID=18732 Thanks!
-
Mkjava's Anovos ANH Stunt Build
WhiteWalker replied to WhiteWalker's topic in Build Threads Requireing Maintenance
Persons of unusual size? I don't think they exist. (Sorry couldn't resist!). [emoji12] That's a good idea, those front forearms edges are probably as good a place to start as any without having to worry about the sizing for right now. What about trimming and sanding return edges on the torso parts, am I better off waiting until I can put them on as a 'tape trooper' over the undersuit to check the fit? Thanks! Sent from my iPad using Tapatalk -
Mkjava's Anovos ANH Stunt Build
WhiteWalker replied to WhiteWalker's topic in Build Threads Requireing Maintenance
I am a little bit further along than my first posting implied. I actually finished up all of the initial trimming over the weekend, now taking some time to go back to trim just a bit more where needed. As you can see I commandeered the dining room table for this work, although I will definitely get kicked out to the garage when sanding begins! These are the tools that I've used so far in the build: Hobby knife set - Home Depot Metal ruler - Home Depot Cut resistant gloves - Home Depot Big 'bag o clamps' - Home Depot Duratrax scissors - Amazon Aviation snips - Harbor Freight For straight edge trimming, I used the 'score and snap' method and that worked well. For curved or small area trimming, the curved scissors worked like a charm. The only time I really turned to the aviation snips was with the thick plastic on the thigh pieces. I believe the next chore probably involves sizing the arm and leg pieces and I'd like to get some 'professional' help with that. l just got news that the squad has an ANOVOS specific armor party coming up in a few weeks, so I may wait until then to do further work. If there's something else I can work on in the meantime, I'm open to suggestions? -
Mkjava's Anovos ANH Stunt Build
WhiteWalker replied to WhiteWalker's topic in Build Threads Requireing Maintenance
I've definitely been following along with Tony's (ukswrath) build. He rocks!! Sent from my iPhone using Tapatalk -
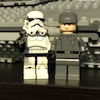
Hi I'm Mike and I'm an officer in the Tampa Bay Squad (ID82666). I've been a 501st member since early last summer with close to 20 troops so far, but this is my first adventure with an armor build. I'm creating this thread to document things for my own reference, get some online advice when I need it, and maybe even give hope to other armor newbies along the way. For reference to other builders, I'm about 6' and 175lbs, so that's what I'm sizing it to. I can definitely be a lazy procrastinator, so hopefully having this build thread out here will pressure me to keep moving along with things at a reasonable pace! Like millions of others, I too purchased the Anovos TK kit when it went on sale back in the Tier 1 timeframe, it was literally the deal of a lifetime. It showed up a few weeks ago and I made the first nervous 'cuts' at an armor party a couple of weeks back. The TK's (and everyone!) here in TBS are extremely helpful to get us armor newbies up to speed and I'm sure I'll be hitting them up quite a bit as I continue work on this. Here's my obligatory BBB pic with what I believe to be an accurate reference model of what I'm shooting for: And my first attempt at assembly using the Elder Wand - 'Armor Assembleosa!': That didn't work and I can only assume it failed as I'm not the true owner of Dumbledore's wand. So with that failure, my future posts will consist of me trying to build this the normal way....
-
This is a great post! I'm already an Executor level Officer and aiming for Imperator. I'm new though as a TK with fresh armor to build from Anovos. I'm definitely aiming for Centurion as I work to put this together! Sent from my iPhone using Tapatalk
-
I believe so, just wasn't sure if the black brow trim needed to match up in the same location relative to the gray traps on each side. If so, I would need to remove the trim and either slide it left or replace it with one a bit larger. Sent from my iPad using Tapatalk
-
A helmet question that I can't find an answer for in the CRL and I'm not sure if it's just another asymmetric thing. Here are pics of the sides of the helmet brow. Notice the black brow strip doesn't end at the same place. Anyone else have this issue and is this acceptable? Thanks!! Sent from my iPhone using Tapatalk
-
This is an amazing write up Jeff! I'll definitely learn from what you've put together here when I begin my TK building adventure! Sent from my iPhone using Tapatalk
-
Are you ever too old to Troop?
WhiteWalker replied to DroidHunter's topic in Getting Started - Read this First!
I'm 49 and I just joined the 501st as an Officer earlier this year and will start building my TK in just a couple of months. I remain as childish, I mean childlike as ever! [emoji51] Sent from my iPad using Tapatalk
