


Novak Dimon
-
Posts
714 -
Joined
-
Last visited
-
Days Won
2
Content Type
Profiles
Forums
Gallery
Articles
Media Demo
Posts posted by Novak Dimon
-
-
Congratulations for finding that M19!

My Sterling arrived yesterday and it's really cool!
I took it apart and cleaned it instantly, took some photos too. But had no time to upload them. Planned that for tomorrow... hope my boss don't ring me again tomorrow morning. I'm on call this weekend and was working today all the time.

I already checked Andy's thread about the display stands. They are cool but I want to make one myself.

At the moment I'm working on my Power Cylinders. The kit is from Andy PlayfulWolfCub and making them is big fun!
Cheers
Christian
-
Hi Dougal,
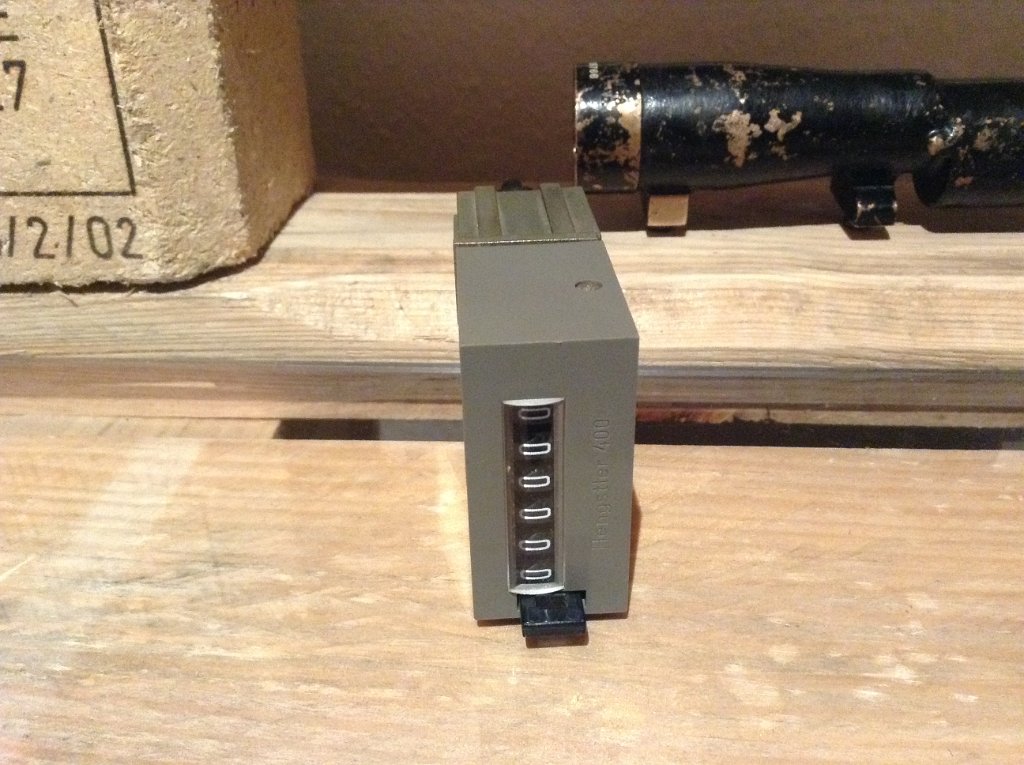
The screw is to fix the plastic cover of the counter.
There is one screw on the top and one at the bottom. Check the pics of my unpainted Hengster in my gallery: http://www.novakdimon.de/Novak%20Dimon%C2%B4s%20E11/Hengstler%20Counter/index.html
Cheers
Christian
-
This is a nice Blaster! Well done!
Cheers
Christian
-
 1
1
-
-
Great pictures!
Today my own deac will be delivered
 I'm really excited and can't wait to hold it in my hands!
Cheers
Christian
-
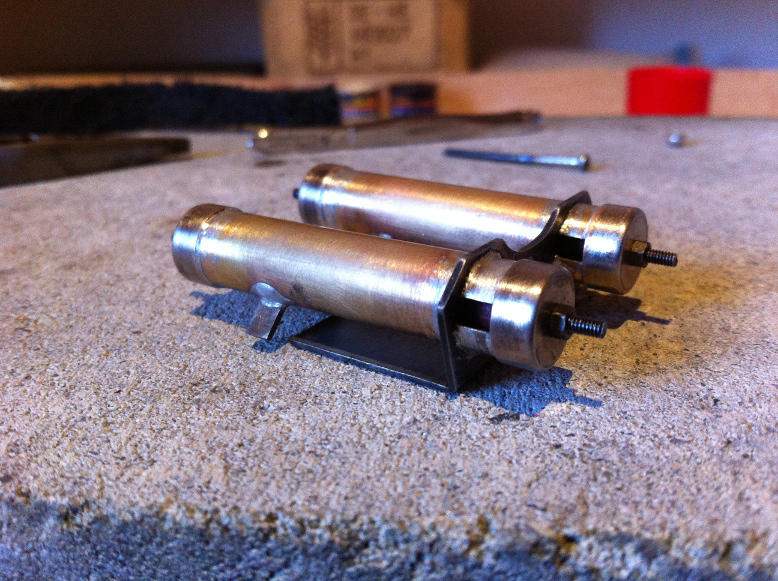
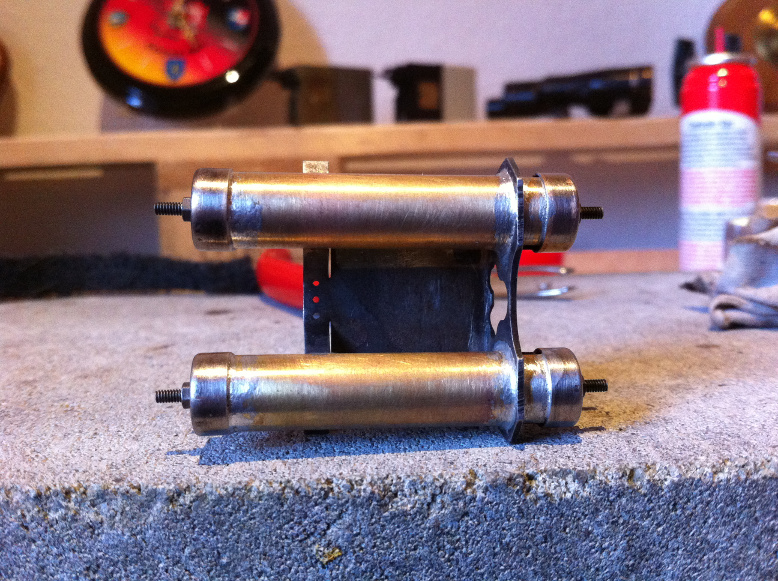
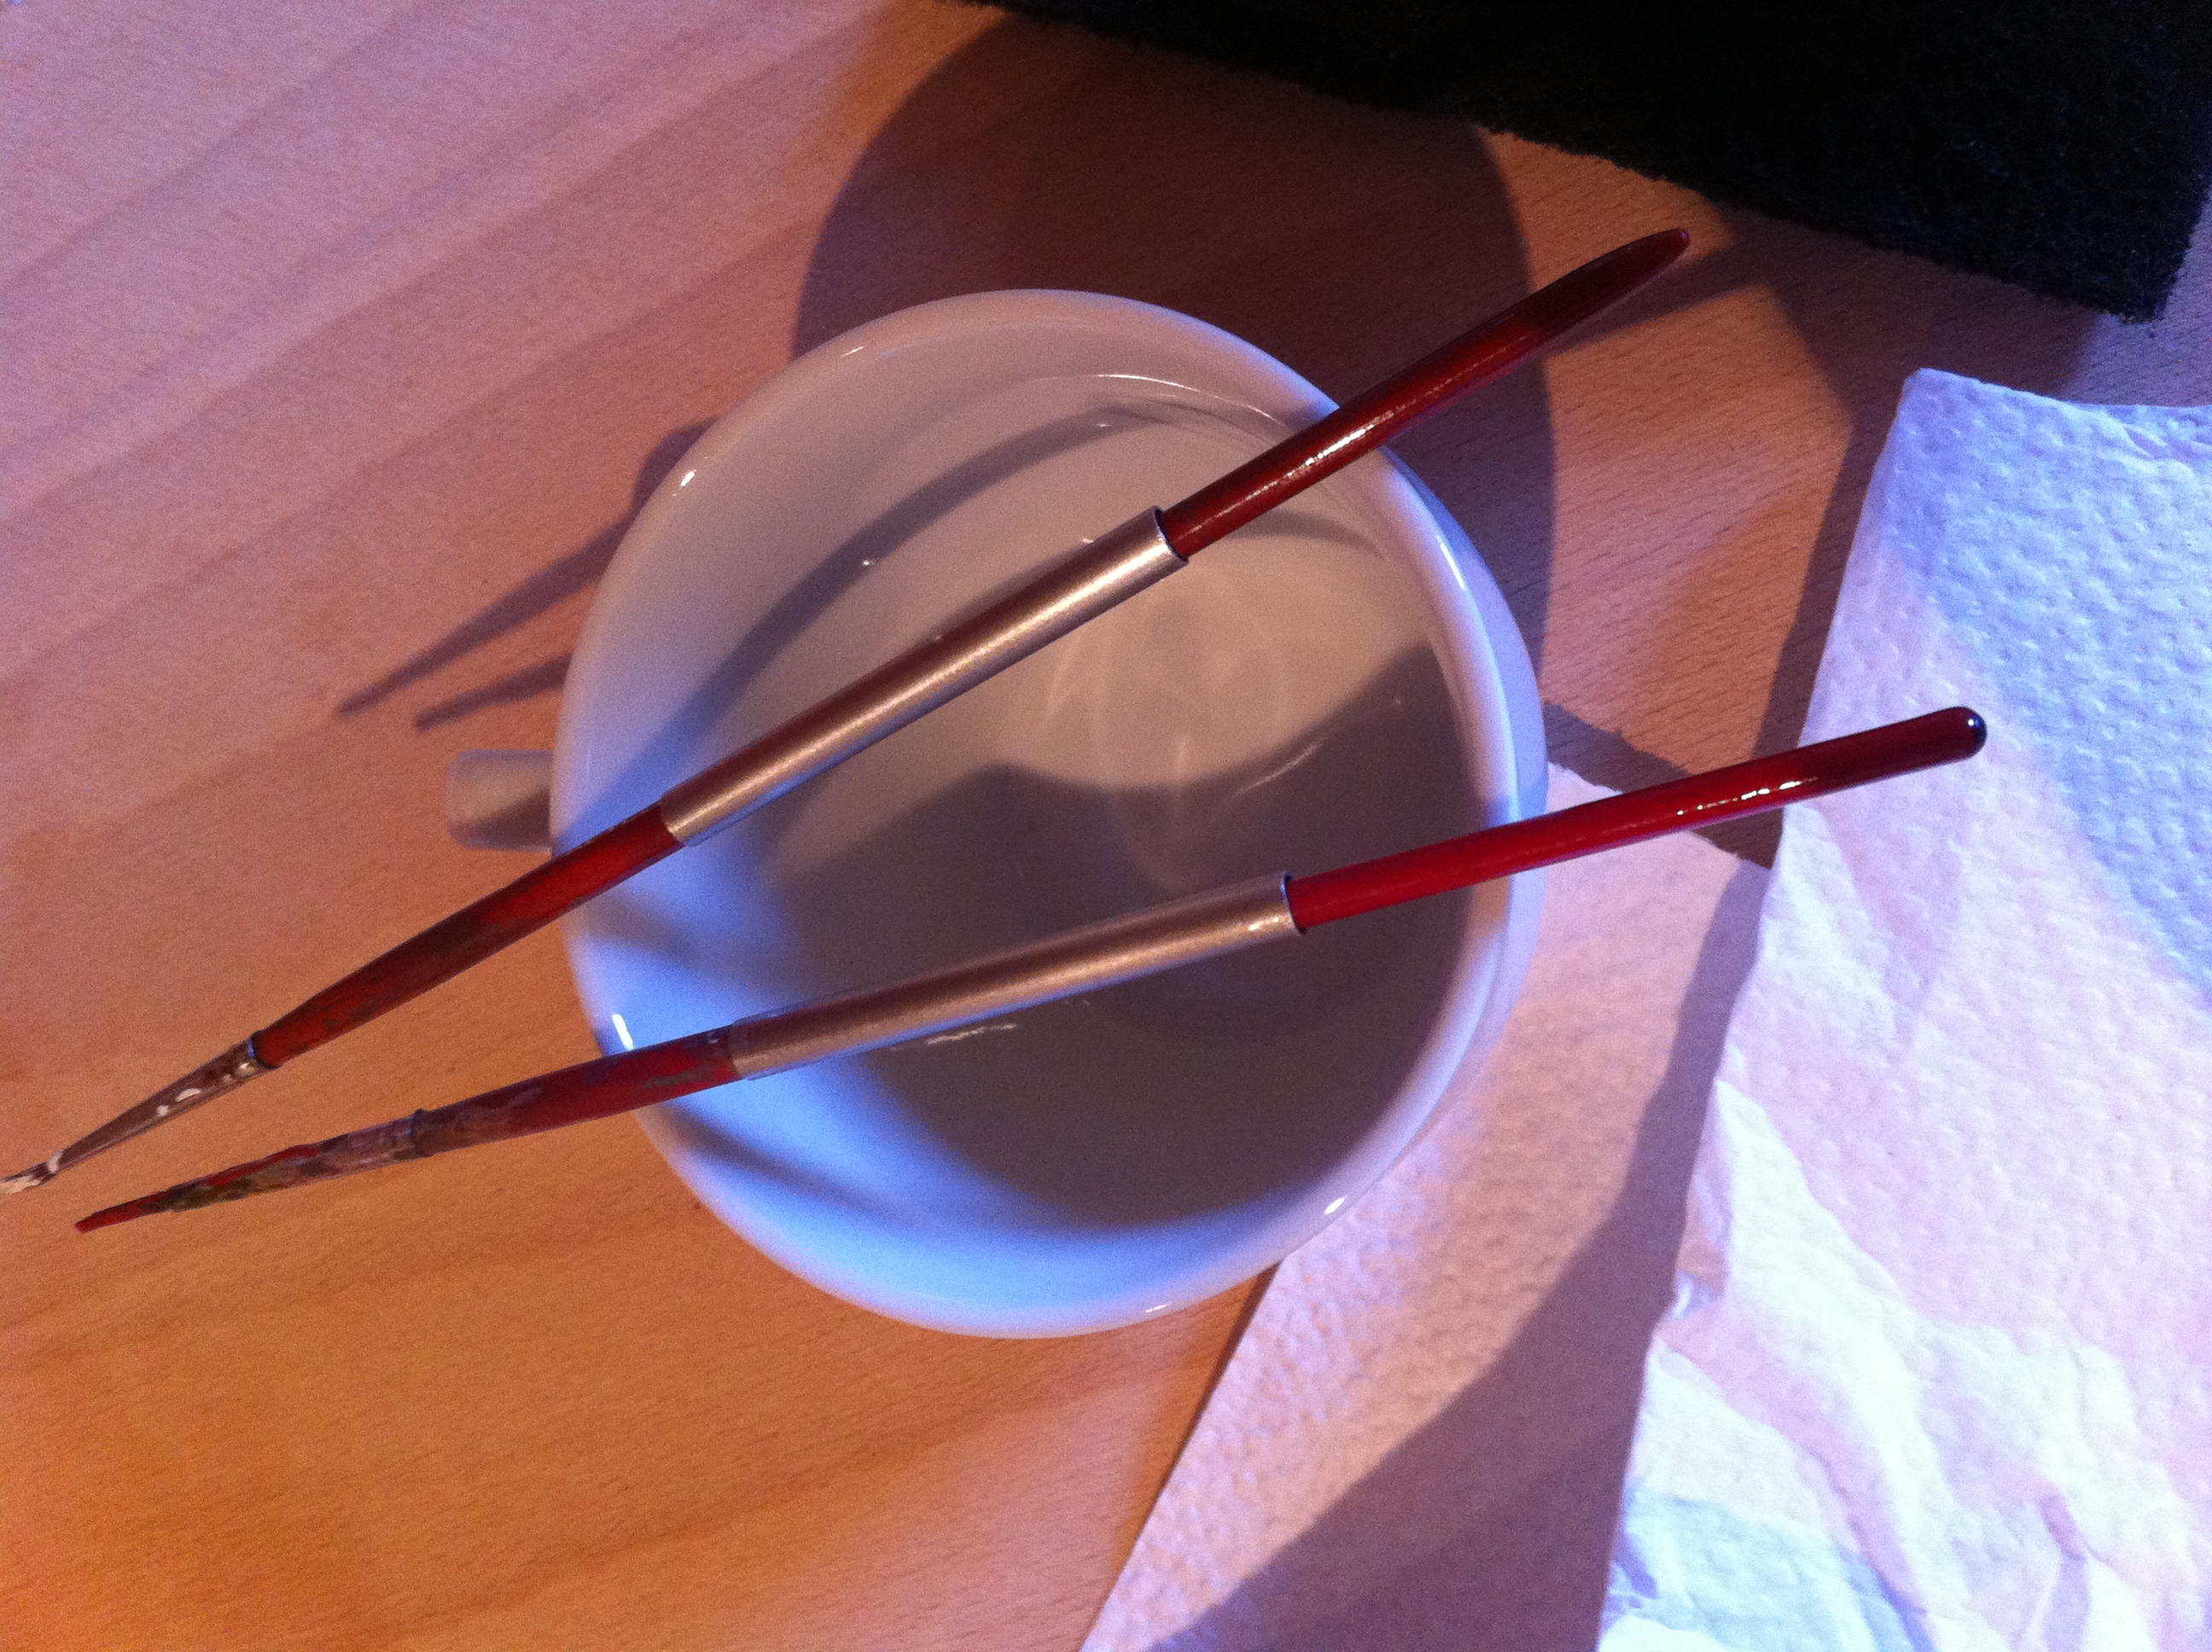
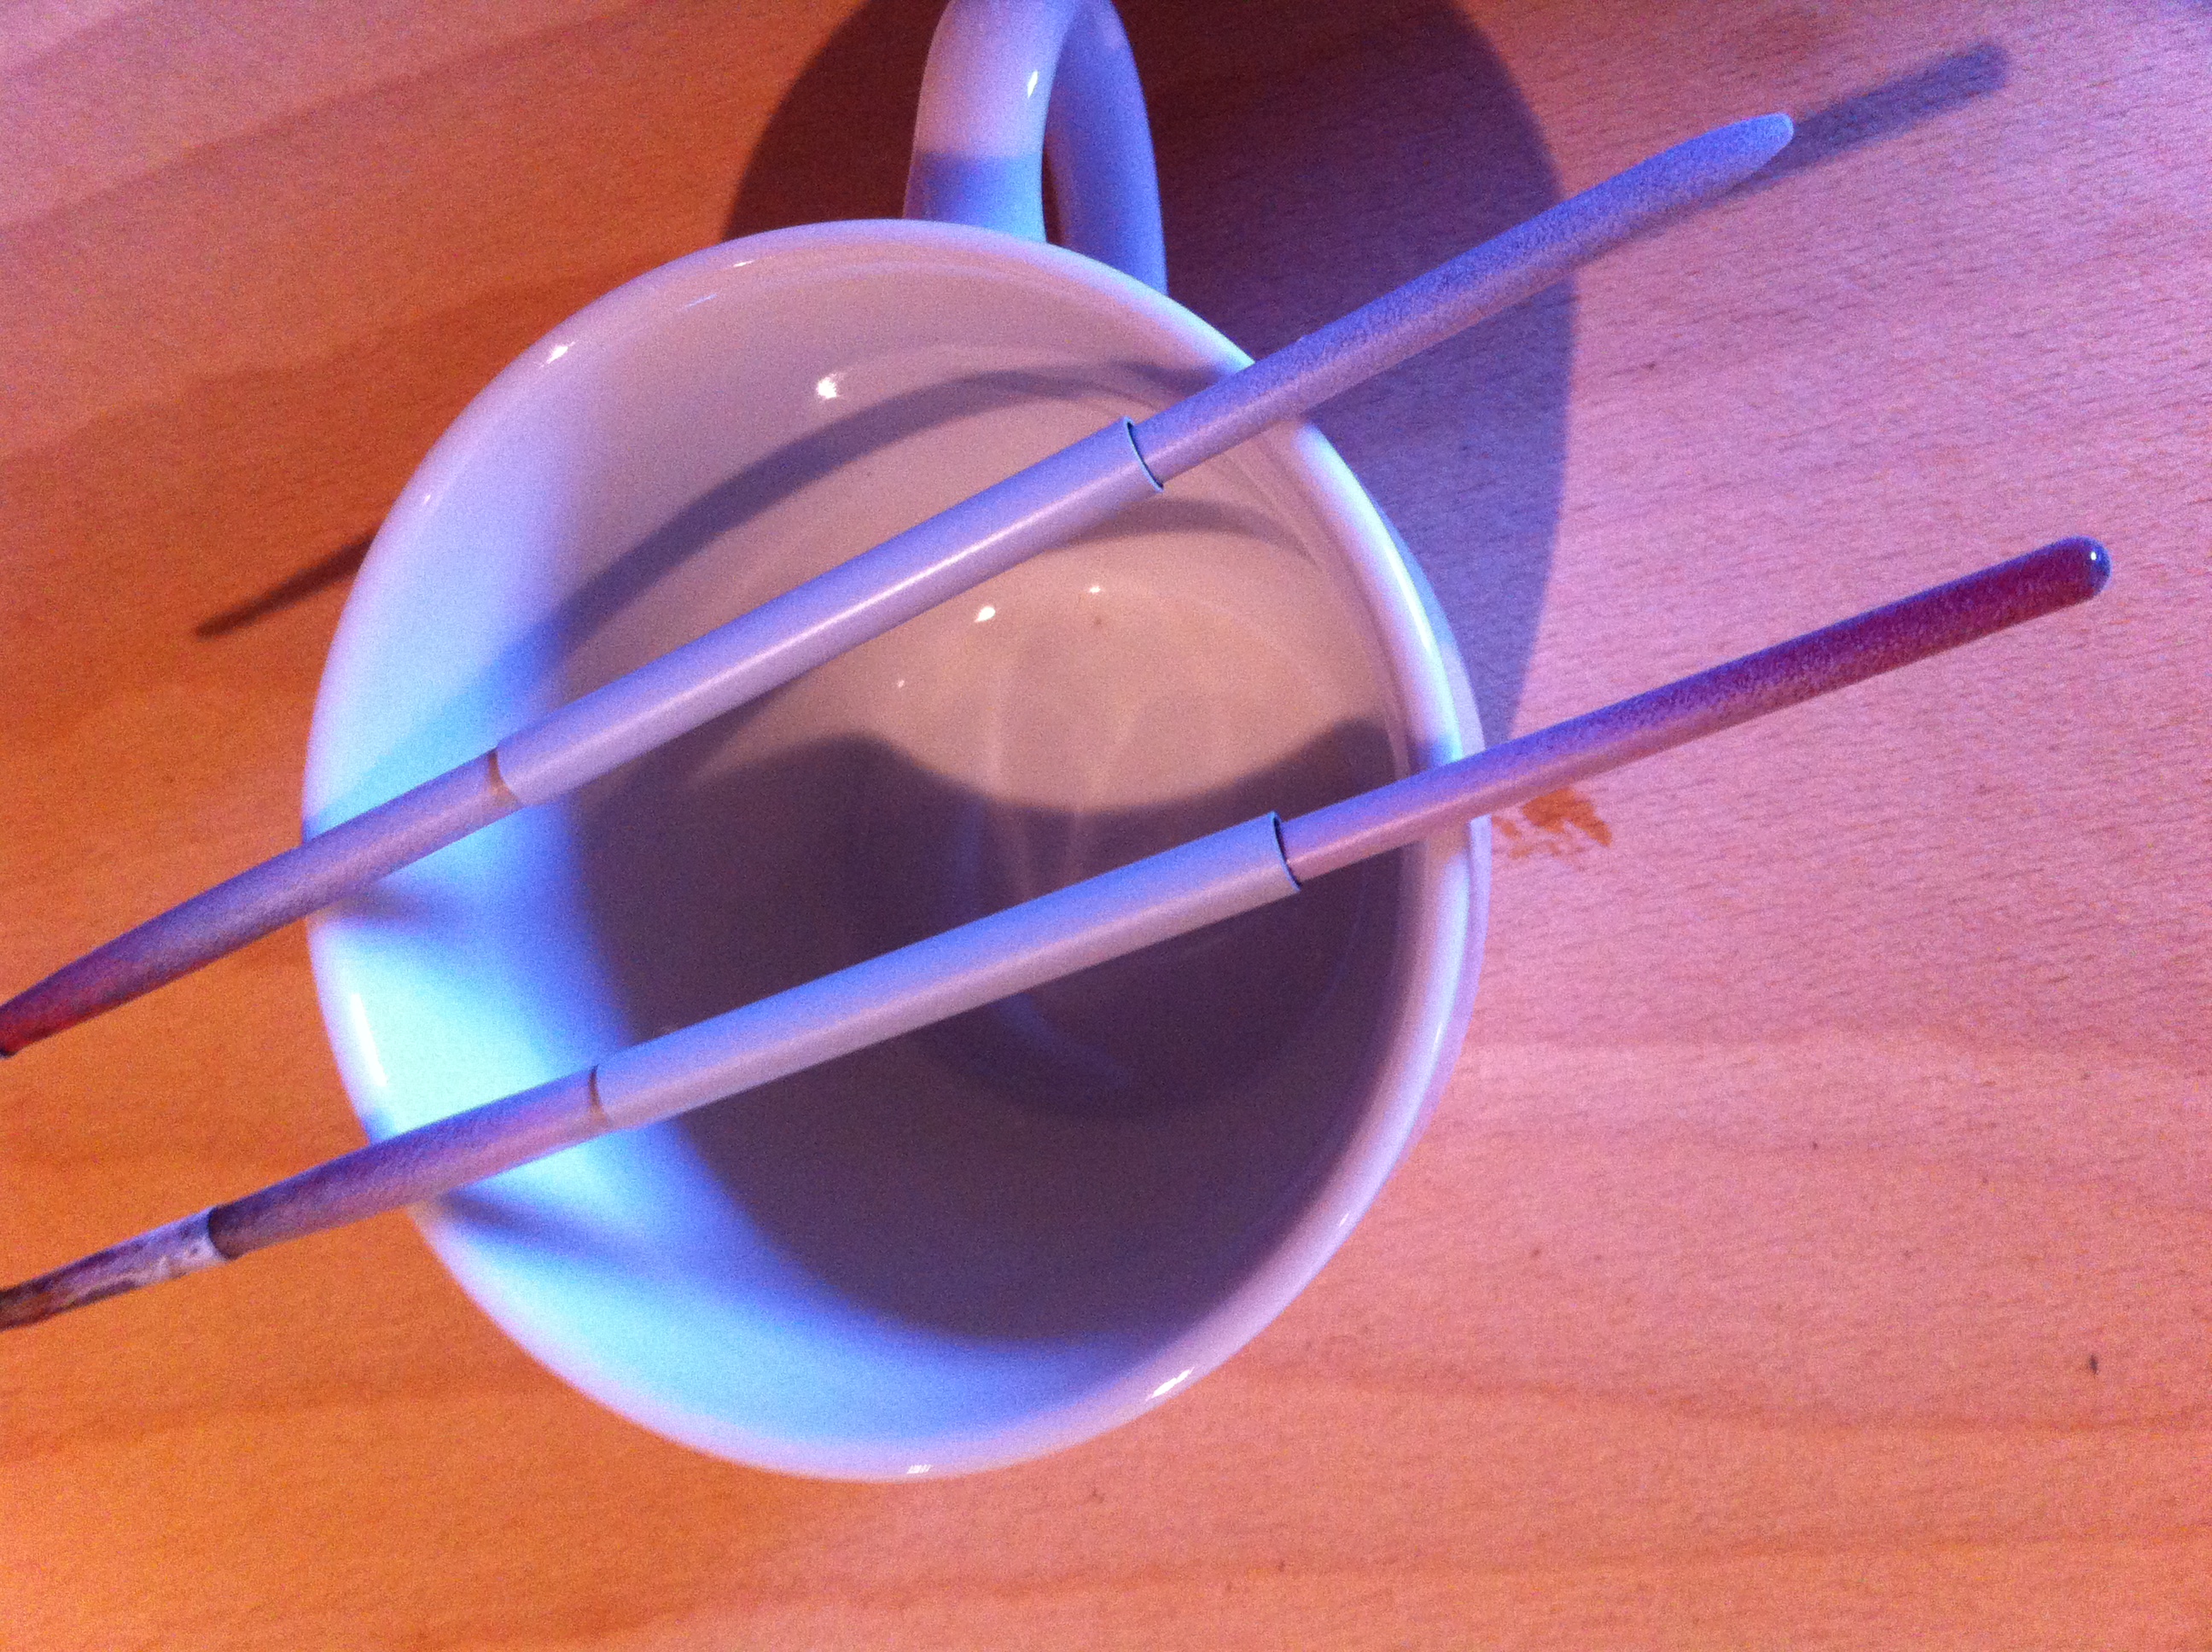
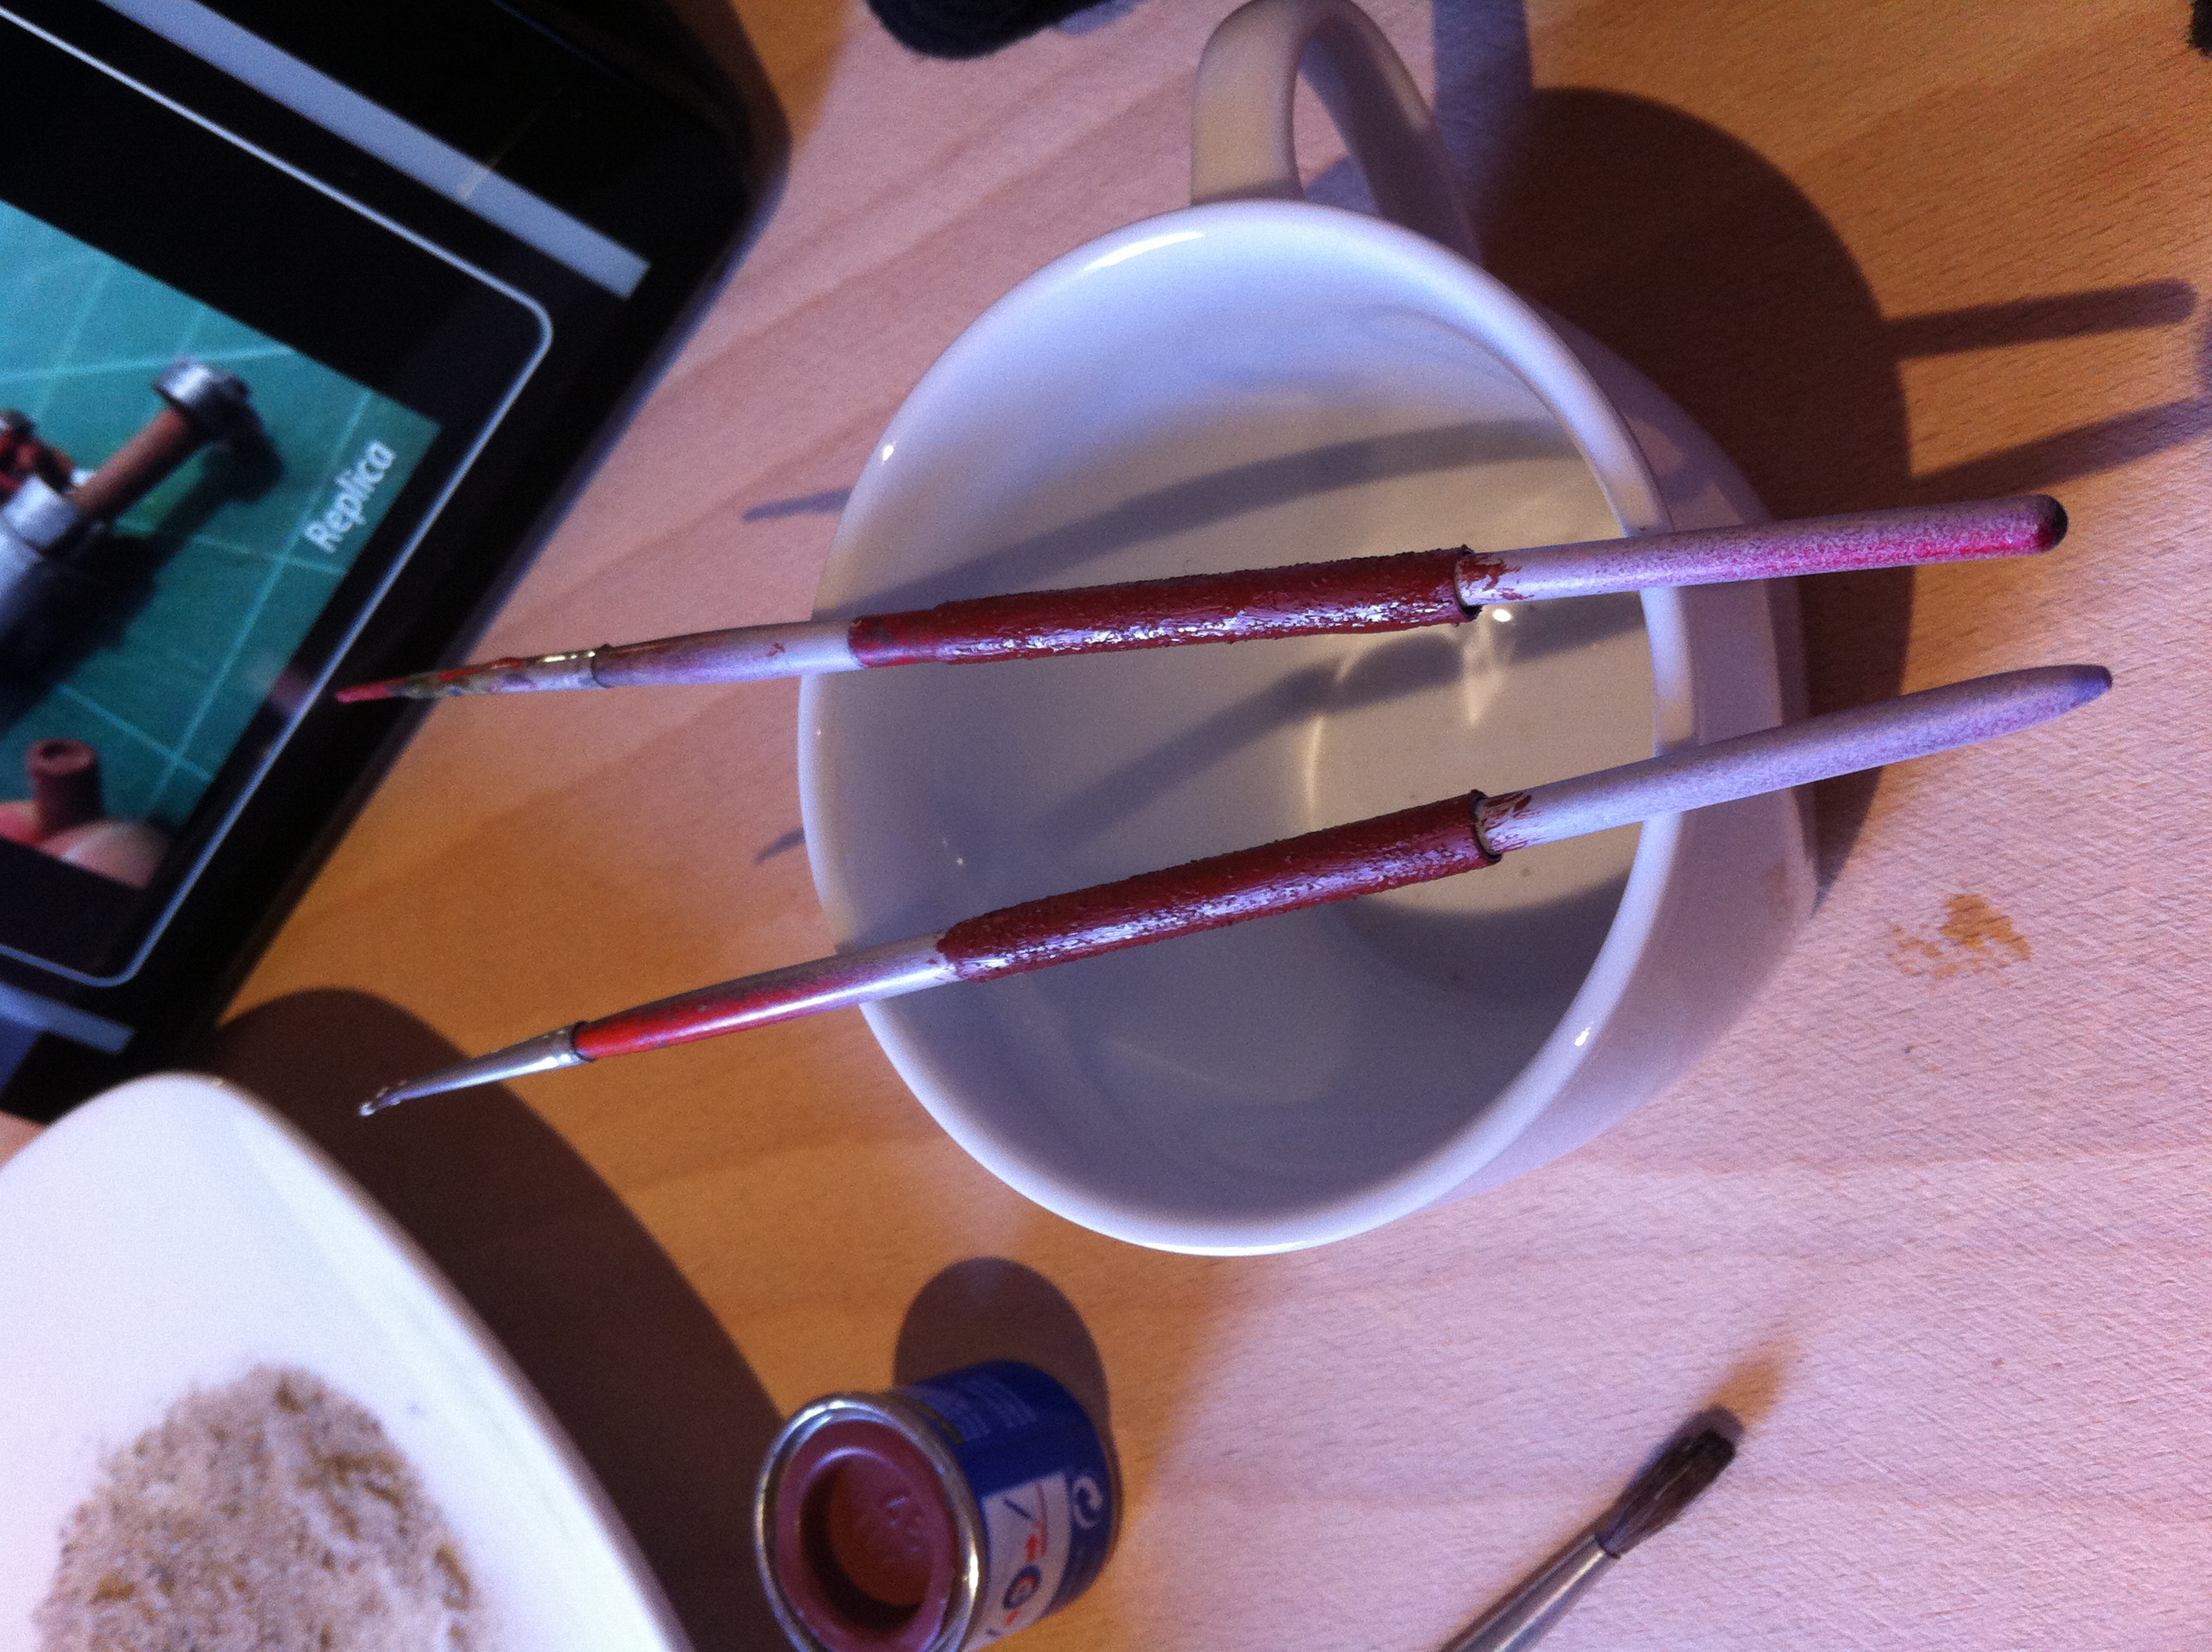
The last days I learned how to zinc plate things like the Power Cylinders.
First I had to find a suitable power source. Unfortunately the railway-transformer of my son, I planned to use, makes AC instead of DC. So I used an old PC power supply unit.
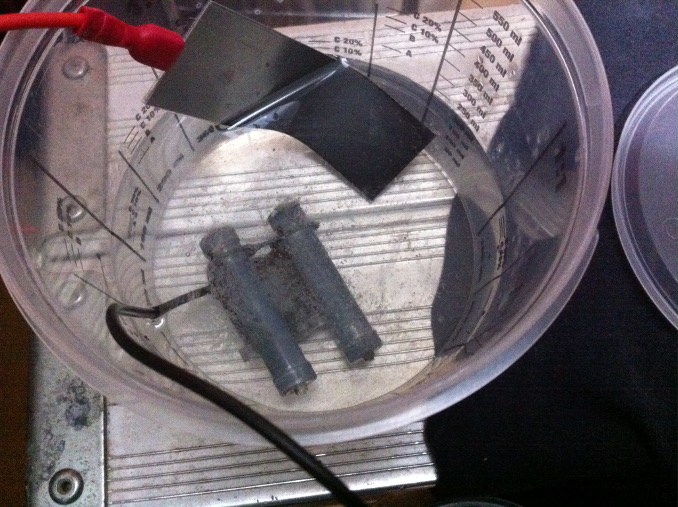
After learning the do´s and dont´s of galvanic zinc plating my Cylinders are looking quite nice:
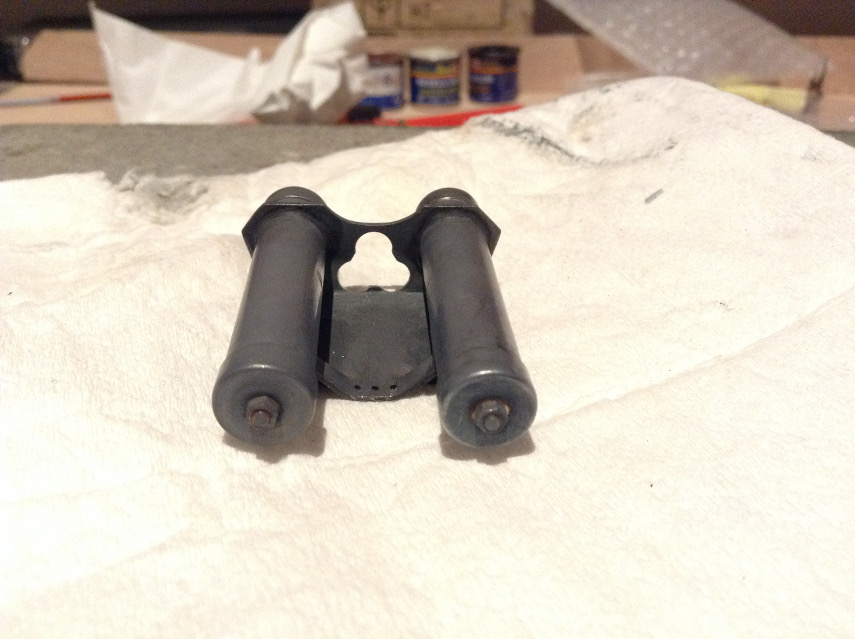
Today I started to attach the UBER Capacitators.
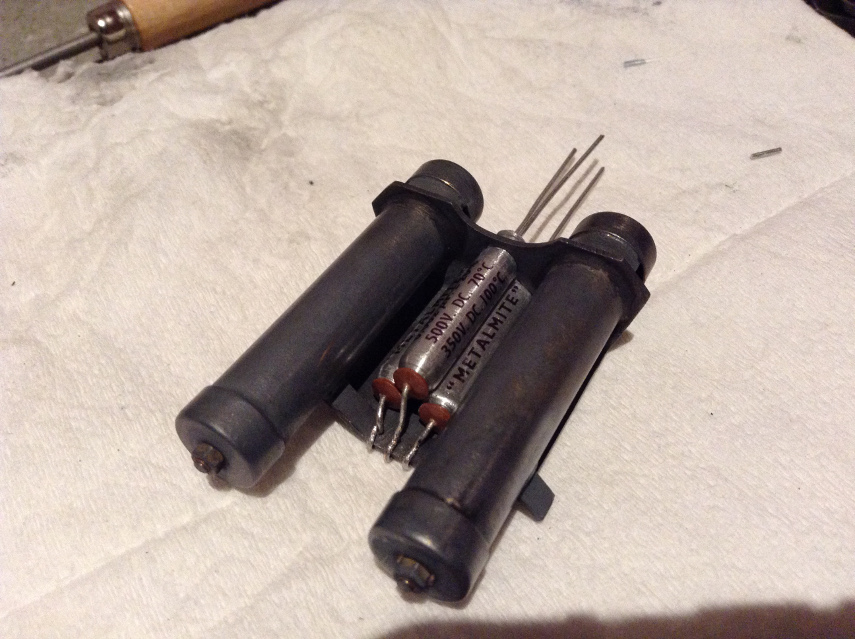
Thats it for today.
More pictures are found in my Gallery: http://www.novakdimon.de/Novak%20Dimon%C2%B4s%20E11/index.html
Kind regards from Germany
Christian
-
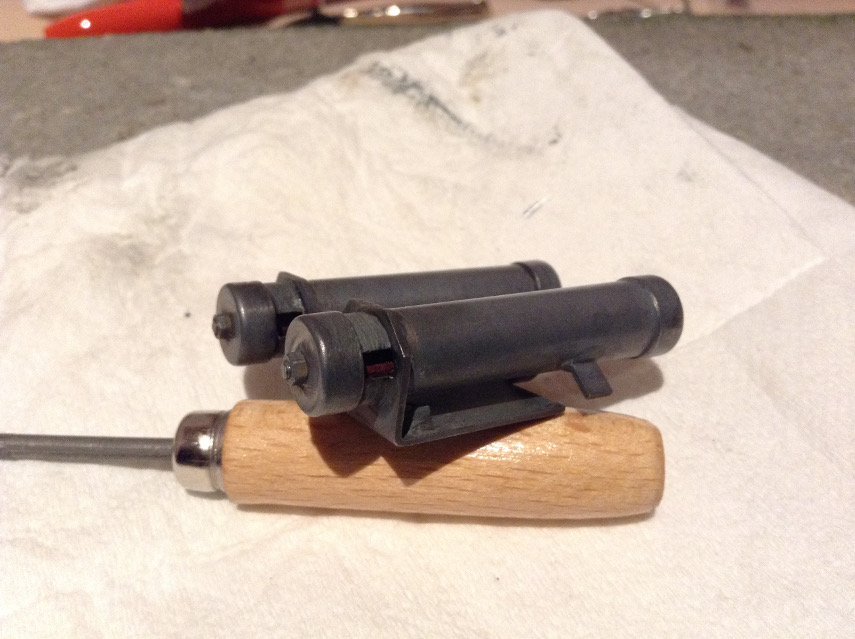
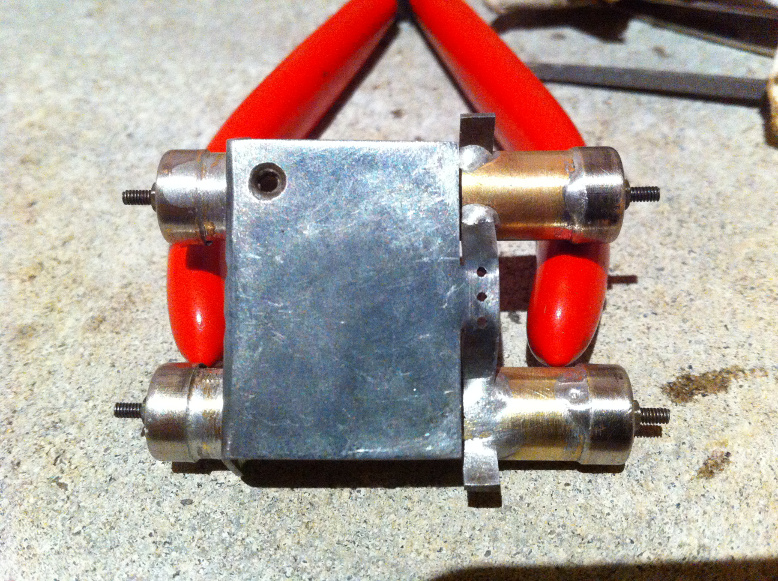
Hi Troopers,
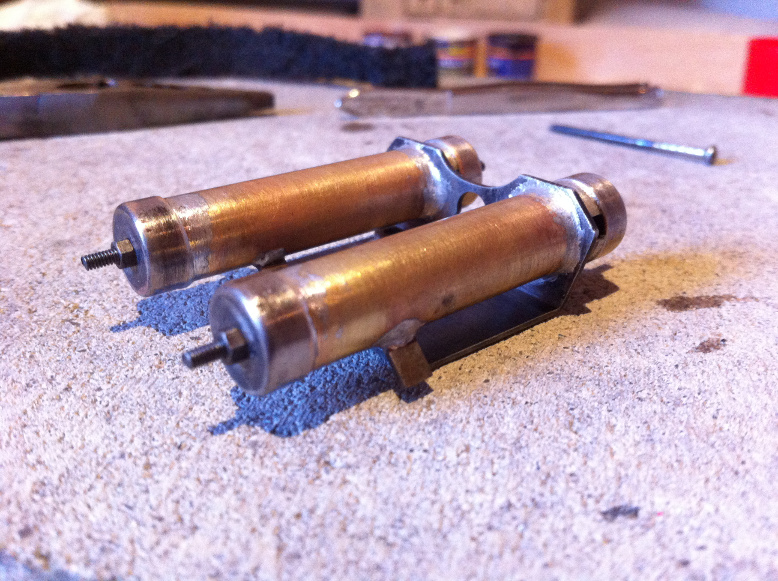
last Sunday I spent some time at my workbench to continue my soldering works on the Power Cylinders and today I like to share my results.
Finding the best way to dose the right amount of solder needed a couple of attempts. Finally I used a mini-blowtorch for all works with fitting-solder and flux.
Some connections needed some finishing with keyfiles, sand cloth and abrasive cleaning mat.
But have a look yourself:
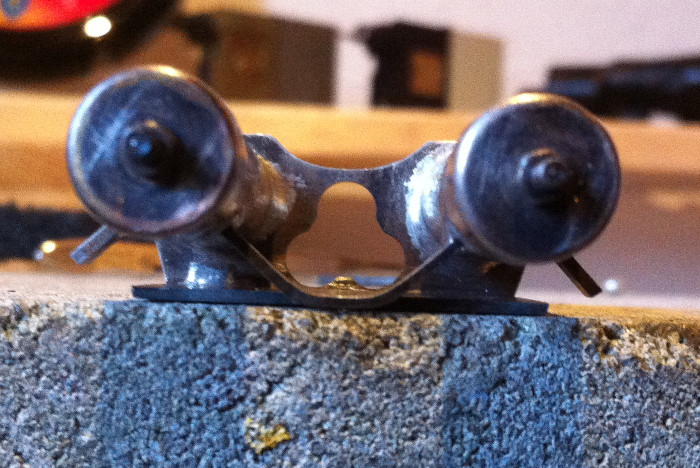
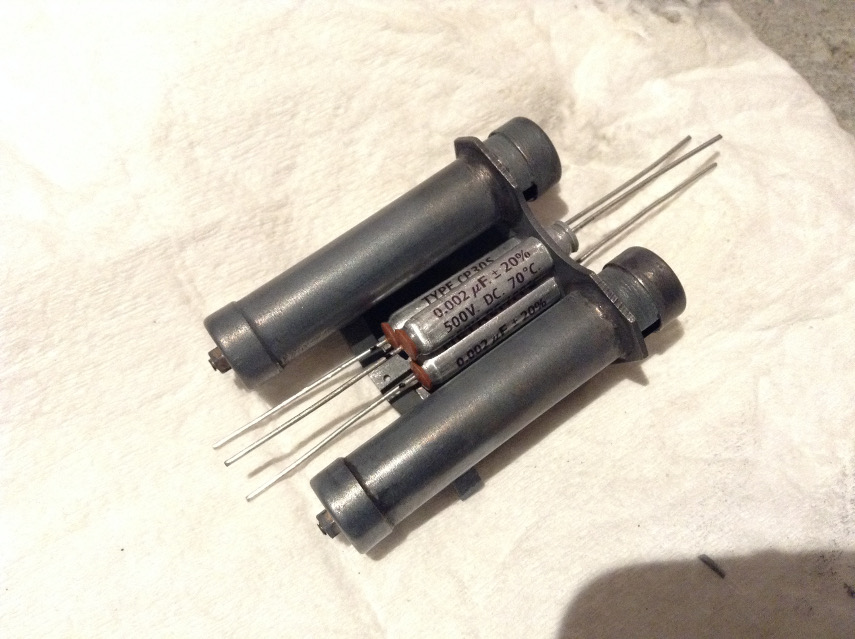
The drops of solder at the bottom of the end caps appeared during the soldering... and then I thoroughly removed them. When I checked the pictures of the original cylinders:
 they have to be there!!
So I ignited the blowtorch again and melted new drops. I´m glad that this is an easy job.

Next thing is cutting the ends of the screws and then zinc plate the Cylinders
>>>To be continued>>> -
Where's the Sterling????
Well, I'm still waiting for it. And until it is here I prepare all the other parts.
-
When I returned home from night-shift today at 6:20 AM
my plan was to sleep at least until 2 PM. But the chimney sweeper was so kind to wake me up at half past ten. I know: leaving the doorbell switched on was my own fault! 
Once awake I choose to set up my workbench for soldering.
And after having everything prepared ... well why not try to solder one small piece. And so I soldered the small mounting nut onto the base plate, a job I finished quite nicely at the second attempt. It's almost looking like made by someone who's knowing how to do such things.
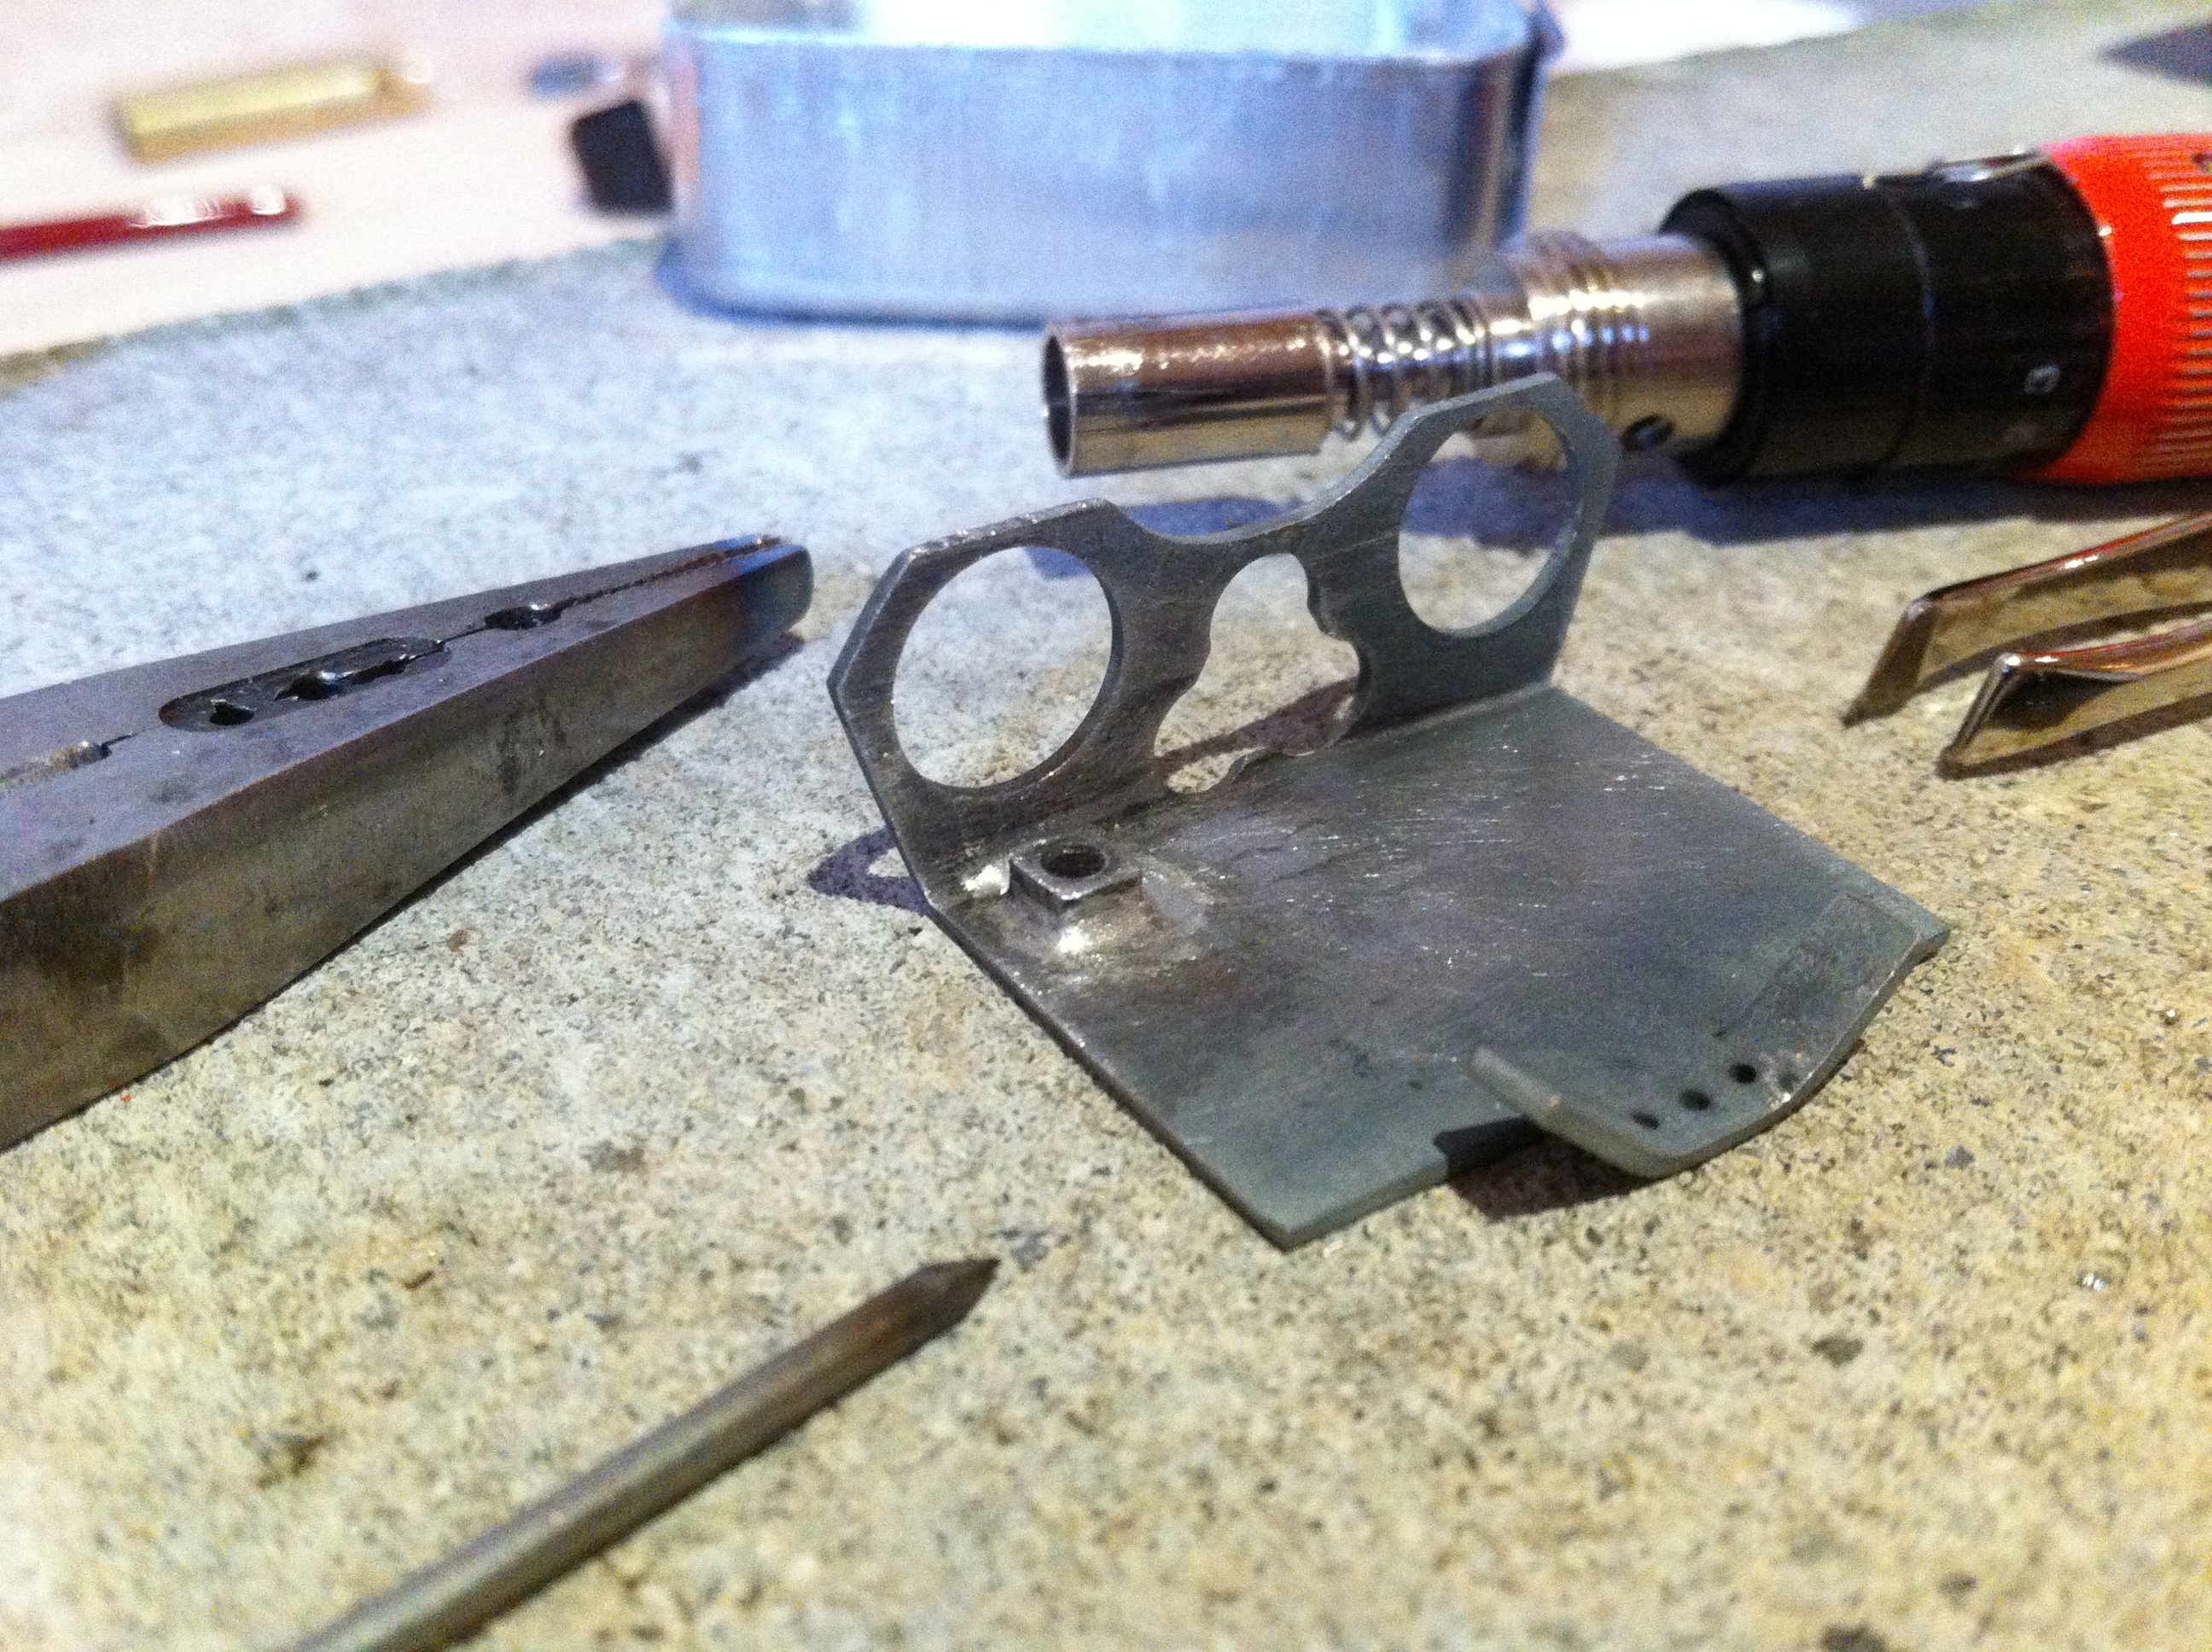
At my first attempt I drowned the nut in solder... surely caused by the lack of sleep!
Now I have to go to work. I will continue at the weekend.
Kind regards
Christian
-
Part 2: Power Cylinders
Last week my Power Cylinder-Kit from Andy PlayfulWolfCub arrived at my place.
The kit is made super accurate and detailed. Two of the end caps and the base plate are zinc plated, great for screen accurate weathering. Though I want to zinc plate the Cylinders completely after soldering like the original ones.
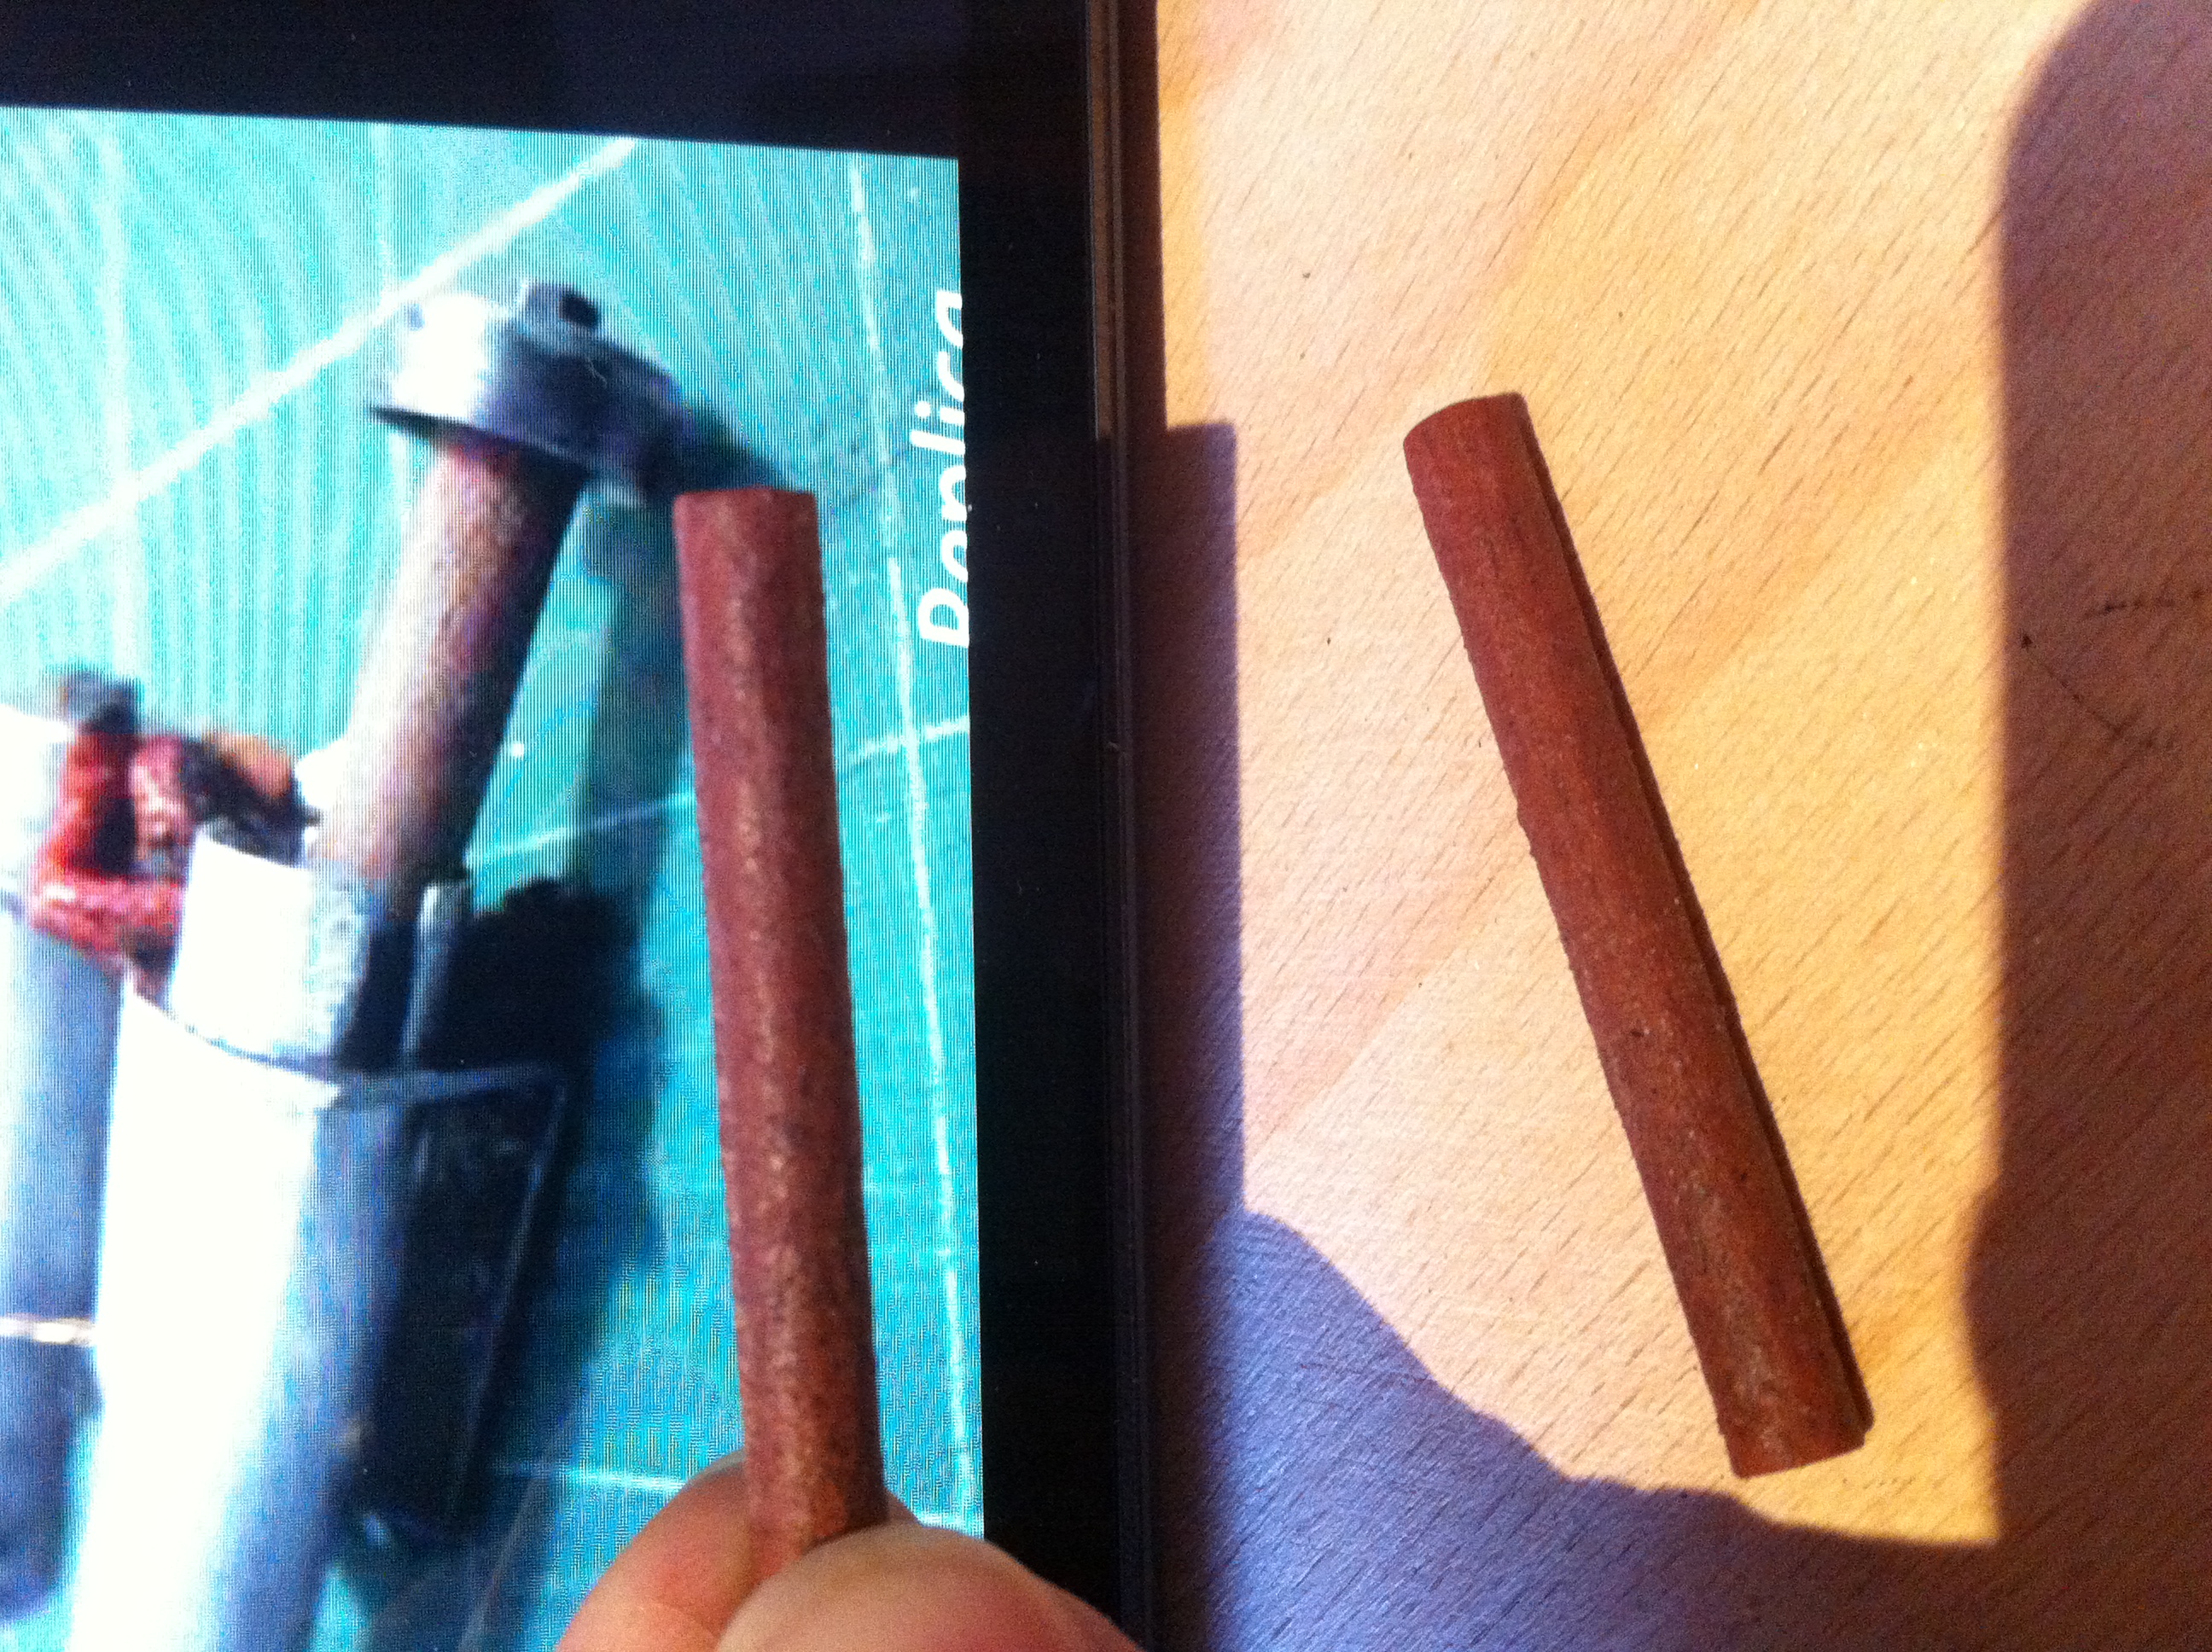
Today I started with the inner cylinders. The original ones were made of ceramic and that's how I want mine lolling like too.
At the beginning I sanded and cleaned them:
Then applied primer:
I choose a flat brick-red color to paint them. When the first coat was almost dry I applied some fine sand with some paint to get a ceramic-like rough surface. That's how it was looking:
After drying I applied a final coat of paint and then some weathering, using black and white paint.
IMHO the result is quite close to the original parts, made by Andy:
That's it for today. Next time I'll start the soldering.
Kindest regards from Germany!
Christian
-
Hi Andy, that's really interesting. Thanks for the post! I thought the tank crew was just looking through the other side of the scope.
-
Small Update:
Today my Hengstler Counter arrived.I had the unbelievable luck that just when I contacted "Blue Snaggletooth" he found a Hengstler Counter with metal box.
Dennis: Thank you very much for giving the counter to me!!
That´s it: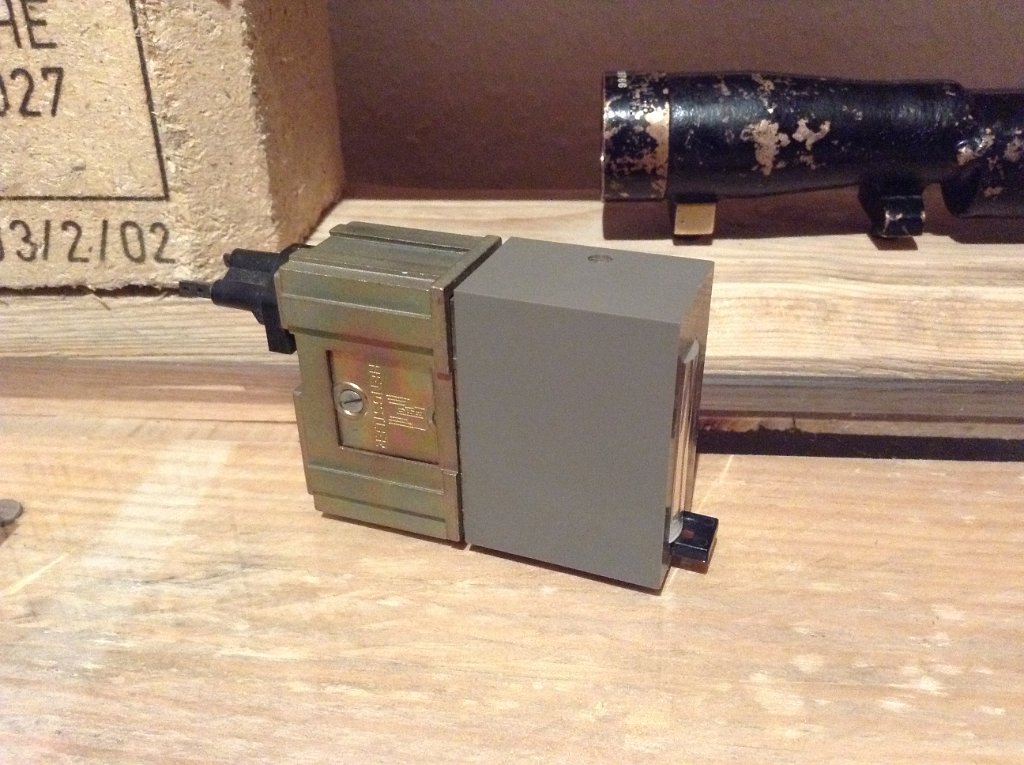
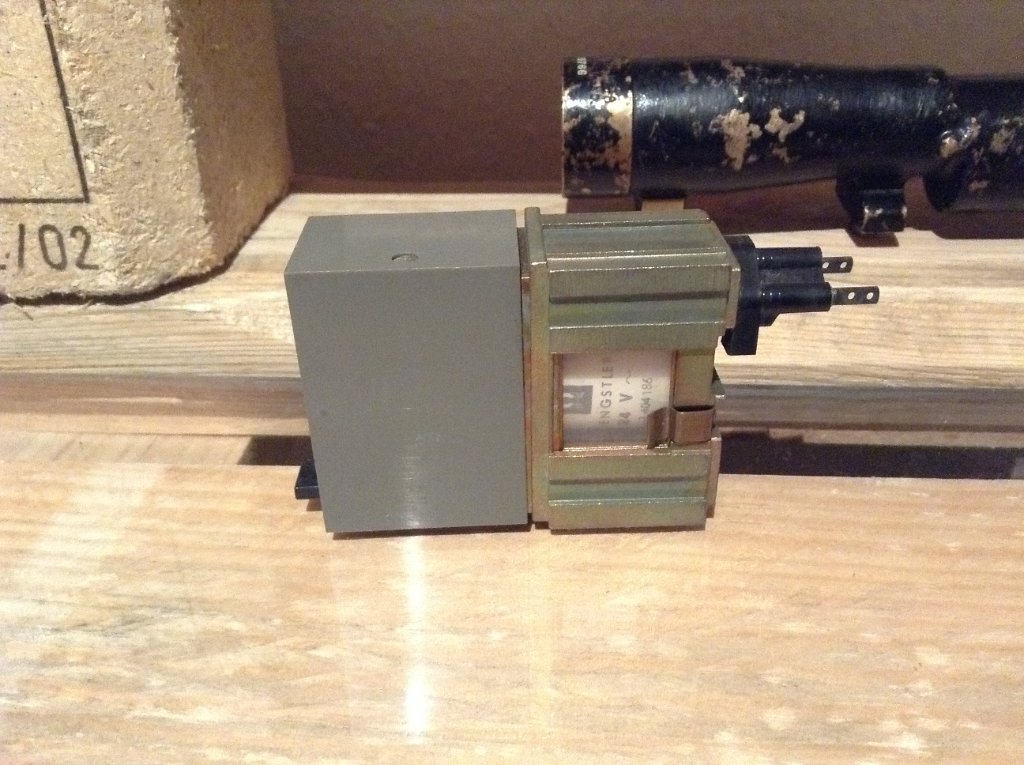
I will paint all the parts together, until painting the counter will have a nice place in my showcase,
For a second Blaster-Project I also bought one of his imitates. That is looking really great too and is much lighter. I guess that´s an advantage for trooping.
Here the replica next to the original: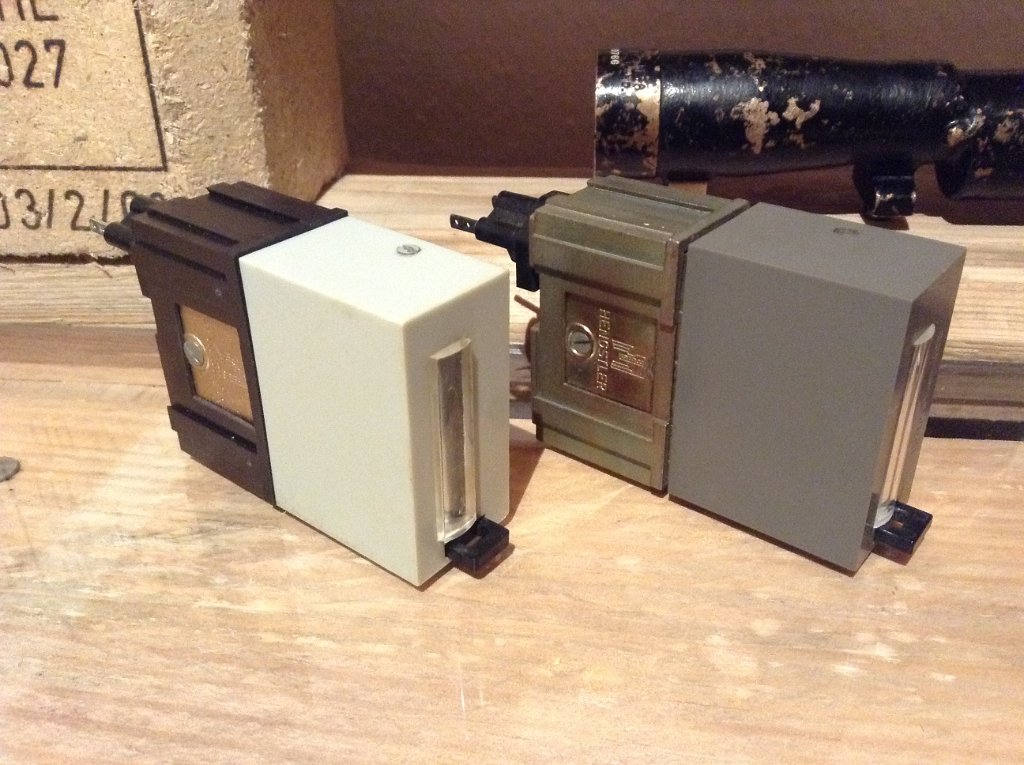
That´s it for today.
Here the Counter-Gallery: http://www.novakdimon.de/Novak%20Dimon%C2%B4s%20E11/Hengstler%20Counter/index.html
Best regards from Germany!Christian
-
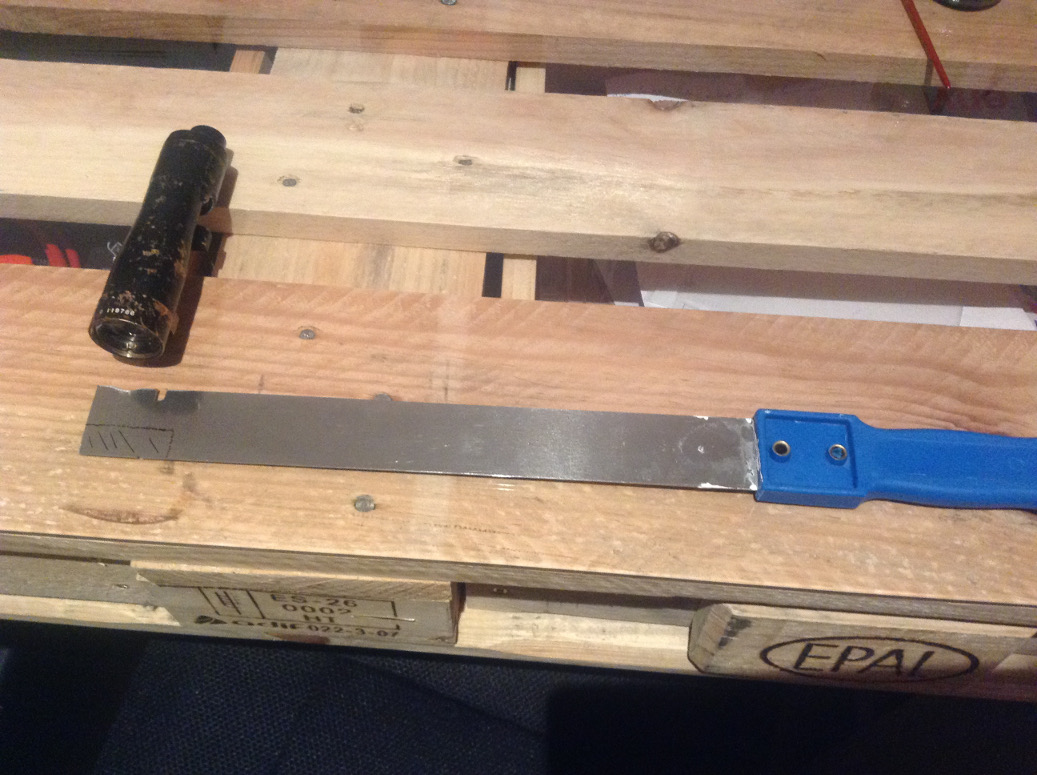
As promised a picture of my "tool" to remove the big ringnut and lens.
The marked area is the part I will cut off to get a tool to remove the inner ringnut and the crosshairs. I also cut the whole thing by half. It´s too long for proper handling. (for the next scope
)Kind regards
Christian
-
What kind of tool you use to remove the biggest lens?
Hi Manu,
I made a tool from a wllppaper-knife. That's a sheet of metal with a handle, I cut to the correct size.
For the inner ringnut and the crosshairs i used a screwdriver but if I do the job a second time I'll make a tool for them too.
Tomorrow I can post a picture of the "tool" I made.
Cheers
Christian
-
1
-
-
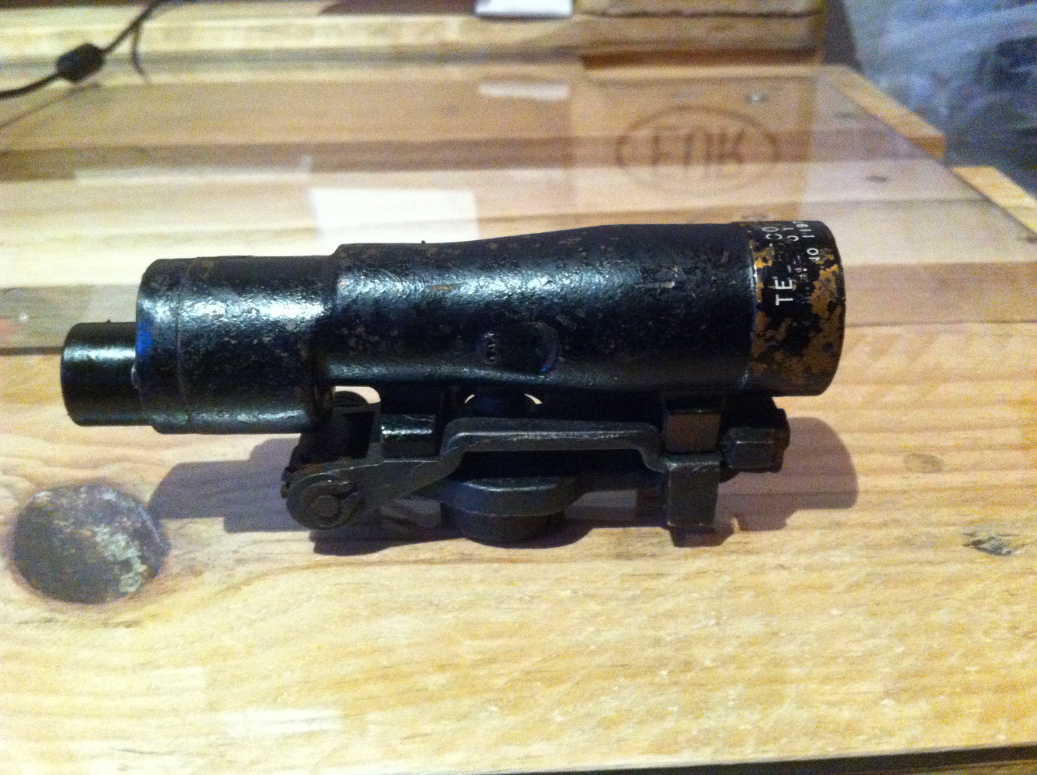
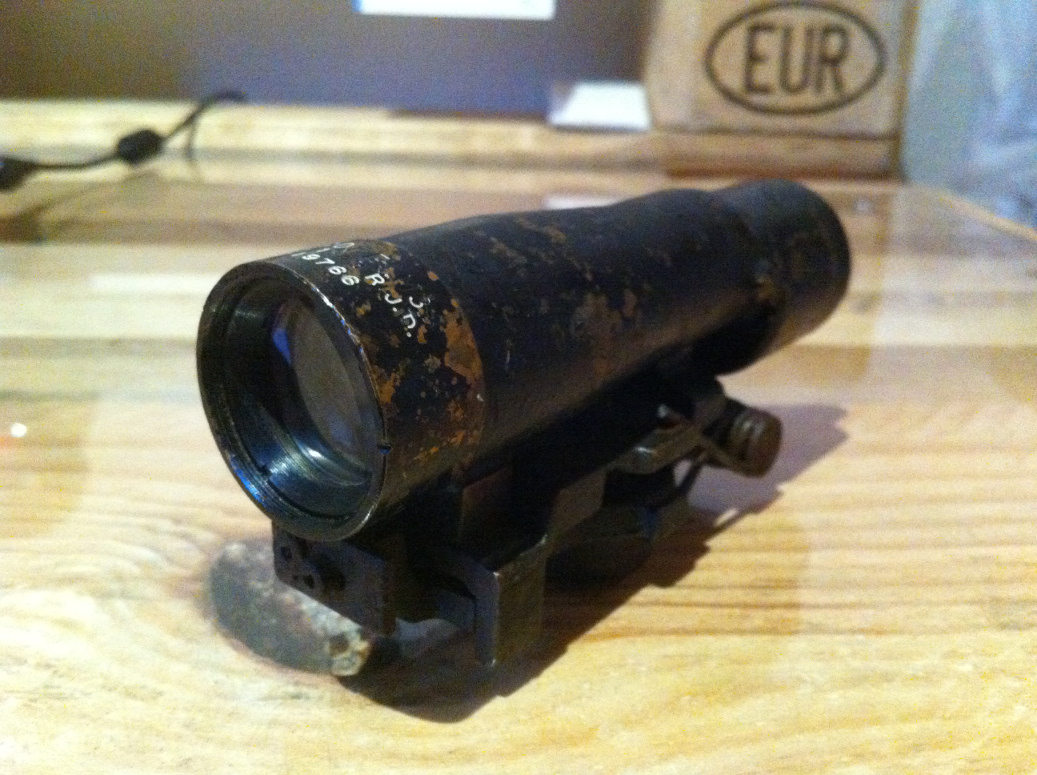
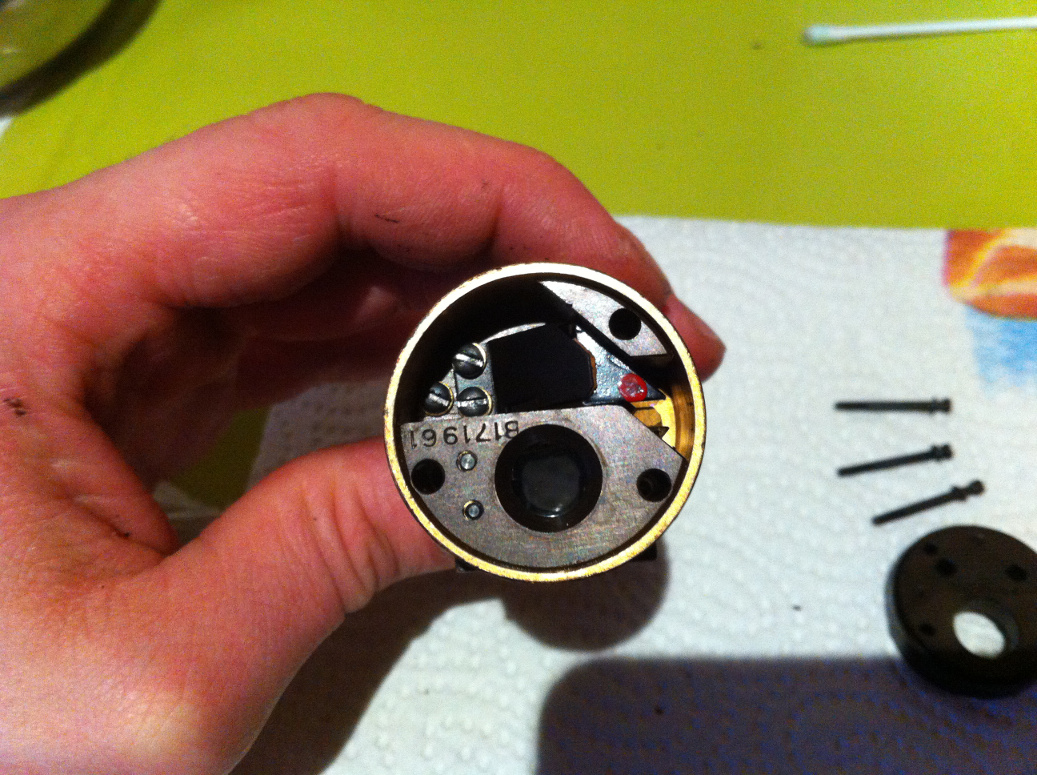
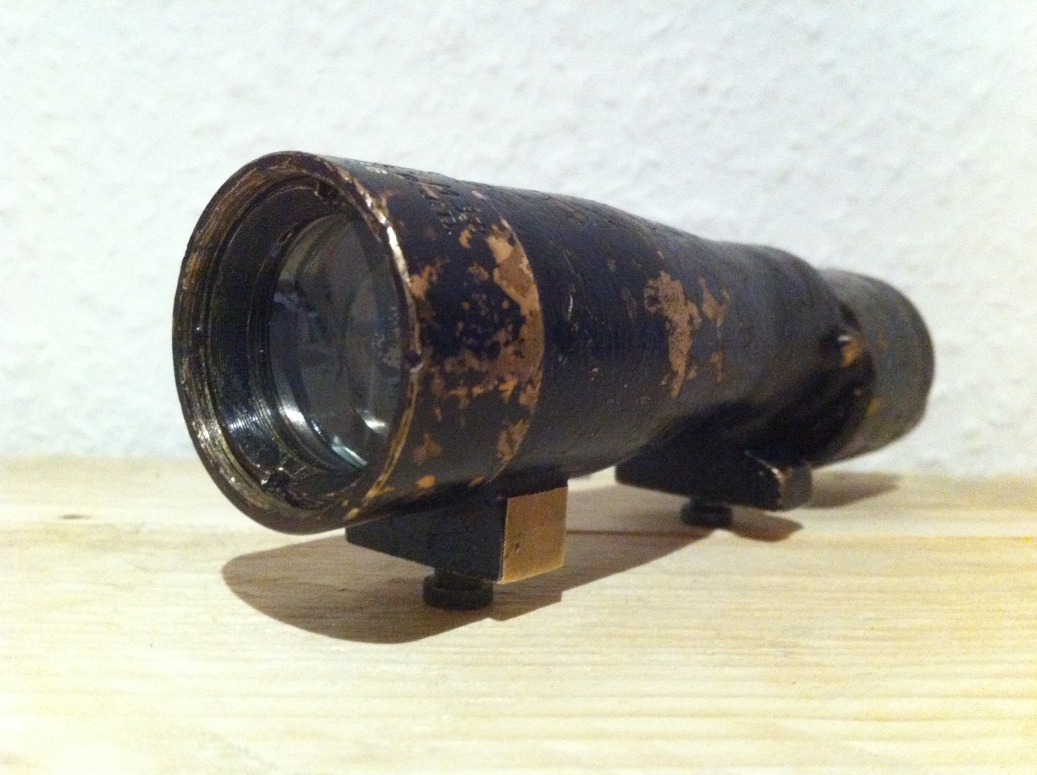
Part 1: M38 Scope
The first part I got was the M38 Scope. I bought it at eBay and it came from Italy.
The following markings are on the Scope :
TELESCOPE, M38
M.H.R. CO. 1943 R.J.D.
NO. 119766
That's the Scope "out of the box":
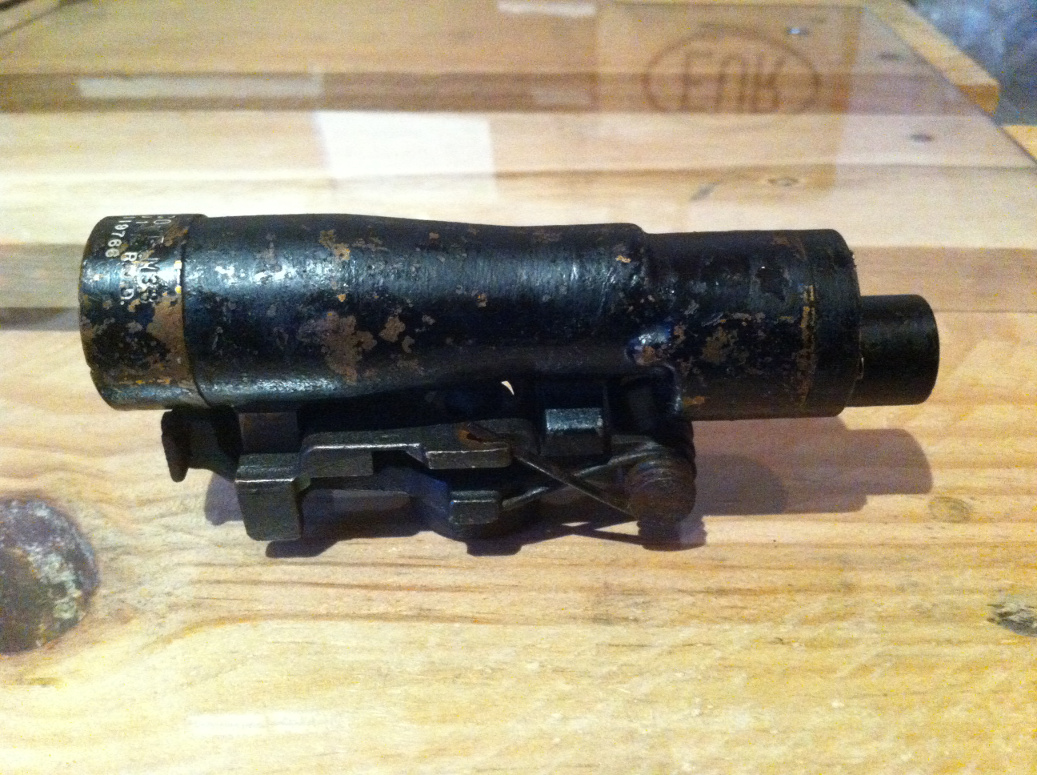
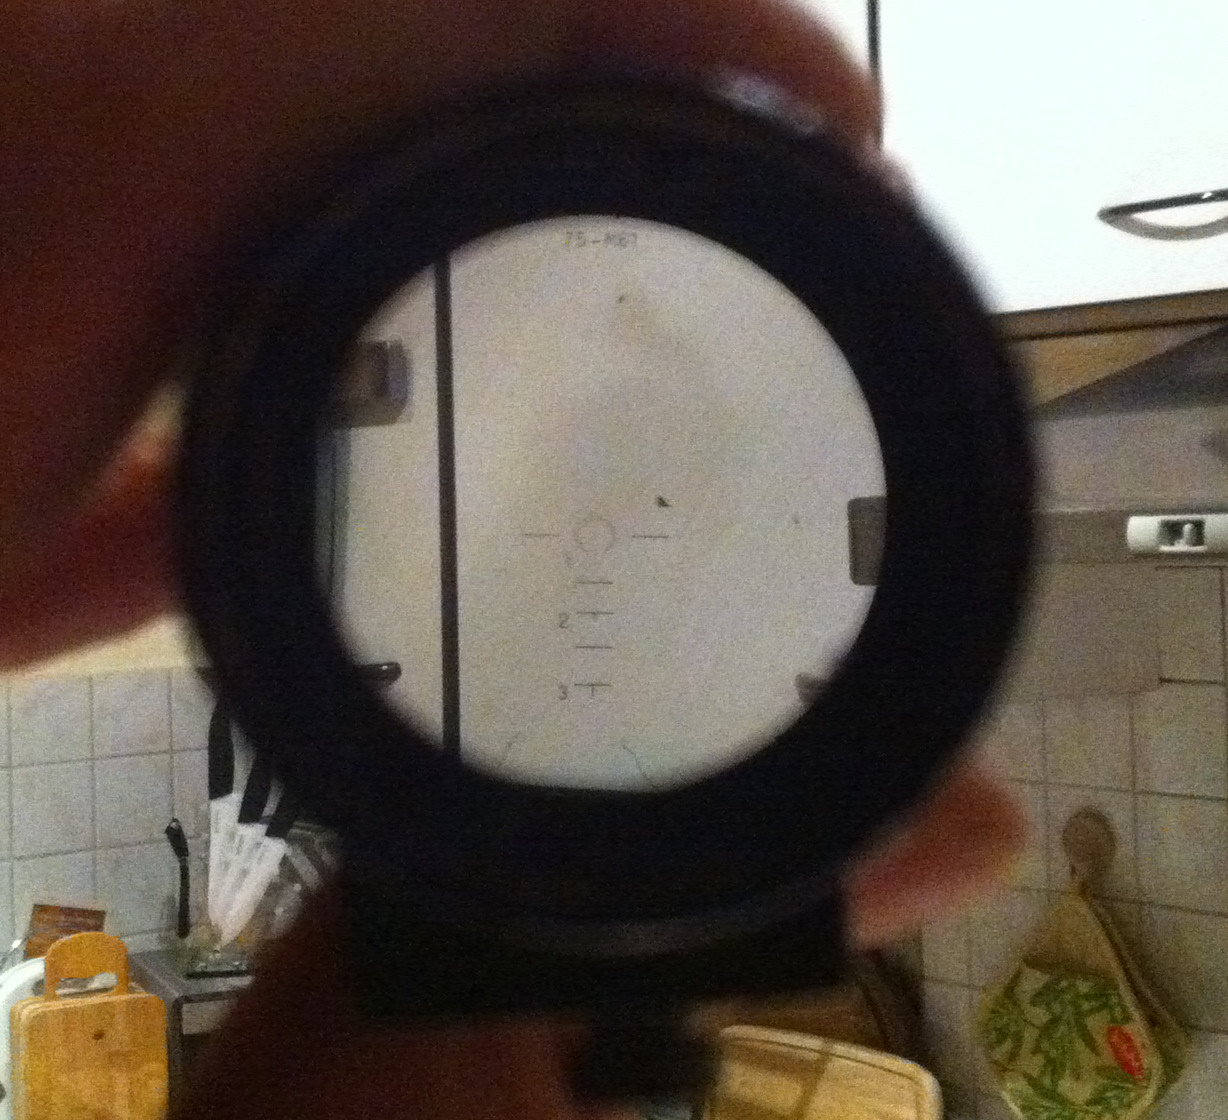
Looking through the scope, I mentioned the crosshairs is 1st: mirror-inverted and 2nd: it's range scale showing to the wrong direction.
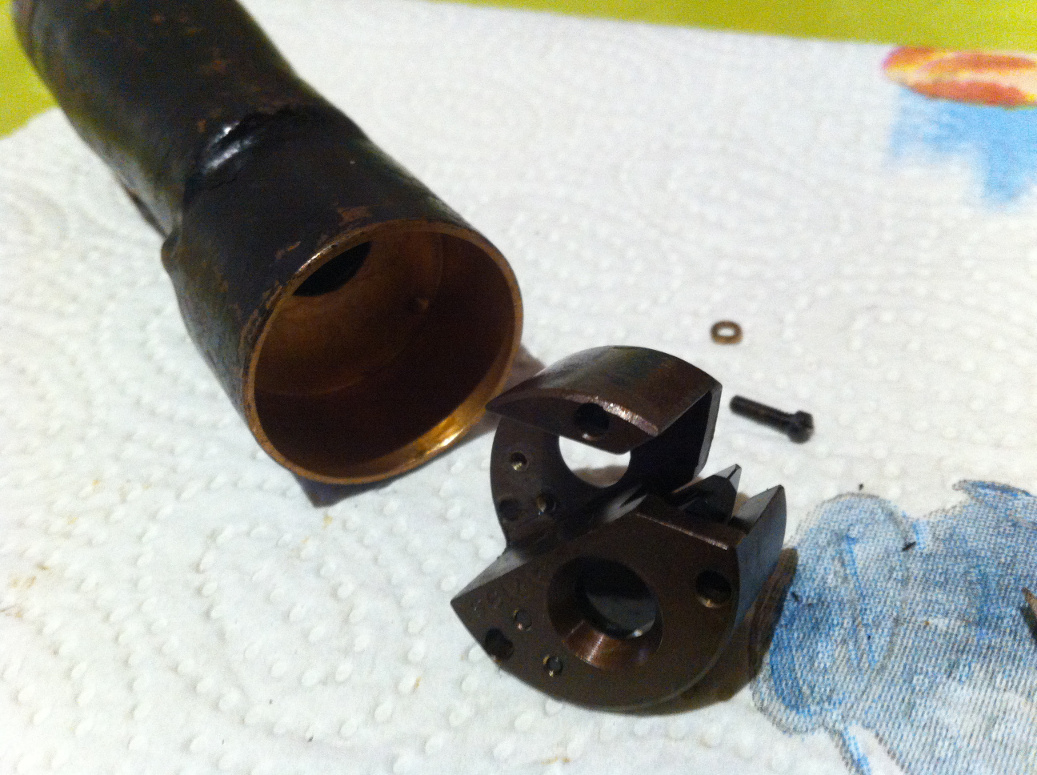
I wanted to clean the scope anyway. Besides I'm a curious person and so I just started to take the whole thing apart to fix the wrong adjusted crosshairs.
First I took of the original base:
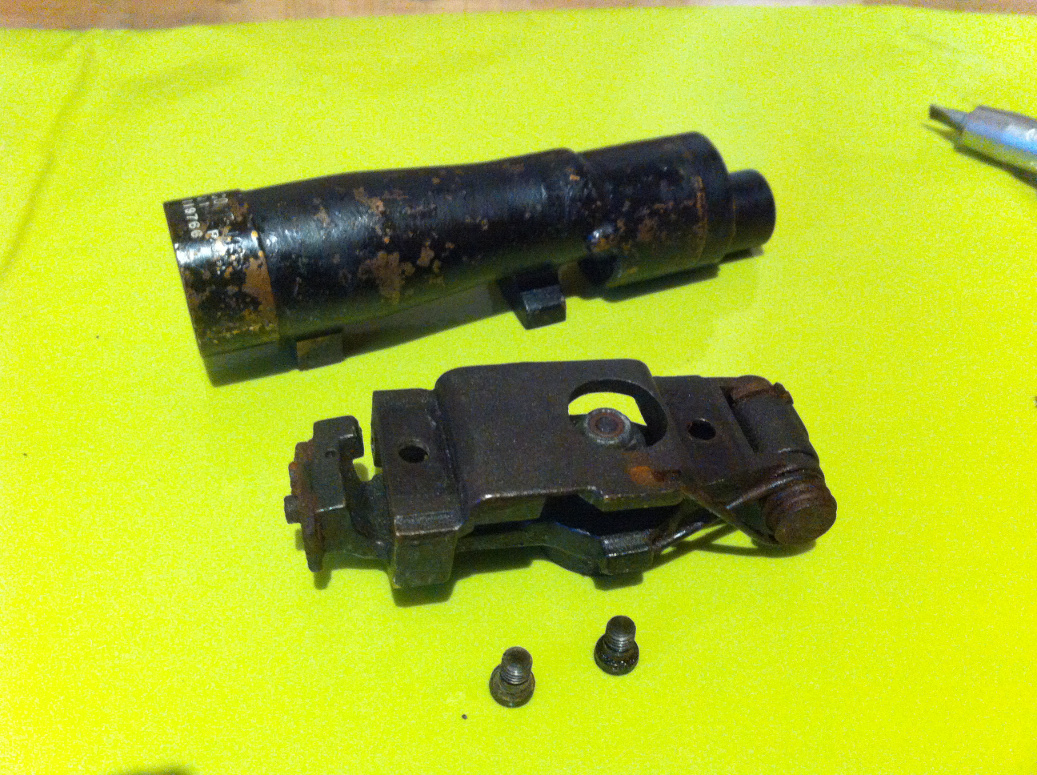
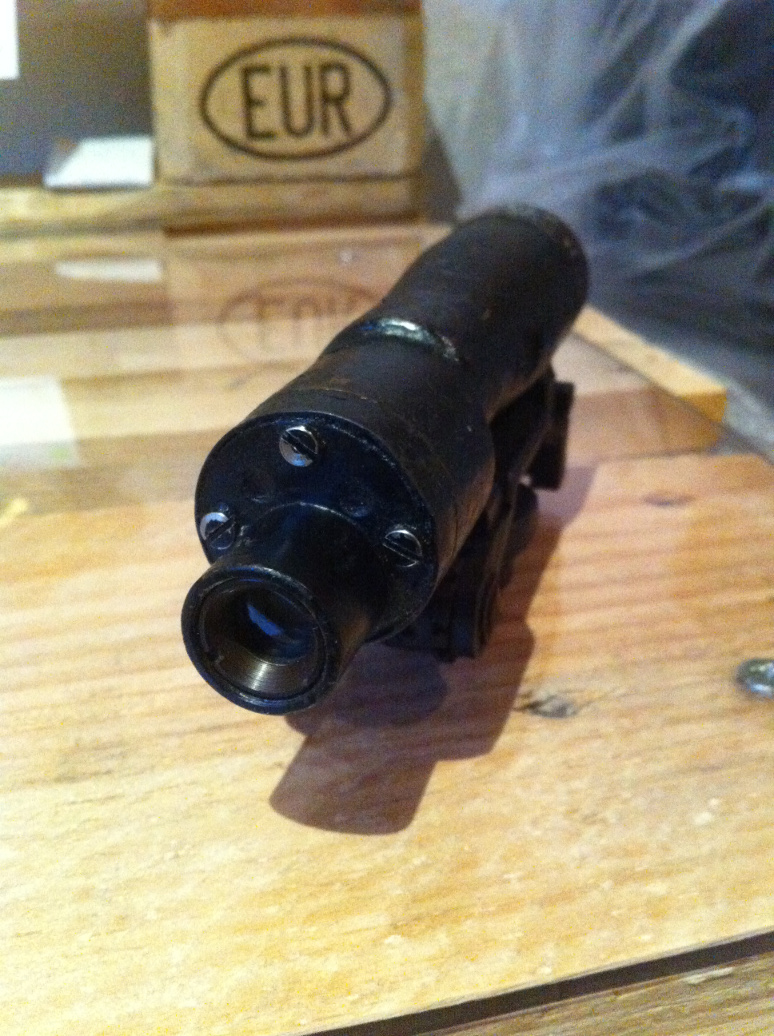
Then I unscrewed the small lens:
Behind the lens is a spool piece.
Underneath is a part with two prisms/mirrors.
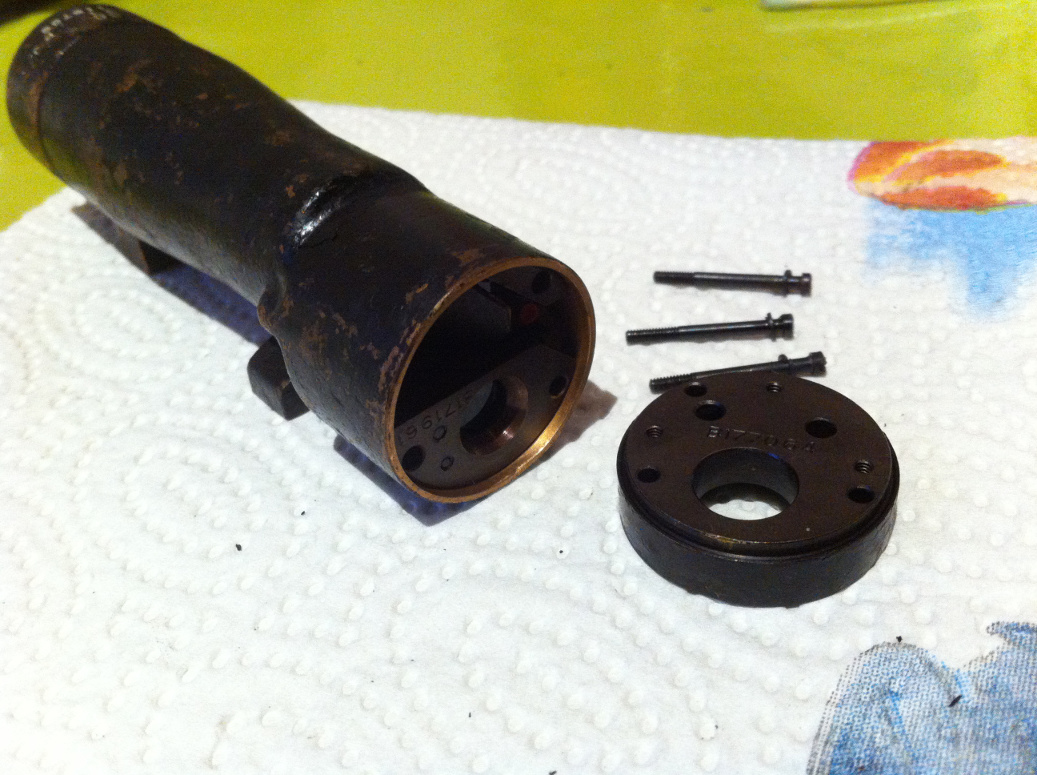
This part fits very well. First I removed the fore prism...
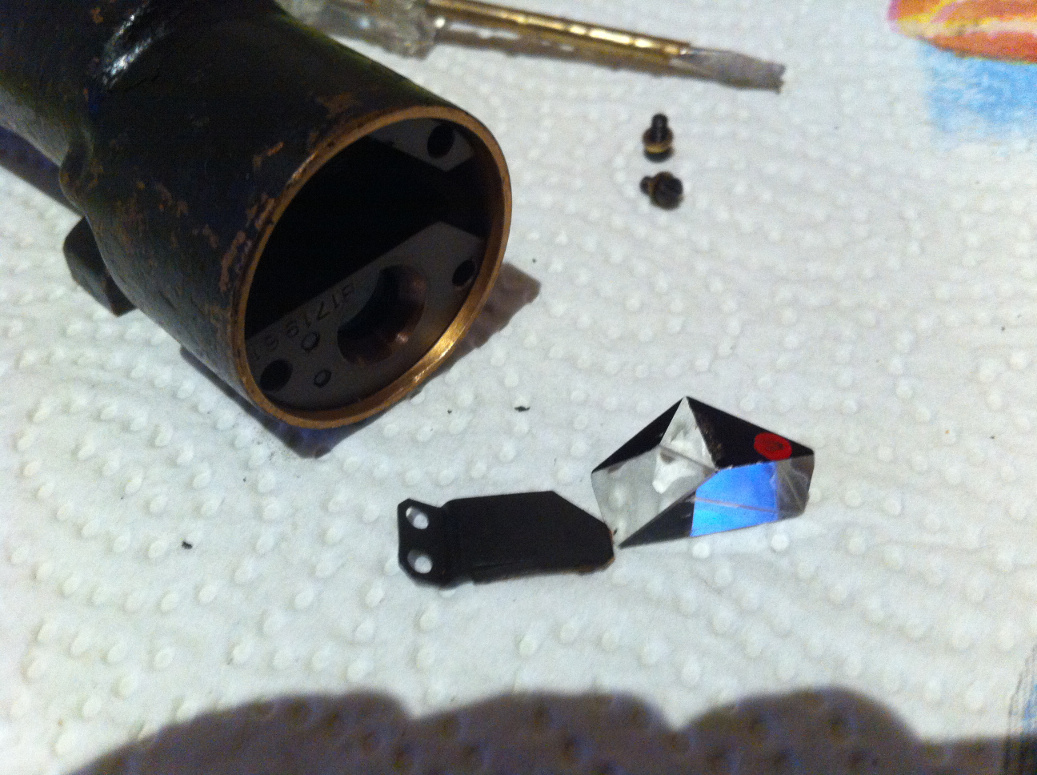
... and used the tightening bolt of the prism-block to carefully lift the block out of the scope. To do that use one of the threads the first prism was screwed with. There is no need to use force or a lever to remove the block.
The rear prism is marked green.
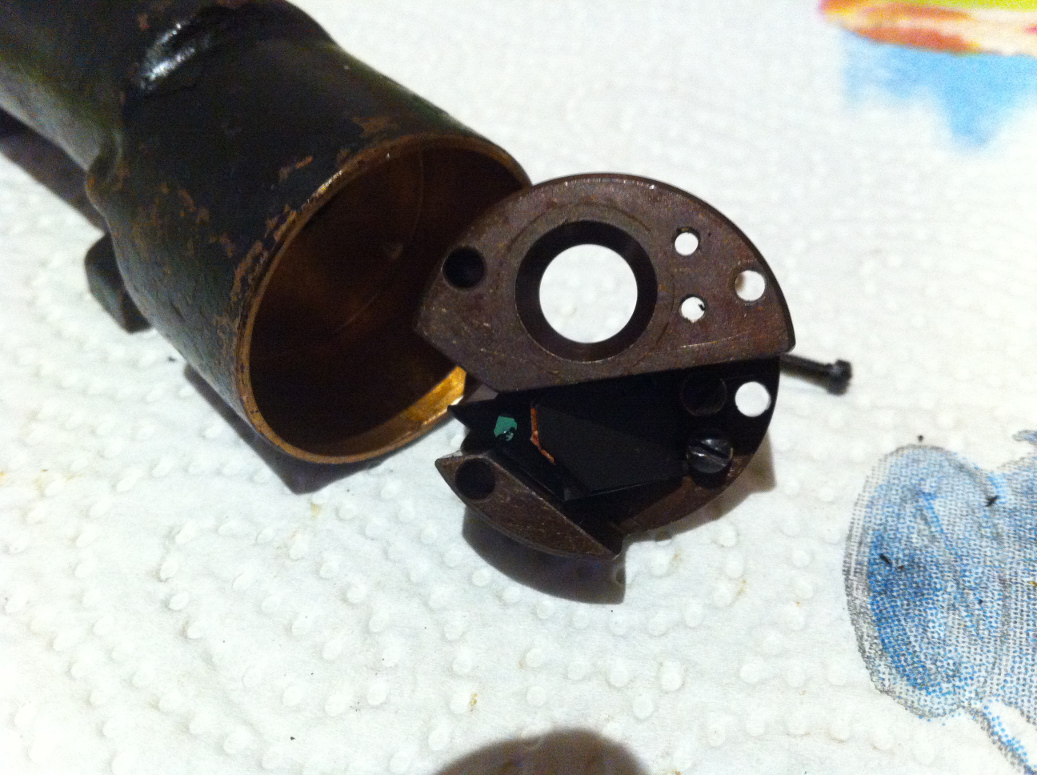
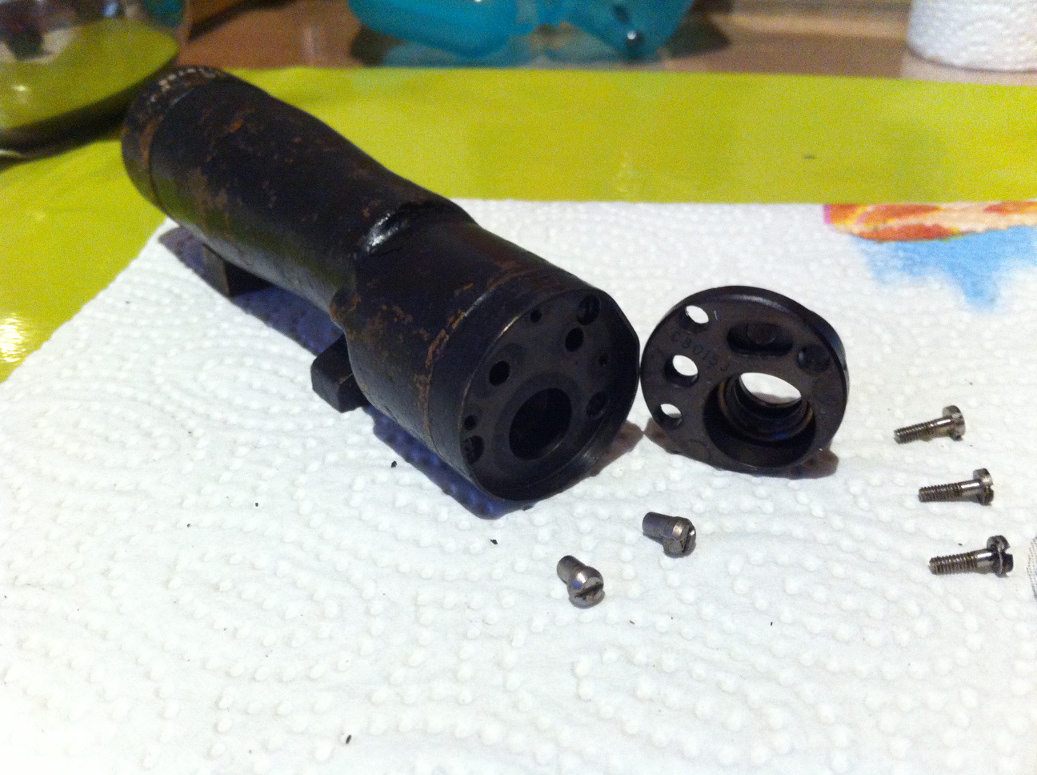
At last I removed the rear lens and the holder with the crosshairs which is assembled underneath.
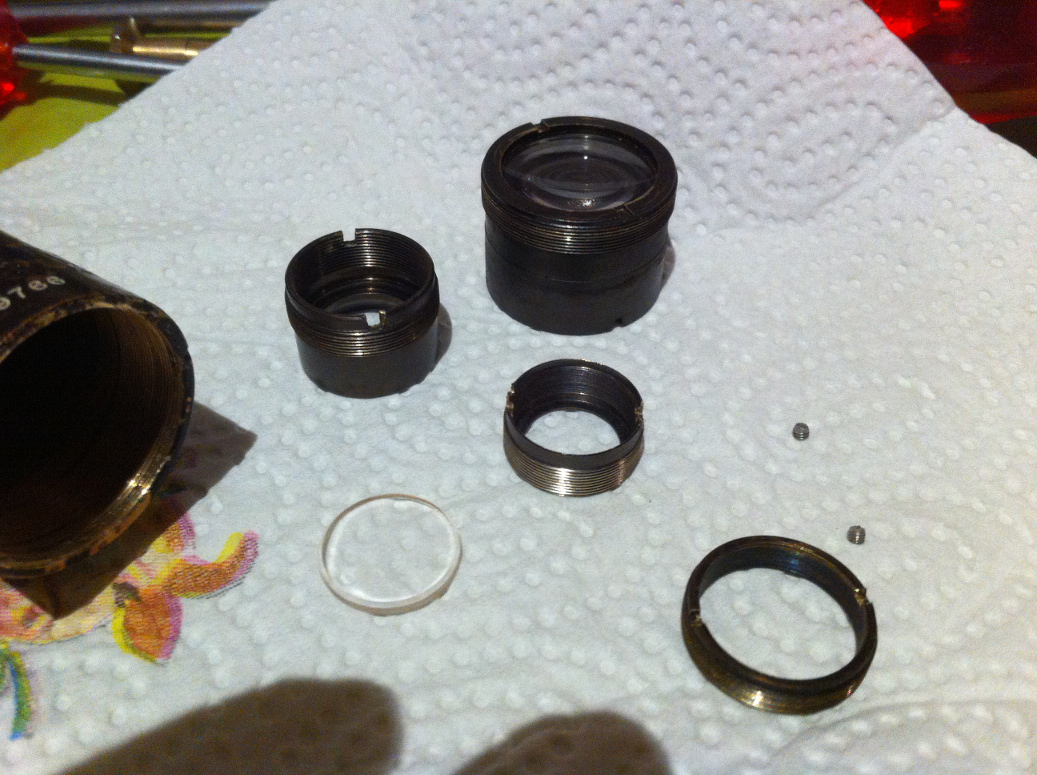
Nice to know: hidden under the paint are 4 small setscrews (you can see two of them on the picture above). The ringnuts and lenses are secured by these setscrews. They have to be removed first!
After cleaning everything, the view through the scope is much clearer and because I turned the crosshairs all markings are readable and correctly adjusted. Perhaps this is not screen accurate but I think it's looking much cooler now.
Was worth the effort, wasn't it?
Here some additional pictures of the scope after reassembling:
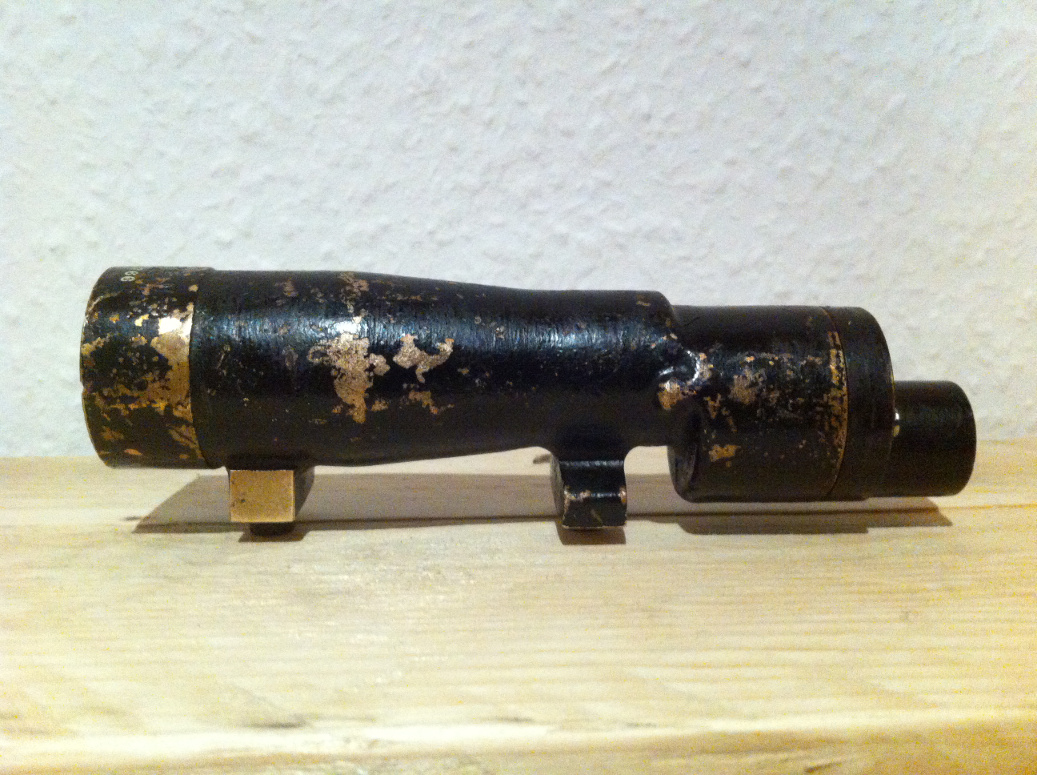
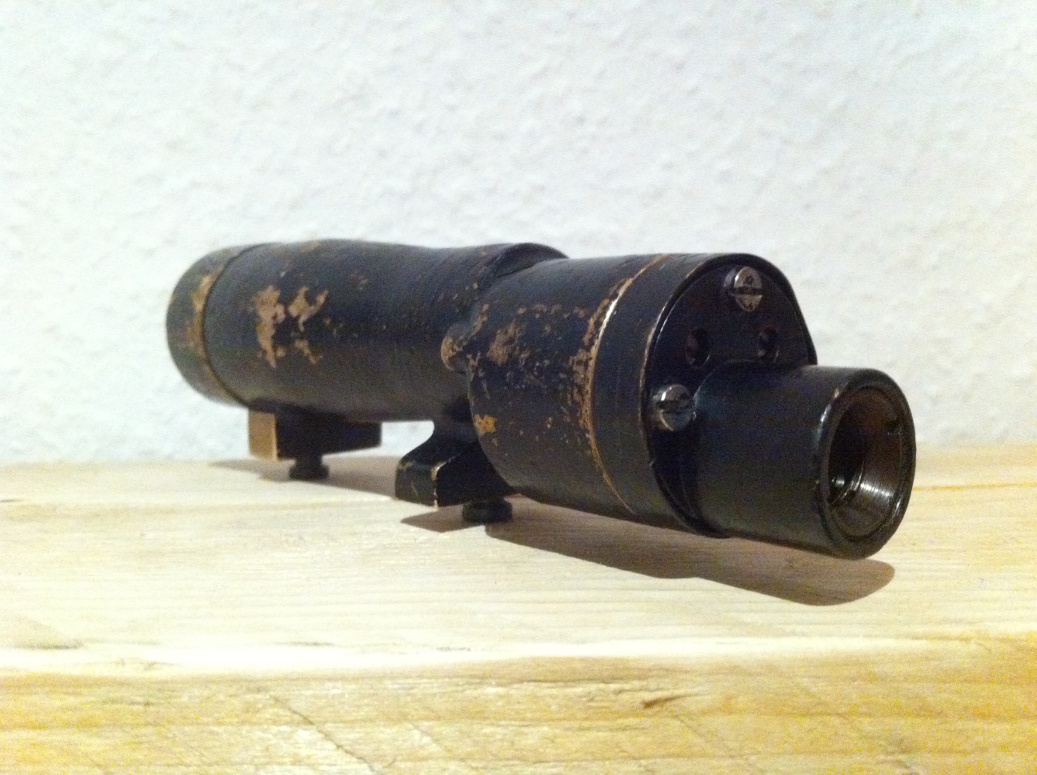
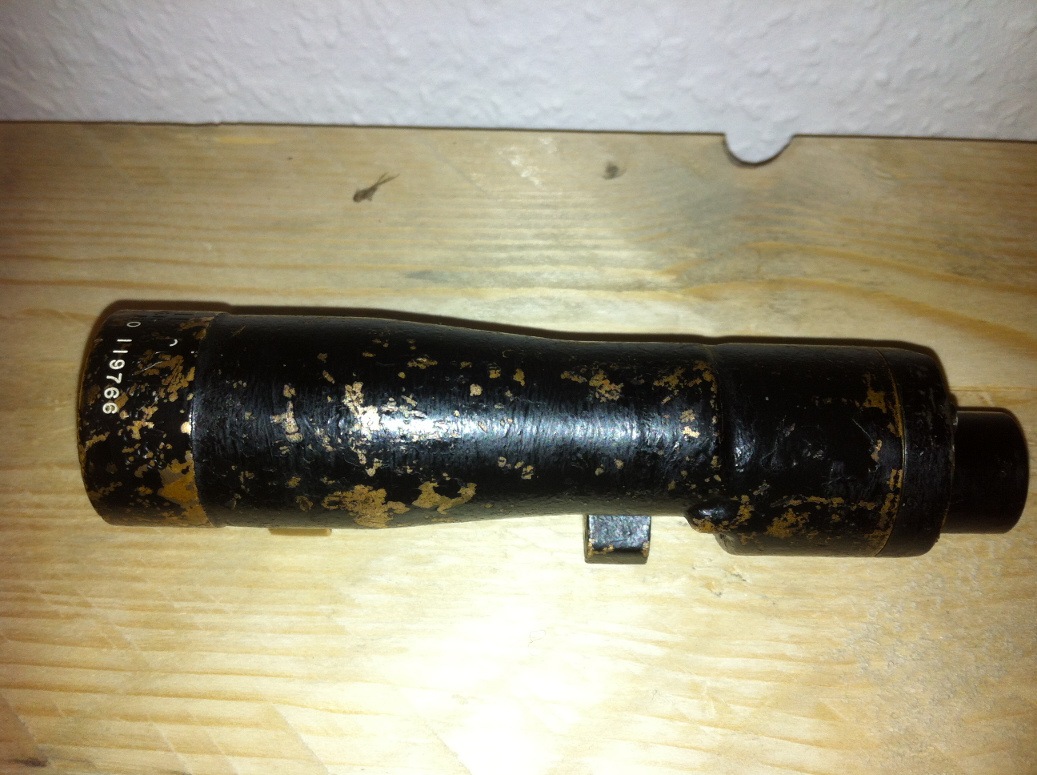
Depending on how the Sterling is looking like I eventually repaint the scope later to get a smooth look. Until then I leave it naturally weathered.
Original sized pictures are in my Blaster-Gallery:http://www.novakdimon.de/Novak%20Dimon%C2%B4s%20E11/M38%20Scope/index.html
Now I have to wait for the next parts to continue.
Greetings from Germany!
Christian
-
1
-
-
Hi Troopers,
Here I want to share my project "conversation of a Sterling Mk4 L2A3 into an E11 Blaster"
For a long time I only dreamed of it. Again and again I put it aside. "No time to do it", "that's too expensive", "what is it good for?" ... relented the "reasonable" arguments over and over again. But who wants to be reasonable all the time?!
Enough of it! Let's do it!I started with research. I took my time until I made first contact to get the parts I need.
I want to make a replica as accurate as possible, using only parts the blasters in the movie "A New Hope" were made of, if available.
Besides I want to build myself everything else. For the power Cylinders I ordered a kit from Andy"PlayfulWolfCub". His Cylinders are the best ever! But I want to put them together myself anyway to challenge myself.
Sources for the Sterling, the Hengstler Counter and the T-tracks are also known and some parts are already on the way to my place.
I received a M38 scope from Italy last week and that's the part I'll start my report with.
I made a gallery for all the pictures I'll take during the project: http://www.novakdimon.de/Novak%20Dimon%C2%B4s%20E11/
Have fun with my report!
Cheers
Christian
-
Hi Troopers,
My name is Christian, I'm 36 years old and I live in the city of Jever in Germany.
A couple ow weeks ago I finally decided to build my own Stormtrooper armor and equipment. The first time I wanted to do it is about 15 years ago but never came further then some basic research.
Times changed and I was looking for something new to do. Because I built models of starships, battlemechs, planes and ships in the past I was looking for Star Wars model kits. But my son, who's sharing my love to Star Wars, reminded me of my former plans and I decided to build a Stormtrooper armor instead.
I joined FISD some time ago while looking for information how to make the equipment as realistic as possible.
I will start with the E11 blaster because I think that it will be harder to find original parts for making it the longer I wait.
I found a lot of parts thanks to this forum and it's German version and want to share the progress of my projects here with you once I started them. Maybe it will be good enough to join the 501st.
I'm looking forward to an interesting time here.
Best regards
Christian
Novak Dimon's Sterling-Conversation
in ANH BlasTech E11
Posted
Hi, It took longer then expected but I wantet to find a gunsmith that makes the deactivation as concealed as possible. The most difficult part here was the deactivation of the trigger mechanism. Because its lengh the Sterling L2A3 is a so called short weapon in germany and the trigger mechanism must be deactivated. Most sellers simply weld the trigger onto the handgrip. I didn´t want it that way but finally I found someone who disabeled the trigger internally so it is invisible and still moving. Even the safety is still working.
  But pictures say more then 1000 words.
On friday the heart of my future E11 arrived: the deactivated Sterling.
Thats how it arrived:
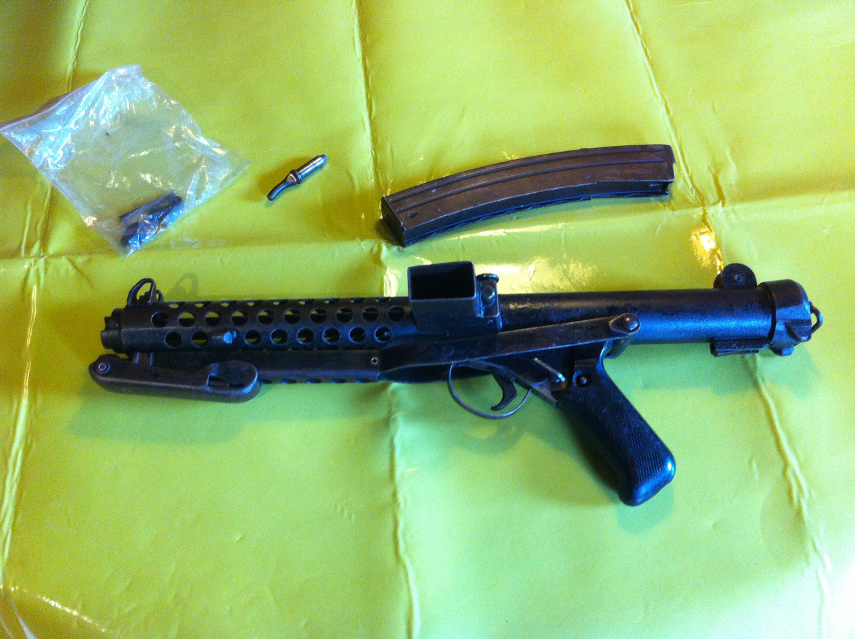
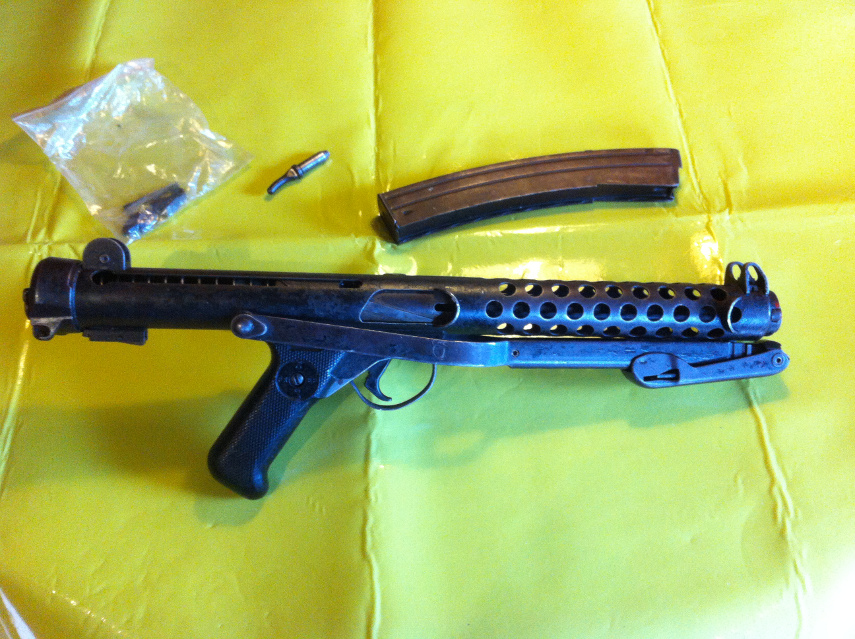
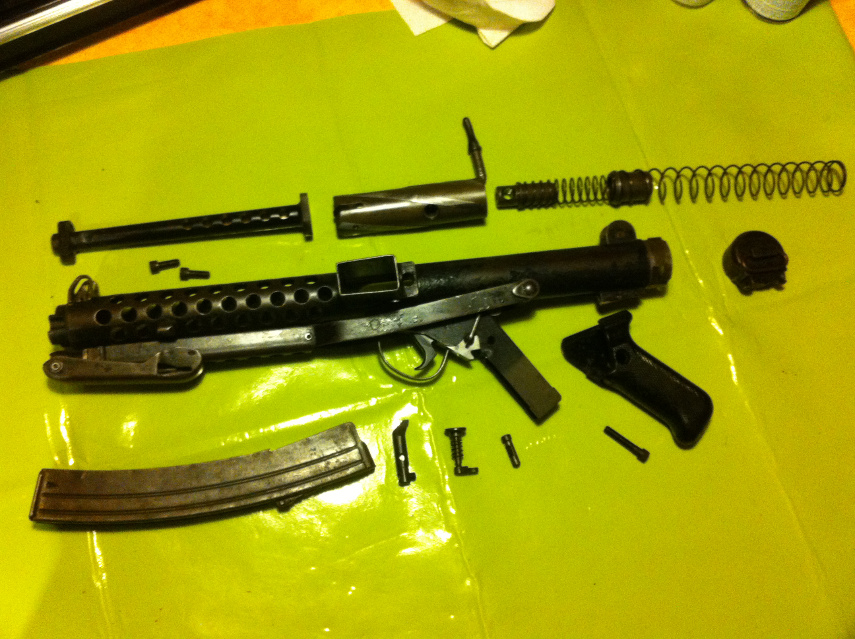
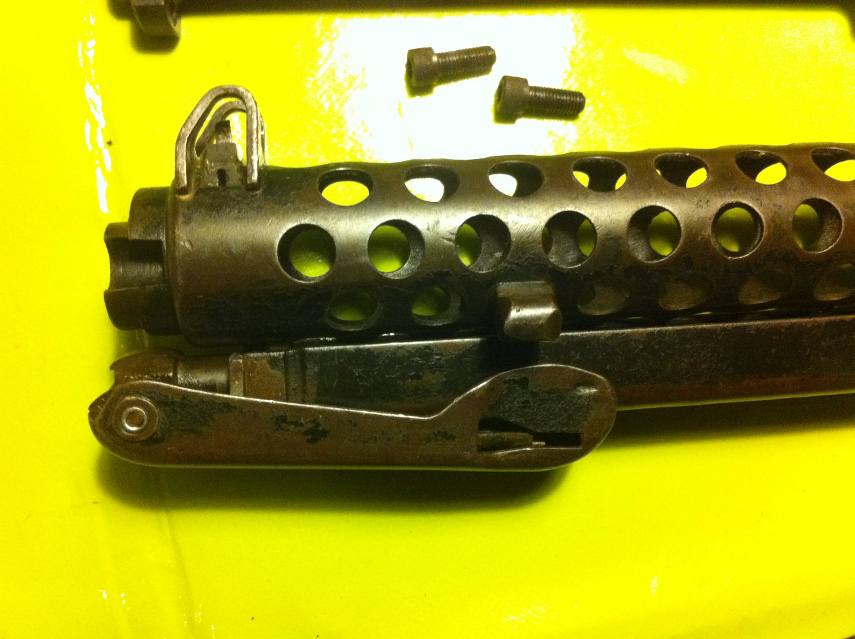
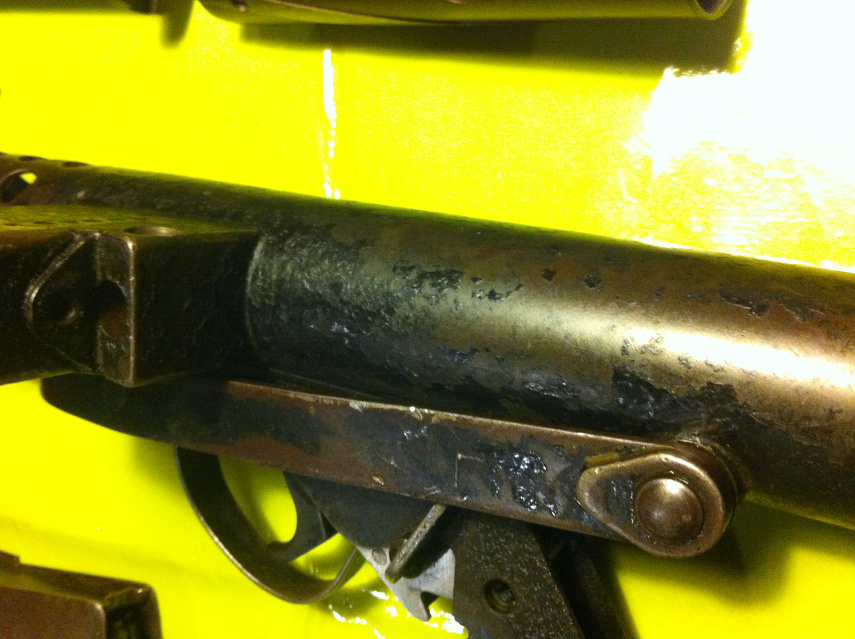
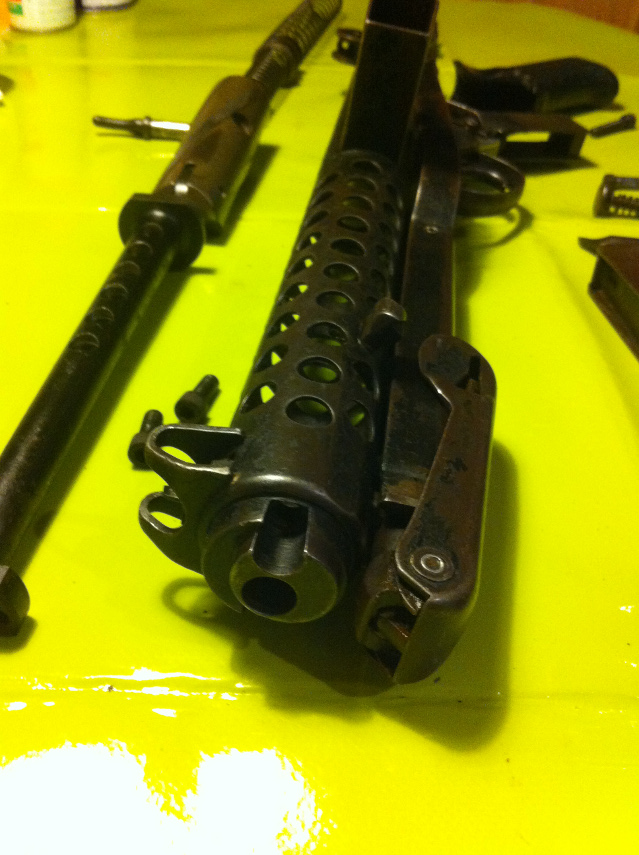
Disassambeled and after some cleaning:
I´m thinking about puting a thin layer of paint onto the Sterling because the original paint is nearly completely gone. Or should I leave it the way it is? What do you think? I will be happy to read your opinion.
Now I will continue cleaning it and then complete my Power Cylinders.
Best regards from Germany!
Christian