Skypig
-
Posts
190 -
Joined
-
Last visited
Content Type
Profiles
Forums
Gallery
Articles
Everything posted by Skypig
-
Love my curved Lexan scissors. Work like a champ! Sent from my iPhone using Tapatalk
-
 Looks real nice.
 -
Are you ever too old to Troop?
Skypig replied to DroidHunter's topic in Getting Started - Read this First!
47 and living the dream. Sent from my iPhone using Tapatalk -
I was recently awarded EIB with my AM build. Also, I believe with the changes Troopergear has done to his molds, AM can be approved for Centurion.
-
The AM might be too big. I'm 6'2", 225 and I had to do a lot of trimming.
-
I just recently completed my AM build and I am very happy with it. With the support of this board, I didn't have any difficulties putting the armor together. It is definitely made for a large trooper. I'm 6'2", 225 and I did not add any shims. I had to do a lot of trimming. Be patient, he'll be in contact with you. I found his communications excellent while I waited on delivery.
-
LoveMonkey's AM 2.0 Build Thread
Skypig replied to LoveMonkey's topic in Build Threads Requireing Maintenance
I just made sure mine was as tight as I could make it (top and bottom), yet still be able to slip my hand through. -
LoveMonkey's AM 2.0 Build Thread
Skypig replied to LoveMonkey's topic in Build Threads Requireing Maintenance
I trimmed off all of the return edge, top and bottom. No need to have anything digging into your shin. -
LoveMonkey's AM 2.0 Build Thread
Skypig replied to LoveMonkey's topic in Build Threads Requireing Maintenance
You can see in this picture where elastic connects the forearm to the bicep. http://www.whitearmor.net/forum/gallery/image/907-arms-1jpg/. The bicep is then attached to the shoulder armor which is then snapped to then elastic holding the chest and back plate together. Essentially you have a sleeve that you pull on. -
LoveMonkey's AM 2.0 Build Thread
Skypig replied to LoveMonkey's topic in Build Threads Requireing Maintenance
No, because they will be attached to the bicep and shoulder armor. -
LoveMonkey's AM 2.0 Build Thread
Skypig replied to LoveMonkey's topic in Build Threads Requireing Maintenance
For the thighs. First I cut all the excess off the front of them to 10mm on each side, so a 20mm cover strip would cover them. I then held them together with blue tape, and made sure they conformed to my leg, and that I could slide them on and off. My wife then marked the center point on the top and bottom of the overlap on the back of the thigh. She made sure the marks were in the center of the back of my leg. I then connected the dots, scored, snapped and used 20mm cover strips to finish them up. -
They'll be your best bet. Just give them some time.
-
Have you made contact with your local Garrison? It looks like California Central Garrison. They may have an armor party scheduled.
-
Got a link?
-
TK 91101 requesting ANH Stunt EIB status [AM2][491]
Skypig replied to Skypig's topic in Request Expert Infantry Status
Thank you. I'm very excited about this. I plan on getting some troops under my belt, and incorporating the changes you suggested and then submit for Centurion. Sent from my iPhone using Tapatalk -
No, but I'll take a pic tomorrow. It wasn't much of a gap, but, I was getting frustrated, so, I heated up the inside and pushed it out. Seemed to work. Sent from my iPhone using Tapatalk
-
Here's a tutorial on adding shims. http://www.whitearmor.net/forum/topic/30448-adding-kidney-shims-for-larger-troopers/
-
"Is it taboo to heat the cheek and push it out to close the gap between the ear and cheek?" This is exactly what I did.
-
TK 91101 requesting ANH Stunt EIB status [AM2][491]
Skypig replied to Skypig's topic in Request Expert Infantry Status
Cod / Butt attachment. Sent from my iPhone using Tapatalk -
TK 91101 requesting ANH Stunt EIB status [AM2][491]
Skypig replied to Skypig's topic in Request Expert Infantry Status
Oh, and the visor is being kept in by a combination of tension, and e6000. Sent from my iPhone using Tapatalk -
TK 91101 requesting ANH Stunt EIB status [AM2][491]
Skypig replied to Skypig's topic in Request Expert Infantry Status
Thank you for the review. The thigh pack has already been addressed in my build thread, http://www.whitearmor.net/forum/index.php?/topic/31919-Skypigs-ANH-Stunt-%28AM-v2%2E0%29/page__view__findpost__p__411241, but I didn't update the pictures here. Let's remedy that. I removed the pack, filled the hole with ABS paste, sanded it smooth, trimmed and reattached it the proper way. Let me know if you need additional pictures. Thank you. Sent from my iPhone using Tapatalk -
Skypigs ANH Stunt (AM v2.0)
Skypig replied to Skypig's topic in Build Threads Requireing Maintenance
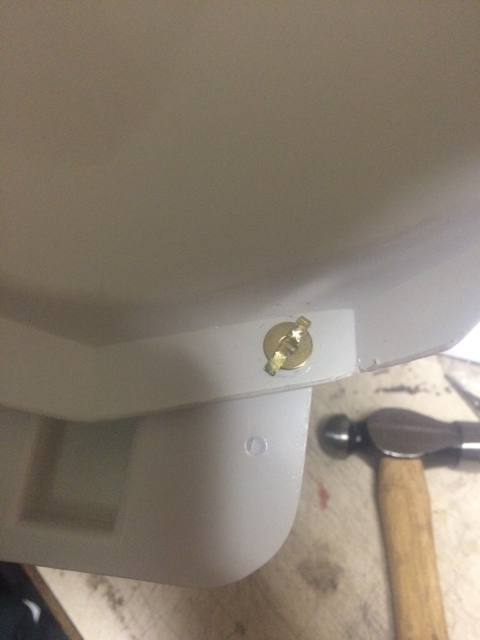
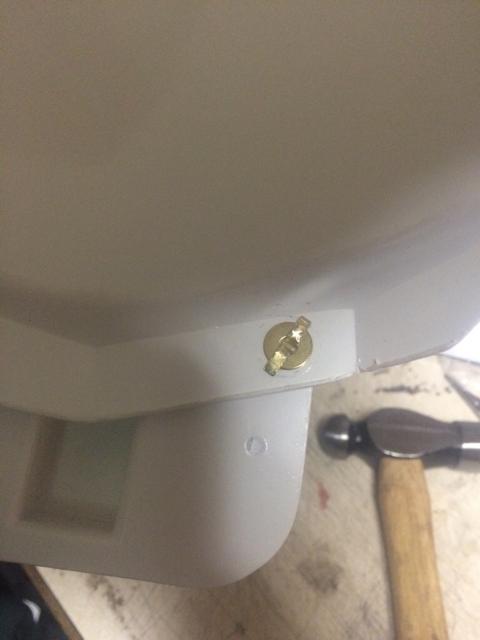
A little light sanding today, followed by a shot of spray "Crystal Clear" enamel, and the results aren't too bad. Used some new split rivets. Used a flat head screw driver to slightly spread them, then finished them off with a ball pean hammer. I also placed a small piece of white Velcro on the front of the thigh to keep the ammo boxes from moving. Much happier with this result. Sent from my iPhone using Tapatalk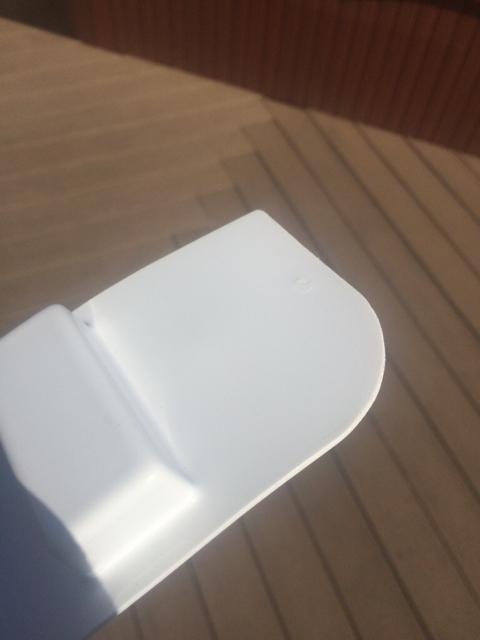
-
Skypigs ANH Stunt (AM v2.0)
Skypig replied to Skypig's topic in Build Threads Requireing Maintenance
So started work on fixing my thigh ammo pack. First I made some ABS paste with some scrap ABS (which there seemed to be a lot) and some acetone I "borrowed" from the wife. I then figured out where I wanted to trim and lightly penciled a mark. I did this on both sides. With the help of a flat headed screw driver, sone needle nose pliers, and a little cursing, I was able to straighten the split rivets and remove the ammo pack. Luckily, I ordered two sets of split rivet's from Echo so I have a couple spares. I then drew my pencil lines, added the curve, cut with my Lexan scissors, and smoothed everything out with some sandpaper. By now, my ABS paste was ready (about the consistency of mayo), so I taped off the backside of the ammo pack to prevent the paste going everywhere, and dabbed a little in each hole. Going to let that dry for a while. -
Look at AM, (Troopergear). It can be done. Looking forward to your build.
-
Looking good, Brother.