
.jpg.e7bd20664903d9264ed0da4d399d8e8f.jpg)

sharkbait
-
Posts
850 -
Joined
-
Last visited
-
Days Won
4
Content Type
Profiles
Forums
Gallery
Articles
Media Demo
Posts posted by sharkbait
-
-
84. Hydrocephalus Walk, Fresno - 11/10
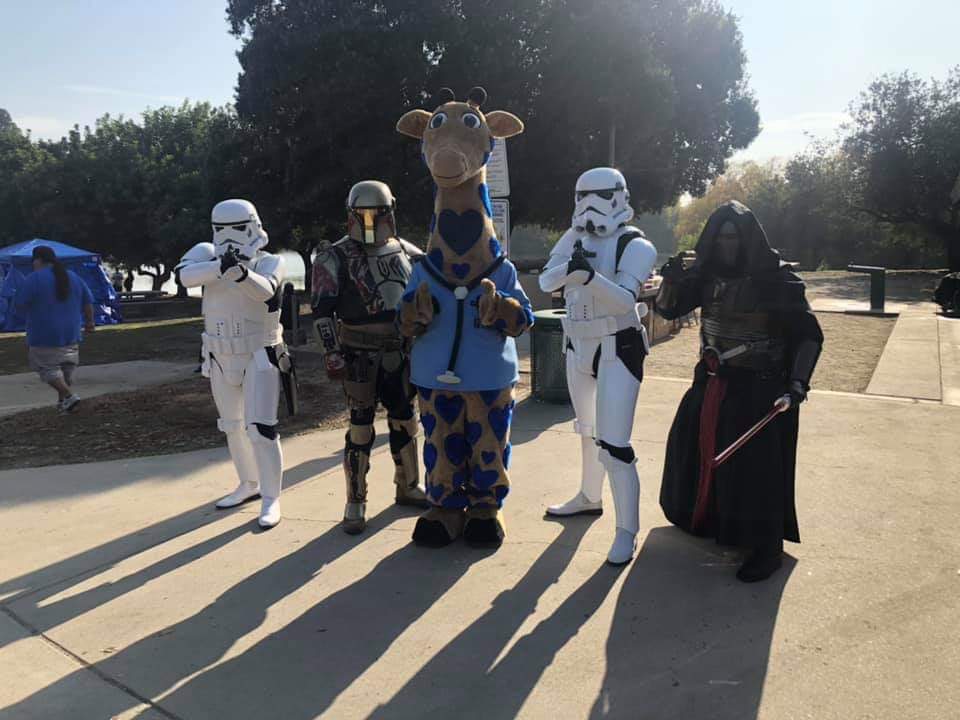
With George, the Valley Children's Hospital Giraffe mascot. We've trooped with George multiple times over the years at various events. (I'm next to Revan)
-
 1
1
-
-
83. SunMaid Family Appreciation Harvest Festival, Kingsburg – 10/26

On the right. Wonder Woman is our own TI-40821.
-
2
-
-
82. Eaton Elementary Harvest Carnival, Fresno – 10/25
On the right.
-
81. Spooktacular, Clovis – 10/24

First TK on the right. Featuring TI-40821's husband (eventual future member, current cosplayer) and daughter- she was a Cereal Killer and specifically choice Life cereal for her costume.
-
2
-
-
My cat's name is Falcon, after the Millennium Falcon. Pretty sure she'd make the Kessel Run in less than 12 parsecs based on her morning (and afternoon and evening and night) zoomies.
Cat tax:

-
3
-
-
She's going to the chromer tomorrow!!!
Don Valenzuela of Don Valenzuela's Autobody in Clovis is going to be doing it for me. His main business is autobody painting and work, but he's also an artist and has done beautiful logos for some local wineries.
I'll be dropping her off after work and then... then I can work on all the other stuff in preparation for when she gets back. Gotta wrap up cutting out all the fleece for the cases I'm making for all the parts while I still have them tonight.
-
6
-
-
Weird things you say when you're a costumer: Oh hello, butt plate... I haven't seen you in a while...
The good news is I was able to fix the holster pretty easily- it came off without much trouble, and with no damage other than some glue to scrape off. It went back on about the same as it did the first time- a huge pain and four plus hands needed to really do it. At least this time I hadn’t been painting so there weren’t any paint smears to worry about.

I scraped and rubbed off excess glue in various places. My thumbs feel rubbed raw from all the rubbing and picking at glue. It reminds me of Peter Jackson saying they had so much chain mail made for the LOTR films, that the guys that did it just about rubbed off their fingerprints on a couple of fingers from linking it all together. I did a bit of fine sanding on a couple of edges, checked on seams and inner strips, basically gave everything a once over. Touched up a trim or two. Doesn’t look like much but will make a difference in the end.
One of the shin spats had shifted during gluing, and the seam was huge, so I pulled it apart and re-glued it. Annoying, but just another symptom of how my week is going. I checked it again before I went to bed and it stayed in place this time.
The belt boxes still honestly confuse me, but I’m just going to send them all off to the chromer/painter and then figure them out later.
In my review and digging through the pile of parts, I found that I had forgotten about the upper boot spats- they weren't the right shape out of the box. They're supposed to be rounded, mine are just straight. This is a pretty early KB kit, so it's entirely possible they've worked out some of these things and quirks in the newer versions (they've had at least two versions since mine, not sure after that).

So I marked it up and trimmed them real quick. I used the first off-cut to mark the next ones.


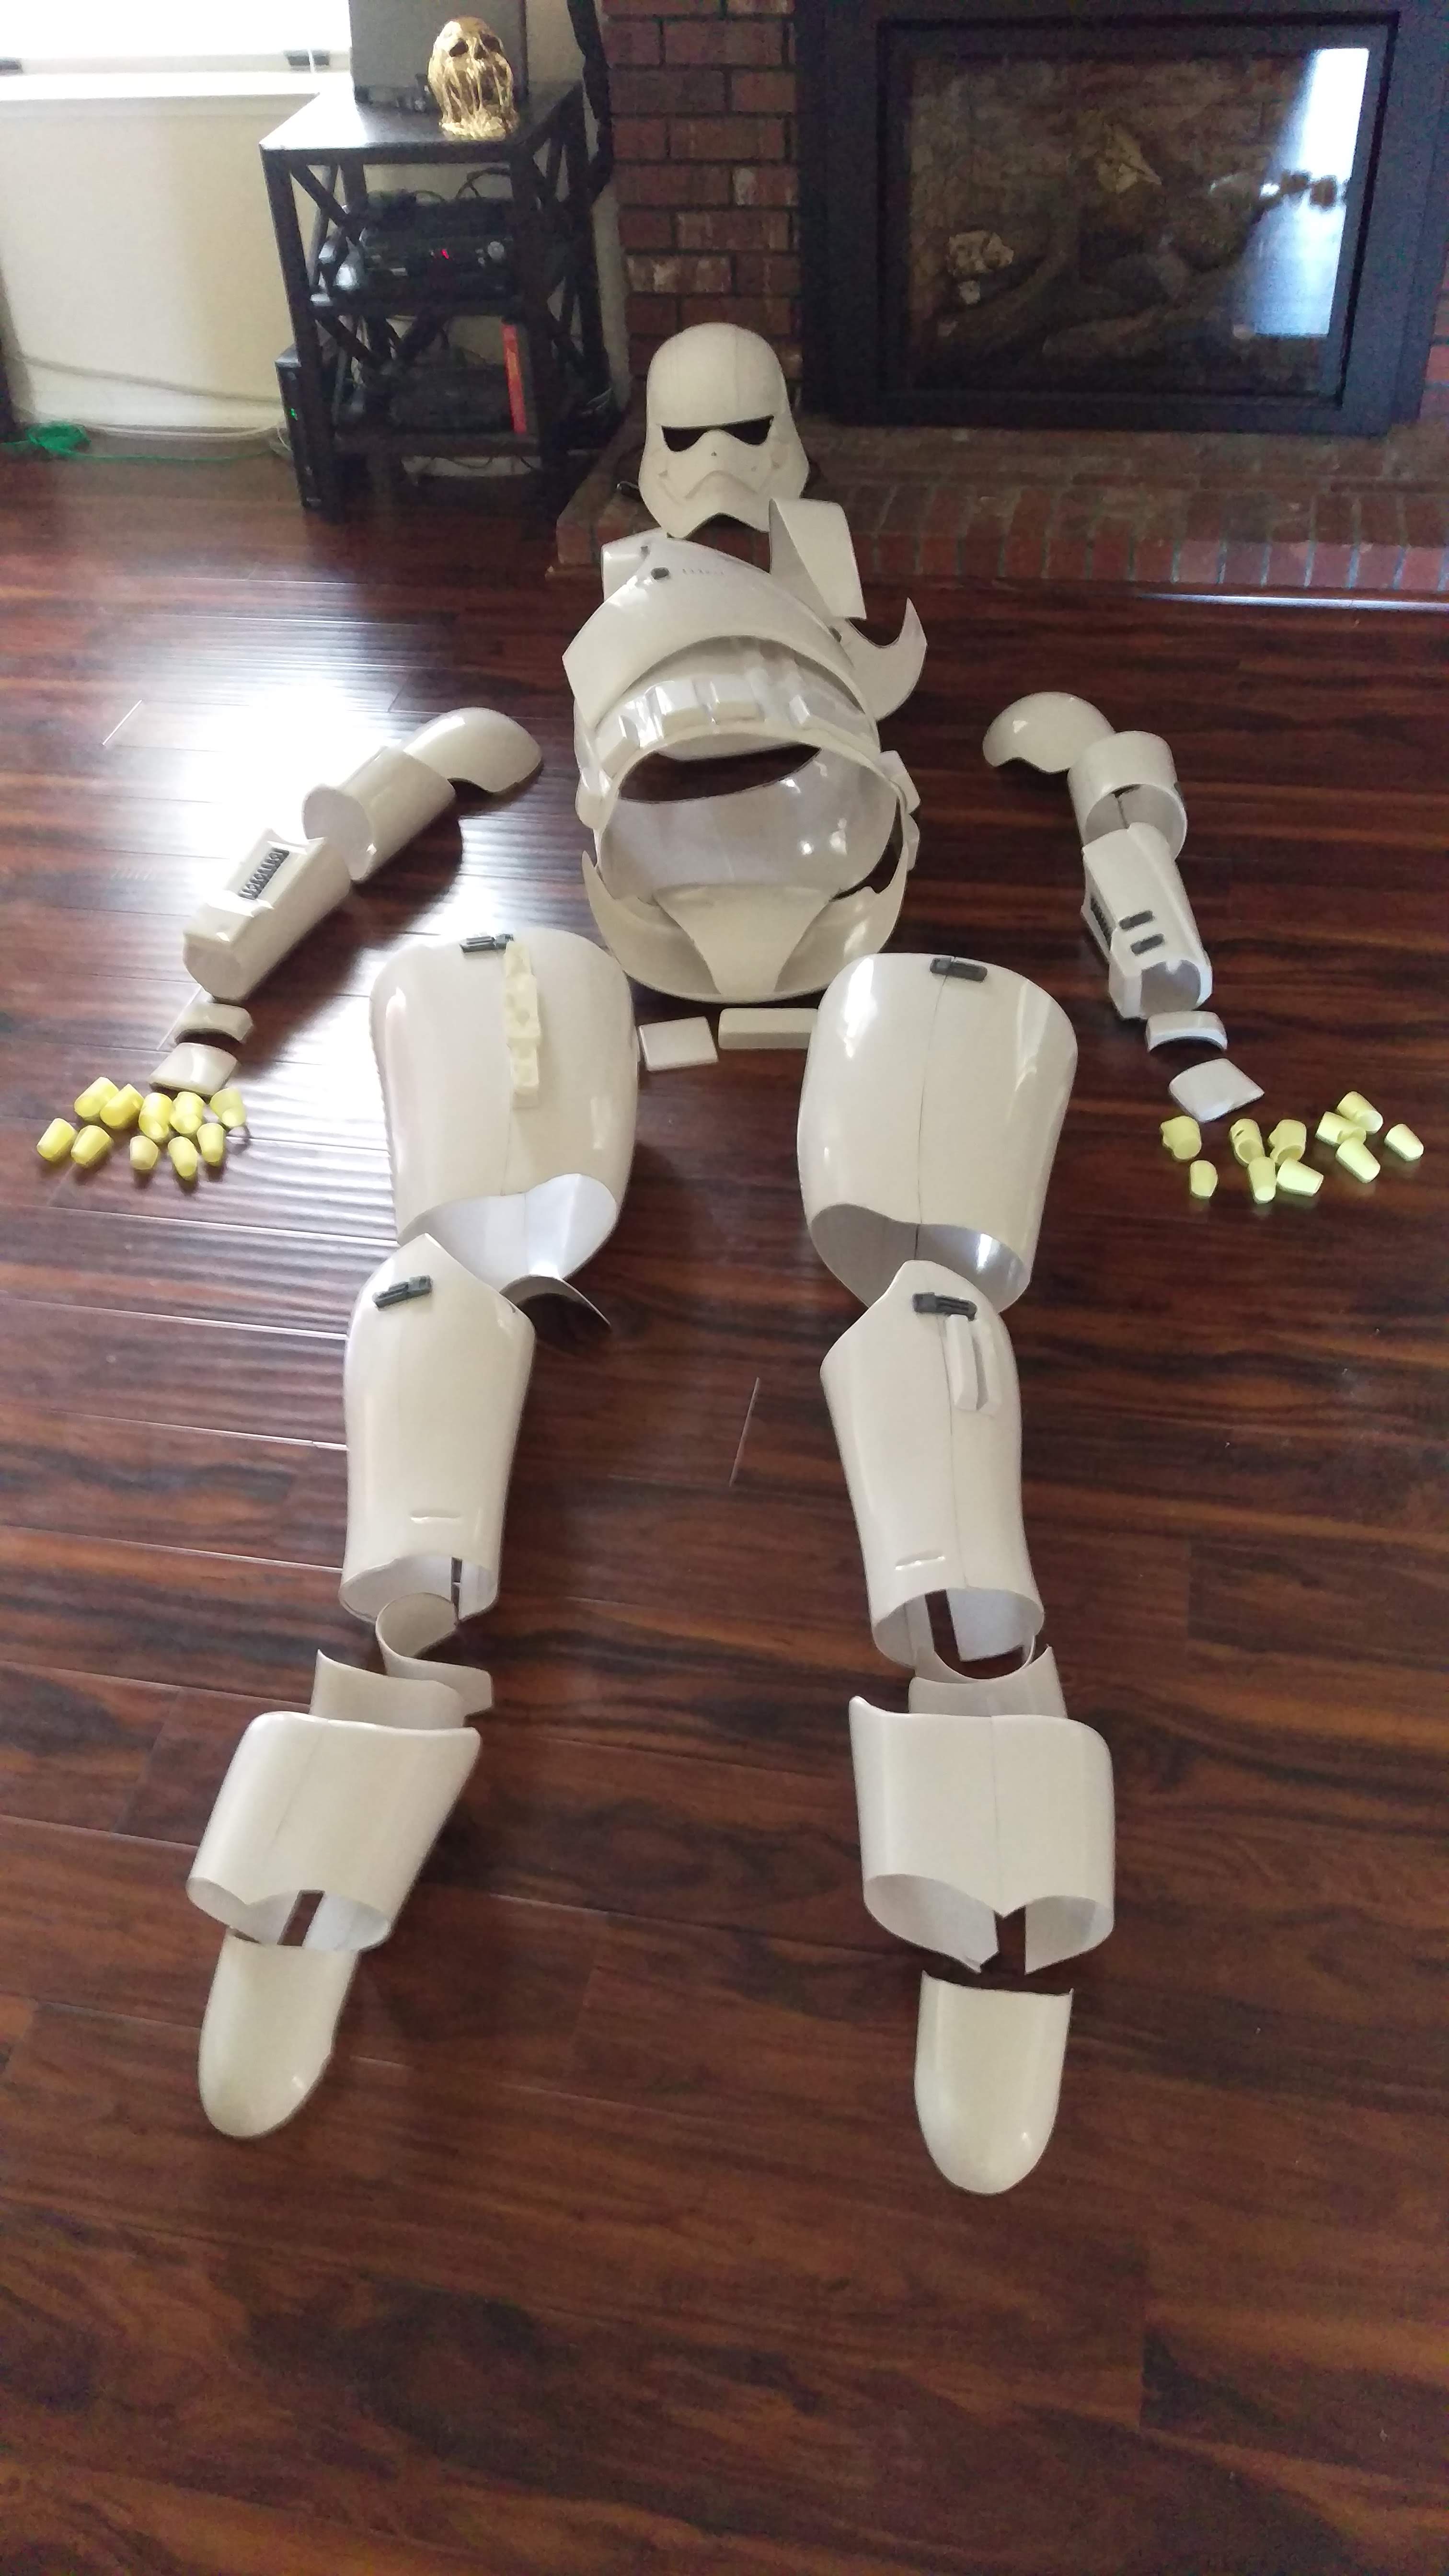
Well look at that... she's actually fully assembled... And yet, she looks not a whole lot different than she did in a huge pile of parts form BBB Day.

Now it's time to get all the dust and grime off from being in the garage for all this time. (My town is a dusty place on a good day, and the garage is terrible, no matter how many times I use the blower to clean it out).
The weird things you do as a costumer:
Bath time for Phasma!
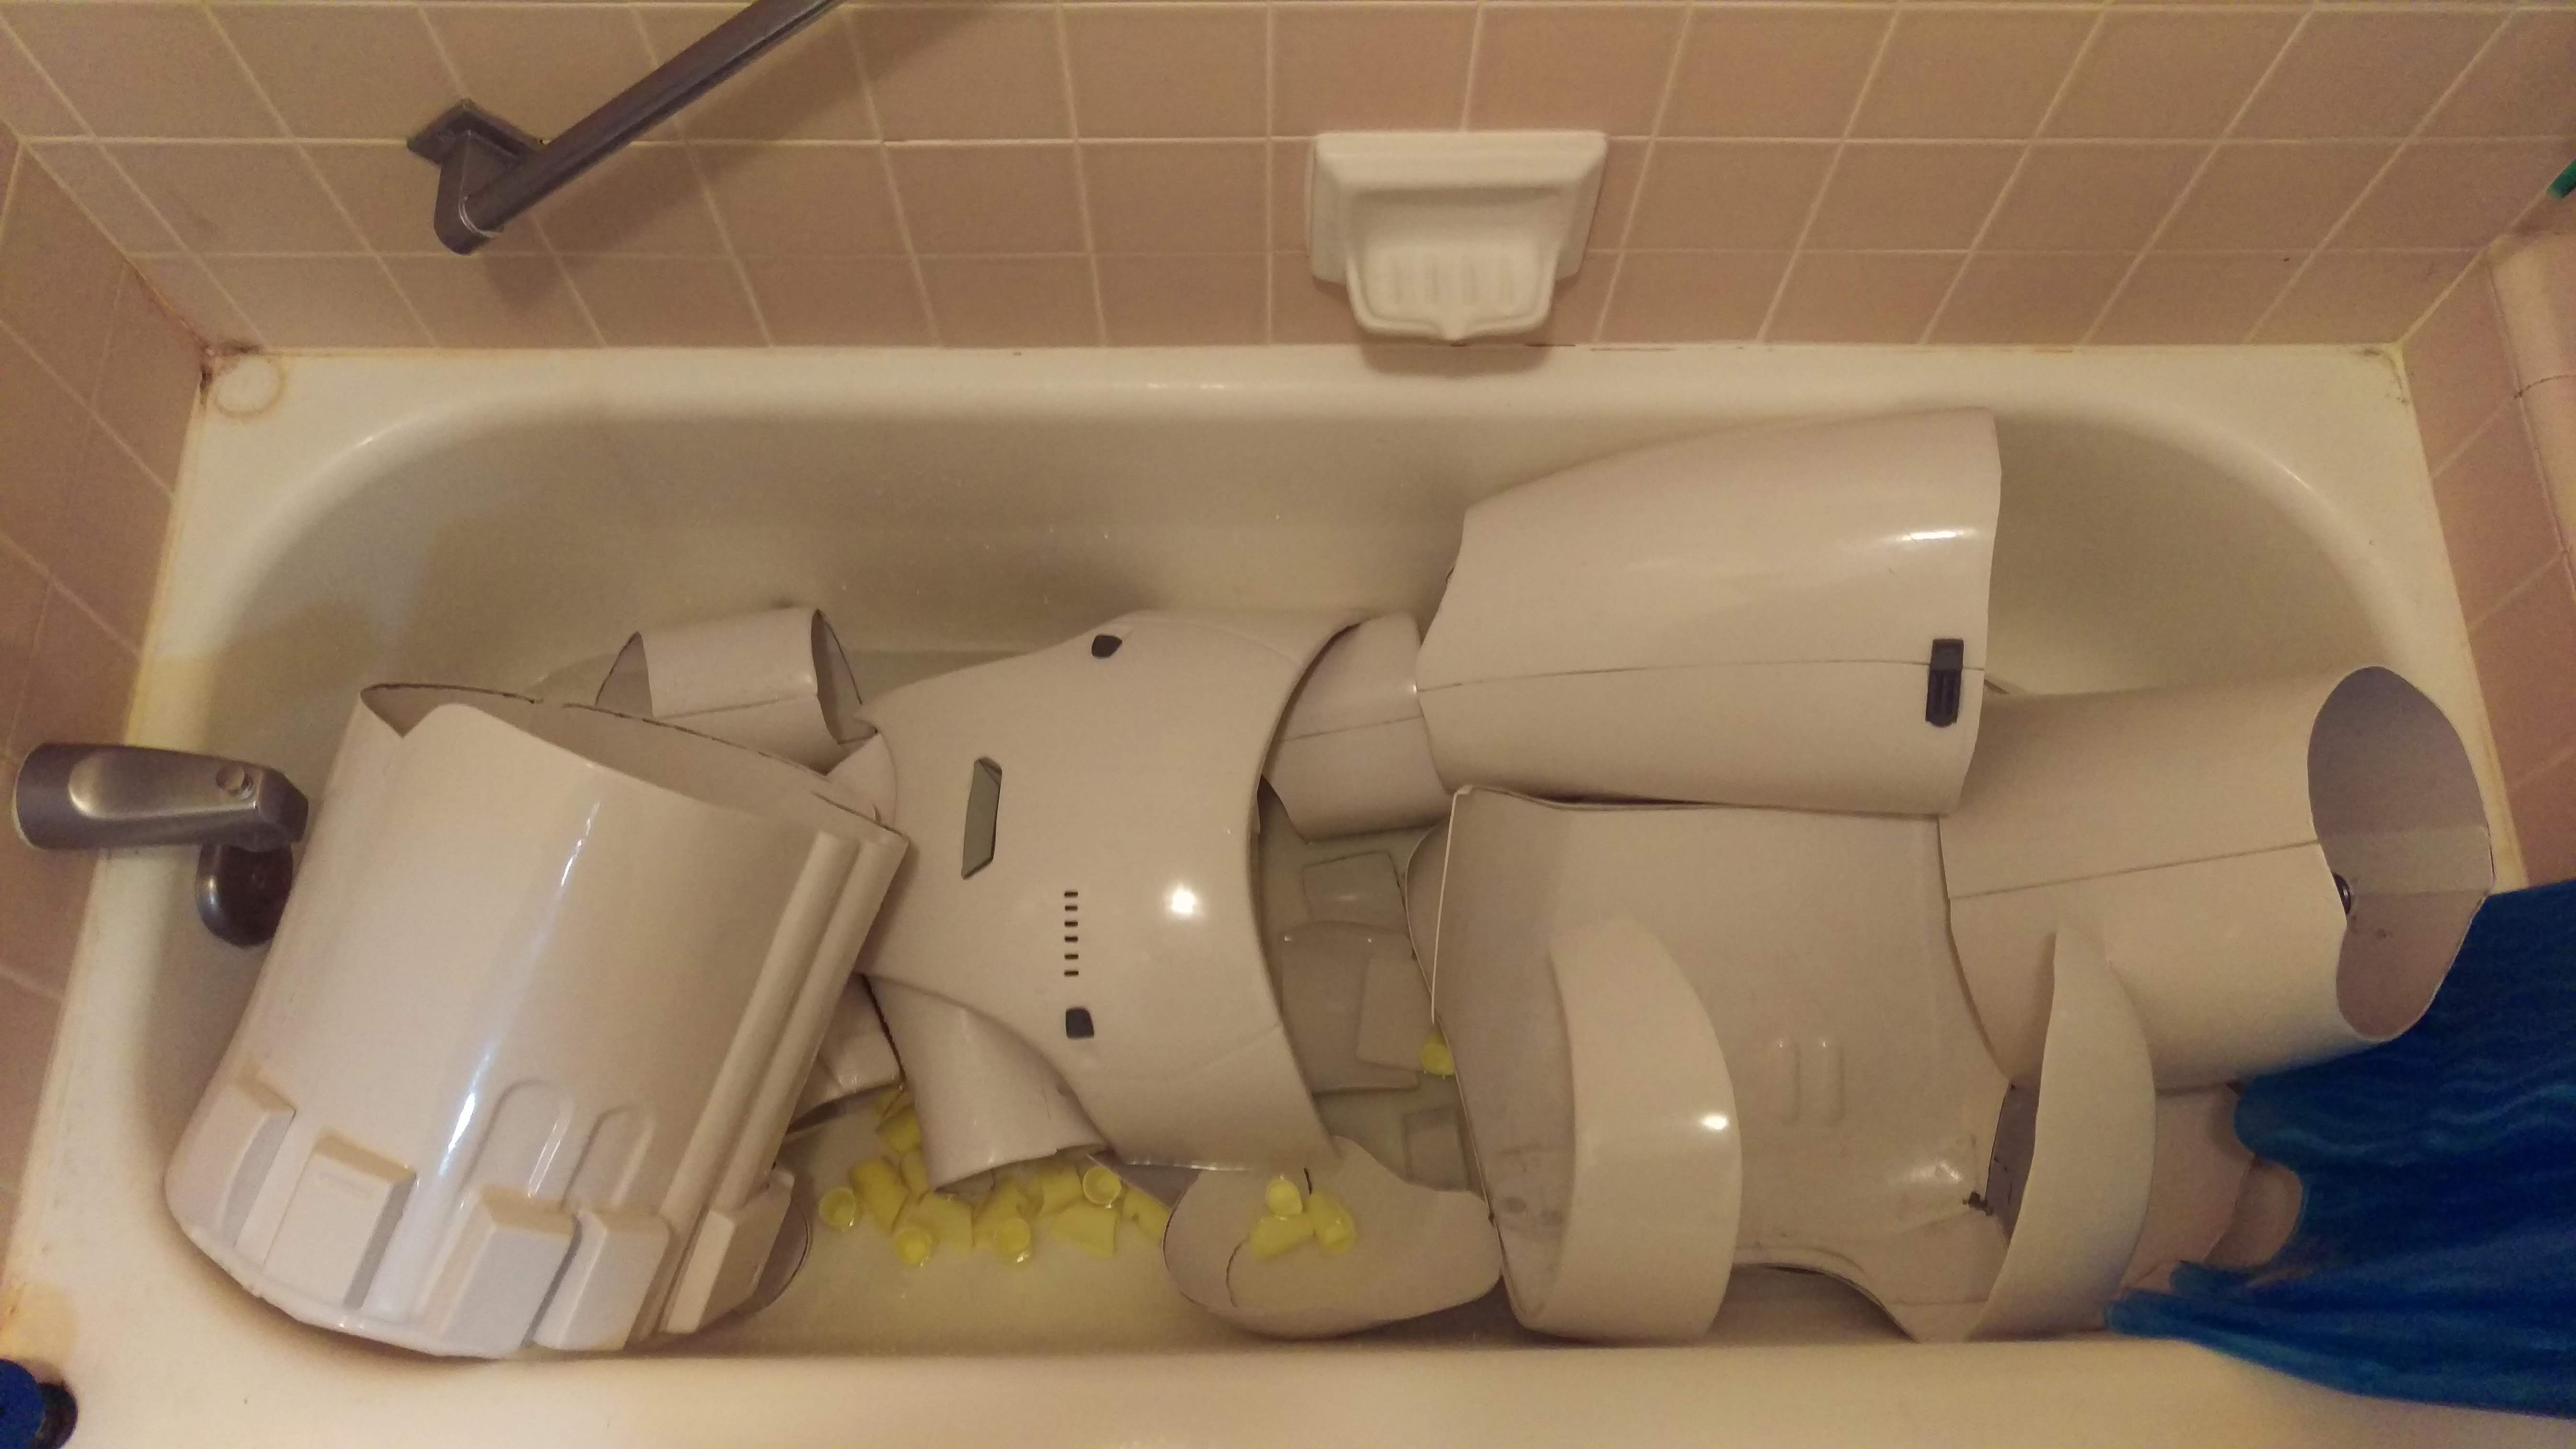
I figured the bathtub was the most efficient way to clean off all the parts. I was going to just take the hose to it, but outside has dirt and grit and dust. And cobwebs. Because I stop cleaning those up in September because I can just call them “Halloween decorations” for the next two months.
I did the helmet clean up by hand- I don’t think fiberglass would react badly to water, but I’m not taking any chances with dropping it, for one. I’ve taken water to ABS before with issues.
She's now drying off across my guest bathroom... which amuses me more than it should.


And that’s… that’s actually it. She’s ready. I can’t believe I’m saying those words- but she is, she’s ready for chroming!
-
4
-
-
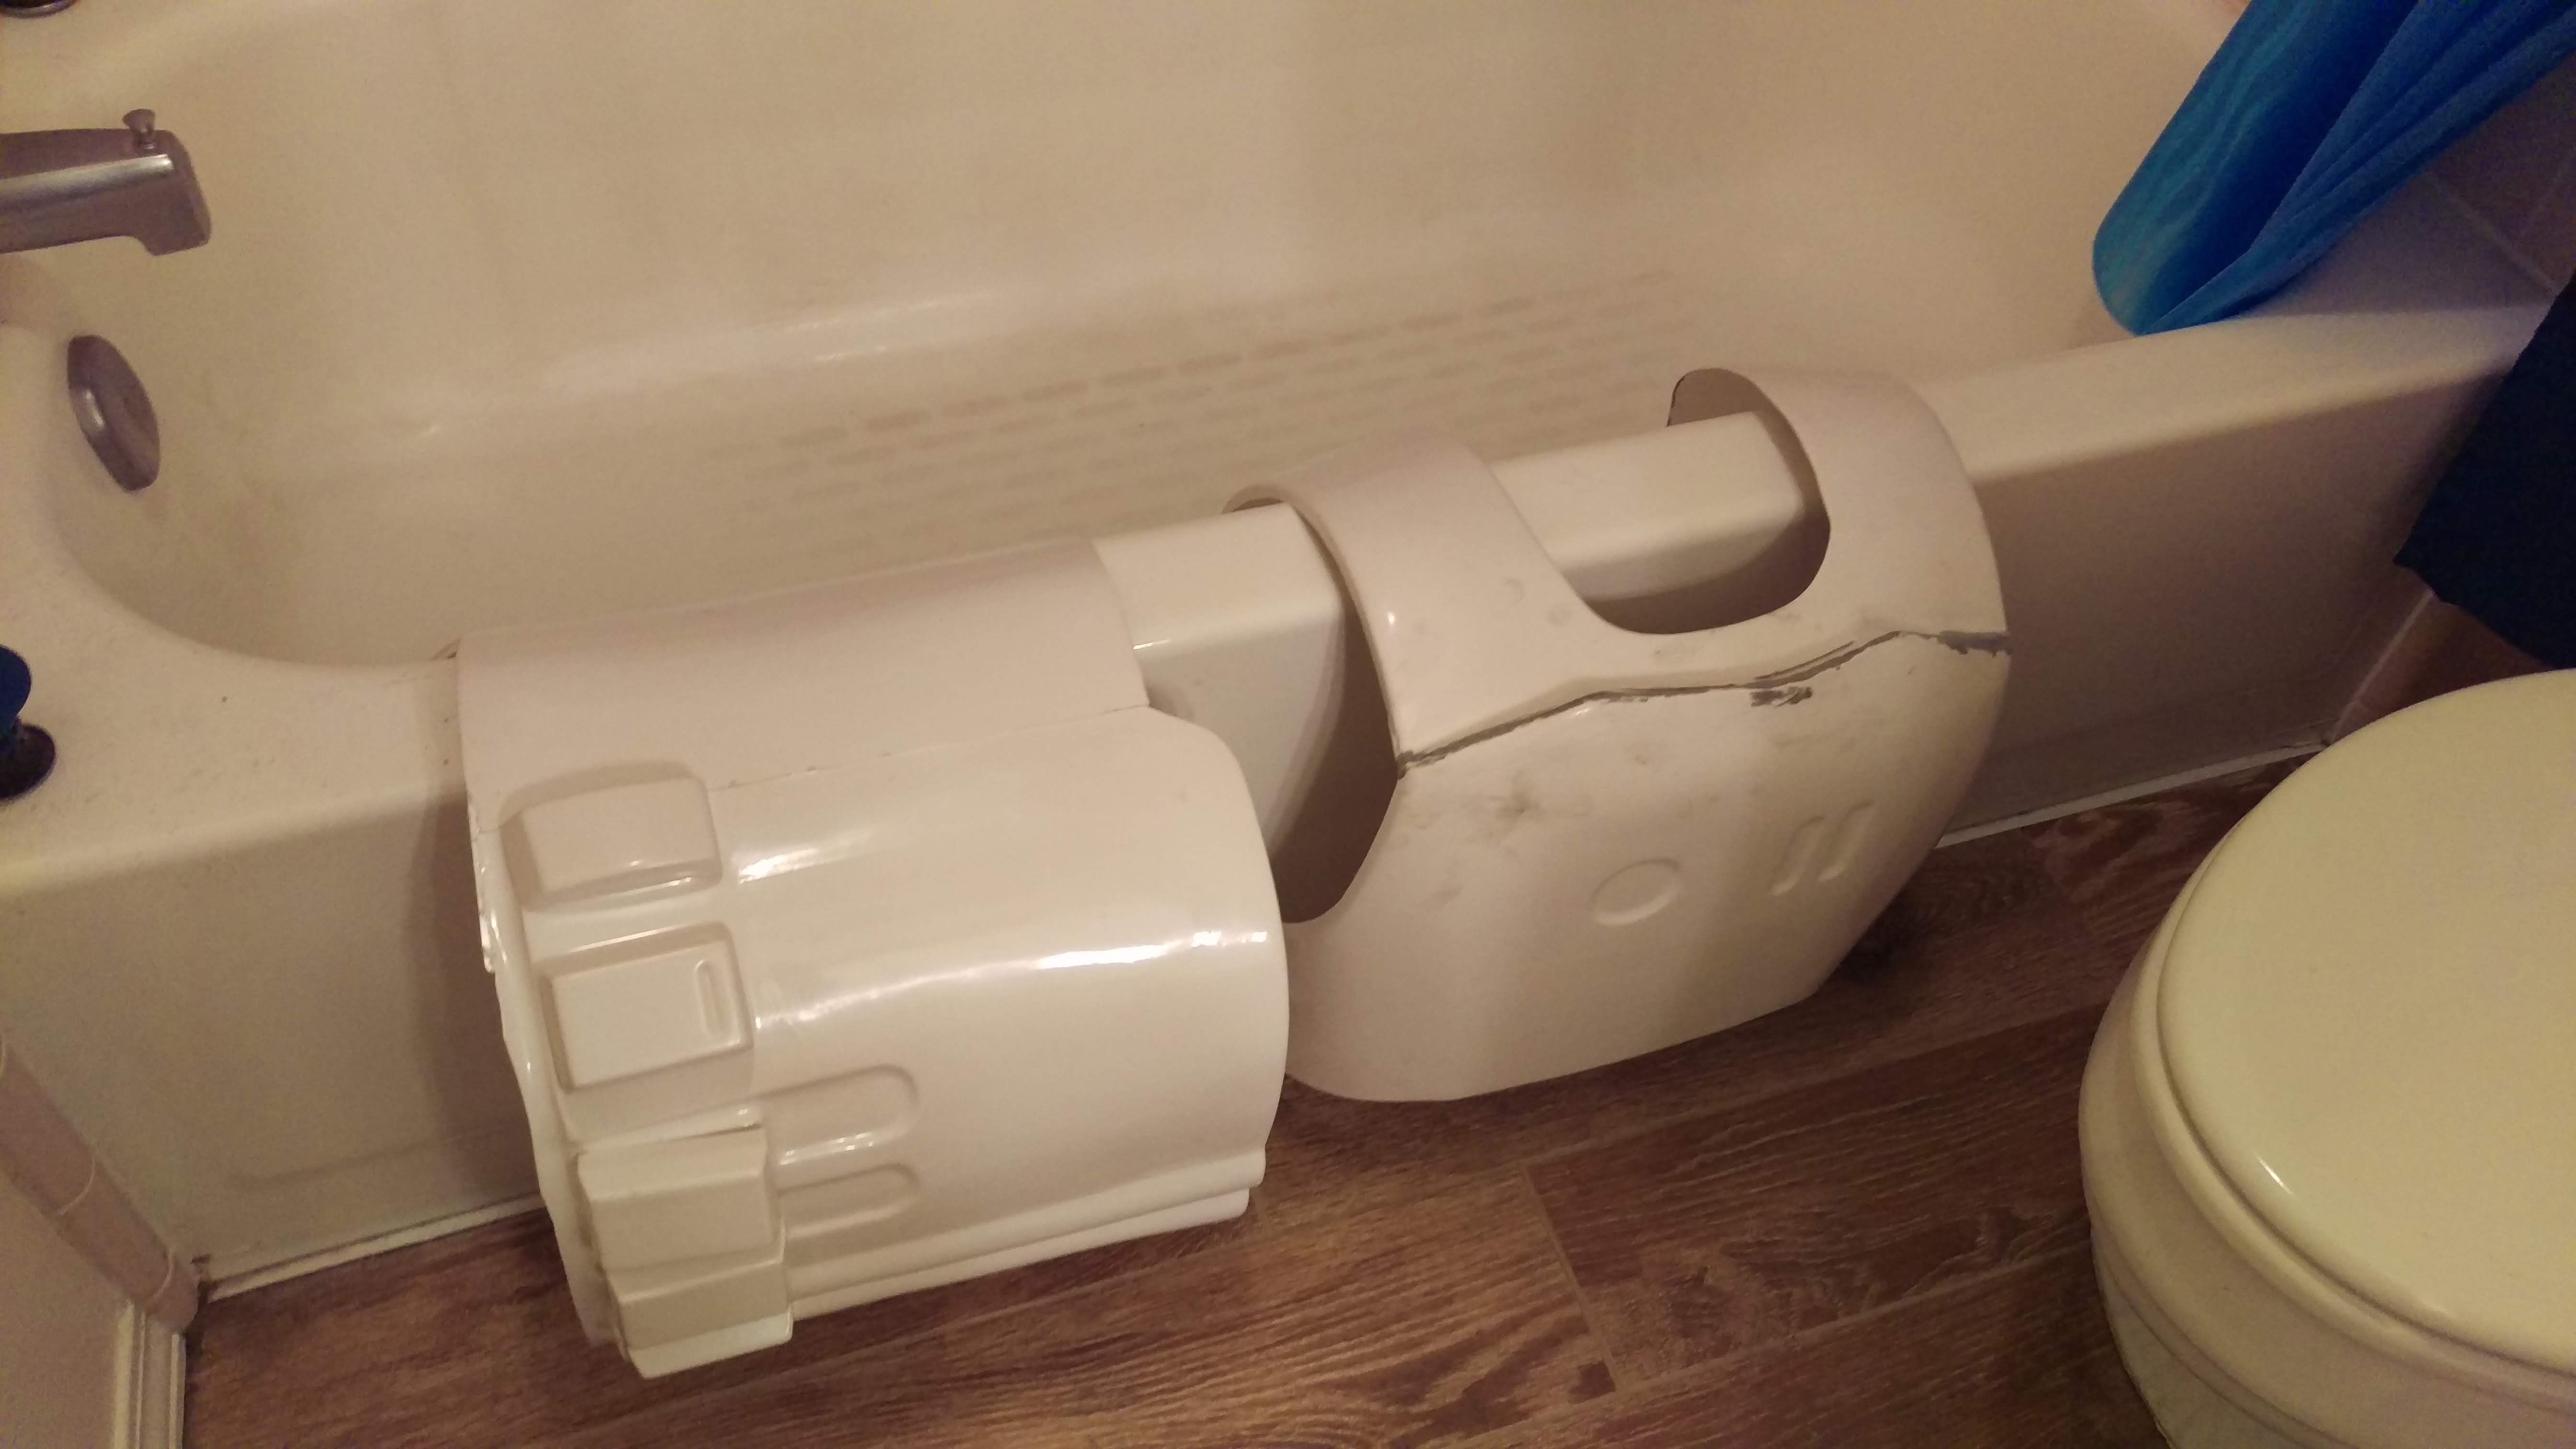
All that freaking work on that damn thigh holster and...

IT'S UPSIDE DOWN. I MUST HAVE FLIPPED IT IN THE BACK AND FORTH TRYING TO GET IT TO STICK ON AT ALL. ARE YOU FREAKING KIDDING ME?
Guess what I'm doing tonight, I guess... I managed to screw in the screw a bit, too, to make it tighter. Now I have to figure out how to unscrew them and pry the thing off.
PTERODACTYL SCREECH.
-
I asked my shiny brothers and sisters for good vibes and well wishes over the weekend, and apparently it worked!
I got a ton done at my Build Party on Saturday, and even did more work on Sunday! It’s a miracle!
I decided that I have to have her ready for the chromer/painter by the end of the first week of October- he needs as much time with it as possible, and I just have to get it done.
I’m down to fiddly, tedious stuff, so I just needed to sit down and do it, because with a nose to the grindstone, it actually wouldn’t take that long. In our terms- in costuming terms not that long, not in normal people terms. The work pictured here is over three days. About six hours on Saturday, about three hours on Sunday morning, and three hours on Tuesday night (sidelined by a bad day at work and a migraine on Monday).
Some re-gluing/extra gluing of the ab boxes, a few were a bit loose (hard to glue):
I sanded down the wrist guards, but I apparently forgot to take a photo of it. If I remember I’ll add it later.
Seriously- invest in a belt sander. Even the one from Harbor Freight. It’s amazing.
Cut out the chest opening and glued the greeblie onto the back. I was debating, but I was right in the end: it looks way better with the deeper recess. I had a bit of trouble with the Dremel getting into the corners, but I think I’ll just touch it up a bit with the epoxy. From a distance of even two feet you really can’t tell now.
I also added the chest greeblies, as you can see. I hit them all with a couple of coats of Rustoleum 2x Primer- it filled in most of the little bubbles in the resin, and the final coats of paint of chroming will take care of the rest, if anyone but me can even see them now (I kinda doubt it). The weather is cooling down (thank god), but it was just warm enough in the sun to get them to set.

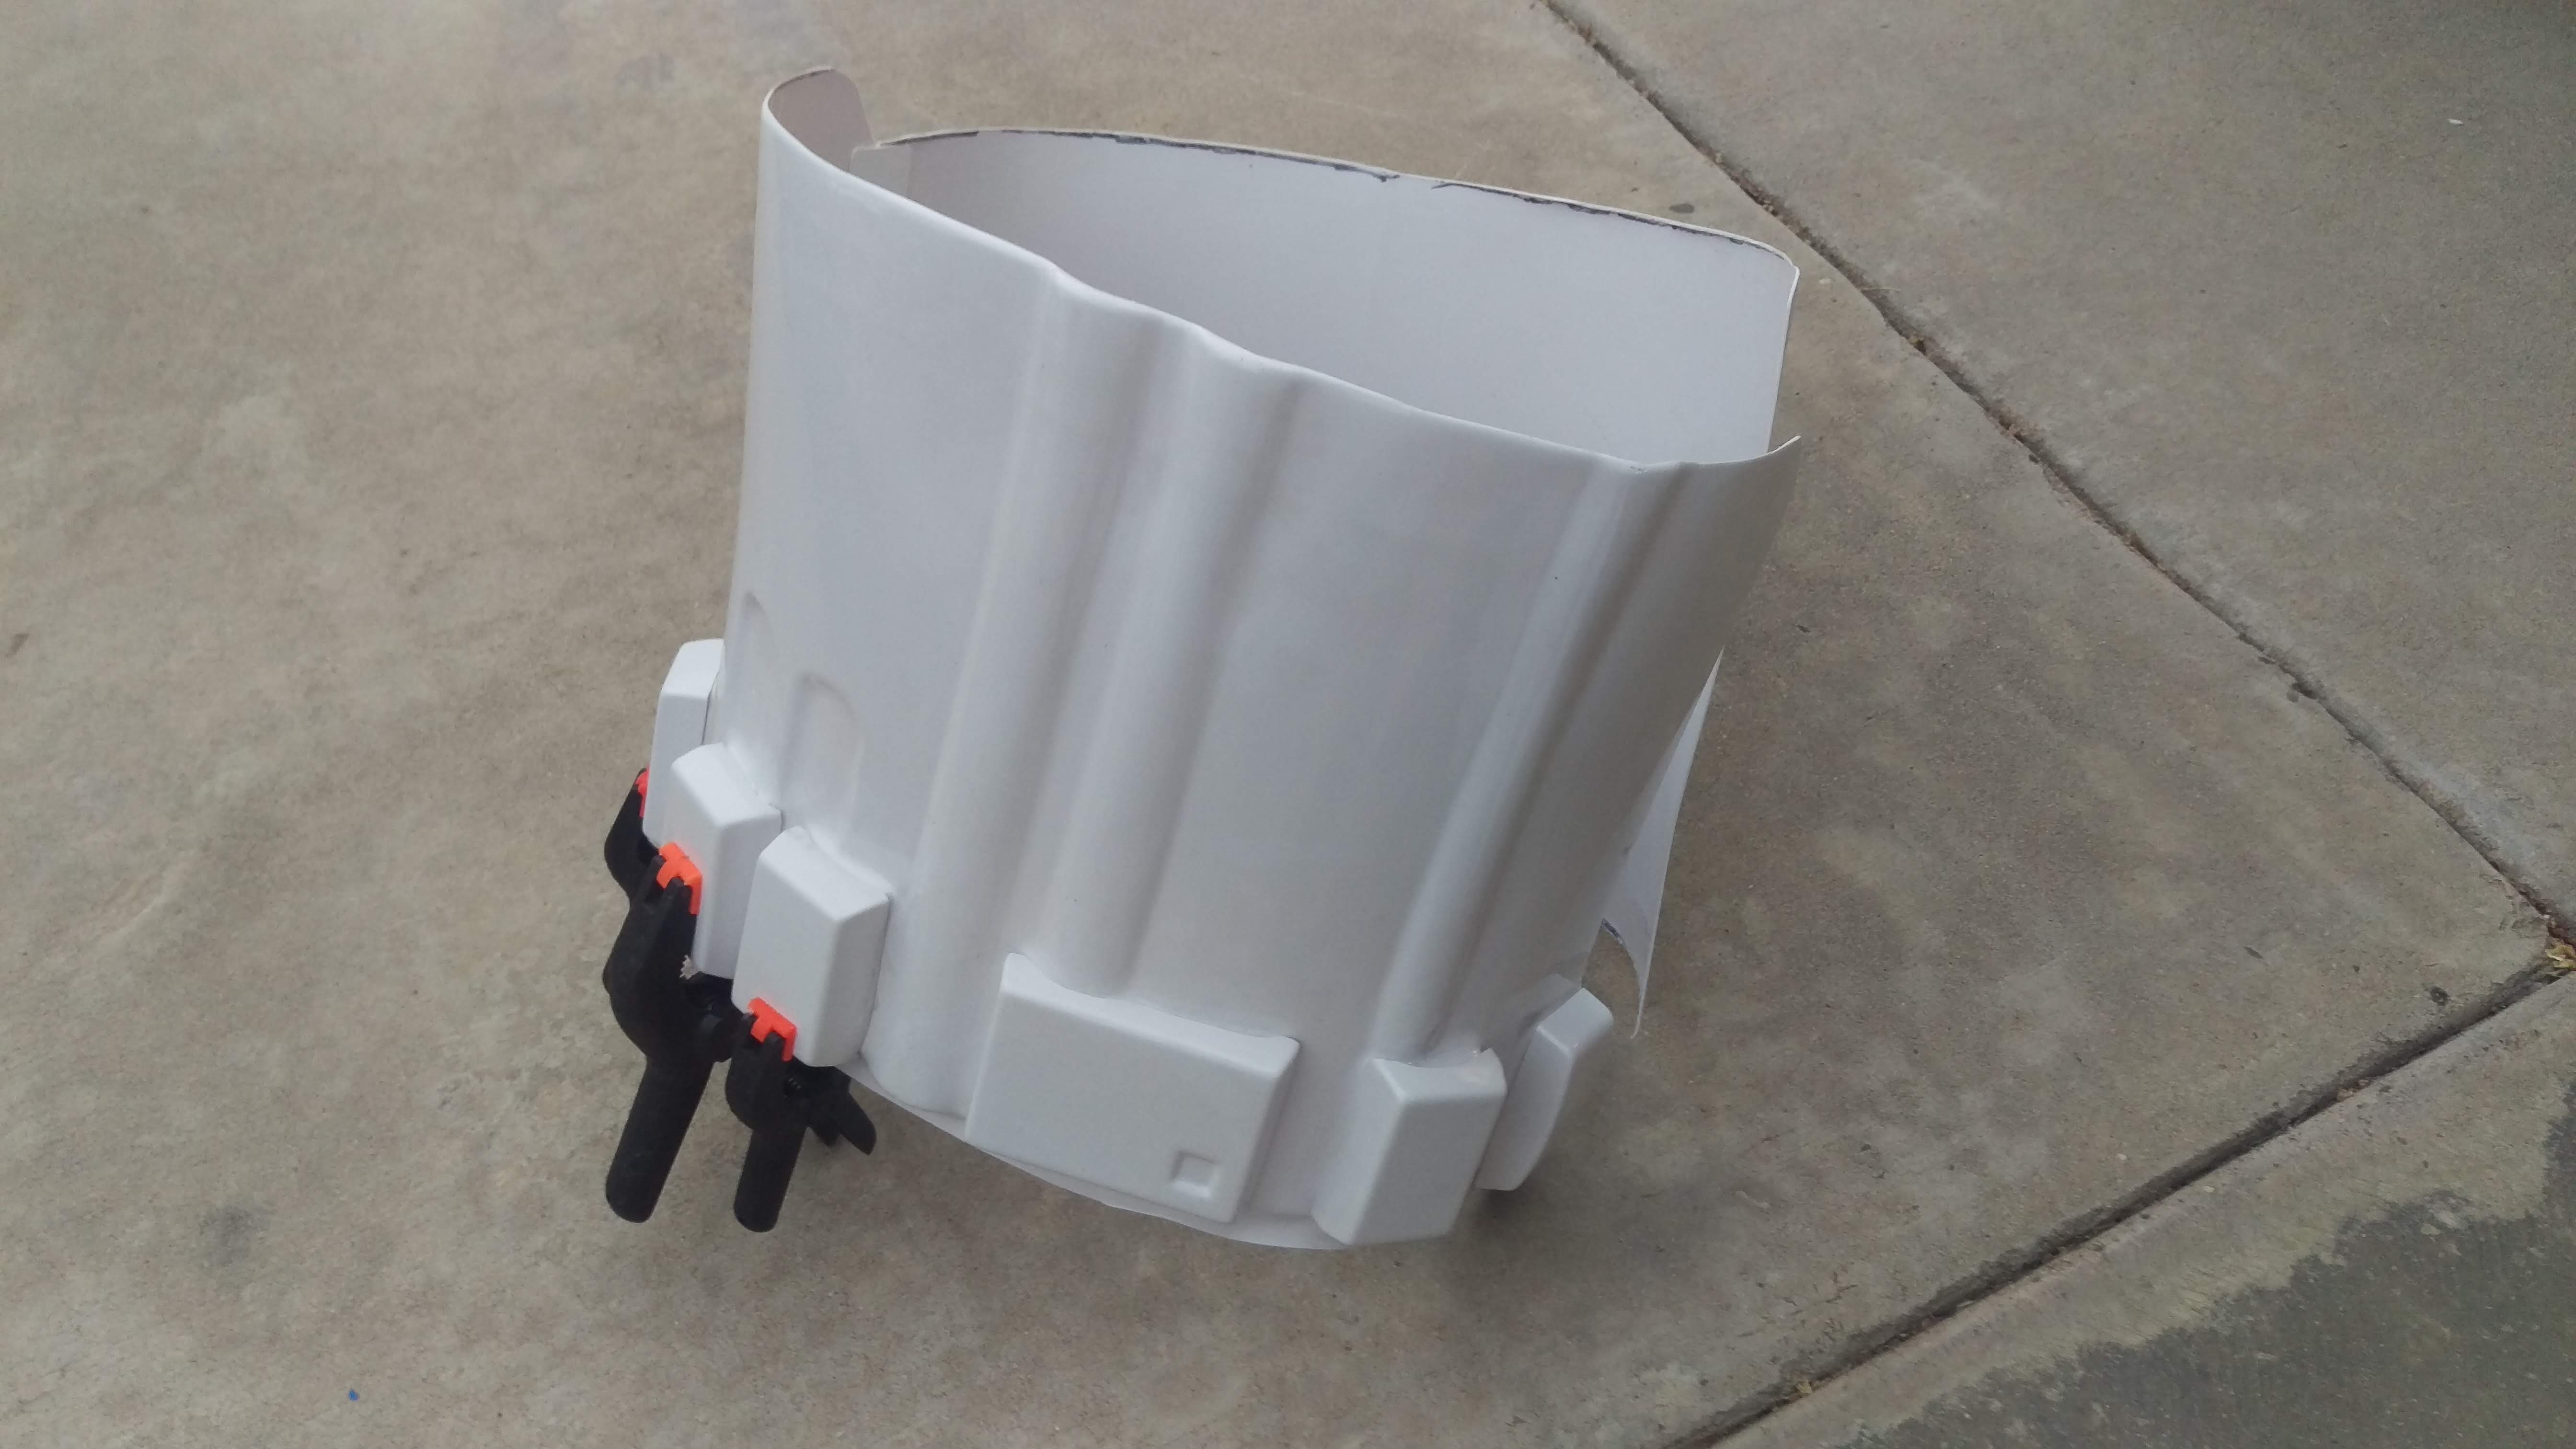
There’s a lot going on here. Ankle spats are getting their inner strip (can’t be fully closed, else you’d never get them on), thighs are being prepped for greeblie attachment, shins are also prepped for the same, gorilla Tusken mask looking utterly creepy in the corner, my TK bin in the background for two new TKs building theirs to look at for reference, my weakness, Red Vines, placed strategically close to me while working. Build party madness, I love it!
Shin ammo packs (no idea what they actually are, I’m calling them ammo packs, because they remind me of the thigh ammo packs on TKs).


The shin greeblies seem to attach pretty easily, but the thighs had more of a curve to them, and the greeblies were straight. I used the same technique I did for the V inner strip attachment bending- two sets of paint sticks on either side, proposed bend in the middle, heat gun (always moving), careful bending, cooling, then repeat for all four.


It worked surprisingly well, I was kind of afraid it wasn’t going to work at all.
I got a lot of stuff sanded down and edges polished up, as well. You really can’t tell in photos, but it’s pretty obvious in person.
Forearm greeblies are gluing:

Bicep greeblies are gluing:

Kitty break!

I was hosting the build party and working majority of Saturday, so I didn’t get to spend much time inside with her. She missed me, clearly. (She does that on her own, incidentally, she loves to lounge on my shoulder and be carried around the house, too). I made it up to her later that night when she crashed out in my lap and we watched BBC Sherlock together.
Next up, thigh holster attachment and greeblies!

That holster is a pain in the butt, not gonna lie. It became clear it’s pretty much a three-step process, once you’re ready to actually attach and assemble.
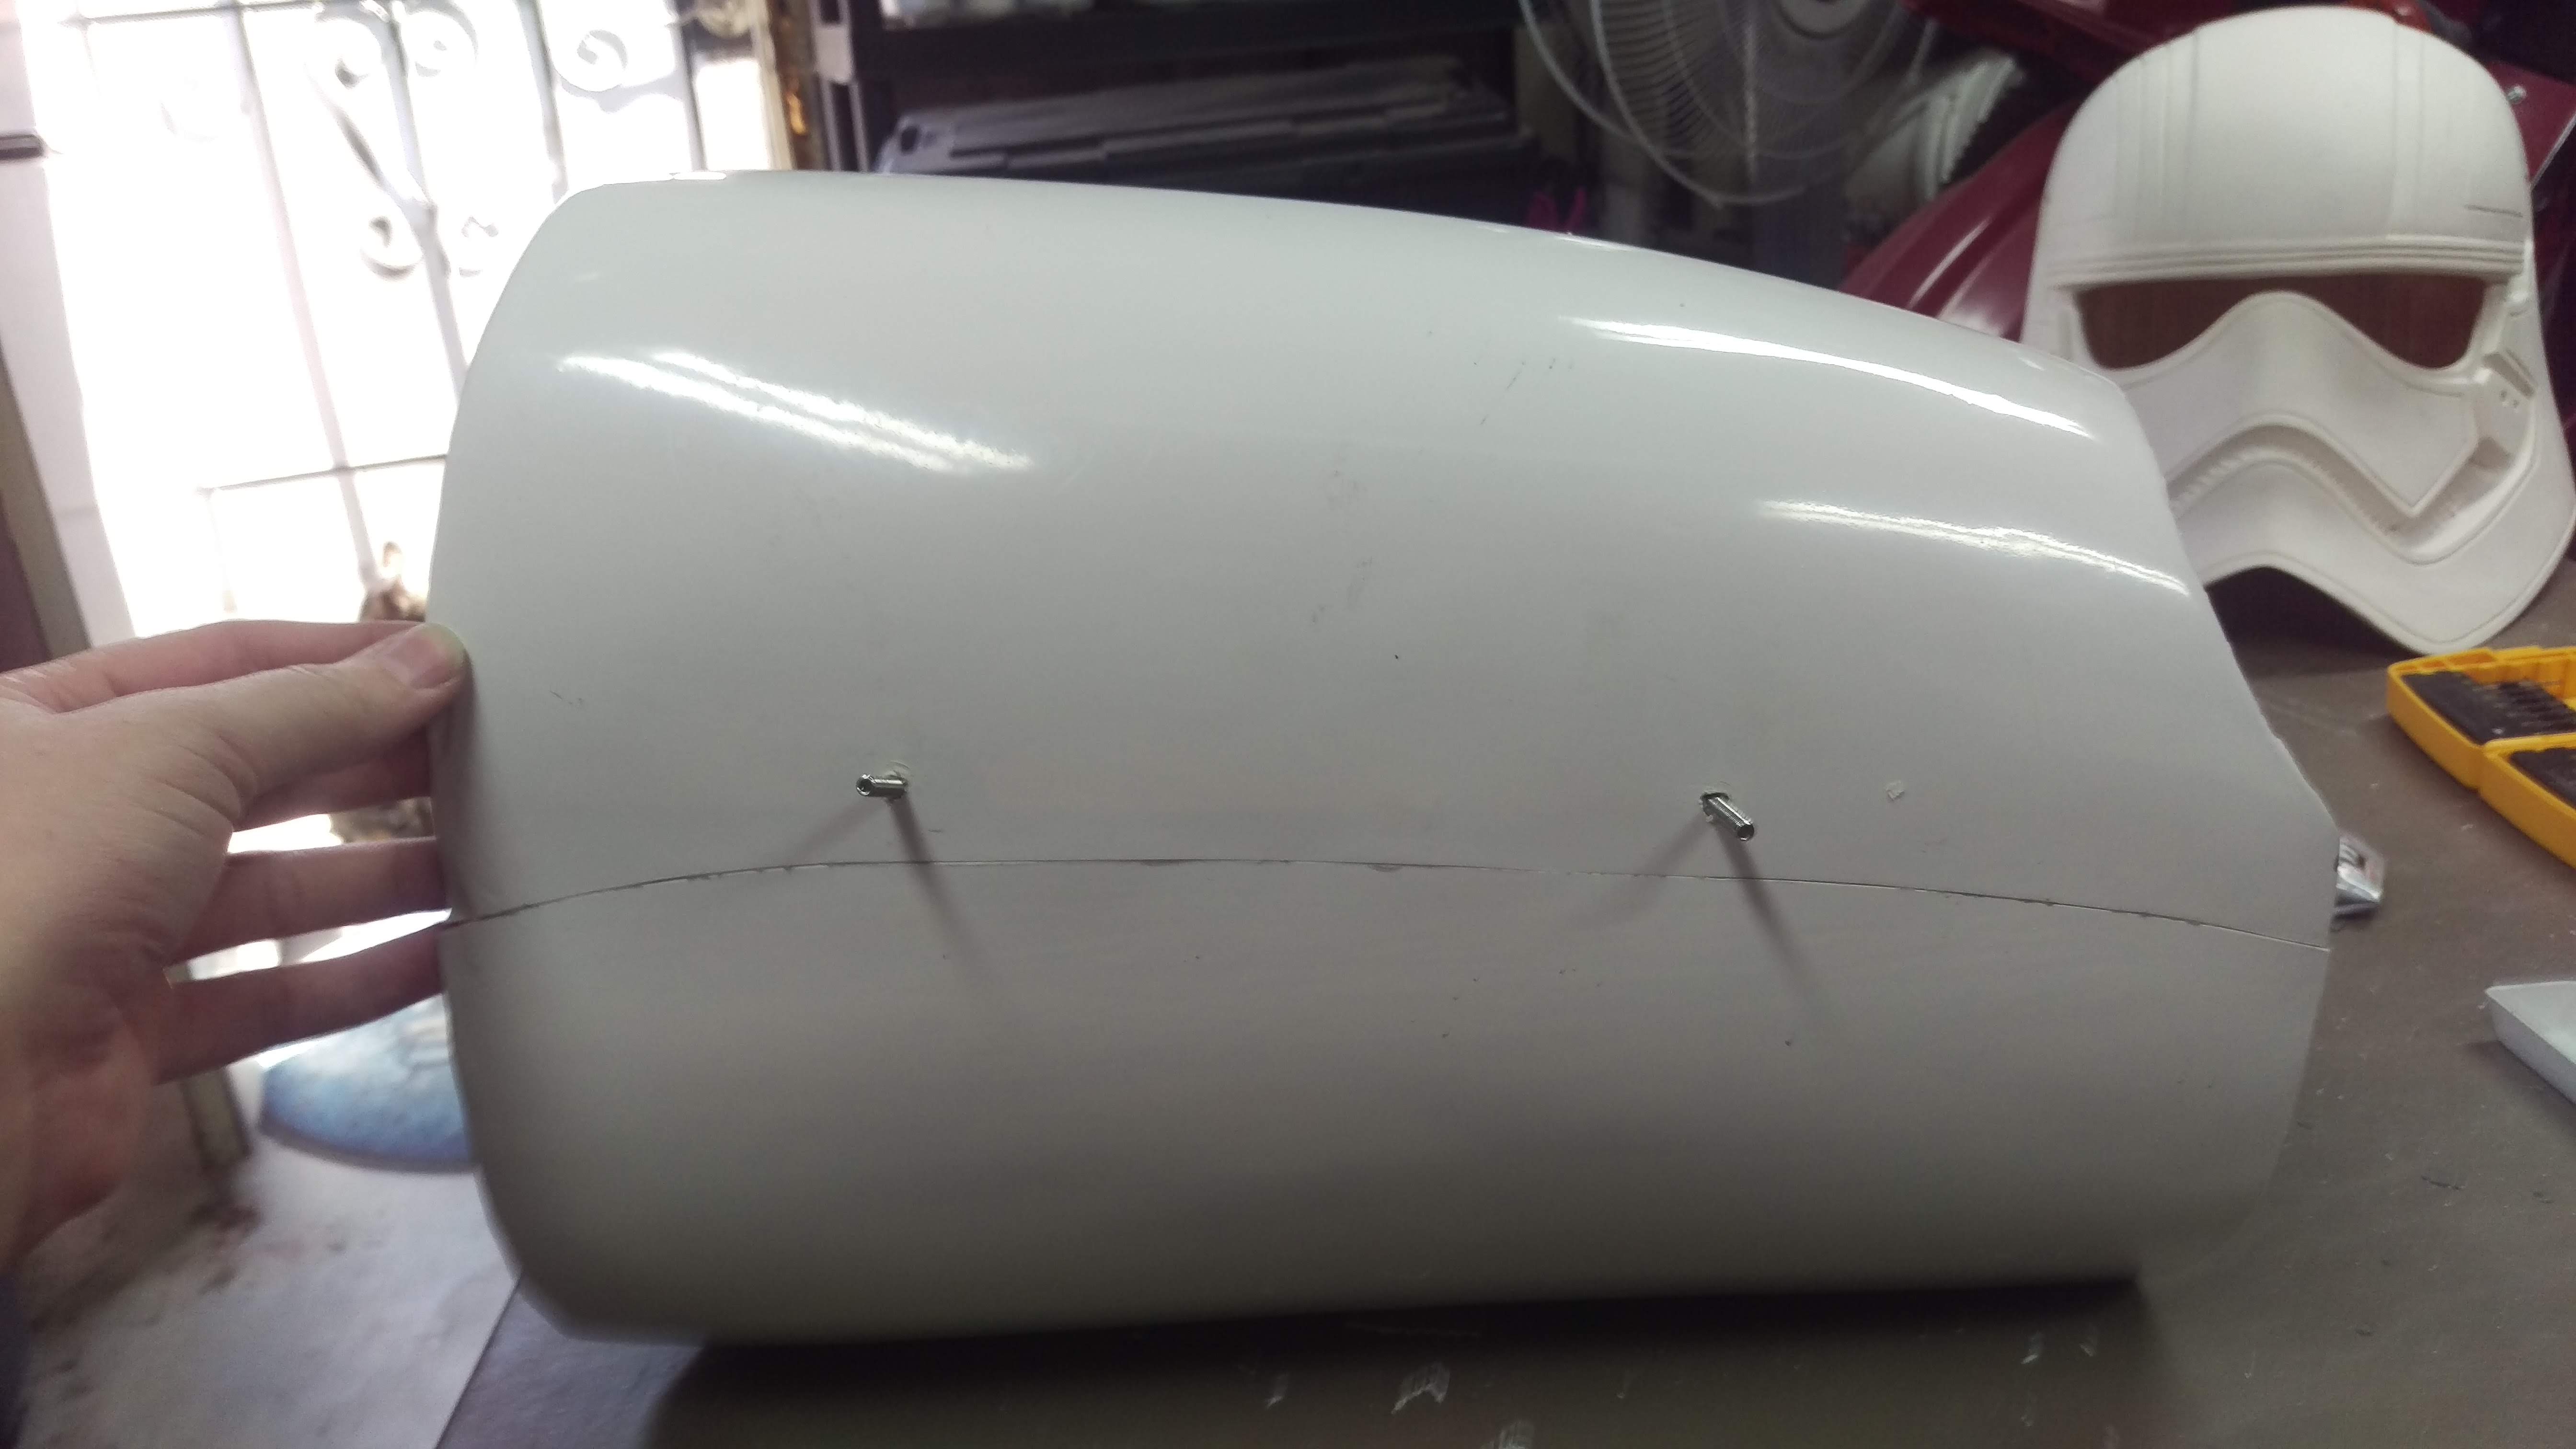
Due to the curve of the thigh, and the small edge for attachment of the base and weight of the resin piece, I’m going to use bolts for extra support.
I’ve been hording screws, brackets, and hardware for years now- every time I had something with extra hardware, it went into the bin (I really am a Jawa at heart, apparently). It took about fifteen minutes, but I was able to dig out a pair of matching length bolts and washers.

I drilled a hole through the base, then marked it on the resin piece, drilled a bit there, and then used the base upside-down to mark and drill the corresponding holes in the thigh. The holes in the resin piece are really just for an extra support and gluing, not for actual screwing in. The washers give the nuts a bigger purchase base on the inside so they won’t pull through.
Here’s the real start of the three-step attachment process:

Bolts through the thigh, giving the washers some glue for extra purchase. You really need at least four hands to work on this part.
Once that glue is dry enough (normally 48 hours, but since I’m gluing the whole thing again I’m going to work with it again in 24), then I’ll glue on the base, give it about 24 hours, then glue the resin holster on, and give it all a final 48.
I also hand sanded down the middle of the base just a bit, to take it from a total straight line to a bit of a curve in the middle so it wouldn’t be fighting the attachment to the curve on the ends.
Then attaching it! It was so easy, worked just like I planned!
No. Not at all. It was a disaster. I didn’t put enough glue on both washers apparently so only the inner ones stuck, so the screws and top washers just slid right out and I needed six hands again to hold them in place. I could get one end through all the parts then the other would pop out, or I just got glue everywhere.
I have glue all over me, all over the thigh, all over the holster parts, I have smudges from paint from the interior of the helmet all over me and now the thigh. My c-clamps aren’t deep enough to reach in on either side to hold it, and it’s too slick to get a purchase while using paint stir sticks as an extender/way to even out pressure. My regular clamps also aren’t long enough. Putting it on the table and weighting the inside didn’t work because it’s too slick and it just rolled all over the place.
But it’s done! So good concept, just needed some better execution. More glue on both washers, perhaps the base of the screw, and bigger/deeper c-clamps. If I were earlier in the build (and day) I would have just gone to Home Depot and/or Harbor Freight and found what I needed and added more glue and set it aside. But it’s 8 pm on Tuesday night, I have work in the morning, haven’t eaten dinner yet, and this thing has to be done by Friday.
I had a moment of panic when I thought I had the thighs flipped. I kept looking at the knee curve and thinking I had it right, but what if I didn’t. So I pulled out Izzy’s FOTK… his are exactly the same shape on both the front and the back.
I’m thinking this is another KB kit quirk- kinda like the top of one of the thighs being straight across, with no curve/cut out for a human butt whatsoever.
The higher curve has to go to the front because it accommodates for the knee plate and the space where you see gasket around the top and bottom of said knee plate. I had it right.
But, I slipped them on, and walking that back bit was just not curved enough for comfortable walking. Since Izzy’s is very obviously curved on both sides, and the CRL is sort of ambiguous (the thigh, knee plate and shin are pretty close together in the full body photo and the individuals don’t really give you a solid view), I just decided to trim the backs up a bit.
Proposed curve to trim:
Left: before trim, Right: after trim (unconsciously throwing the Live Long and Prosper, apparently):
That littlest bit of trim and curve made a world of difference- I can walk with no pinching at all, and the gasket should protect to a degree against that, too. Also, I think it looks a little better being more uniform.
I picked up some Gorilla Glue epoxy to fill in some spaces and gaps. I was originally going to use Bondo, but: I hate Bondo. It’s goopy. It’s messy. Its stench is legendary. It sets way to quick no matter how little hardener you put in. I don’t know what I’m doing and half the time end up making more work for myself in clean up. I hate Bondo. Plus, for the areas I was working with, having the putty consistency was going to be much easier and better suited for placement and smoothing.
I picked Gorilla over JB Weld because the packaging specifically mentioned sanding. I’m pretty sure they both could be sanded after hardening, from what I could tell they were basically identical just different brands. Gorilla did say a work time of ten minutes, while JB was 25. I kinda wanted 25, but I also figured 10 was better than Bondo’s 1 – 4 minutes if you’re lucky. It gets harder to work with and less pliable towards the end, but it doesn’t lock up and become a brick like Bondo, so I’m calling that a win, too. I hate Bondo, in case you couldn’t tell.
I had sanded down the back/yoke connection to make it more even. All I had to do was fill in the valley with the putty and smooth out the corner. The putty worked just like it was supposed to and was pretty easy to work with. I always try and wear gloves at first, but it never work and they rip and I end up taking them off halfway through.


It turned out pretty good! I’m very happy with it. I’ll sand it to make it smooth once it’s cured, but I think it will disappear once chromed/painted.
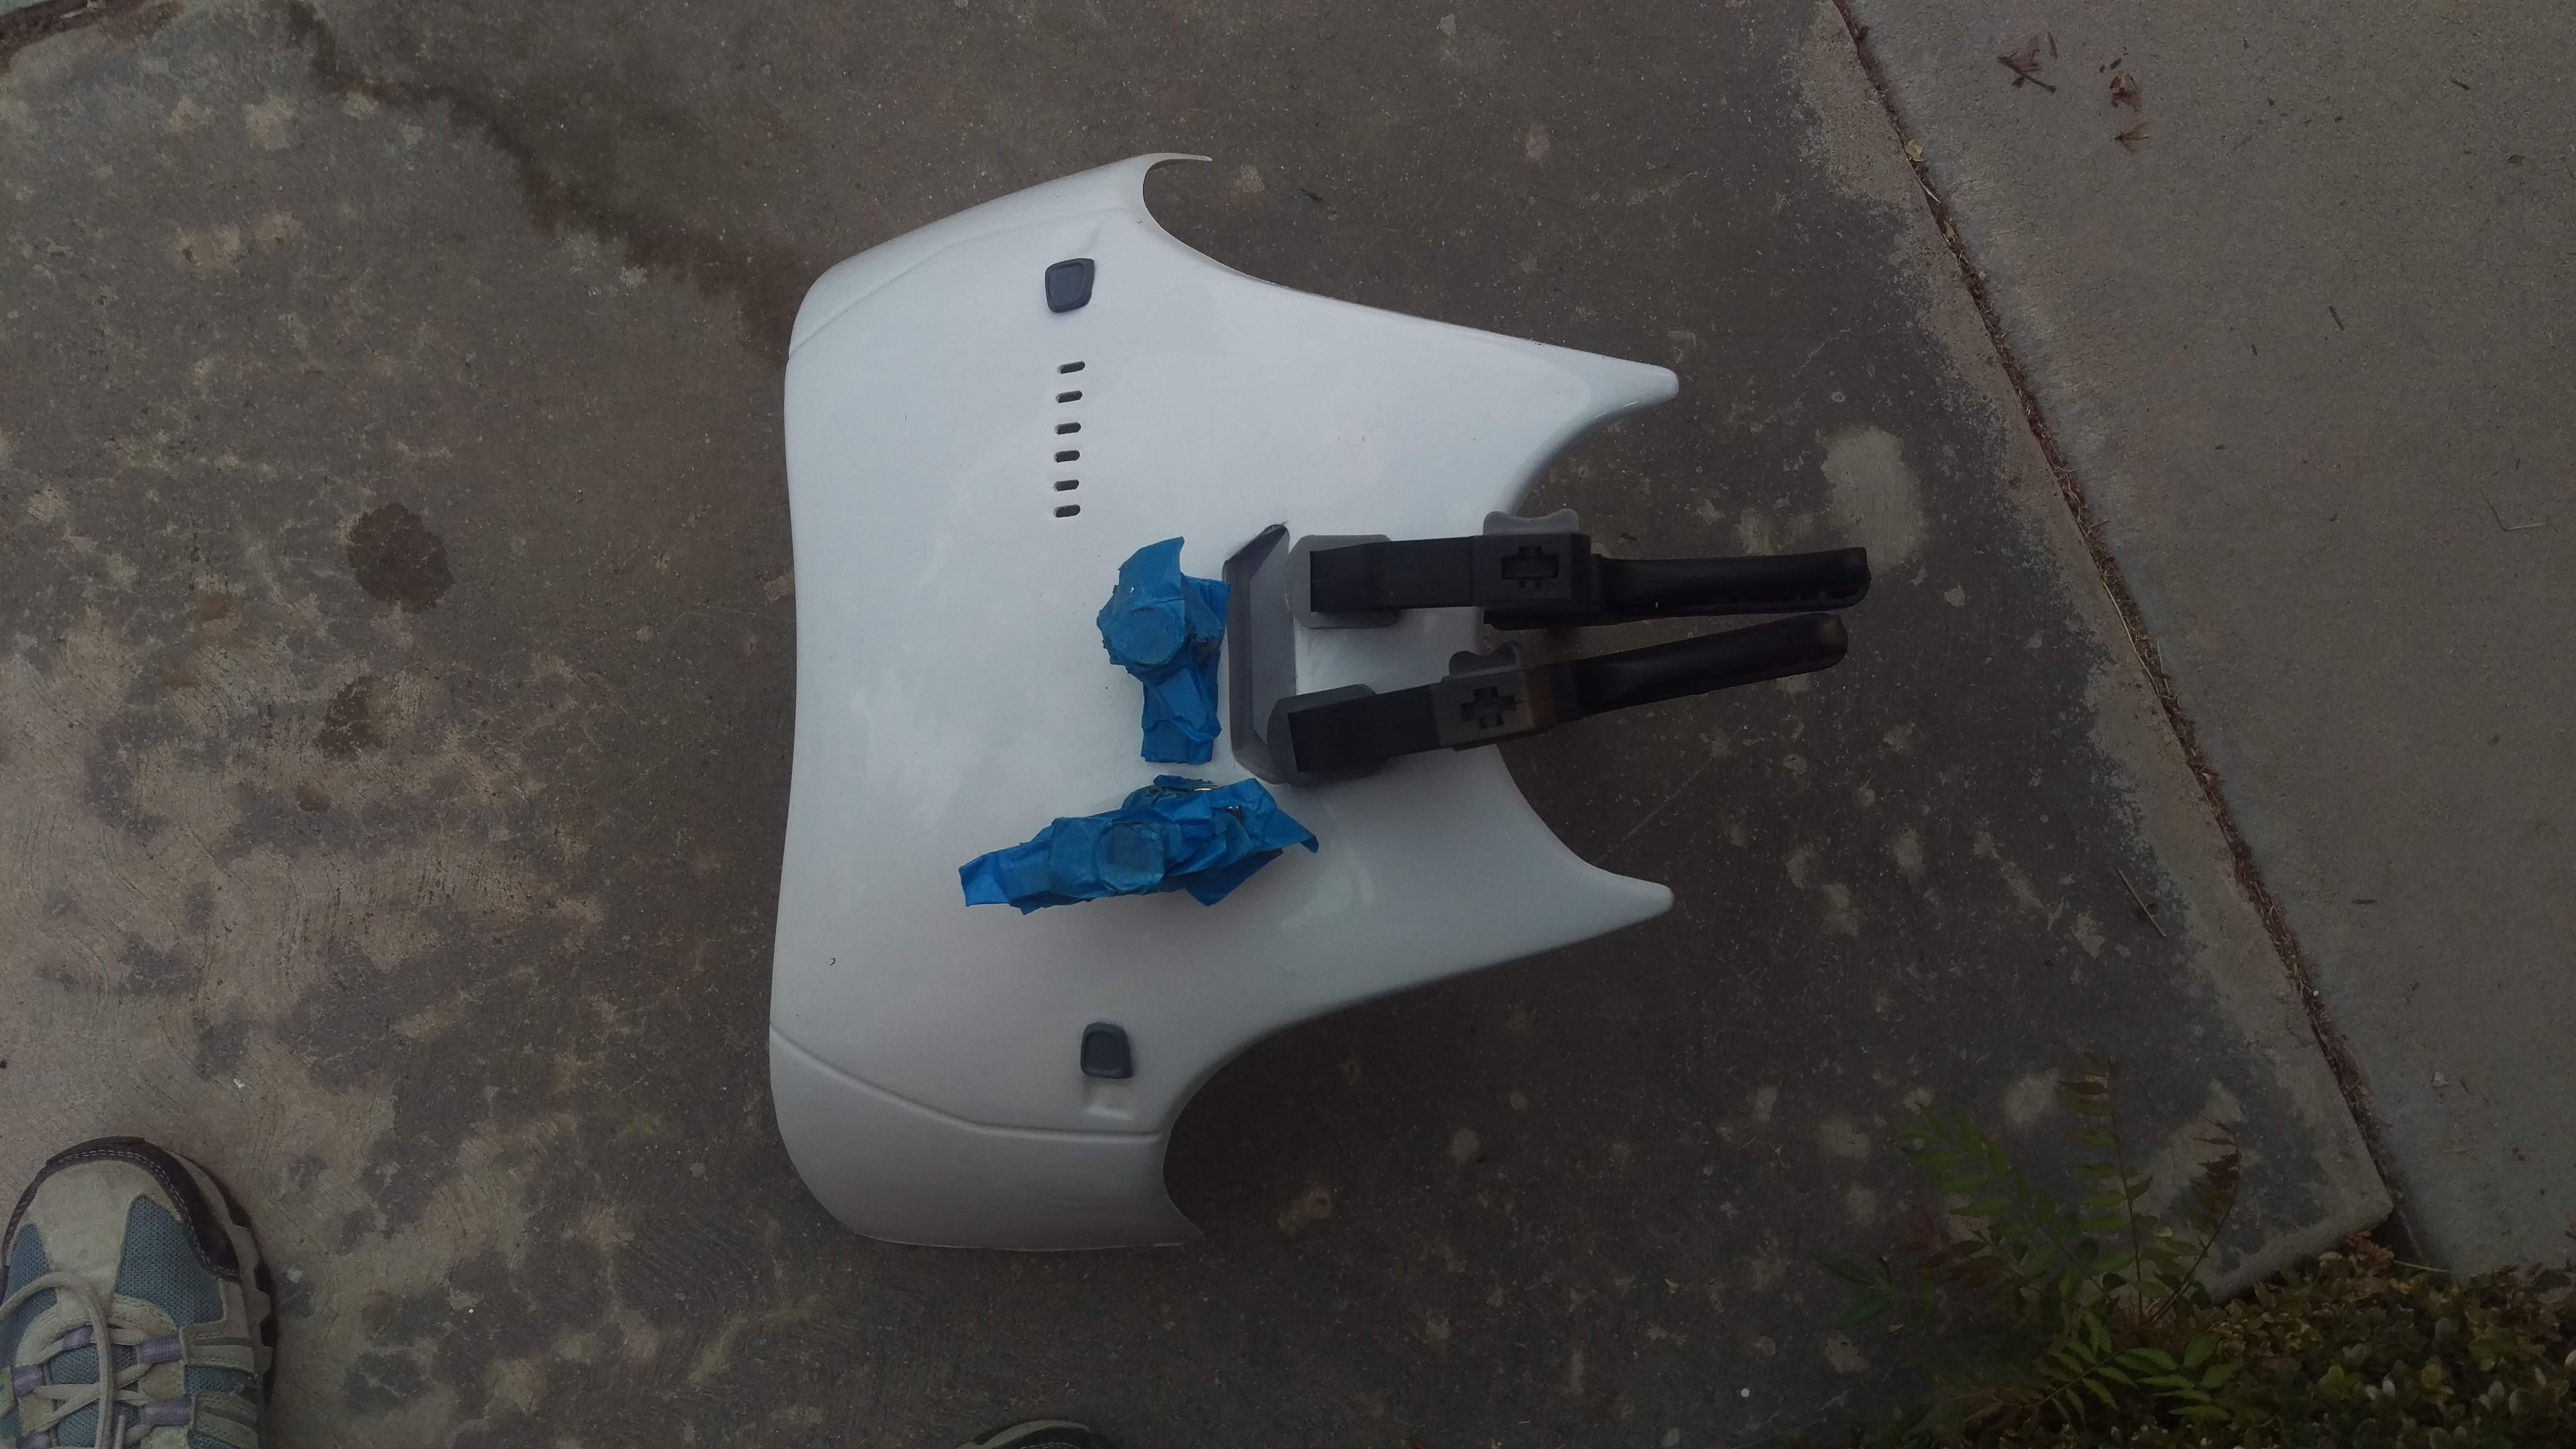
Lastly I spray painted the inside of the helmet black:

It looks cool, it looks better than white, when kids (and short adults) look up they see darkness inside the helmet, not a prop made of fiberglass, and also the dark interior lets you get away with a less-dark lens, which is optimal for vision.
To Do List for the Phasma Phinish Line!
Before the end of the week:
One last round of fine sanding, where needed (pretty much done, but there’s always that one spot you missed)
Dust, wipe down, and remove any remaining excess glue (it will move from the garage to living inside once this is done)
Helmet clean up – touch up some of the grooves, a light wet sand across the whole thing, a bit of clean up in the mouth/nose area. It came pretty close to ready out of the box.
Before the premiere:
Acetone 3D print lines from blasters
Paint blasters
Or at least the F-11D, the SE-44C is, after all, TLJ, and just a fun addition. But I plan do just do everything on them at once, to make it easy and not repeat steps unnecessarily.
I also already have the quicksilver baton (also TLJ) so it’s not like I’m going to be short on things to occupy my hands.
Whenever I get around to it:
Battle damage to prop helmet
Paint prop helmet
It’s now a prop, after all.
The end… is in sight. It’s actually quite anti-climatic and it doesn’t feel done in any way, but my to-do list is dwindling rapidly. I guess it’s all fine-tuning, mostly, so you don’t see as much of a difference in the many piles of white plastic parts scattered all over the garage.
I wanted to prep the strapping and stuff now, so it would just be an install job when I got it back from chroming, but I’m not going to have time. And honestly it won’t take me that long anyway- I’ve done a whole lot of strapping now and I think I can knock it out in an evening or two, plus glue dry time.
It looks like she’s gonna be done by the premiere!!!
-
1
-
-
11 hours ago, MrFlavaFlave said:
I am building the SE sandtrooper and it requires RotJ TK armor. I am loving the all white look, but I will get it dirty......eventually.
Interesting! Sounds neat! Clean is fun, but so is dirty!
-
1
-
-
Definitely intrigued by 3D printing- haven't seen any 3D printed TKs yet. (Two Deathtroopers, though). Good luck!
-
I cannot wait to see your Phasma! And whatever paths you take while building. It's a build, that's for sure!
-
Welcome aboard!
Main tips: check out all build threads, not just those for your armor maker (though that can be helpful), check out the approved EIB and Centurion applications for close ups, high quality builds, even if you're not wanting to go for either (but why not?), if you aim to copy theirs, you'll have basic in the bag no problem. Ask all the questions- stuff comes up as you're working, so start a build thread and show off your progress and get semi-real time tips. Seek out any local Garrison members- our forums are amazing, but there's nothing like local, hands on help. They've been there before, they know their way around or at least who to find or where to go to find the necessary info.
-
1
-
-
Welcome to FISD! You can't go wrong with AM- I have it and love it. Treat it well (or at least decently well, stuff drops sometimes) and it will last you for a very long time. Glad to see you have local help- nothing quite substitutes for it, as good as our forums are.
-
1
-
-
Centurion, whoo! I highly recommend checking out the EIB and Centurion submission threads (especially approved ones), for great close ups of everything. It helps if it's your armor maker, but isn't required (same with build threads). And of course, ask all the questions!
-
Welcome to FISD! ROTJ is an interesting choice- what made you choose it? Always glad to see some love for the other OT TKs.
-
10 hours ago, JZYL said:
@sharkbait it was this little blurb, if you've got a longer explanation or thread I love to link it!
Ah yes! Thank you.
A bit of expansion, and links:
I use this for a basic, budget fan set up:
amazon.com/gp/product/B0775ZM4DW - Fans (if specific product not in stock, basically you want "DC Cooling Blower Fan 5015S 5V 0.1-0.3A 50x15mm"
amazon.com/gp/product/B07BXBS93X/ - Battery pack with on/off switch (9v Battery Holder or 9v battery case WITH SWITCH)
amazon.com/AmazonBasics-Everyday-Alkaline-Batteries-8-Pack/dp/B00MH4QM1S/ - 9v batteries on the cheap (Amazon Basics are great batteries in general). Unfortunately, the rechargeable 9Vs don't have the juice to work for us. I tried them, and they didn't even last a whole troop, and weren't as strong even at the start. (I also heard after I bought them but before I tried them the same thing from another member).
Cut off the white end cap on the fan wires, and expose some of the wiring from the casing. Solder the red wire from the battery box to the red wire of the fan, repeat with the black wires. Test with a battery. Repeat for second fan. Use velcro to attach fans and battery packs into the helmet in desired location.
This will work with really any helmet set up, provided you have space to mount them. They are pretty compact, but some buckets are quite tight on everyone (still trying to figure out where to mount them in my Shadow Scout helmet...)
This is the same concept you would use to attach it to a USB connector for a USB power bank, in place of the battery box. I personally could never make rechargeable anything work, so I ditched them all for 9V batteries, and haven't had any issues since. That said, I know a whole lot of guys and Mandos who use USB chargers and love them and never have any issues. I could just be unlucky.
This is the blue rechargeable battery:
They are 12 v, so while they do power the fans for ages, they also are quite loud because they're overpowered for the fans. I found them unreliable and it was incredibly difficult to hear- which it's already hard. And I got called Hard Drive for a while because you could hear the fan buzz outside my helmet. Biggest tip: they must be in the ON position to charge. They're backwards. If the switch isn't ON, then they won't take a charge. So, turn them on before you plug them in to be sure (because once you plug them in the light comes on regardless). I had issues with them taking a charge even when on, etc., and they're mass produced in China- so it's kind of a gamble on how good your individual product will be. Still, like USBs, people swear by them and have used them for years. Maybe I'm just unlucky, again.
Aker:
I found it was worth it to go for the good one up front, it's lasted for years now and given me no issues.
http://store.voicebooster.com/voicebooster-mr1506-aker-10watt-voice-amplifier/ (he also sells them on Amazon- just check both places to see which has a better price/is on sale that day). The 10 watt is plenty- unless you really want the deaf old lady down the street to hear you, too. You ever heard a Jawa yell "Utinni!" with a 12 watt? It's LOUD.
I am a huge fan of the iComm, if you can splurge on it:
http://store.voicebooster.com/icomm-imperial-communication-system/
Wireless mic:
amazon.com/dp/B01HOB5SKE/ - They're constantly changing names, brands, but they're all basically the same, so if the product shows unavailable, just Amazon search for "wireless mic" and you'll find the new incarnation. They're usually about $25 - $30.
The wireless mic set up allows you to take your bucket off without any wire encumbrance. I wear my Aker around my neck and it sits at high-chest, right below my collar bone. You could also mount it in your chest if you have room, or I've also seen the back. I'm leery of mounting it in the back because you don't want it to sound like you're talking from behind you. In the general chest area it sounds like it's coming form an internal speaker system and gives it that slightly disembodied effect like the suit is actually wired up and real.
I also run TK chatter though an old iPod shuffle, and my Aker. It's also compatible with the wireless and iComm set up.
-
1
-
-
Welcome to White Armor! We're all here to help, so ask all the questions! If you haven't already, also reach out to your local 501st unit- they've all been where you are before, as have most of us on the forums.
-
Welcome aboard! Good luck on your build, and check out all the corners of the forums- such a wealth of information for you!
-
Welcome aboard! Glad you have some skilled hands to help the Anovos to taller troopers is a bit challenging. But nothing is impossible! Good luck!
-
2
-
-
On 8/9/2019 at 4:56 AM, TK-51948 said:
Don, I am 6ft1 as well.
Does that mean I could go for a Vader build? Or would I look too short?
how did it work for u?
Adam
TK-51948
We have a 5'11'' Vader, and a 5'9'' Vader- they wear lifts. Plus the helmet dome gives you a bit, normal boot heels give you a bit, and honestly, as long as you're above the kids, the suit really makes an impression. Then it's just attitude.
-
1
-
-
Welcome aboard! A great many feats, indeed!
-
14 hours ago, JZYL said:
Made more edits
expanded the Build your Own section considerations
tried to tag FISD builders where possible, so if this is being used as a reference it's a quick find
Also tried to give credit to others when I used their info - @sharkbait would you prefer I added a link to the thread I looked at as well? The rest of the thread wasn't completely related, but I liked the power option breakdown.
Considering I've totally forgotten which thread your talking about- a link to the comment in the thread you're referring to would be a great resource!
If you're talking about fan power options, yes, I can lay it out again, but I probably did it better originally. I can also provide links and basic instructions for wiring up your own set of simple fans (what I use in my buckets with fans).
-
On 9/14/2019 at 8:02 PM, Drednok said:
Gonna try this out. Would nail polish remover work the same? It is acetone.
Nail polish remover with acetone is generally not overly strong- you'd want 100% acetone, which can be billed as nail polish remover, but generally is just called "100% acetone", and sometimes sold in smaller bottles that resemble nail polish remover. Also, not all nail polish remover is acetone- some are "nicer" on your nails (but less effective). Read the ingredients list to see what's in it, and what percentage. You can get 100% acetone for pretty cheap on Amazon.
TK-29118 Sharkbait's Troop Log (108 Troops)
in Field Training Exercises
Posted · Edited by sharkbait
85. 100th Annual Veterans Day Parade, Fresno - 11/11
Yes, you read that right- 100th Annual. It's the largest and longest running Veterans parade in the nation. It was our first year attending (though I marched in it a million years ago as a Girl Scout), and we will definitely be making this an annual event.
We had two Garrisons represented, Central California and Golden Gate, Mando Mercs' Wolves of Mandalore Clan, and Rebel Legion's Endor Base, with members from the most Northern reaches of CCG territory (Reno), to the most Southern reaches (Visalia) in attendance. It was a ton of work to organize and myself and the Wolves event coordinator couldn't have done it without the support of our respective clubs and the participation of everyone who came out, whether it be a five hour drive or a fifteen minute drive. Also, pre-party dinner on Sunday night for our early arrivals and a late lunch after the parade were a blast! One of our drivers and five of our troopers were Vets, themselves! The two non-costumed guys holding the lightsabers in front are our sponsored veterans who we asked to join us in honoring all Veterans this Veteran's Day.
Bonus Ladies of the Legions (501st, Mandos and Rebels represented! Most of us are also members of multiple clubs, too!)