


Spycee
-
Posts
422 -
Joined
-
Last visited
-
Days Won
1
Content Type
Profiles
Forums
Gallery
Articles
Everything posted by Spycee
-
I'm not sure I want to remove the ridge, I kind of like it :-) It gives a nice "3D" effect. But I think the problem was resolved easily : the bottom part of the thigh was too tight for me (a lot too tight in fact, when I used the thigh muscles I had a bit of trouble trying to walk !), so I just opened it larger at the bottom, with almost no overlap. And since it is larger like in the top part it fits a lot better when joining the 2 parts. I'll post pictures of the result tonight. I have pretty big thighs :-(
-
Ok, I have a problem : My thigh is very uneven ! The top is big enough to not let the 2 pieces to join, but the bottom has a big overlap. I took a picture of 2 options that I can see : With the "diagonal" stripe following the ridge : Or with the straight vertical stripe (the bottom right part would be cut to follow the stripe) : First option can look weird, if all the other stripes are completely vertical. And the second option is weird with the stripe not following the ridge. I prefer the first option. There is a third option, where I completely cut the ridge and use a shim under, but I don't like this idea, the shim will surely be too visible. Any idea ?
-
Katü's AP build thread! (help appreciated)
Spycee replied to Katü's topic in Build Threads Requireing Maintenance
Wow Really good ! -
Katü's AP build thread! (help appreciated)
Spycee replied to Katü's topic in Build Threads Requireing Maintenance
Really good job on the left ear ! Do you have a picture of the right one ? -
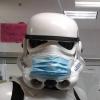
Helmet almost completed Here it is with my son's helmet (mine is on the left) : Armor building goes well, almost all snaps are glued on the body, the next thing I have to check is how to do the side shimming.
-
@Scott : Woo hoo, you'll begin at last ! I'm 5'11" / 185lb and it needs a little shimming on the sides, nothing too bad. Like an inch or 2 on each side. No trimming on the height, just a bit for the biceps width. @Joel : At 5'9" with an AP you could need a little height trimming but nothing serious. At 185lb it should be correct.
-
Nice pictures ! What fabric did you use for the jawa robe ?
-
Thanks for your comments @Scott : I understand very well, the waiting was killing me ! "The top of the thighs digs in to my hip area", that's exactly what I meant ! Well, I'm not exactly able to climb stairs "with the armor" since I hadn't all the part on me, but with the thighs on it was ... ok. I wil have to shim larger on the top than on the bottom. I have pretty big thighs For the E6000, I found a way to tape the parts before gluing them, it is easier. For the first pieces it was a mess with glue everywhere and me swearing ! Now it should be faster, so the glue will not have time to dry. And of course I let it cure 24h, don't want to redo the gluing for something that easily avoidable. But I should have bought more good magnets to glue more parts at the same time ! The clamps I have are not long enough to go in the middle. For the thermal detonator, must it be exactly the same grey than on the helmet ? I have a grey spray that I used on another costume that is a bit darker ... I didn't find the same grey in spray.
-
I bought foam to put around the biceps, in case there's a gap after a little trimming. And the foam will be used in the helmet, to see if it fits correctly. I glued forearms, but the E6000 seems to not stick correctly, maybe I took too much time placing clamps and magnets and it dried a bit before ? I knew I should have taken more than 1 tube of E6000 ! I'll have to hunt for another one, the store closest to me lost all their inventory somewhere in the backstore For the thighs : how much should I be able to lift the leg ? You know, like climbing stairs ... I can climb stairs, but the top of the thigh seems too high when the leg is bending, and correct when the leg is straight ... Not sure how to say it. "La partie du haut me rentre dans la peau quand je lève la jambe" And I'm not sure how the shins will work : my legs are BIG, and when I'll put on the shins I will be forced to open them wide, and I fear that doing that will just "break" the front, that the glue will not be enough. I will maybe put stripes inside, like I'm currently doing for the thighs. Pictures soon ! I just don't have a lot of time during the week.
-
Well, I glued a stripe on the right arm and it was ok But for the upper arm, does the space is too much ? It feel a bit too loose, but on this picture it doesn't seem so bad ...
-
I have a question : the ABS stripes that I got with the armor are thick ! Like 1.5mm ... Is it too thick for that ? It seems that it is very visible (not sure how to say that) ...
-
It's exactly like that. Hey, so no size trimming for me, yay ! I just have to shim the shins and thighs a little bit.
-
Hmmm ... the left ear is tougher to place than on my first helmet : Ok, I tried the pieces with green tape to see how it fits. I won't have to trim a lot, it fits relatively well. The legs : The arms : The upper arm is loose but when I force it is just correct. Is it normal to have a lot of loose in this place ? I'll have to trim a bit here to even the 2 pieces : And the body ! :
-
Oh, and I also got an almost 2k$ bill for my car just after, I bumped in a nasty hole on the highway after getting the kit and it broke a couple of parts
-
I didn't receive my big brown box by mail yesterday I picked it up directly from Mark He took the time to unbox it with me and gave me tips on how to assemble it. Thanks Mark ! I began assembling the helmet and sanding / trimming a little bit the holes (it came already trimmed). So ... I'll presume a couple of you will receive their AP kit very soon, since he finished to prepare / trim the orders
-
My 2mm TM Hero helmet build 8/2014
Spycee replied to DarSec's topic in Build Threads Requireing Maintenance
Good job ! -
I made an AP helmet that was not completely trimmed when I got it, and it was VERY easy. The "difficult" part was trimming the ears, and it's already done in a trimmed kit.
-
Painting/coating the inside of the helmet
Spycee replied to Koyaanisqatsi's topic in Assembly, Mods, and Painting
Well, if you paint it inside, it will smell a lot for a while, and I'm not sure that breathing paint in a very closed environment for a couple of hours is good ... Maybe after a while it gets better. If you find a way to get it all black inside without paint it, I'm in But if you put padding in it, a lot of the inside gets hidden so it's less necessary to get it painted. I didn't paint mine, not too bad. -
Ohhh ... "Sent from my iPhone 6" ... Nice
-
I got my straps from Club Tissus. And I got my "s" rubber from TrooperBay, and also 2 helmet bags and a pack of magnets. Holy ***, they are so hard to separate !!! I've been practicing my snaps skills on my son's armor, the first one took some time, I wasn't totally sure about how to do it. But the second one was very easy I've been strapping it with elastic straps and it seems fine for him, but I don't think I'll use elastic ones for mine. I think I'm only missing my blaster ... Oh, and I need to find what to use for padding the helmet. I'm supposed to get my armor parts in the next days, I'm VERY excited
-
Building a Scootch CAP-W bucket!
Spycee replied to Tolo's topic in Build Threads Requireing Maintenance
Painting straight lines is an art Do each line in one shot, in a fluid movement, not too slowly. Take the brush lightly, not too firmly or your hand will shake. -
Maybe this one : http://www.canadiantire.ca/en/pdp/shop-vac-19-l-heavy-duty-portable-vacuum-0540072p.html#.VDSKTPl5OL0
-
Ohhhh, nice, thanks ! Great advices in there. So getting a second shop vac from Canadian Tire (wait for the rebate !), cover the unused holes with a styrene sheet. Also maybe check for a rubber strip. And make an opening frame. Here are the pictures of my setup : My super duper effective vacuum ! : Oh, and what I saw on netflix while writing (HIMYM Season 5) :
-
I'm sure it's the same stuff I used ... So it must be the vacuum !
-
Thanks ! @James : 900$, ouch ! Maybe not for the moment at that price The nearest Lowes is at about 8h from me, maybe I can check near stores what their return policies are. For the moment I'm still trying small parts for testing, I don't want to invest big amounts. I mainly want to test the procedure to see if I'll be able to make pieces for my kids costumes. @Bryan : Mine is smaller, but looks like yours. What did you use for the plastic seal on the top ? @walt : Buying an AP kit for a kid that will outgrown the armor in less than 2 years (after the trimming and adjustments) ... I can do it for sure, but it would cost too much for me, I'll have to buy another one not too long after. If I try vacforming I will be able to mold new pieces while my son is growing, and I can do some pieces for my daughters costumes. Here what I bough (I think) : http://www.rona.ca/en/polystyrene-sheet/ It's 0.060, so it should be ok for that. But styrene vs polystyrene ? What would be an affordable vacuum that can work ? I don't want to be fancy or do very big pieces, it must fit in my oven. Or I should build a heater now ... How much do you think it can cost to start from scratch ? And I'm not too familiar with molds, I must read more on that subject ... Here's some vacuums : http://www.rona.ca/en/wet-dry-vacuum-05915065--1 http://www.rona.ca/en/8-gal-wet-and-dry-vacuum-05915082 http://www.rona.ca/en/wet-dry-vacuum-05915067--1
