Elumusic
-
Posts
315 -
Joined
-
Last visited
Content Type
Profiles
Forums
Gallery
Articles
Everything posted by Elumusic
-

TK Commander Build - It's become a OCD thing
Elumusic replied to Elumusic's topic in TKC Build Threads
Wow....I just realized that my bicep armor is on the wrong arms.....hmmmmm. stripes are on the back...thumb print is on the right arm instead of the left. UGH!!!! -
TK Commander Build - It's become a OCD thing
Elumusic replied to Elumusic's topic in TKC Build Threads
-
TK Commander Build - It's become a OCD thing
Elumusic replied to Elumusic's topic in TKC Build Threads
Here are some finish shots. And for the record, the holster is removable without affecting the look of the belt. Best of both worlds. -
I know this is old....but here goes. There are many ways to achieve this, but weathering on a TK Commander should be more about soot and blaster marks. Not like weathering on a Sandtrooper. My technique is two fold. I applied a clear coat of glossy Lacquer to the armor. The lacquer paint helps the removal of the enamel if there is a mistake. Lacquer is impervious to mineral spirits when dry. So First paint on the colored accents (Blue enamel) and then let it dry a day and then take some 400 grit sandpaper to all the edges and bring them down to the white armor. This gives probable wear to the armor. Then I take a butter knife or screwdriver and I add scratches. Scratches would occur in groups and depending on the situation there may be numerous scratches that are in the same direction all over certain portions of the armor, such as the thighs or calves. There would also be incidental rubs and scratching. Then I went back and made a mixture of Embrol Grey and black enamel. I added some mineral spirits to thin it down. Then I took a brush in the thinned down paint to all the folds and creases and joints of the armor. This is also where probable gathering of dirt and soot would occur. Thin strokes. Very important and then I let it dry for a second or two and then I use my finger to dab the paint and blend it so there are no hard edges in the strokes. Whatever is left on my finger gets smeared onto the armor. The biggest thing to look at are the creases, joints and folds. creases and joints get a dark edge with feathered edges and the folds of the armor and hard return areas such as the chest and back get a good rub down to make these areas darker. If you don't like it, the mineral spirits will take it completely off and you can try again.
-
Imperial Shock Trooper could it happen?
Elumusic replied to pedro2931's topic in ANH (Stunt and Hero)
We need some images from the game. There aren't enough on line to determine ANH or ROTJ armor. -
ATA helmet build...stumbling block
Elumusic replied to silverBoyd's topic in Build Threads Requireing Maintenance
Exactly!!!!! -
TK Commander Build - It's become a OCD thing
Elumusic replied to Elumusic's topic in TKC Build Threads
I know the holster thing..... But it's so convenient not to have to carry a blaster around. I can get ESB with a holster. So I am mulling it around. I did the weathering with a mixture of grey and flat black with mineral spirits. Dabbed it with a brush and let it dry enough to smudge it with my fingers. Blast marks are painted with the same color and a fine brush. I pulled a reference from the Internet for the blast marks and it definitely helps to have an art background. Sent from my iPhone using Tapatalk -
TK Commander Build - It's become a OCD thing
Elumusic replied to Elumusic's topic in TKC Build Threads
So this weekend was adding some battle wear, scuffs and scratches. I have yet to add some wear to the helmet and boots. That will be the next thing that happens. The last thing is adding the holster to the belt. I am trying to figure out if I want it to snap to the belt or if I want to make it permanent with rivets. My concern is that snaps will fail and the blaster will fall to the ground. -
Imperial Shock Trooper could it happen?
Elumusic replied to pedro2931's topic in ANH (Stunt and Hero)
After I finish up my Dia De Los Muertos armor I am doing this one....even if it's not approved. This is too cool.
-
TK Commander Build - It's become a OCD thing
Elumusic replied to Elumusic's topic in TKC Build Threads
Painting the blue now...I'll add photos this weekend. -
There is also an action figure. http://www.whitearmor.net/forum/topic/33020-imperial-shock-trooper-could-it-happen/?hl=%2Bshock+%2Btrooper
-
Imperial Shock Trooper could it happen?
Elumusic replied to pedro2931's topic in ANH (Stunt and Hero)
Awesome...I'd do it. I'm guessing this will probably go by the way side if more people don't get interested in it however. We need to push this one out there for sure. -
Until I got into this Stormtrooper thing...I never noticed any of it. I never even noticed the difference between the troopers in movies 4,5 and 6. I love those movies. ESB was my fav. Still noticing new things.
-
TK Commander Build - It's become a OCD thing
Elumusic replied to Elumusic's topic in TKC Build Threads
The boots are from TK Boots. And as far as painting them I will spray paint them after I mask them off and then leave them. No protective coat. They need to get scuffed up. Sent from my iPhone using Tapatalk -
I never noticed that.
-
I'm already built slim. But even for slim guys a suit like this can fit one year and then not the next. I weighed in at a whopping 140 lbs at the age of thirty sopping wet. During my 30's I made it a point to hit the gym regularly and I put on muscle. I think I reached about 180 lbs of lean muscle in about 5 years time. I was in the best shape of my life and I felt wonderful. ..... and then I broke my leg pretty bad in a skiing accident. I was laid up for one year, had complications with leg hardware over the next two and couldn't excersize, got another surgery to remove hardware and had to heal again. So three years later I was soft and my love for beer outweighed my love of being in shape. Now at the age of 49 I decided that I can grow old gracefully or I can just grow old. Can't stop 50 from coming but I can certainly try. For others my age we all know it, but for the younger guys, growing old brings on a whole bunch of health issues that we take for granted when we are young, no matter how minor. And even the minor ones we dealt with in our younger years really get the best of us as we get older. For example, chronic tendinitis makes me not want to excersize because it hurts afterwards. It always has. There is nothing like the pain of having tendons pulling from your muscles and bones to make you stop and think about pain. Oh and then Arthritis sucks. I can tell you if it's going to rain these days. I can't consume certain foods any more without feeling like crap. Ice cream is out of the question, as is spicy food. Usually hits me about 2:00am. My doctor told me my neck muscles were starting to atrophy and I needed physical therapy. I was seriously moving toward being miserable and feeling awful 24/7 and the best advice my doc had was "your getting old". No miracles to be had, the only thing to make you feel better as we get older is diet and excersize. So during my custom build over the past year which will be completed this weekend I reduced my calorie intake and I eat better and I got back into the gym. Prior to this build my weight was 178 lbs and I was soft and miserable. My compression suit came and it made me feel like a sausage...And for the record I also have a batman compression costume that also made me feel like a sausage at this state of my life. So now after about 8 months at the gym and eating properly again (reducing my beer intake, and kinda sticking with wine), I'm down to 168 lbs, lean and toned and no longer have a gut that protrudes over my belt and my love handles have pretty much disappeared. I'm feeling pretty good again. I am at a turning point now with my work outs. So now I need to just maintain. I will not allow myself to head down that road again. We can all grow old gracefully if we don't let life get in the way.
-
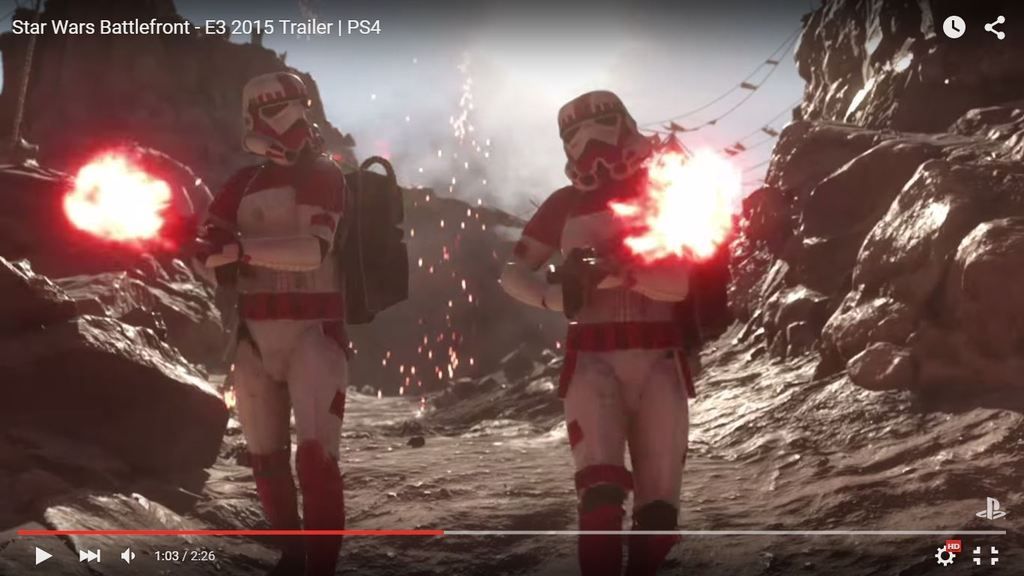
Anyone notice something funny about the guy on the right? Isn't it a little early in the film for a hero?
-
Albuquerque Stormtrooper Helmet V2
Elumusic replied to Elumusic's topic in The Foundry - Armor and Prop Making
Fitted and ready for paint. -
Albuquerque Stormtrooper Helmet V2
Elumusic replied to Elumusic's topic in The Foundry - Armor and Prop Making
Here's the trimmed back piece. New chest armor. -
Albuquerque Storm Trooper Helmet Mold
Elumusic replied to Elumusic's topic in The Foundry - Armor and Prop Making
Almost ready to join the ranks. TK Commander in the last detailing phase with the new helmet. See you on the other side Tye since you live in the hood. -
By the time you are done making your molds and building the table etc you will have spent in excess of $1000 easy. I know cuz I did. I could have purchased a couple of sets of armor from someone else and saved myself a lot of cash.
-
TK Commander Build - It's become a OCD thing
Elumusic replied to Elumusic's topic in TKC Build Threads
The overlap method only refers to the way the armor is assembled. it has nothing to do with velcro or hooks. That is only for the back of the shin armor. The overlap method is also only for Centurion Status. You can get away with the butt joint method for basic entry level approval. -
The helmet is exactly what you need, however my understanding is that you could not even get to the basic certification using this armor without some major conversions. You would need to cut the return edges off all of your chest, ab, back, kidney and posterior armor off and then use a flexible U shaped gasket around all of the edges. You will need to fuse the posterior armor to the kidney plate. And you would need to somehow get rid of the rivets that hold the crotch together. You would need to drill out the rivets on the crotch and replace them with an internal snap plate and fill the hole with plastic paste. And you need a 5 button strip in lieu of the 4 button strip. Your detonator can not have silver paint or stickers for basic approval. If you want to get to level two additional mods need to be made, And you could not possibly get to Centurion with this armor as you need to use the overlap method for arms and leg armor. Hope that helps.
-
TK Commander Build - It's become a OCD thing
Elumusic replied to Elumusic's topic in TKC Build Threads
I used Velcro because it works better, It's like a solid hold and easier to put on based on all the posts I have seen. Sent from my iPhone using Tapatalk -
TK Commander Build - It's become a OCD thing
Elumusic replied to Elumusic's topic in TKC Build Threads
Well, the hook and/or velcro methods are not referenced as a requirement for Centurion status. So I doubt that is true. From what I understand, these things really have nothing to do with the appearance of the armor but are more functional and up to the wearer. It would be the same for the strapping. Sent from my iPhone using Tapatalk