

drscifi
-
Posts
44 -
Joined
-
Last visited
Content Type
Profiles
Forums
Gallery
Articles
Everything posted by drscifi
-

How To: Hasbro E-11 > Disney E-11 with Doopy Doo
drscifi replied to drscifi's topic in Tutorials, Tips and HOWTOs
Yeah. That's one of the reasons I moved the selector switch is it would have been covered by the added counter. -
How To: Hasbro E-11 > Disney E-11 with Doopy Doo
drscifi replied to drscifi's topic in Tutorials, Tips and HOWTOs
I ended up just glueing the DD one over the existing one. I can always pop it off to replace the batteries if I need to in 3/4 years. -
How To: Hasbro E-11 > Disney E-11 with Doopy Doo
drscifi replied to drscifi's topic in Tutorials, Tips and HOWTOs
Part 4 The Ammo Clip Marking the cuts for removing the clip part to add the full DD part. Lots of scoring and snapping with a hobby knife. Now that the piece can be held closer I can fine tune the cut. Better to make 10 small cuts than 2 too large cuts. Getting there. Lots of test fitting and trimming now. A perfect fit. It's pretty flush all the way around. It does tilt a little up on the far edge but I'm ok with that. Super glue all the way around and I added a small piece of ABS plastic for extra support inside. -------------------------------------------------------------------------------------------------------------------------- Part 5 More Details & Painting Started cutting away the front of the scope to replace it with the DD piece. Not too bad. Took a bit more of a chunk out than I wanted to. I'll fix that with some black tape after final painting. I'm still thinking of just adding the DD counter on top of the built in one. I like it's look better and it's not super noticeable. Getting ready for painting. Covered up the LED's to prevent any overspray from covering them. In hindsight I should have also covered the selector switch from the outside or removed it before painting as now the when in the stun mode the trigger is intermittent. Ready for a coat of Rust-Oleaum Hammered Black. The same I used for my Hasbro E-11. A light coat of black. Be sure to spray sparingly and far enough away to not drip the paint. Looking pretty good. I've also reglued the T-Tracks by this point after the painting. I re-installed the clear light tracks after painting as well. I left the grip plates out during painting. I think they will look better their natural unpainted texture. You can see there was a little bit of overspray inside after painting. Still working on the switch issues for the stun setting. Dry fitted with screws back in. I got this far before discovering the switch issue. I'm waiting until that is fixed before gluing the few outside elements that would make it hard (impossible) to separate the two halves. But at least the blaster mode works great. Should be good to go for this weekend's troop. More work tomorrow night to finish it up. TK-88800 -
How To: Hasbro E-11 > Disney E-11 with Doopy Doo
drscifi replied to drscifi's topic in Tutorials, Tips and HOWTOs
Part 1 Some exploratory disassemble and figuring out what exactly I want to change. All of the screws on the blaster are the same which makes it very easy to reassemble later. First thing I did is cut off the orange plastic tip. I will eventually cut the entire nose area off to replace it with the DD (Doopy Doos) barrel. This blaster has 3AAA's in the counter as opposed to the 9V in the handle of the old Hasbro E-11. There is also the switch from Blast to Stun. The blaster opens up very easily. There are some loose black parts that come right off without screws. I started on the non electronics side to be sure I didn't damage them. Two screws remove the reflective light channel. I cut off the tip as it would be too long with the new barrel i'm adding from the DD kit. You can easily pop out the tiny T-tracks with a hobby knife. I discarded these T-tracks as I'll be using the ones I made for the Hasbro E-11. I cut and smoothed the front of the barrel for adding the DD piece. The process is repeated on the electronics side. You need to remove one screw on the LED assembly to get to the light channel track. One thing that I'm not a fan of is the loose trigger. It bounces around a little. Need to add a spring or a rubber band to keep the pressure on the button stud but not press it without squeezing the trigger. I popped out the back sight. Still considering using it or cutting the one off of the Hasbro E-11. --------------------------------------------------------------------------------------------------------------------------------- Part 2 Moving the Blast/Stun switch. This is one of my favorite parts of this new blaster But I need to move the switch to the pistol grip. I found that an 11/64th bit will drill out the new hole for the switch perfectly. On the inside I marked where I wanted the switch to go. It will pop out just below the fake collapsed arm rail. Perfect to reach with my thumb. Used a hobby knife to clean up the hole into a rectangle. I ditched the white switch extension. As the blaster will be painted black anyway and the switch will be mounted flush with the outside skin of abs. I couldn't reuse the mounting screws as they would go deeper than the outer shell. I superglued the switch in place. Then replaced the trigger electronics and orange trigger itself. I'll paint this part separately before final re-assembly. You can see the switch is just visible and is easily reached by my thumb. ------------------------------------------------------------------------------------------------------------------------------- Part 3 Deciding what parts from the DD kit to include. These are the parts I decided to move over to the Disney E-11. Here is the front with the original tip cut off completely. Here is the DD barrel tip on the end. It makes the LED a nice circle when it projects on the wall. It's a little large but I can live with it. My first thought for the ammo box was to just attach the clip part. But i've since seen some people who removed the entire Disney E-11 ammo side and added the DD to it. I think i'll go that route too. The counter will be tricky. Part of me just wants to add the DD counter on top of the built in one but I may need to come up with something from scratch. The scope can be cut right off and the more accurate DD will be installed. The back lower part fits well. The D-Ring covers the speaker hole but it can still be heard well. It adds some more bass to the sound. I may mount the speaker facing forwards instead to channel it out the front. I sliced off my home made T-tracks from the Hasbro to reuse. I may remake these but we will see. So that's where I'm at so far. More work tonight. TK-88800 -
I just picked up the new Disney E-11 and I love it! I'm about a third through my conversion but I've been taking photos of every step. I've been using my Hasbro E-11 DD for almost a year but have removed most of the DD parts to use on the new Disney E-11. Also, there are several other great Disney E-11 mod builds popping up here on White Armor. These fans each have their own wonderful take on our favorite blaster. Check them out! Scott - http://www.whitearmor.net/forum/topic/30848-howto-mod-the-new-disney-e-11/ David - http://www.whitearmor.net/forum/topic/31272-disneys-new-e-11-mod-build-my-version/
-
Bin Packing it all in 28" x 19" x 17"
drscifi replied to drscifi's topic in Boots, Soft Parts, and other Accessories
Glad this post was helpful. The Pelican case was given to me by an LA bomb squad friend. Otherwise I would have used a Home Depot bin. Pelicans are nice but they are not cheap. But the nesting techniques can be used in any sized bin. -
So after finishing a ANH TK and a MSE-6 mouse droid I needed a new build project. So i'm making myself a pair of binders. Acquired all of the pieces form Home Depot. Assembly will start in a few days and I will keep detailed notes here on whitearmor. TK-88800 and EP-1C The raw parts for my binders. One of the main reasons I wanted to do this project was in response to the growing number of troops where it is so/so on having your blaster out. Big events with a lot of kids, at schools, etc. So this way I can have something on my belt and still get some great pictures.
-
I am finally getting around to this bin packing post. Hope it helps with inspiration for your own bin. I was extremely blessed to be given a Pelican 1660 case. http://www.pelican-case.com/1660nf.html I installed some coroplast dividers and 1" white foam from walmart. http://www.walmart.com/ip/Poly-Fil-Nu-Foam-Pre-Cut-14-X14-X2-FOB-MI/32856780http://www.walmart.com/ip/Poly-Fil-Nu-Foam-Pre-Cut-14-X14-X2-FOB-MI/32856780 The dimensions: INSIDE: 28.20" x 19.66" x 17.63" (71.6 cm x 49.9 cm x 44.8 cm) OUTSIDE: 31.59" x 22.99" x 19.48" (80.2 cm x 58.4 cm x 49.5 cm) It's smaller than most bins yet I fit everything inside it. I have my FISD and EPIC stickers on the front, still need the 501st and SCG ones to finish the top. A look inside, the coroplast dividers cut it into 4 quadrants of different sizes. There was some preexisting foam in the lid so I cut that out and riveted some velco straps to hold my E-11 blaster in place. This works very well at saving space. Here is everything with the towel padding off. Let's walk around the bin. Top right has my thighs with the calfs nested inside them. Top left has my boots with my thermal detonator/glasses case inside one. My folded canvas belt and permanently attache holster are folded over the boots. Bottom right has my helmet inside a pillow case. I wrap my shoulder bells in a towel and either stuff them inside the helmet or in the corner created by the dome. Bottom left is where the real nesting begins. I break apart my torso and nest my arms inside it all. Lets delve into this nest. First my chest plate. Then my back plate is next. My but plate on top of that. I store my modded cod attachment here, keeps this area from pinching more than the elastic. Next the forearms. Placing the left forearm into the right bicep and vise versa. These pack up nicely and are folded in a towel. That towel is added to the stack. Then the entire stack is placed inside the turned up torso. Extra little bits like gloves, hand plates and electronics are in zip lock backs placed in the free space on top of the thighs. I hope this helps give some ideas for your own bin. Make it your own and have fun.
-
E-11 storage question
drscifi replied to PiettLives's topic in Boots, Soft Parts, and other Accessories
I have seen Echo's bin in person, it is quite impressive. Here's mine. I was extremely blessed to be given a Pelican 1660 case. ========= ---------- -
how do you keep your pants up?
drscifi replied to TK Rome's topic in Boots, Soft Parts, and other Accessories
I use this method for mine. Works like a charm. http://www.whitearmor.net/forum/topic/293-howto-garter-for-thighs/ 3" black elastic around the waist and makes V's to your thighs. He has lots of pictures. -
static burst walkie takie talk
drscifi replied to TKedt's topic in Electronics for Helmets / Blasters
Looks very interesting. Thank you for the links too. -
Requesting 501st access Southern California Garrison TK-88800 Darren Moser http://www.501st.com/members/displaymemberdetails.php?userID=17215
-
Another week of progress. A lot to cover and a lot finished. I went on a trimming (score and snap) spree on many of my pieces. Some still need a little trim on the edges but are 90% there. Back. Front A rough composite of my left arm. A beautiful cover strip. Ab Plate. Most body pieces all trimmed and split. My belt turned out great. A tad shorter on the sides than I would like but i didn't have any material to (not trim). Started on my right calf, mocked it up with blue tape then tried it with the boot. This is one of my favorite photos of the build so far. You can see both of my arm pieces are done and the calf is glueing. Found some $6 screen mesh for my frown, way more than I need. I cut out 3 layers at different angles to build it up. No more peeking frown. I am just starting on the blaster, hard work taking out all the screws and splitting it. I am combining two different tutorials on my build. I want to extend the barrel using Bondo and re-drill most of the holes like this tutorial by TK-6908. I also really like this one from TX-71379 I've added many of his little mods to my list. I found some cleaver plastic rain gutter screens to turn into T-tracks. Now I have 3' of T-track material. Last update is my armor bin. I've removed the purple plus from the top with a razor and have been gathering up stickers for the sides. My collection thus far. I ordered some 4" ribbon magnets that I will glue to the sides. Each one of these is a cancer that has effected my family. I also got my 16" Imperial Cog in the mail for the top. I'm just deciding between this orientation or 90* turned. Either top is the narrow way, along the opening hinge, or top is along the long way when the bin is being pulled on its wheels. But I'm leaning towards what it is in the picture. More progress coming, my next attack is finishing the legs and beginning making snap plates. I'm holding off for now as I want to make sure I have enough cover strips before chopping that material up for snap plates. Thank you again everyone for your words and encouragement. Also I have pushed my done day up about 2 weeks. I need to account for last minute issues and more importantly, the submission and acceptance into the 501st before my 4th of July troop. (14 days 'till submission of the armor)
-
That has been a cool part. I like tailoring each part to me, knowing it will fit and then when the whole thing is together it will look amazing!
-
Thank you Ingrid, progress is ramping up. Even if I don't make it for the 4th of July parade I know I will be done soon after. EP!C on Facebook and Whitearmor here have been very helpful and encouraging during the build. Every day is a little more work and a little more research. What did you find was the most challenging part of your own TK build? Helmet? All the snaps and elastic?
-
A lot of progress this week. I setup a nice little work station with bright light. A friend was able to procure me a hard hat which I promptly took the headband out of and fitted into the helmet. I cut away the squares around the mounting points in the hard hat and I'll glue those to the inside of the helmet. This will allow me to remove and secure the headband if I need to make changes to the interior. This is the headband temporarily taped in with the cut out mounting squares in place. Our local library had it's Star Wars day. It was a great afternoon. I was able to meet several 501st and Rebel Legion members. A AT-ST drive, TD, TK, Imperial Officer, Rebel Pilot, Jedi, Han Solo! So many great costumes. I had my Stormtrooper jacket on with my new headband insert helmet. One kid came up and asked a lot of questions about it, where the microphone was, where the speaker was, what the hovi tips were. But for most of the afternoon I just walked around with it under my arm. But next year I'll go in full TK armor! I've been working a lot on the forearms. After trimming them and taping together for fitting I clamped and E6000 for 24 hour with one cover strip. Some trimming needed. My first clamp attempt. So I had a bit of a disaster. After about 28 hours had passed I removed the clamps and closed the other side of the forearm. The cover strip unglued and bent away from the seam. This was a very frustrating point. The cover strip had also slid with the clamps so it wasn't aligned properly anyway. But I have a plan for try 2. Oh and It was clamped for about 28 hours. I think I missed the" scuff up the pieces" to create a better bond, so that should help. I also will clamp it with the forearm closed instead of open. That should prevent it from loosing the bond when I close it. (since it will already be closed). I received some great encouragement and support from the Endor Party Crashers on Facebook and prepared for try 2. I roughed up the joining edges real good. Added some tape to keep the cover strip from sliding in the beginning. Clamped it real good with 3 sets of REM on each strip. I also let the E6000 tack some before applying. I had also purchased some stronger rare earth magnets to hold the middle of the cover strip and I could tell they were holding stronger. So after that was set I finished my shoulder bells. I left a small return edge on the bottom but non on the inside edge. (vertical). Lots of progress. Thank you everyone for your feedback and encouragement. (37 Days)
-
Thanks! Now I know where to look. Sent from my iPhone using Tapatalk
-
Diana's RS Props Build- ANH Stunt
drscifi replied to AsBlondeAsLuke's topic in Build Threads Requireing Maintenance
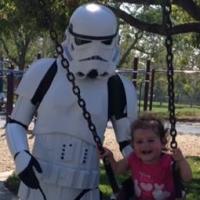
That's a great post! I can't wait to be trooping. I'm hoping to make it to a 4th of July parade. Score and snap, score and snap. Sent from my iPhone using Tapatalk -
Does anyone know where to get Bondo? Is this an online only order? Or can I pick it up somewhere. Need it for my blaster work. Sent from my iPhone using Tapatalk
-
I got my case today! It's perfect. Should have plenty of space. It won't fit in my trunk. HA, but it will fit in the back seat. Now I just need to clean it up and add some of my stickers!
-
Same here. For now it's black. I can change the gloss level later before submitting 501st pics. Right now I'm trying to hit July 4th for a local parade. Sent from my iPhone using Tapatalk
-
Good to know on the rear traps. I was needing to clean that up anyway as the black lines bleed a little. I'll research the vocoder some more as well. Thanks for the info. Sent from my iPhone using Tapatalk
-
It is on both, just not in the pictures. And yes, I still need to paint the screws white.
-
So I haven't been posting in a while, but I have been making progress. A big thanks to the Endor Party Crashers (EP!C) for their support and encouragement on Facebook. And to everyone who has commented or posted on this thread. As I continue to post with more frequency I hope others will aid me in my construction questions and continue the support that White Armor is known for. Now on with the progress pics. My Hasbro blaster arrived and about a week later my Doopy Doos kit joined it on my work bench. I will set these aside for now until I can acquire some Bondo. I penciled in the black areas for the helmet, having decided to paint my details instead of using decals. It was a bit harrowing but I am glad I did it. I felt the experience connected me more with the build and my helmet. Yes there will be small flaws and hand drawn wavy bits, but this is still screen accurate and more personal. I at first made the mistake of buying flat black and gray, but caught it and was able to get some gloss black and gray before reaching the gray level of paint. I am really happy with how my frown came out. Also I received my screen accurate Hovie Tips from Captain Keith! For the cheek tubes I had printed out a template on sticker paper, then cut out the marks and placed it on the sides. After masking it off and applying some coats of paint. Well..... it didn't work. The sticker was too sticky. So I scraped all of the paint off and buffed the remnants away. I looked back at my sticker pack and realized to my joy that the cheek tube stripes were individual stickers on a transfer paper. I had believed they were a single large rectangular sticker which I was desperate to avoid. They turned out beautiful, even better than I could have painted. In adding the black details I first painted the traps, vents and tears black then filled in the gray. I used a sharpie to fix up some of the black edges and to draw in the vent stripes on the tears and back vents. This was much easier than using a fine paint brush. The last stripe was the rank stripe on the ears. So now the exterior is finished. All that is left is the interior components. Fans, padding, head straps and the frown mesh. I am very excited for the build and will be tackling the score and snap of many components this week. So look for more updates with more frequency and some questions as I progress. -Darren (Dr. Sci-Fi)
